深扒那些艺术的CSS
概览
使用单个div做css绘图,会充分利用到:
- before、after伪元素
- 使用
border-radius、border来控制图形的形状。 - 使用叠加的
box-shadow来创建多个相同的形状(可以有不同的大小、位置、颜色、模糊)。 - 在
background-image、border-image属性上叠加使用渐变(线性、径向、圆锥、重复),叠加的渐变可以有不同的位置、大小颜色。
这几个属性配合起来就可以绘制出许多物体了。
当我们充分利用好了单个div,再用多个div来绘图就更加容易了。
常用属性
1.border与伪元素
bofore、after伪元素会创建一些不在文档树中的元素,并为其添加样式。注意区分伪元素与伪类的区别,看本小节后面的代码示例。
border是分为top、left、right、bottom四个方向的,它们是怎么划分势力范围的呢?答案是平分,像这样:
div {
    position: absolute;
    height: 0em;
    width: 0em;
    background-color: aquamarine;
    border-right: 2em solid red;
    border-bottom: 2em solid blue;
    border-top: 2em solid green;
    border-left: 2em solid yellow;
    /* border-radius: 50%; */
}

给它加一个border-radius:

设置一下height、weight:
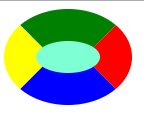
把border-bottom改成透明色transparent吧:
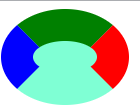
所以使用四个方向的border结合透明色transparent、border-radius可以轻松画出矩形、三角形、梯形(直角、等腰、不等腰)、弧形、环形。
好,改一改画个羽毛球吧
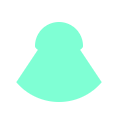
好吧,不怎么像,去掉border-radius再改一改就是喇叭了:
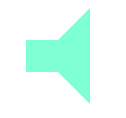
再给喇叭加一点音浪,像上面那样利用after、before在喇叭右边画两个1/4圆环吧!

使用rotate旋转的话,元素和它的before、after伪元素是作为整体一起的

我们给喇叭的音浪加一点震动的动画吧

这里要把音波的box-sizing设置为border-box,以免动画中改变border-width而使元素不对齐。
音波小喇叭的完整css代码在下面,也可以在我的codepen里面找到。
        @keyframes shock {
            from{
                border-width: 0.1em;
            }
            to{
                border-width: 0.6em;
            }
        }
        div {
            position: relative;
            height: 2em;
            width: 2em;
            background-color: aquamarine;
            border-right: 2em solid transparent;
            border-bottom: 2em solid white;
            border-top: 2em solid white;
            border-left: 2em solid white;
            border-radius: 0;
        }
        div:after,div:before{
            position: absolute;
            content: '';
            box-sizing: border-box;
            border-radius: 50%;
            border-right: 0.5em solid aquamarine;
            border-bottom: 0.5em solid transparent;
            border-top: 0.5em solid transparent;
        }
        div::after{
            top: -0.5em;
            right:-3.5em;
            height:3em;
            width:3em;
            animation: shock 1s linear 0s infinite alternate;
        }
        div:before{
            top: -2em;
            right:-4.5em;
            height: 6em;
            width: 6em;
            animation: shock 1s linear 0s infinite alternate;

        }
2.border-radius
border-radius用于设置元素外边框圆角,本质上是设置4个圆角对应椭圆的长轴、短轴(共8个轴),轴长可以是百分数或者长度,负值无效。
你可以这样统一设置8个轴为一样的长度:
border-radius: 20px;

当然长轴和短轴是可以分开设置的,形如长轴(水平轴) / 短轴(竖轴),后面的同理:
border-radius:20px / 50%;
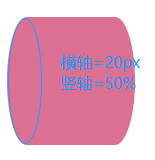
也可以设置2个值(分别对应左上与右下、右上与左下,其其长轴=短轴=对应值):
border-radius: 20px 60px ;
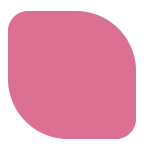
也可以分别设置4个值(分别对应左上、右上、右下、左下的圆角,其长轴=短轴=对应值):
border-radius: 20px 40px 60px 80px ;
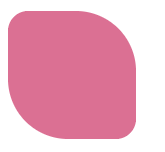
综上所诉,你还可以这样写:
border-radius: 20px 80px / 50%;

border-radius: 20px 40px 60px 80px / 50%;

border-radius: 20px 40px 60px 80px / 50% 10% 20% 30%;
3.box-shadow
box-shadow以多个逗号分隔的列表来描述一个或多个阴影,阴影和原元素的形状相同,位置、大小、颜色、模糊可以不同。
box-shadow: h-shadow v-shadow blur spread color inset , ... ;
| 值 | 说明 |
|---|---|
| h-shadow | 必需的。水平阴影的相对位置。允许负值 |
| v-shadow | 必需的。垂直阴影的相对位置。允许负值 |
| blur | 可选。模糊距离 |
| spread | 可选。阴影的相对大小 |
| color | 可选。阴影的颜色,默认黑色 |
| inset | 可选。从外层的阴影(开始时)改变阴影内侧阴影 |
阴影们按列表顺序渲染,后面的阴影被前面的阴影遮挡覆盖
给出几个栗子🌰:
外侧阴影:
box-shadow: -10px -10px 10px 0px black;

内侧阴影:
box-shadow: -10px -10px 10px 0px black inset;

具象的来区分外侧阴影和内侧阴影大概是这样子:
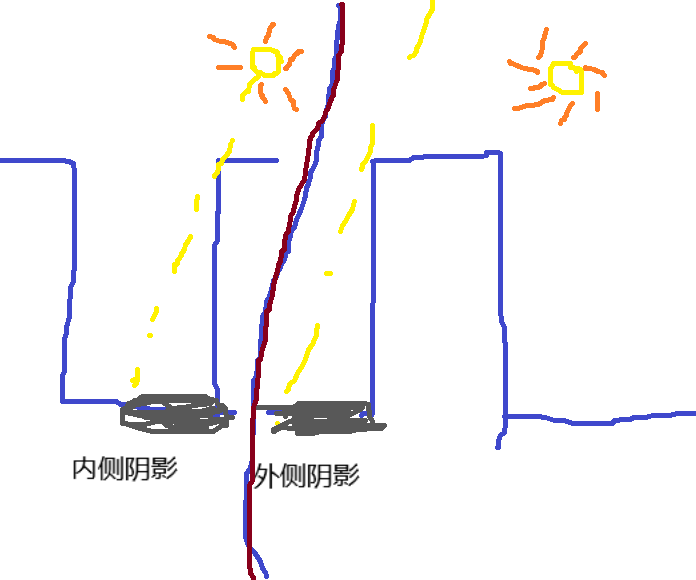
来自灵魂画手这幅画的意思就是:
inset是将元素视为凹进去的物体,没有inset的元素视为凸出来的物体。同一个方向的光线,会使inset的元素阴影打在元素内部,非inset的元素阴影打在元素外部。
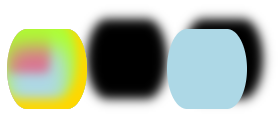
我们利用box-shadow可以产生任意个形状相同的阴影,而且阴影可以重叠。
box-shadow: -10px -10px 10px 0px gold inset,
            -10px 10px 20px 0.5em greenyellow inset,
            -20px -20px 10px 1em lightblue inset,
            10em 0 0 0 lightblue,
            5em -10px 10px 0px black ,
            11em -10px 10px 0px black;
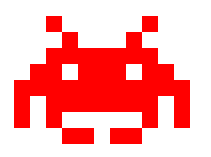
足够有耐心的话,你还可以用box-shadow来画像素画,不过没多大必要就是了,像下面这样:
要注意的是box-shadow是盒子模型的阴影,border-radius会改变盒子模型的形状,而border改变的不是盒子模型的形状,所以即使你用border画了个三角形,你的盒子并不是三角形,自然也得不到三角形的阴影。
4.渐变
渐变有linear-gradient、radial-gradient、conic-gradient、reapeating-linear-gradient、repeating-radial-gradient。
渐变可以在任何使用 <image> 的地方使用,例如background-image、border-image。
利用背景渐变可以实现条纹、格子、波点以及各种东西。
线性渐变就是沿着一条渐变线,根据给出的若干色点,构建的一系列垂直于渐变色的着色线。
所以一个线性渐变定义为:
linear-gradient(
[| to ,]? [, ]+ ) where
= [left | right] || [top | bottom]
and= [ | ]?
such as= 45deg | 0.25turn
色点列表的规则
色点是描述了颜色、位置的点,两个色点中间的区域的颜色是介于这两个颜色中间的渐变色。
当两个色点处于同一位置时,就不会有渐变区域,形成鲜明的颜色分界线,这样就可以用来画条纹了。如果是3色以上的条纹,中间的色点可以重复一下,就能保证相邻不同颜色的色点位置相同,像下面这样:
background:linear-gradient(to right,violet 33%,rgb(37, 88, 228) 33%,rgb(37, 88, 228) 66%,#fb3 0%);
            background-repeat: repeat-x;
            background-size: 2.5em;

还有一个常用的规范:
如果某个色标的位置值比整个列表中在它之前的色标的位置值都要小, 则该色标的位置值会被设置为它前面所有色标位置值的最大值。
也就是说:#58a 33%, #fb3 0, #fb3 66%, #e45b5a 0 等价于 #58a 33%, #fb3 0, #fb3 66%, #e45b5a 66%。
除了线性渐变之外,还有径向渐变、圆锥渐变、重复渐变,使用规则也差不多,后面会结合例子来讲解,更详细的文档可以去MDN上查阅。
一个渐变可以有多个色点(绘图时透明色点很有用),一个background-image或border-image可以叠加多个渐变,有时再配合其他属性(如background-repeat、background-size、border-image-repeat、border-image-width等)来分区域重复绘制,就可以画出很多东西。
那下面就让我也来画一只绿色的蜡笔吧!
终稿如下,同样可以在codepen上尝试一下。

笔头的阴影有点违和,是用radial-gradient画的,在只有div、:before、:after三个元素的情况下我也想不到其他什么了...
懒得码字,解释就交给代码注释了。
.div4{
    position:relative;
    height: 3rem;
    width: 16rem;
    margin:4rem;
    box-sizing: border-box;
    background: #237449;
    background-image:   linear-gradient(178deg,transparent 0,rgba(0, 0, 0, 0.4) 100%),  /*笔身的渐变*/
        linear-gradient(to right,transparent 6% ,rgba(41,237,133,.6) 0,
            rgba(41,237,133,.6) 12%,rgba(0,0,0,0.3) 0,rgba(0,0,0,0.3) 14%, rgba(41,237,133,.6) 0,   /*从左到右四个细条纹*/
            rgba(41,237,133,.6) 16%,rgba(0,0,0,0.3) 0,rgba(0,0,0,0.3) 18%, rgba(41,237,133,.6) 0,
            rgba(41,237,133,.6) 82%,rgba(0,0,0,0.3) 0,rgba(0,0,0,0.3) 84%, rgba(41,237,133,.6) 0,
            rgba(41,237,133,.6) 86%,rgba(0,0,0,0.3) 0,rgba(0,0,0,0.3) 88%, rgba(41,237,133,.6) 0,
            rgba(41,237,133,.6) 94%, transparent 0),
        radial-gradient(ellipse at top, rgba(2, 37, 18, 0.9) 30%,transparent 0); /*笔身上半椭圆花纹*/
    border-radius:4px;
    box-shadow:2px 3px 3px 0 gray;
}
.div4::before{
    position: absolute;
    left:-3rem;
    top:0.1rem;
    content: '';
    box-sizing: border-box;
    height: 2.8rem;
    width: 1rem;
    border-radius:2px;
    /*梯形的笔头,实际看到的是border部分,所以不能在当前元素直接用backgroung-image来做渐变*/
    border-right: 3rem solid #237449;
    border-bottom: 1.1rem solid transparent;
    border-top: 1.1rem solid transparent;
}
.div4::after{
    position: absolute;
    left: -3rem;
    right: 0;
    content: 'green';
    box-sizing: border-box;
    height: 3.5rem;
    width: 19rem;
    background-image: linear-gradient(to bottom,transparent 25%,rgba(112, 182, 142, 0.3) 40%,transparent 60%),  /*整只笔中间的反光*/
        radial-gradient(ellipse at 2.2rem 3rem,gray,transparent 1.8rem);    /*笔头下方的阴影*/
    /*green字*/
    font-family: Arial, sans-serif;
    font-size: 12px;
    font-weight: bold;
    color: rgba(255,255,255,0.3);
    text-align: right;
    padding: 1.5rem 4rem 0 0 ;
}
参考文章
在不考虑成本的情况下,css是能画出许多有简单几何图形并、补、差得到的图画的。css是潜力十足的,或者应该说,使用css的人们是有无穷潜力的。
不过实际工程中也不需要用css来画很复杂的图像,直接用图片就好了,但用文中的一些技巧也能开发出一些简单、实用、美观的元素效果。
下面的参考文章中还有一些有趣的东西,不妨去看看,看一看别人的神仙操作。


