使用 WPF 创建预加载控件
2015-03-04 16:30 Dorisoy 阅读(1003) 评论(0) 收藏 举报Introduction
At the time when WPF applications do a very long process like getting response from a web server, download file from a distant server, search files, etc., this control can be used to make the wait time more interactive. This is an alternative method to create preloader by using WPF methods instead of using GIF animation images. GIF animation might require more bitmap processing.
This demo will explain how to use this control in your projects. The solution used for this demo is created using Visual Studio 2008 (WPF, C#, .NET 3.5).
Using the Code
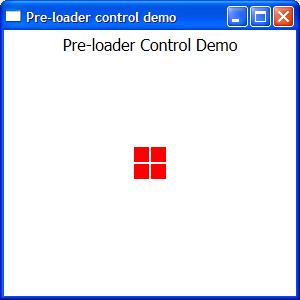
This user control is created with four rectangle blocks animated sequentially with Width property with a defined speed.

The following XAML is to create the rectangle block: Block.xaml
Height and width property is set by the PreLoaderControl.xaml control automatically. Developer would not require to change the values of these properties.
<UserControl x:Class="PreLoader.CustomControls.Block"
    xmlns="http://schemas.microsoft.com/winfx/2006/xaml/presentation"
    xmlns:x="http://schemas.microsoft.com/winfx/2006/xaml"
    Height="Auto" Width="Auto">
    <Grid x:Name="PreLoaderBlock">
        <Rectangle Width="Auto" Height="Auto" Fill="Red" Margin="0">
            <Rectangle.Style>
                <Style TargetType="{x:Type Rectangle}">
                    <Setter Property="RenderOptions.BitmapScalingMode" Value="NearestNeighbor" />
                    <Setter Property="RenderOptions.EdgeMode" Value="Aliased" />
                </Style>
            </Rectangle.Style>
        </Rectangle>
    </Grid>
</UserControl>
The Fill property can be changed to your desired color or bind with a style theme.
Fill="{DynamicResource PreLoaderColor}"
The resource PreLoaderColor can be defined in the App.xaml or in any style theme.
<ResourceDictionary>
    <SolidColorBrush x:Key="PreLoaderColor" Color="Red" />
</ResourceDictionary>
The following xaml is to define the animation: PreLoaderControl.xaml.
The UserControl.Resources holds the definition for the storyboard animation targeting the Width property for all the four rectangle blocks defined in the Grid as shown below.
The speed of the animation can be adjusted with the property SpeedRatio.
A Completed event is created in each storyboard to notify when the animation is completed respectively.
 Copy Code
<UserControl x:Class="PreLoader.CustomControls.PreLoaderControl"
    xmlns="http://schemas.microsoft.com/winfx/2006/xaml/presentation"
    xmlns:x="http://schemas.microsoft.com/winfx/2006/xaml"
    xmlns:local="clr-namespace:PreLoader.CustomControls"
    Height="{Binding}" Width="{Binding}" Loaded="UserControl_Loaded">
    <UserControl.Resources>
        <Storyboard x:Key="ProgressAnimation1" SpeedRatio="12">
            <DoubleAnimation Storyboard.TargetName="block1"
            Storyboard.TargetProperty="Width" From="16" To="0"
                             Completed="ProgressAnimation1_Completed" Duration="0:0:2"/>
        </Storyboard>
        <Storyboard x:Key="ProgressAnimation2" SpeedRatio="12">
            <DoubleAnimation Storyboard.TargetName="block2"
            Storyboard.TargetProperty="Width" From="16" To="0"
                             Completed="ProgressAnimation2_Completed" Duration="0:0:2" />
        </Storyboard>
        <Storyboard x:Key="ProgressAnimation3" SpeedRatio="12">
            <DoubleAnimation Storyboard.TargetName="block3"
            Storyboard.TargetProperty="Width" From="16" To="0"
                             Completed="ProgressAnimation3_Completed" Duration="0:0:2" />
        </Storyboard>
        <Storyboard x:Key="ProgressAnimation4" SpeedRatio="12">
            <DoubleAnimation Storyboard.TargetName="block4"
            Storyboard.TargetProperty="Width" From="16" To="0"
                             Completed="ProgressAnimation4_Completed" Duration="0:0:2" />
        </Storyboard>
    </UserControl.Resources>
    <Grid Width="Auto" Height="Auto" >
        <Grid HorizontalAlignment="Left" x:Name="gridBlock1"
        VerticalAlignment="Top" Margin="0,0,0,0" >
            <local:Block x:Name="block1" RenderTransformOrigin="0.5,4.3689"
            HorizontalAlignment="Stretch" Height="Auto"
            Width="Auto" VerticalAlignment="Stretch">
                <local:Block.RenderTransform>
                    <TransformGroup>
                        <ScaleTransform/>
                        <SkewTransform/>
                        <TranslateTransform/>
                    </TransformGroup>
                </local:Block.RenderTransform>
            </local:Block>
