All About Debian /etc/network/interfaces File
All About Debian /etc/network/interfaces File
The default interfaces file looks like the following:
Where auto starts the interface at boot and iface calls the network interface (in this case lo, loopback). All lines beginning with “auto” specify the interfaces which will be enabled when running “ifup -a”, a command executed at boot.
Lines beginning with “iface” have the following syntax:
For example:
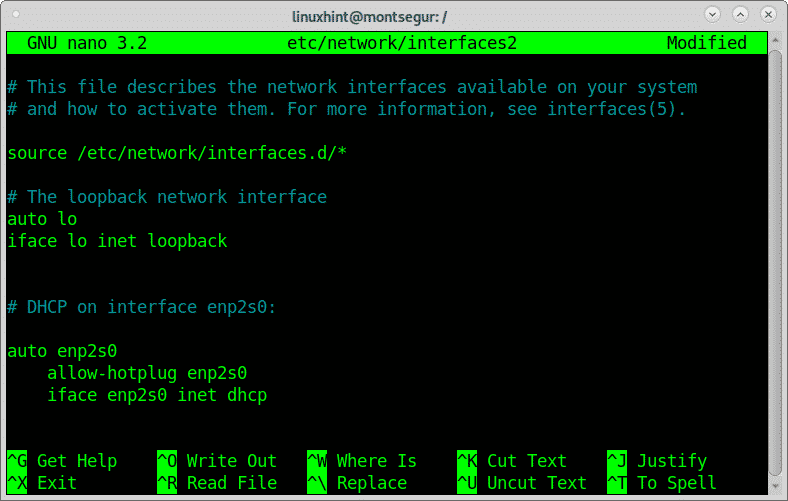
The following example shows how to setup a network card using DHCP:
Setting up an interface with DHCP by editing the /etc/network/interfaces:
To add a new interface using DHCP, add the following lines:
allow-hotplug <Interface>
iface <Interface> inet dhcp
Where allow-hotplug will start the interface upon event detection.
Note: for IPv6 add “inet6”: iface <interface> inet6 dhcp
Where <interface> you should set your device name, eth0, enp2s0, wlp3s0, etc.
Setting up an interface with static address by editing the /etc/network/interfaces:
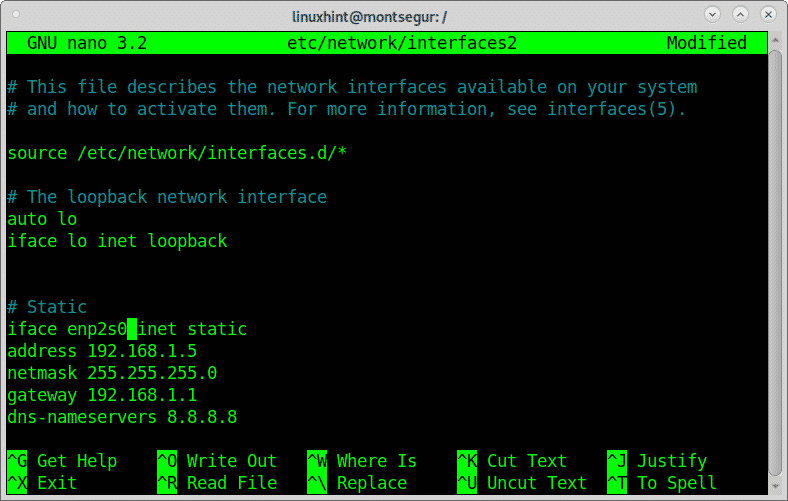
If instead of configuring the interface with DHCP you want to set a static IP address and gateway replace the previous instructions with the following (replace 192.168.0.8/24 and 192.168.0.1 with your correct IP addresses):
iface <Interface> inet static
address 192.168.0.1
netmask 255.255.255.0
gateway 192.168.0.1
dns-nameservers 8.8.8.8
Defining gateway and broadcast is optional.
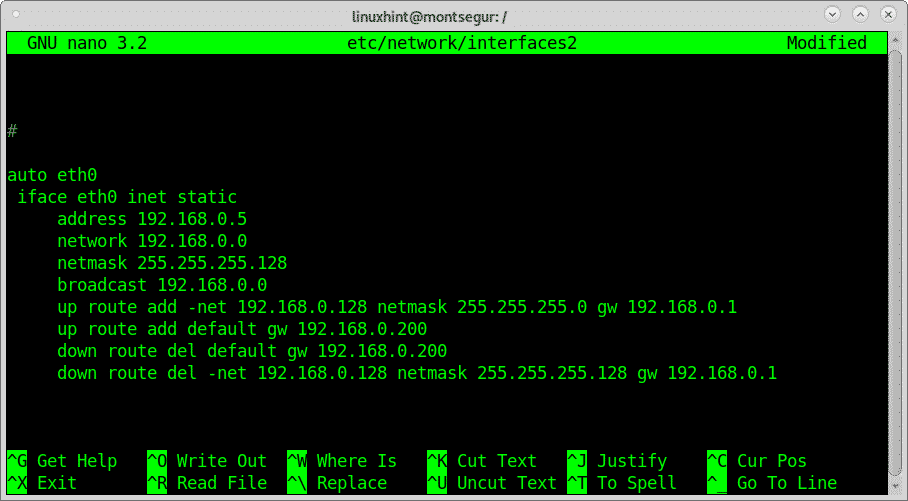
The following example shows a different configuration which runs after the network interface is enabled (up) or disabled (down). The “up” lines are executed when the device is enabled while the “down” lines when it is disabled:
iface eth0 inet static
address 192.168.0.5
network 192.168.0.0
netmask 255.255.255.128
broadcast 192.168.0.0
up route add -net 192.168.0.128 netmask 255.255.255.0 gw 192.168.0.1
up route add default gw 192.168.0.200
down route del default gw 192.168.0.200
down route del -net 192.168.0.128 netmask 255.255.255.128 gw 192.168.0.1
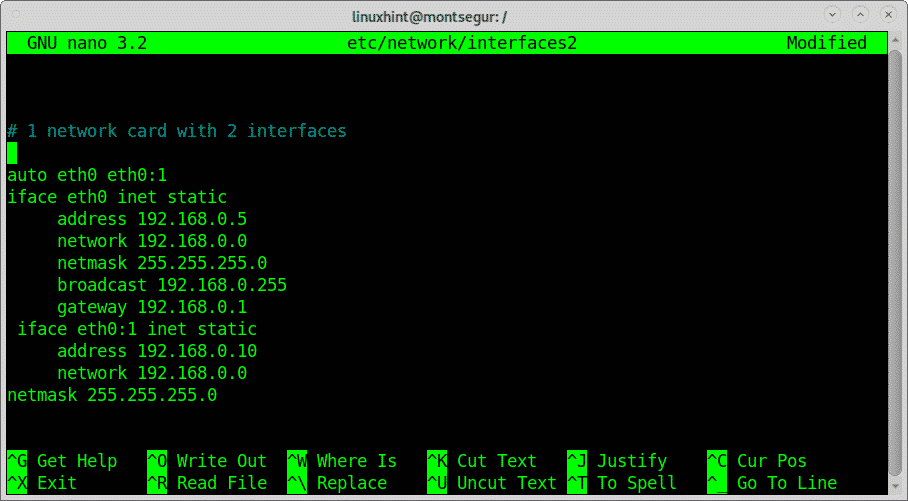
Setting up a network card with 2 interfaces:
The following example below shows a static configuration for a network card with two interfaces:
iface eth0 inet static
address 192.168.0.5
network 192.168.0.0
netmask 255.255.255.0
broadcast 192.168.0.255
gateway 192.168.0.1
iface eth0:1 inet static
address 192.168.0.10
network 192.168.0.0
netmask 255.255.255.0
As you can see in this way you can assign multiple IP addresses to a single network interface.
Configure network bonding by editing the /etc/network/interfaces:
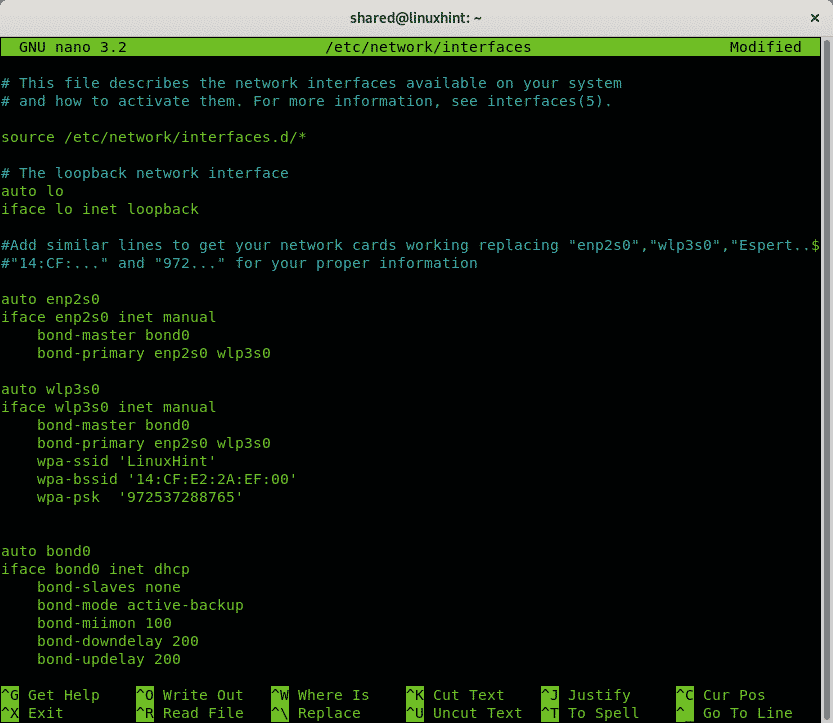
The following example shows my previous bonding mode 1 configuration within the /etc/network/interfaces file, I will leave interfaces with their names for easier understanding:
iface enp2s0 inet manual
bond-master bond0
bond-primary enp2s0 wlp3s0
auto wlp3s0
iface wlp3s0 inet manual
bond-master bond0
bond-primary enp2s0 wlp3s0
wpa-ssid 'LinuxHint'
wpa-bssid '14:CF:E2:2A:EF:00'
wpa-psk '972537288765'
auto bond0
iface bond0 inet dhcp
bond-slaves none
bond-mode active-backup
bond-miimon 100
bond-downdelay 200
bond-updelay 200
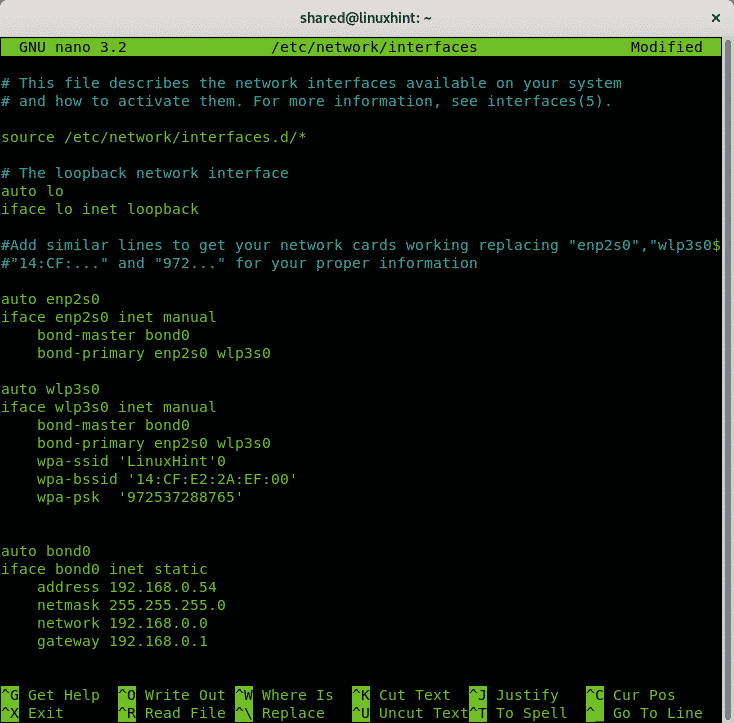
A network bonding configuration with static IP instead of DHCP would have the last block like:
address 192.168.0.54
netmask 255.255.255.0
network 192.168.0.0
gateway 192.168.0.1
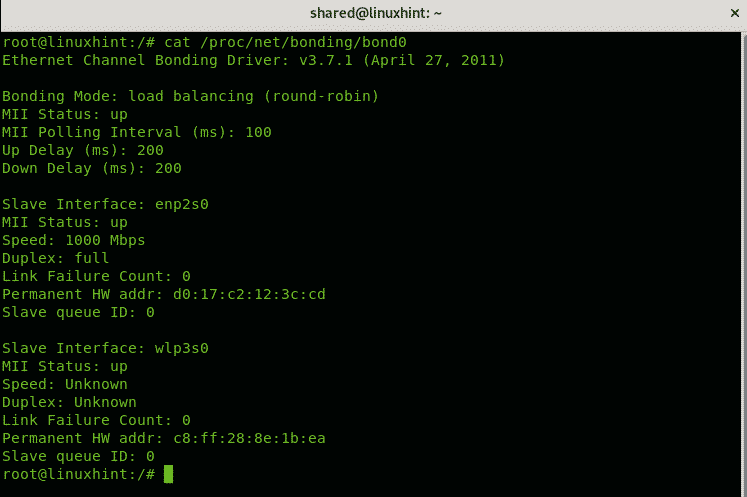
 You can run the following command to make sure bonding is working properly:
Source of examples: How to do Linux Network Bonding
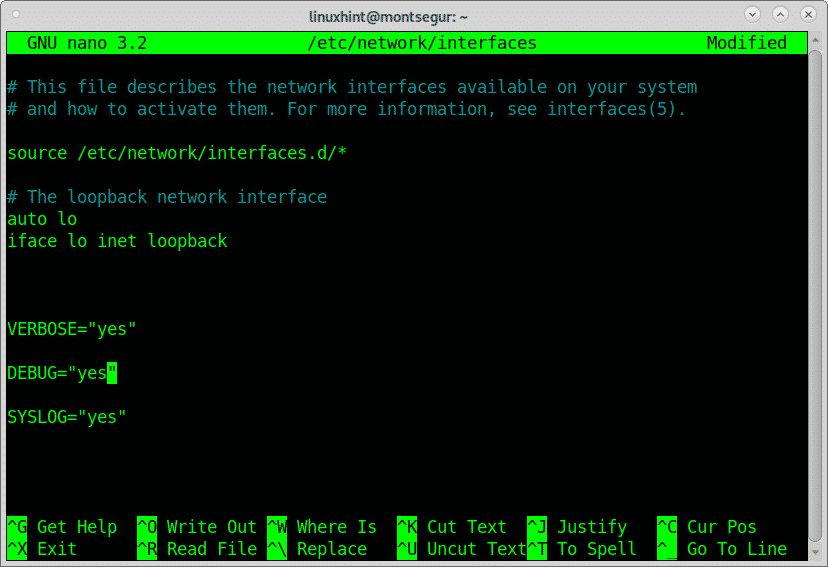
Enable logging for the file /etc/network/interfaces:
There are 3 options related to the logging:
VERBOSE: instructs log files to have detailed information.
DEBUG: enable debugging when logging.
SYSLOG: save logs within /var/log/syslog.
Pre-up commands for /etc/network/interfaces: Pre-up commands are executed before enabling the network device. If the pre-up command fails the network card activation wont take place.
Post-up instructions for /etc/network/interfaces: Post-up instructions are executed after the network interface is enabled.
Pre-down instructions for /etc/network/interfaces: Pre-down instructions are executed before disabling the network device.
Post-down instructions for /etc/network/interfaces: Post-down instructions are executed after the network interface is disabled.
Pre-up, pre-down, post-up and post-down flags are conditional, if they ail the network device won’t get enabled or won’t be properly marked as disabled.
For example, the instruction:
Will run the firewall before the network interface gets enabled, if iptables fails to start the network interface wont turn on.
These instructions are optionals are valid for any method, they can be reiterated, alternatively if you want to run script when enabling and disabling network interfaces you can save them inside the directories:
/etc/network/if-post-down.d
/etc/network/if-pre-up.d
/etc/network/if-up.d
The /etc/network/interfaces file is very complex with many more available options detailed at the main page or online at https://manpages.debian.org/jessie/ifupdown/interfaces.5.en.html.
I hope you found this brief article on About debian /etc/network/interfaces File useful.
Keep following LinuxHint for additional updates and tips on Linux and Networking.


