
centos安装zookeeper服务
zookeeper介绍
ZooKeeper 是一个开源的分布式协调服务。它是一个为分布式应用提供一致性服务的软件,分布式应用程序可以基于 Zookeeper 实现诸如数据发布/订阅、负载均衡、命名服务、分布式协调/通知、集群管理、Master 选举、分布式锁和分布式队列等功能。
ZooKeeper 的目标就是封装好复杂易出错的关键服务,将简单易用的接口和性能高效、功能稳定的系统提供给用户。
Zookeeper 保证了如下分布式一致性特性:
顺序一致性
原子性
单一视图
可靠性
实时性(最终一致性)
客户端的读请求可以被集群中的任意一台机器处理,如果读请求在节点上注册了监听器,这个监听器也是由所连接的 zookeeper 机器来处理。对于写请求,这些请求会同时发给其他 zookeeper 机器并且达成一致后,请求才会返回成功。因此,随着 zookeeper 的集群机器增多,读请求的吞吐会提高但是写请求的吞吐会下降。
有序性是 zookeeper 中非常重要的一个特性,所有的更新都是全局有序的,每个更新都有一个唯一的时间戳,这个时间戳称为 zxid(Zookeeper Transaction Id)。而读请求只会相对于更新有序,也就是读请求的返回结果中会带有这个zookeeper 最新的 zxid。
配置java环境
详见文章 centos7配置jdk环境
下载地址:https://www.apache.org/dyn/closer.lua/zookeeper/zookeeper-3.8.0/apache-zookeeper-3.8.0-bin.tar.gz
wget https://www.apache.org/dyn/closer.lua/zookeeper/zookeeper-3.8.0/apache-zookeeper-3.8.0-bin.tar.gz
安装zookeeper
使用命令解压
tar -zxvf apache-zookeeper-3.8.0-bin.tar.gz
cd apache-zookeeper-3.8.0-bin
cd conf
cp zoo_sample.cfg zoo.cfg
修改配置文件
# The number of milliseconds of each tick
tickTime=2000
# The number of ticks that the initial
# synchronization phase can take
initLimit=10
# The number of ticks that can pass between
# sending a request and getting an acknowledgement
syncLimit=5
# the directory where the snapshot is stored.
# do not use /tmp for storage, /tmp here is just
# example sakes.
dataDir=/www/server/apache-zookeeper-3.8.0-bin/data
# the port at which the clients will connect
clientPort=2181
# the maximum number of client connections.
# increase this if you need to handle more clients
#maxClientCnxns=60
#
# Be sure to read the maintenance section of the
# administrator guide before turning on autopurge.
#
# https://zookeeper.apache.org/doc/current/zookeeperAdmin.html#sc_maintenance
#
# The number of snapshots to retain in dataDir
#autopurge.snapRetainCount=3
# Purge task interval in hours
# Set to "0" to disable auto purge feature
#autopurge.purgeInterval=1

## Metrics Providers
#
# https://prometheus.io Metrics Exporter
#metricsProvider.className=org.apache.zookeeper.metrics.prometheus.PrometheusMetricsProvider
#metricsProvider.httpHost=0.0.0.0
#metricsProvider.httpPort=7000
#metricsProvider.exportJvmInfo=true
#zookeeper集群配置

server.1=192.168.31.20:3188:3288
server.2=192.168.31.21:3188:3288
server.3=192.168.31.22:3188:3288
启动zookeeper
进入文件夹的bin目录
cd bin/
./zkServer.sh start
./zkServer.sh status
ps -ef|grep zookeeper
#配置zk环境变量
vim /etc/profile

ZOOKEEPER_HOME=/www/server/apache-zookeeper-3.8.0-bin
PATH=$PATH:$ZOOKEEPER_HOME/bin
export PATH ZOOKEEPER_HOME PATH
source /etc/profile
设置开机自动启动
#开机自启
vi /usr/lib/systemd/system/zookeeper.service
[Unit]
Description=zookeeper
After=network.target remote-fs.target nss-lookup.target
[Service]
Type=forking
ExecStart=/root/apache-zookeeper-3.7.0-bin/bin/zkServer.sh start
ExecReload=/root/apache-zookeeper-3.7.0-bin/bin/zkServer.sh restart
ExecStop=/root/apache-zookeeper-3.7.0-bin/bin/zkServer.sh stop
[Install]
WantedBy=multi-user.target
# 设置自启
systemctl enable zookeeper.service
systemctl daemon-reload

# 查看是否自启
systemctl is-enabled zookeeper.service

# 取消自启
systemctl disable zookeeper.service
systemctl daemon-reload
cd /www/server/apache-zookeeper-3.8.0-bin/bin
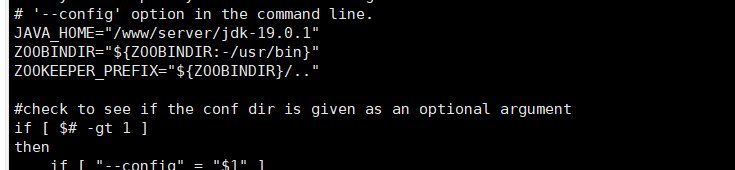
vi zkEnv.sh
#添加如下设置
JAVA_HOME="/www/server/jdk-19.0.1"
至此 zookeeper以及集群搭建完成

 浙公网安备 33010602011771号