【Redis总结】3-Linux下 Redis 的安装与配置
一、下载地址
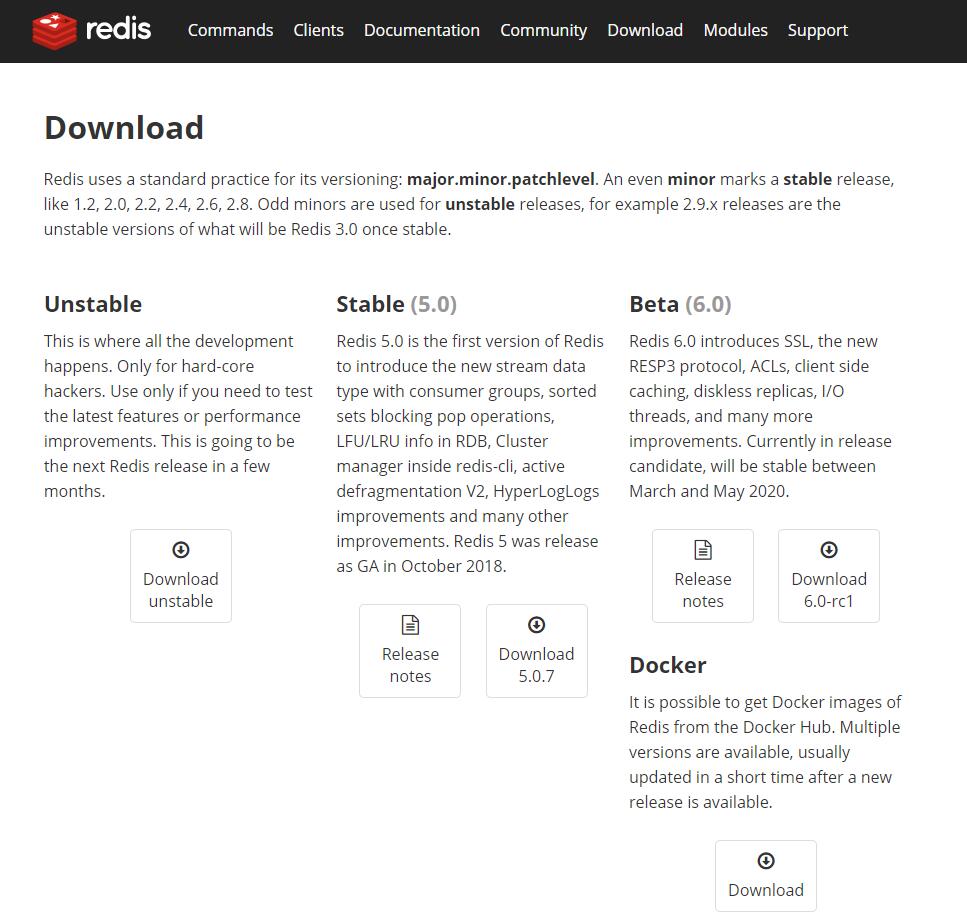
Redis 官方的下载地址: https://redis.io/download
二、Linux 下 Redis 的安装
截止目前(2020-01-07),Redis 的最新稳定版本为 5.0.7 (如上图)。
在 https://redis.io/download 页面,也有 Redis 的安装方式介绍。
1、Redis 的下载、解压缩、编译
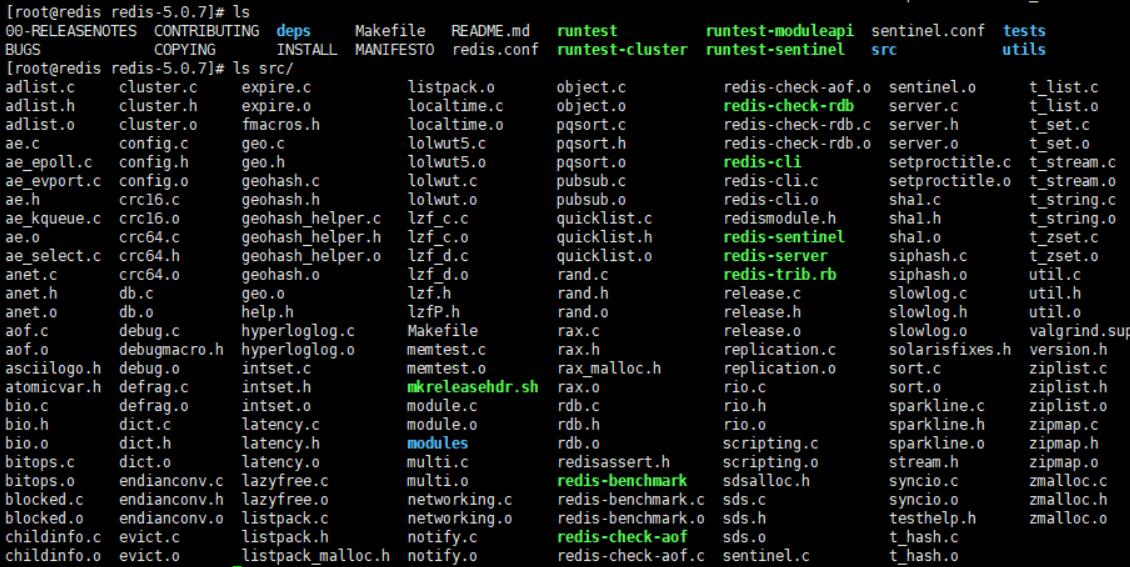
下载、解压缩、编译 (Download、extract and compile Redis with:)
$ wget http://download.redis.io/releases/redis-5.0.7.tar.gz
$ tar xzf redis-5.0.7.tar.gz
$ cd redis-5.0.7
$ make
make(编译)后,src/ 目录下多了好多文件。如下图:
在进行 redis 的编译时,确保 Linux 系统安装有 gcc、gcc-c++ 软件,若没有,执行如下命令:
yum install gcc gcc-c++ -y
2、创建 Redis 的相关目录
为了方便管理,将 Redis 的配置文件和常用命令移动到统一的目录下。
# 创建目录
mkdir -p /data/redis/{bin,etc,data,logs,run}

# 拷贝配置文件到指定目录(/data/redis/etc/)下
mv redis.conf /data/redis/etc/

# 将可执行文件拷贝到指定目录(/data/redis/bin/)下
cd src/
mv mkreleasehdr.sh redis-benchmark redis-check-aof redis-check-rdb redis-cli redis-sentinel redis-server /data/redis/bin/

3、修改 Redis 的配置文件
cd /data/redis/etc/

# 设置后台启动 Redis 服务。把 daemonize 的值设置为yes(表明需要在后台运行)
sed -i 's;^daemonize no;daemonize yes;g' redis.conf

# 开启 Redis 远程访问服务器(注释掉 bind 127.0.0.1)
sed -i 's;^bind 127.0.0.1;#bind 127.0.0.1;g' redis.conf

# 设置 protected-mode 为 no (默认是 yes,即阻止了远程访问)
sed -i 's;^protected-mode yes;protected-mode no;g' redis.conf

# 修改 Redis 的默认密码(默认密码为空)
sed -i '/^# requirepass foobared/a\requirepass 123456' redis.conf

# 设置 Redis 本地数据文件的存放路径
sed -i 's;^dir ./;dir ../data/;g' redis.conf

# 设置 Redis 的 pid 文件存放路径
sed -i 's;^pidfile /var/run/redis_6379.pid;pidfile ../run/redis_6379.pid;g' redis.conf

# 设置 Redis 的日志存放路径
sed -i 's;^logfile "";logfile "../logs/redis6379.log";g' redis.conf
配置文件(redis.conf)详解:
# 指定redis绑定的主机地址
bind 0.0.0.0
protected-mode yes
# 指定访问redis服务端的端口
port 6379
tcp-backlog 511
# 指定客户端连接redis服务器时,当闲置的时间为多少(如300)时,关闭连接
timeout 0
tcp-keepalive 300
daemonize yes
supervised no
pidfile ../run/redis_6379.pid
loglevel notice
logfile ../logs/redis6379.log
databases 16
always-show-logo yes
# 指定redis数据库多长时间内(s)有多少次(c)更新操作时就把缓存中的数据同步到本地库,
# 比如:save 600 2,指的是10分钟内有2次更新操作,就同步到本地库
save 900 1
save 300 10
save 60 10000
stop-writes-on-bgsave-error yes
rdbcompression yes
rdbchecksum yes
dbfilename dump6696.rdb
# 指定redis本地数据文件存放的目录(这里也可以使用绝对路径 /data/redis/data/)
dir ../data/
replica-serve-stale-data yes
replica-read-only yes
repl-diskless-sync no
repl-diskless-sync-delay 5
repl-disable-tcp-nodelay no
replica-priority 100
# 指定redis的访问密码
requirepass 123456
lazyfree-lazy-eviction no
lazyfree-lazy-expire no
lazyfree-lazy-server-del no
replica-lazy-flush no
# 指定redis是否开启日志记录功能,由于redis是利用什么save命令异步的方式更新数据到本地库,
# 所以不开启日志记录功能,可能会导致在出现生产事故时,导致部分数据未更新到本地库
appendonly no
appendfilename "appendonly.aof"
appendfsync everysec
no-appendfsync-on-rewrite no
auto-aof-rewrite-percentage 100
auto-aof-rewrite-min-size 64mb
aof-load-truncated yes
aof-use-rdb-preamble yes
lua-time-limit 5000
slowlog-log-slower-than 10000
slowlog-max-len 128
latency-monitor-threshold 0
notify-keyspace-events ""
hash-max-ziplist-entries 512
hash-max-ziplist-value 64
list-max-ziplist-size -2
list-compress-depth 0
set-max-intset-entries 512
zset-max-ziplist-entries 128
zset-max-ziplist-value 64
hll-sparse-max-bytes 3000
stream-node-max-bytes 4096
stream-node-max-entries 100
activerehashing yes
client-output-buffer-limit normal 0 0 0
client-output-buffer-limit replica 256mb 64mb 60
client-output-buffer-limit pubsub 32mb 8mb 60
hz 10
dynamic-hz yes
aof-rewrite-incremental-fsync yes
rdb-save-incremental-fsync yes
# 指定内存
maxmemory 4294967296
4、将 Redis 服务设置为开机启动
在 /etc/rc.local 文件的最后一行,添加 一行:
/data/redis/bin/redis-server /data/redis/etc/redis.conf
也可以直接执行如下命令:
echo "/data/redis/bin/redis-server /data/redis/etc/redis.conf" >> /etc/rc.local
5、将 Redis 的 bin 目录添加到 系统环境变量中
echo "export PATH=$PATH:/data/redis/bin" >> /etc/profile

# 使设置的环境变量生效
source /etc/profile
6、启动 Redis 服务
启动redis,执行如下命令:
[root@redis ~]# /data/redis/bin/redis-server /data/redis/etc/redis.conf
21447:C 08 Jan 2020 01:51:03.431 # oO0OoO0OoO0Oo Redis is starting oO0OoO0OoO0Oo
21447:C 08 Jan 2020 01:51:03.431 # Redis version=5.0.7, bits=64, commit=00000000, modified=0, pid=21447, just started
21447:C 08 Jan 2020 01:51:03.431 # Configuration loaded
[root@redis ~]# ps -ef|grep redis
root      21448      1  1 01:51 ?        00:00:00 redis-server *:6379
root      21453  16617  0 01:51 pts/0    00:00:00 grep --color=auto redis
7、查看 Redis 是否启动
[root@redis ~]# redis-cli
127.0.0.1:6379> auth 123456
OK
127.0.0.1:6379> ping
PONG
127.0.0.1:6379>
- 127.0.0.1 :是本机IP
- 6379 :是 Redis 服务端口
- 输入ping命令,返回 PONG :说明 Redis 服务已启动
三、Redis 配置
Redis 的配置文件位于 Redis 安装目录下,文件名为 redis.conf(Windows 名为 redis.windows.conf)。
你可以通过 CONFIG 命令查看或设置配置项。
1、查看配置
语法:
CONFIG GET 命令的语法格式如下:
127.0.0.1:6379> CONFIG GET CONFIG_SETTING_NAME
示例1:
127.0.0.1:6379> CONFIG GET loglevel
1) "loglevel"
2) "notice"
示例2:
使用 * 星号获取所有配置项:
127.0.0.1:6379> CONFIG GET *
  1) "dbfilename"
  2) "dump.rdb"
  3) "requirepass"
  4) "123456"
  5) "masterauth"
  6) ""
  7) "cluster-announce-ip"
  8) ""
  9) "unixsocket"
 10) ""
 11) "logfile"
 12) "../logs/redis6379.log"
 13) "pidfile"
 14) "../run/redis_6379.pid"
 15) "slave-announce-ip"
 16) ""
 17) "replica-announce-ip"
 18) ""
 19) "maxmemory"
 20) "0"
 21) "proto-max-bulk-len"
 22) "536870912"
 23) "client-query-buffer-limit"
 24) "1073741824"
 25) "maxmemory-samples"
 26) "5"
 27) "lfu-log-factor"
 28) "10"
 29) "lfu-decay-time"
 30) "1"
 31) "timeout"
 32) "0"
 33) "active-defrag-threshold-lower"
 34) "10"
 35) "active-defrag-threshold-upper"
 36) "100"
 37) "active-defrag-ignore-bytes"
 38) "104857600"
 39) "active-defrag-cycle-min"
 40) "5"
 41) "active-defrag-cycle-max"
 42) "75"
 43) "active-defrag-max-scan-fields"
 44) "1000"
 45) "auto-aof-rewrite-percentage"
 46) "100"
 47) "auto-aof-rewrite-min-size"
 48) "67108864"
 49) "hash-max-ziplist-entries"
 50) "512"
 51) "hash-max-ziplist-value"
 52) "64"
 53) "stream-node-max-bytes"
 54) "4096"
 55) "stream-node-max-entries"
 56) "100"
 57) "list-max-ziplist-size"
 58) "-2"
 59) "list-compress-depth"
 60) "0"
 61) "set-max-intset-entries"
 62) "512"
 63) "zset-max-ziplist-entries"
 64) "128"
 65) "zset-max-ziplist-value"
 66) "64"
 67) "hll-sparse-max-bytes"
 68) "3000"
 69) "lua-time-limit"
 70) "5000"
 71) "slowlog-log-slower-than"
 72) "10000"
 73) "latency-monitor-threshold"
 74) "0"
 75) "slowlog-max-len"
 76) "128"
 77) "port"
 78) "6379"
 79) "cluster-announce-port"
 80) "0"
 81) "cluster-announce-bus-port"
 82) "0"
 83) "tcp-backlog"
 84) "511"
 85) "databases"
 86) "16"
 87) "repl-ping-slave-period"
 88) "10"
 89) "repl-ping-replica-period"
 90) "10"
 91) "repl-timeout"
 92) "60"
 93) "repl-backlog-size"
 94) "1048576"
 95) "repl-backlog-ttl"
 96) "3600"
 97) "maxclients"
 98) "10000"
 99) "watchdog-period"
100) "0"
101) "slave-priority"
102) "100"
103) "replica-priority"
104) "100"
105) "slave-announce-port"
106) "0"
107) "replica-announce-port"
108) "0"
109) "min-slaves-to-write"
110) "0"
111) "min-replicas-to-write"
112) "0"
113) "min-slaves-max-lag"
114) "10"
115) "min-replicas-max-lag"
116) "10"
117) "hz"
118) "10"
119) "cluster-node-timeout"
120) "15000"
121) "cluster-migration-barrier"
122) "1"
123) "cluster-slave-validity-factor"
124) "10"
125) "cluster-replica-validity-factor"
126) "10"
127) "repl-diskless-sync-delay"
128) "5"
129) "tcp-keepalive"
130) "300"
131) "cluster-require-full-coverage"
132) "yes"
133) "cluster-slave-no-failover"
134) "no"
135) "cluster-replica-no-failover"
136) "no"
137) "no-appendfsync-on-rewrite"
138) "no"
139) "slave-serve-stale-data"
140) "yes"
141) "replica-serve-stale-data"
142) "yes"
143) "slave-read-only"
144) "yes"
145) "replica-read-only"
146) "yes"
147) "slave-ignore-maxmemory"
148) "yes"
149) "replica-ignore-maxmemory"
150) "yes"
151) "stop-writes-on-bgsave-error"
152) "yes"
153) "daemonize"
154) "yes"
155) "rdbcompression"
156) "yes"
157) "rdbchecksum"
158) "yes"
159) "activerehashing"
160) "yes"
161) "activedefrag"
162) "no"
163) "protected-mode"
164) "no"
165) "repl-disable-tcp-nodelay"
166) "no"
167) "repl-diskless-sync"
168) "no"
169) "aof-rewrite-incremental-fsync"
170) "yes"
171) "rdb-save-incremental-fsync"
172) "yes"
173) "aof-load-truncated"
174) "yes"
175) "aof-use-rdb-preamble"
176) "yes"
177) "lazyfree-lazy-eviction"
178) "no"
179) "lazyfree-lazy-expire"
180) "no"
181) "lazyfree-lazy-server-del"
182) "no"
183) "slave-lazy-flush"
184) "no"
185) "replica-lazy-flush"
186) "no"
187) "dynamic-hz"
188) "yes"
189) "maxmemory-policy"
190) "noeviction"
191) "loglevel"
192) "notice"
193) "supervised"
194) "no"
195) "appendfsync"
196) "everysec"
197) "syslog-facility"
198) "local0"
199) "appendonly"
200) "no"
201) "dir"
202) "/data/redis/data"
203) "save"
204) "900 1 300 10 60 1"
205) "client-output-buffer-limit"
206) "normal 0 0 0 slave 268435456 67108864 60 pubsub 33554432 8388608 60"
207) "unixsocketperm"
208) "0"
209) "slaveof"
210) ""
211) "notify-keyspace-events"
212) ""
213) "bind"
214) ""
2、编辑配置
可以通过修改 redis.conf 文件或使用 CONFIG SET 命令修改配置。
语法:
CONFIG SET 命令的语法格式如下:
127.0.0.1:6379> CONFIG SET CONFIG_SETTING_NAME NEW_CONFIG_VALUE
示例1:
127.0.0.1:6379> CONFIG SET loglevel "notice"
OK
127.0.0.1:6379> CONFIG GET loglevel
1) "loglevel"
2) "notice"
3、redis.conf 配置项说明
| 序号 | 配置项 | 说明 |
| 1 | daemonize no | Redis 默认不是以守护进程的方式运行,可以通过该配置项修改,使用 yes 启用守护进程(Windows 不支持守护线程的配置为 no ) |
| 2 | pidfile /var/run/redis.pid | 当 Redis 以守护进程方式运行时,Redis 默认会把 pid 写入 /var/run/redis.pid 文件,可以通过 pidfile 指定 |
| 3 | port 6379 | 指定 Redis 监听端口,默认端口为 6379,作者在自己的一篇博文中解释了为什么选用 6379 作为默认端口,因为 6379 在手机按键上 MERZ 对应的号码,而 MERZ 取自意大利歌女 Alessia Merz 的名字 |
| 4 | bind 127.0.0.1 | 绑定的主机地址 |
| 5 | timeout 300 | 当客户端闲置多长时间后关闭连接,如果指定为 0,表示关闭该功能 |
| 6 | loglevel notice | 指定日志记录级别,Redis 总共支持四个级别:debug、verbose、notice、warning,默认为 notice |
| 7 | logfile stdout | 日志记录方式,默认为标准输出,如果配置 Redis 为守护进程方式运行,而这里又配置为日志记录方式为标准输出,则日志将会发送给 /dev/null |
| 8 | databases 16 | 设置数据库的数量,默认数据库为0,可以使用SELECT 命令在连接上指定数据库id |
| 9 |
save 900 1 |
save <seconds> <changes> 分别表示 900 秒(15 分钟)内有 1 个更改,300 秒(5 分钟)内有 10 个更改以及 60 秒内有 10000 个更改。 |
| 10 | rdbcompression yes | 指定存储至本地数据库时是否压缩数据,默认为 yes,Redis 采用 LZF 压缩,如果为了节省 CPU 时间,可以关闭该选项,但会导致数据库文件变的巨大 |
| 11 | dbfilename dump.rdb | 指定本地数据库文件名,默认值为 dump.rdb |
| 12 | dir ./ | 指定本地数据库存放目录 |
| 13 | slaveof <masterip> <masterport> | 设置当本机为 slav 服务时,设置 master 服务的 IP 地址及端口,在 Redis 启动时,它会自动从 master 进行数据同步 |
| 14 | masterauth <master-password> | 当 master 服务设置了密码保护时,slav 服务连接 master 的密码 |
| 15 | requirepass foobared | 设置 Redis 连接密码,如果配置了连接密码,客户端在连接 Redis 时需要通过 AUTH <password> 命令提供密码,默认关闭 |
| 16 | maxclients 128 | 设置同一时间最大客户端连接数,默认无限制,Redis 可以同时打开的客户端连接数为 Redis 进程可以打开的最大文件描述符数,如果设置 maxclients 0,表示不作限制。当客户端连接数到达限制时,Redis 会关闭新的连接并向客户端返回 max number of clients reached 错误信息 |
| 17 | maxmemory <bytes> | 指定 Redis 最大内存限制,Redis 在启动时会把数据加载到内存中,达到最大内存后,Redis 会先尝试清除已到期或即将到期的 Key,当此方法处理 后,仍然到达最大内存设置,将无法再进行写入操作,但仍然可以进行读取操作。Redis 新的 vm 机制,会把 Key 存放内存,Value 会存放在 swap 区 |
| 18 | appendonly no | 指定是否在每次更新操作后进行日志记录,Redis 在默认情况下是异步的把数据写入磁盘,如果不开启,可能会在断电时导致一段时间内的数据丢失。因为 redis 本身同步数据文件是按上面 save 条件来同步的,所以有的数据会在一段时间内只存在于内存中。默认为 no |
| 19 | appendfilename appendonly.aof | 指定更新日志文件名,默认为 appendonly.aof |
| 20 | appendfsync everysec |
指定更新日志条件,共有 3 个可选值: |
| 21 | vm-enabled no | 指定是否启用虚拟内存机制,默认值为 no,简单的介绍一下,VM 机制将数据分页存放,由 Redis 将访问量较少的页即冷数据 swap 到磁盘上,访问多的页面由磁盘自动换出到内存中(在后面的文章我会仔细分析 Redis 的 VM 机制) |
| 22 | vm-swap-file /tmp/redis.swap | 虚拟内存文件路径,默认值为 /tmp/redis.swap,不可多个 Redis 实例共享 |
| 23 | vm-max-memory 0 | 将所有大于 vm-max-memory 的数据存入虚拟内存,无论 vm-max-memory 设置多小,所有索引数据都是内存存储的(Redis 的索引数据 就是 keys),也就是说,当 vm-max-memory 设置为 0 的时候,其实是所有 value 都存在于磁盘。默认值为 0 |
| 24 | vm-page-size 32 | Redis swap 文件分成了很多的 page,一个对象可以保存在多个 page 上面,但一个 page 上不能被多个对象共享,vm-page-size 是要根据存储的 数据大小来设定的,作者建议如果存储很多小对象,page 大小最好设置为 32 或者 64bytes;如果存储很大大对象,则可以使用更大的 page,如果不确定,就使用默认值 |
| 25 | vm-pages 134217728 | 设置 swap 文件中的 page 数量,由于页表(一种表示页面空闲或使用的 bitmap)是在放在内存中的,,在磁盘上每 8 个 pages 将消耗 1byte 的内存。 |
| 26 | vm-max-threads 4 | 设置访问swap文件的线程数,最好不要超过机器的核数,如果设置为0,那么所有对swap文件的操作都是串行的,可能会造成比较长时间的延迟。默认值为4 |
| 27 | glueoutputbuf yes | 设置在向客户端应答时,是否把较小的包合并为一个包发送,默认为开启 |
| 28 |
hash-max-zipmap-entries 64 |
指定在超过一定的数量或者最大的元素超过某一临界值时,采用一种特殊的哈希算法 |
| 29 | activerehashing yes | 指定是否激活重置哈希,默认为开启(后面在介绍 Redis 的哈希算法时具体介绍) |
| 30 | include /path/to/local.conf | 指定包含其它的配置文件,可以在同一主机上多个Redis实例之间使用同一份配置文件,而同时各个实例又拥有自己的特定配置文件 |


