CSS gradient渐变之webkit核心浏览器下的使用以及实例
一、关于渐变
渐变是一种应用于平面的视觉效果,可以从一种颜色逐渐地转变成另外一种颜色,故可以创建类似于彩虹的效果渐变可以应用在任何可以使用图片的地方。例如,您可以指定一个这么一个渐变:顶部的颜色是红色,中间的是蓝色,底部为黄色来作为div的背景色。渐变通过-webkit-gradient方法实现,可以用来代替图片URL。在webkit核心浏览器下(Safari4+, Chrome),有两种类型的渐变,线性的和径向的。您还可以指定多个中间过渡色,此称之为color stops。
二、基本语法
webkit核心浏览器下的的基本语法如下:
- -webkit-gradient(type, start_point, end_point, / stop...)
- -webkit-gradient(type, inner_center, inner_radius, outer_center, outer_radius, / stop...)
参数:
- type : 渐变的类型,可以是线性渐变(linear)或是径向渐变(radial)
- start_point :渐变图像中渐变的起始点
- end_point :渐变图像中渐变的结束点
- stop :color-stop()方法,指定渐变进程中特定的颜色
- inner_center :内部中心点,径向渐变起始圆环
- inner_radius : 内部半径,径向渐变起始圆
- outer_center :外部渐变结束圆的中心点
- outer_radius :外部渐变结束圆的半径
关于参数的具体说明
1.start_point和end_point
如果您对photoshop或是flash之类的设计软件的渐变功能熟悉,那么理解渐变的一些概念或是参数相对就容易些。例如,我们再photoshop中划一条渐变线,会有起始点和结束点,这个起始点和结束点就对应这里的start_point和end_point参数,如下图:

start_point(x1,x2),end_point(x2,y2),这里的x,y对应左上角为起点的坐标,此处的x,y参数表示与CSS中的background-position是一致的,可以使像素值,或是百分比值或是left,top,right,bottom。
当x1等于x2,y1不等于y2,实现垂直渐变,调整y1,y2的值可以调整渐变半径大小;
当y1等于y2,x1不等于x2,实现水平渐变,调整x1,x2的值可以调整渐变半径大小;
当y1不等于y2,x1不等于x2,实现角度渐变,当x1,x2,y1,y2取值为极值的时候接近垂直渐变或水平渐变;
当x1等于x2,y1等于y2,实现没有渐变,取from色,即“ from(颜色值) ”;
2.stop
color-stop()我的理解就是过渡点,这些过渡点有两个参数,一个是点的位置,另外一个是过渡点的颜色。这些参数的示意也可以在photoshop之类的软件渐变编辑器中找到对应的位置。

我们会见到类似下面的代码片段,color-stop(0.5, #ff0000)所表示的意思是在渐变过渡进程的中心位置(50%的位置)有个颜色为#ff0000(红色)的过渡色。
三、创建线性渐变
这里展示的是最简单的线性渐变,由蓝色至白色的渐变。代码如下:
.linear{
    width:130px;
    height:130px;
    border:1px solid green;
    padding:10px;
    background:-webkit-gradient(linear, left top, left bottom, from(#00abeb), to(#fff));
    -webkit-background-origin:padding;
    -webkit-background-clip:content;
}

<div class="linear"></div>
参见上面的background属性值,可以得到webkit核心浏览器下线性渐变的基本语法,如下:
-webkit-gradient(type,x1 y1, x2 y2, from(开始颜色值), [color-stop(位置偏移-小数,停靠颜色值),...],to(结束颜色值));
上面示例代码实现的效果如下截图:

四、创建径向渐变
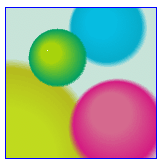
径向渐变也可以称为放射状渐变,常用来形成环状效果,晕状效果等。如下示例代码:
.radial{
    display:block;
    width:150px;
    height:150px;
    border:1px solid blue;
    background-image:-webkit-gradient(radial, 45 45, 10, 52 50, 30, from(#A7D30C), to(rgba(1,159,98,0)), color-stop(90%, #019F62)),
        -webkit-gradient(radial, 105 105, 20, 112 120, 50, from(#ff5f98), to(rgba(255,1,136,0)), color-stop(75%, #ff0188)),
        -webkit-gradient(radial, 95 15, 15, 102 20, 40, from(#00c9ff), to(rgba(0,201,255,0)), color-stop(80%, #00b5e2)),
        -webkit-gradient(radial, 0 150, 50, 0 140, 90, from(#f4f201), to(rgba(228, 199,0,0)), color-stop(80%, #e4c700));
}

<div class="radial"></div>
结果如下图,截自Safari浏览器:

五、指定过渡颜色点
即使用color-stop方法创建色标点。含有两个参数,第一个参数表示渐变点的在整个渐变范围内的位置,以小数表示;第二个参数为颜色,可以使用RGBA的形式表示,这样可以指定颜色的透明度。
使用color-stop指定过渡点或称为色标点时,渐变的开始(from())以及结束(to())颜色都是可以省略的。您可以参见下面的实例,第一个有from()以及end()的渐变,第二个没有from()以及stop()。
1.使用from()以及to()方法
body {
   background: -webkit-gradient(linear, left top, left bottom, from(#ff0), color-stop(0.5, orange), to(rgb(255, 0, 0)));
}
上面代码结果如下:

2.不指定起始颜色与结束颜色
background-image:-webkit-gradient(linear, left top, left bottom, color-stop(0.40, #ff0), color-stop(0.5, orange), color-stop(0.60, rgb(255, 0, 0)));
结果如下,截自Safari 4浏览器:

3.多个过渡点在同一位置
width:200px; height:120px; background:-webkit-gradient(linear, left top, left bottom, from(#00abeb), to(#fff), color-stop(0.5, #fff), color-stop(0.5, #66cc00));
结果类似下面截图:

六、创建背景重复渐变
CSS3中有个background-size属性,可以改变背景图片的大小,配合背景渐变属性可以实现重复的背景渐变,如下代码:
width:400px; height:150px; background:-webkit-gradient(linear, left top, left bottom, from(#ff0000), to(#ffff00)); -webkit-background-size:0 20px;
结果如下图:

七、实例
一条斜线从圆的左上角平移过圆:
<!DOCTYPE html>
<html>
<head>
<meta charset="utf-8"/>
<title>gradient的使用</title>
<meta name="viewport" content="width=device-width, initial-scale=1.0">
<link href="css/bootstrap.css" rel="stylesheet">
<style>
html,body{background:#000;}
.divcirle{position: absolute;width:385px;height:385px;left:173px;top:50px;border-radius:385px;border:2px solid #fff;overflow:hidden;}
.divcirle:before{
    content: "";
    position: absolute;
    width: 40px;
    height: 467px;
    top: 0;
    left: -150px;
    overflow: hidden;
    background: -moz-linear-gradient(left,rgba(255,255,255,0)0,rgba(255,255,255,.2)50%,rgba(255,255,255,0)100%);
    background: -webkit-gradient(linear,left top,right top,color-stop(0%,rgba(255,255,255,0)),color-stop(50%,rgba(255,255,255,.2)),color-stop(100%,rgba(255,255,255,0)));
    background: -webkit-linear-gradient(left,rgba(255,255,255,0)0,rgba(255,255,255,.2)50%,rgba(255,255,255,0)100%);
    background: -o-linear-gradient(left,rgba(255,255,255,0)0,rgba(255,255,255,.2)50%,rgba(255,255,255,0)100%);
    -webkit-transform: skewX(-25deg);
    -moz-transform: skewX(-25deg);
    transform: skewX(-25deg);
}
.divcirle.current:before{
   left:650px;
  -webkit-transition:left 8s;
  -moz-transition:left 8s;
  transition:left 8s;

}

</style>
</head>
<body>
<div class="divcirle"></div>
<script src="js/jquery-1.11.3.min.js"></script>
<script>
    $(function(){
        $(".divcirle").addClass('current');
    })
</script>
</body>
</html>
实现的效果如图所示:


