

猫狗检测分类系统
- 源码及演示地址:
演示地址:https://www.wchime.xyz:8083/#/
后端代码:https://gitee.com/mom925/pet-web-api
前端代码:https://gitee.com/mom925/uniapp-pets
- 项目说明
- 项目技术:django+mysql+uwsgi+nginx+uniapp
- 逻辑:前端用户上传图片,django接收图片传给模型预测,首先做检测,检测是猫还是狗,然后将检测到的框裁剪下来,送进分类算法,对其进行具体得分类,得到结果再将其返回给前端
- 部署:采用docker容器部署,可见我docker分类文章
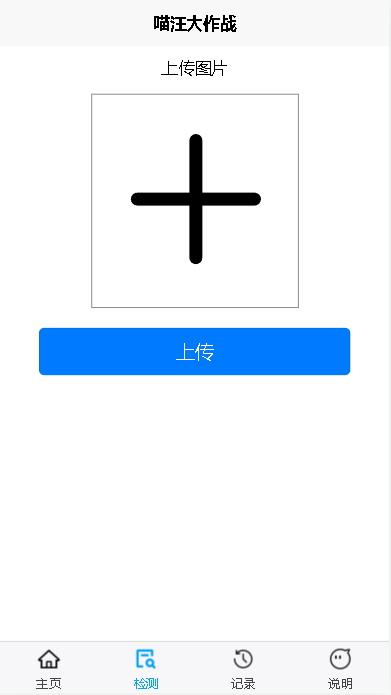
- 演示图:

- 主要代码说明
主要代码是其中对图片进行预测的算法。

其中检测算法代码结构如上,都在predict_deploy文件夹下
首先是主文件my_detect.py,二进制图片文件进行预测入口。

import os
import sys
from pathlib import Path

from tools_detect import draw_box_and_save_img, dataLoad, predict_classify, detect_img_2_classify_img, get_time_uuid

FILE = Path(__file__).resolve()
ROOT = FILE.parents[0]  # YOLOv5 root directory
if str(ROOT) not in sys.path:
    sys.path.append(str(ROOT))  # add ROOT to PATH
ROOT = Path(os.path.relpath(ROOT, Path.cwd()))  # relative

from models.common import DetectMultiBackend
from utils.general import (non_max_suppression)
from utils.plots import save_one_box

import config as cfg

conf_thres = cfg.conf_thres
iou_thres = cfg.iou_thres

detect_size = cfg.detect_img_size
classify_size = cfg.classify_img_size


def detect_img(img, device, detect_weights='', detect_class=[], save_dir=''):
    # 选择计算设备
    # device = select_device(device)
    # 加载数据
    imgsz = (detect_size, detect_size)
    im0s, im = dataLoad(img, imgsz, device)
    # print(im0)
    # print(im)
    # 加载模型
    model = DetectMultiBackend(detect_weights, device=device)
    stride, names, pt = model.stride, model.names, model.pt
    # print((1, 3, *imgsz))
    model.warmup(imgsz=(1, 3, *imgsz))  # warmup

    pred = model(im, augment=False, visualize=False)
    # print(pred)
    pred = non_max_suppression(pred, conf_thres, iou_thres, None, False, max_det=1000)
    # print(pred)
    im0 = im0s.copy()
    # 画框,保存图片
    # ret_bytes= None
    ret_bytes = draw_box_and_save_img(pred, names, detect_class, save_dir, im0, im)
    ret_li = list()
    # print(pred)
    im0_arc = int(im0.shape[0]) * int(im0.shape[1])
    count = 1
    for det in reversed(pred[0]):
        # print(det)
        # print(det)
        # 目标太小跳过
        xyxy_arc = (int(det[2]) - int(det[0])) * (int(det[3]) - int(det[1]))
        # print(xyxy_arc)
        if xyxy_arc / im0_arc < 0.01:
            continue
        # 裁剪图片
        xyxy = det[:4]
        im_crop = save_one_box(xyxy, im0, file=Path('im.jpg'), gain=1.1, pad=10, square=False, BGR=False, save=False)
        # 将裁剪的图片转为分类的大小及tensor类型
        im_crop = detect_img_2_classify_img(im_crop, classify_size, device)

        d = dict()
        # print(det)
        c = int(det[-1])
        label = detect_class[c]
        # 开始做具体分类
        if label == detect_class[0]:
            classify_predict = predict_classify(cfg.cat_weight, im_crop, device)
            classify_label = cfg.cat_class[int(classify_predict)]
        else:
            classify_predict = predict_classify(cfg.dog_weight, im_crop, device)
            classify_label = cfg.dog_class[int(classify_predict)]
        # print(classify_label)
        d['details'] = classify_label
        conf = round(float(det[-2]), 2)
        d['label'] = label+str(count)
        d['conf'] = conf
        ret_li.append(d)
        count += 1

    return ret_li, ret_bytes


def start_predict(img, save_dir=''):
    weights = cfg.detect_weight
    detect_class = cfg.detect_class
    device = cfg.device
    ret_li, ret_bytes = detect_img(img, device, weights, detect_class, save_dir)
    # print(ret_li)
    return ret_li, ret_bytes


if __name__ == '__main__':
    name = get_time_uuid()
    save_dir = f'./save/{name}.jpg'
    # path = r'./test_img/hashiqi20230312_00010.jpg'
    path = r'./test_img/hashiqi20230312_00116.jpg'
    # path = r'./test_img/kejiquan20230312_00046.jpg'
    f = open(path, 'rb')
    img = f.read()
    f.close()
    # print(img)
    # print(type(img))
    img_ret_li, img_bytes = start_predict(img, save_dir=save_dir)
    print(img_ret_li)
我的工具文件tools_detect.py,主要封装了一些工具方法
import datetime
import os
import random
import sys
import time
from pathlib import Path

import torch
from PIL import Image
from torch import nn

from utils.augmentations import letterbox

FILE = Path(__file__).resolve()
ROOT = FILE.parents[0]  # YOLOv5 root directory
if str(ROOT) not in sys.path:
    sys.path.append(str(ROOT))  # add ROOT to PATH
ROOT = Path(os.path.relpath(ROOT, Path.cwd()))  # relative

from utils.general import (cv2,
                           scale_boxes, xyxy2xywh)
from utils.plots import Annotator, colors
import numpy as np

def bytes_to_ndarray(byte_img):
    """
    图片二进制转numpy格式
    """
    image = np.asarray(bytearray(byte_img), dtype="uint8")
    image = cv2.imdecode(image, cv2.IMREAD_COLOR)
    return image


def ndarray_to_bytes(ndarray_img):
    """
    图片numpy格式转二进制
    """
    ret, buf = cv2.imencode(".jpg", ndarray_img)
    img_bin = Image.fromarray(np.uint8(buf)).tobytes()
    # print(type(img_bin))
    return img_bin

def get_time_uuid():
    """
        :return: 20220525140635467912
        :PS :并发较高时尾部随机数增加
    """
    uid = str(datetime.datetime.fromtimestamp(time.time())).replace("-", "").replace(" ", "").replace(":","").replace(".", "") + str(random.randint(100, 999))
    return uid


def dataLoad(img, img_size, device, half=False):
    image = bytes_to_ndarray(img)
    # print(image.shape)
    im = letterbox(image, img_size)[0]  # padded resize
    im = im.transpose((2, 0, 1))[::-1]  # HWC to CHW, BGR to RGB
    im = np.ascontiguousarray(im)  # contiguous

    im = torch.from_numpy(im).to(device)
    im = im.half() if half else im.float()  # uint8 to fp16/32
    im /= 255  # 0 - 255 to 0.0 - 1.0
    if len(im.shape) == 3:
        im = im[None]  # expand for batch dim

    return image, im


def draw_box_and_save_img(pred, names, class_names, save_dir, im0, im):

    save_path = save_dir
    fontpath = "./simsun.ttc"
    for i, det in enumerate(pred):
        annotator = Annotator(im0, line_width=3, example=str(names), font=fontpath, pil=True)
        if len(det):
            det[:, :4] = scale_boxes(im.shape[2:], det[:, :4], im0.shape).round()
            count = 1
            im0_arc = int(im0.shape[0]) * int(im0.shape[1])
            gn = torch.tensor(im0.shape)[[1, 0, 1, 0]]
            base_path = os.path.split(save_path)[0]
            file_name = os.path.split(save_path)[1].split('.')[0]
            txt_path = os.path.join(base_path, 'labels')
            if not os.path.exists(txt_path):
                os.mkdir(txt_path)
            txt_path = os.path.join(txt_path, file_name)
            for *xyxy, conf, cls in reversed(det):
                # 目标太小跳过
                xyxy_arc = (int(xyxy[2]) - int(xyxy[0])) * (int(xyxy[3]) - int(xyxy[1]))
                # print(im0.shape, xyxy, xyxy_arc, im0_arc, xyxy_arc / im0_arc)
                if xyxy_arc / im0_arc < 0.01:
                    continue
                # print(im0.shape, xyxy)
                c = int(cls)  # integer class
                label = f"{class_names[c]}{count} {round(float(conf), 2)}" #  .encode('utf-8')
                # print(xyxy)
                annotator.box_label(xyxy, label, color=colors(c, True))

                im0 = annotator.result()
                count += 1
                # print(im0)

                # print(type(im0))
                # im0 为 numpy.ndarray类型

                # Write to file
                # print('+++++++++++')
                xywh = (xyxy2xywh(torch.tensor(xyxy).view(1, 4)) / gn).view(-1).tolist()  # normalized xywh
                # print(xywh)
                line = (cls, *xywh)  # label format
                with open(f'{txt_path}.txt', 'a') as f:
                    f.write(('%g ' * len(line)).rstrip() % line + '\n')
    cv2.imwrite(save_path, im0)

    ret_bytes = ndarray_to_bytes(im0)
    return ret_bytes


def predict_classify(model_path, img, device):
    # im = torch.nn.functional.interpolate(img, (160, 160), mode='bilinear', align_corners=True)
    # print(device)
    if torch.cuda.is_available():
        model = torch.load(model_path)
    else:
        model = torch.load(model_path, map_location='cpu')
    # print(help(model))
    model.to(device)
    model.eval()
    predicts = model(img)
    _, preds = torch.max(predicts, 1)
    pred = torch.squeeze(preds)
    # print(pred)
    return pred


def detect_img_2_classify_img(img, classify_size, device):
    im_crop1 = img.copy()
    im_crop1 = np.float32(im_crop1)
    image = cv2.resize(im_crop1, (classify_size, classify_size))
    image = image.transpose((2, 0, 1))
    im = torch.from_numpy(image).unsqueeze(0)
    im_crop = im.to(device)
    return im_crop
我的配置文件config.py,主要是一些可改配置
import torch
import os

base_path = r'E:\project\pet-web-api\predict_deploy\weights'

detect_weight = os.path.join(base_path, r'cat_dog_detect/best.pt')
detect_class = ['猫', '狗']

cat_weight = os.path.join(base_path, r'cat_predict/best.pt')
cat_class = ['东方短毛猫', '亚洲豹猫', '加菲猫', '安哥拉猫', '布偶猫', '德文卷毛猫', '折耳猫', '无毛猫', '暹罗猫', '森林猫', '橘猫', '奶牛猫', '狞猫', '狮子猫', '狸花猫', '玳瑁猫', '白猫', '蓝猫', '蓝白猫', '薮猫', '金渐层猫', '阿比西尼亚猫', '黑猫']

dog_weight = os.path.join(base_path, r'dog_predict/best.pt')
dog_class = ['中华田园犬', '博美犬', '吉娃娃', '哈士奇', '喜乐蒂', '巴哥犬', '德牧', '拉布拉多犬', '杜宾犬', '松狮犬', '柯基犬', '柴犬', '比格犬', '比熊', '法国斗牛犬', '秋田犬', '约克夏', '罗威纳犬', '腊肠犬', '萨摩耶', '西高地白梗犬', '贵宾犬', '边境牧羊犬', '金毛犬', '阿拉斯加犬', '雪纳瑞', '马尔济斯犬']

# device = 0
# device = torch.device('cuda' if torch.cuda.is_available() else 'cpu')
device = torch.device('cpu')
conf_thres = 0.5
iou_thres = 0.45

detect_img_size = 416
classify_img_size = 160
其中预测的结果不是很理想,因为我没有更多的数据。
以上就是项目大概内容,具体可看源码。


【推荐】国内首个AI IDE,深度理解中文开发场景,立即下载体验Trae
【推荐】编程新体验,更懂你的AI,立即体验豆包MarsCode编程助手
【推荐】抖音旗下AI助手豆包,你的智能百科全书,全免费不限次数
【推荐】轻量又高性能的 SSH 工具 IShell:AI 加持,快人一步
· 无需6万激活码!GitHub神秘组织3小时极速复刻Manus,手把手教你使用OpenManus搭建本
· C#/.NET/.NET Core优秀项目和框架2025年2月简报
· Manus爆火,是硬核还是营销?
· 终于写完轮子一部分:tcp代理 了,记录一下
· Qt个人项目总结 —— MySQL数据库查询与断言