LNMP与Zabbix4.0 环境部署
LNMP+Zabbix4.0 环境部署
环境
关闭防火墙,Selinux
systemctl stop firewalld
sed -i 's/SELINUX=enforcing/SELINUX=disabled/g' /etc/selinux/config
setenforce 0
服务端
LNMP环境所需要的安装包如下。主要以rpm包为主。不是源码安装
[root@json-server ~]# rpm -qa | grep nginx
nginx-1.16.0-1.el7.ngx.x86_64
[root@json-server ~]# rpm -qa |grep php
php-common-5.4.16-46.el7.x86_64
php-5.4.16-46.el7.x86_64
php-cli-5.4.16-46.el7.x86_64
php-fpm-5.4.16-46.el7.x86_64
php-pdo-5.4.16-46.el7.x86_64
php-mysql-5.4.16-46.el7.x86_64
[root@json-server ~]# rpm -qa | grep mysql
mysql-community-common-5.7.26-1.el7.x86_64
mysql-community-release-el7-7.noarch
mysql-community-libs-5.7.26-1.el7.x86_64
mysql-community-server-5.7.26-1.el7.x86_64
mysql-community-client-5.7.26-1.el7.x86_64
mysql-community-libs-compat-5.7.26-1.el7.x86_64
详细的LNMP搭建参考:LNMP搭建详解
安装zabbix
cat <<EOF > /etc/yum.repos.d/zabbix.repo
[zabbix]
name=Zabbix Official Repository - \$basearch
baseurl=https://mirrors.aliyun.com/zabbix/zabbix/4.0/rhel/7/\$basearch/
enabled=1
gpgcheck=1
gpgkey=file:///etc/pki/rpm-gpg/RPM-GPG-KEY-ZABBIX-A14FE591

[zabbix-non-supported]
name=Zabbix Official Repository non-supported - \$basearch
baseurl=https://mirrors.aliyun.com/zabbix/non-supported/rhel/7/\$basearch/
enabled=1
gpgkey=file:///etc/pki/rpm-gpg/RPM-GPG-KEY-ZABBIX
gpgcheck=1
EOF
curl https://mirrors.aliyun.com/zabbix/RPM-GPG-KEY-ZABBIX-A14FE591 -o /etc/pki/rpm-gpg/RPM-GPG-KEY-ZABBIX-A14FE591
curl https://mirrors.aliyun.com/zabbix/RPM-GPG-KEY-ZABBIX -o /etc/pki/rpm-gpg/RPM-GPG-KEY-ZABBIX
# rpm -Uvh https://repo.zabbix.com/zabbix/4.0/rhel/7/x86_64/zabbix-release-4.0-1.el7.noarch.rpm 下载速度太慢,所以使用上面的aliyun镜像地址
yum clean all
yum -y install zabbix-server-mysql zabbix-web-mysql zabbix-agent zabbix-get zabbix-web zabbix-sender

## failed to link /usr/share/zabbix/fonts/graphfont.ttf -> /etc/alternatives/zabbix-web-font: No such file or directory

## 进行解决
## 在windows里面找一个显示中文的字体文件复制到服务器中

mkdir /usr/share/zabbix/fonts
mv SIMHEI.TTF /usr/share/zabbix/fonts/graphfont.ttf
ln -s /usr/share/zabbix/fonts/graphfont.ttf /etc/alternatives/zabbix-web-font
创建,配置zabbix
1.创建zabbix库,并授权用户
mysql -uroot -p123456
mysql> create database zabbix character set utf8 collate utf8_bin;
mysql> grant all privileges on zabbix.* to zabbix@'%' identified by '123456';
msyql> flush privileges
2.解压zabbix数据库文件并导入数据库
gunzip /usr/share/doc/zabbix-server-mysql*/create.sql.gz

# 方法1:
mysql -uroot -p zabbix < /usr/share/doc/zabbix-server-mysql*/create.sql

# 方法2:
mysql -uroot -p123456
mysql> use zabbix;
mysql> source create.sql的路径;
mysql> show tables;

# 方法3:
zcat /usr/share/doc/zabbix-server-mysql*/create.sql.gz | mysql -uzabbix -p zabbix

# 移动文件到web根目录
cp -rp /usr/share/zabbix/ /usr/share/nginx/html/
启动各项服务
systemctl restart mysqld nginx zabbix-server.service  zabbix-agent.service php-fpm
systemctl enable mysqld nginx zabbix-server.service  zabbix-agent.service php-fpm
访问网页,从网页进行安装
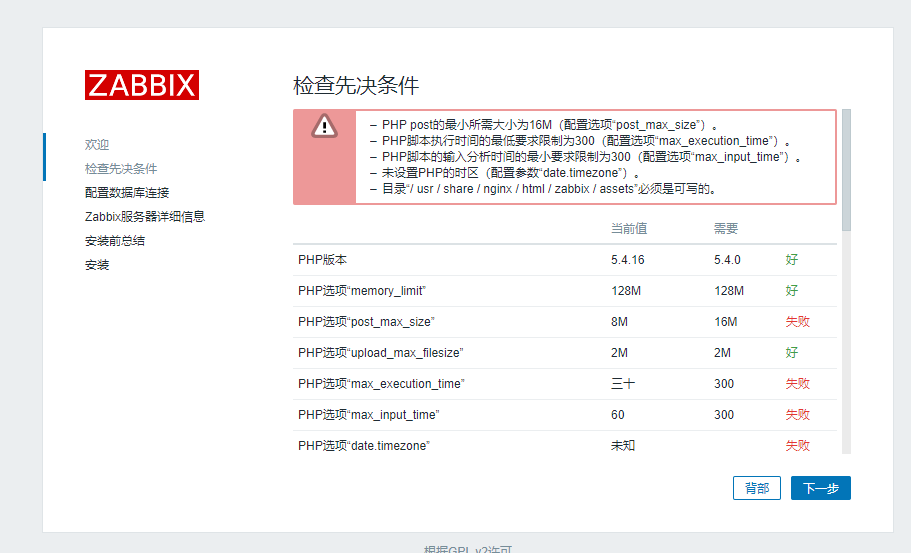
出现上图,按照要求进行设置相关配置文件
主要的配置文件有:
/etc/php.ini/etc/httpd/conf.d/zabbix.conf
当全部为绿色后就可以进行下一步
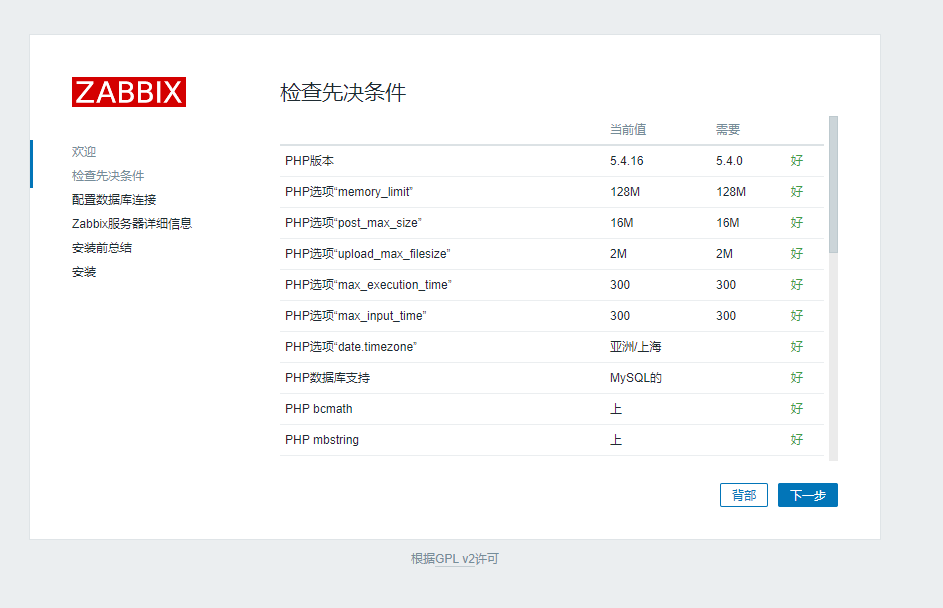
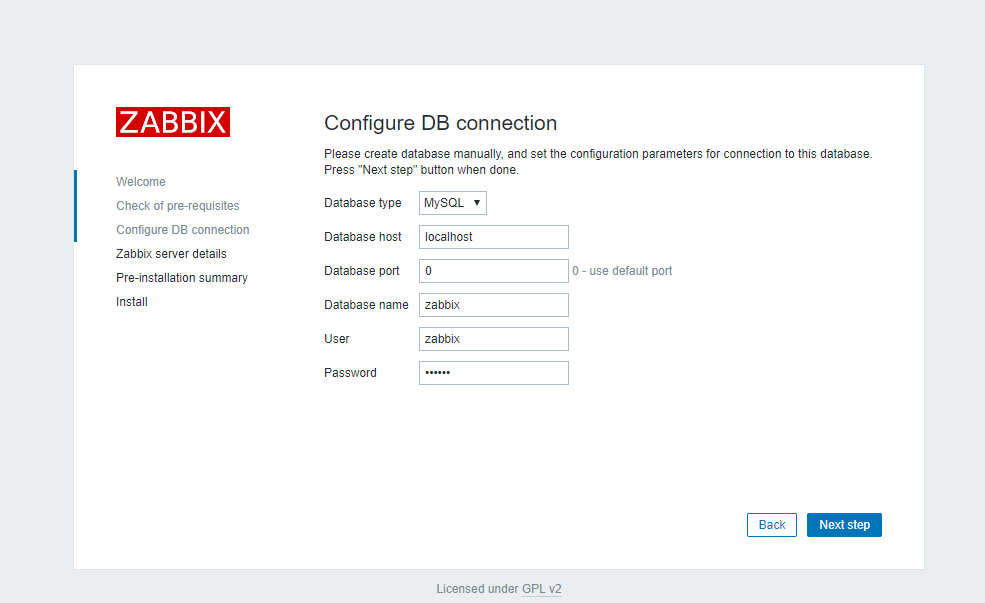
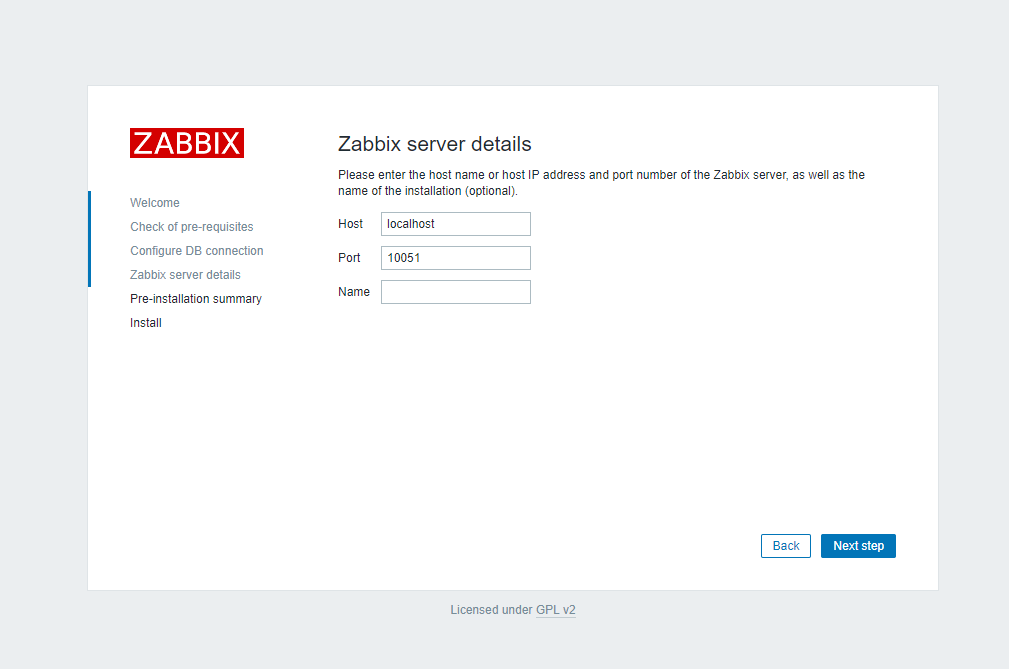
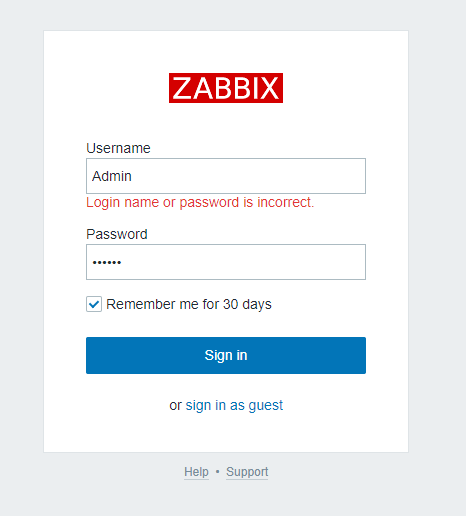
登录的时候,默认账户名Admin,密码zabbix
参考文献:zabbix安装官方参考
参考文献:zabbix图像配置参考
解决zabbix乱码问题
没有任何显示或者显示人看不懂的,表明存在乱码,需要进行解决
1.在window拷贝一个能显示中午的字体文件到zabbix-server的/usr/share/zabbix/fonts目录下面,注意字体文件的权限
2.制作字体文件名改为graphfont.ttf软连接
mv /usr/share/nginx/html/zabbix/fonts/SIMHEI.TTF ./fonts/graphfont.ttf
3.重启服务
systemctl restart zabbix-agent.service zabbix-server.service nginx php-fpm.service mysqld.service
解决Zabbix server is not running :the information displayed may not be current.
在登录了zabbix首页之后,可能在底部会出现
Zabbix server is not running :the information displayed may not be current.
可能出现的原因:
- 防火墙阻止了nginx服务
- 数据库授权有问题
- zabbix的web配置文件配置问题
- dns的解析问题
1.防火墙
# 关闭防火墙和selinux
systemctl status firewalld
systemctl stop firewalld
systemctl disabled firewalld

# 关闭selinux
setenforce 0   # 临时关闭
sed -i '/^SELINUX=/cSELINUX=disabled' /etc/selinux/config
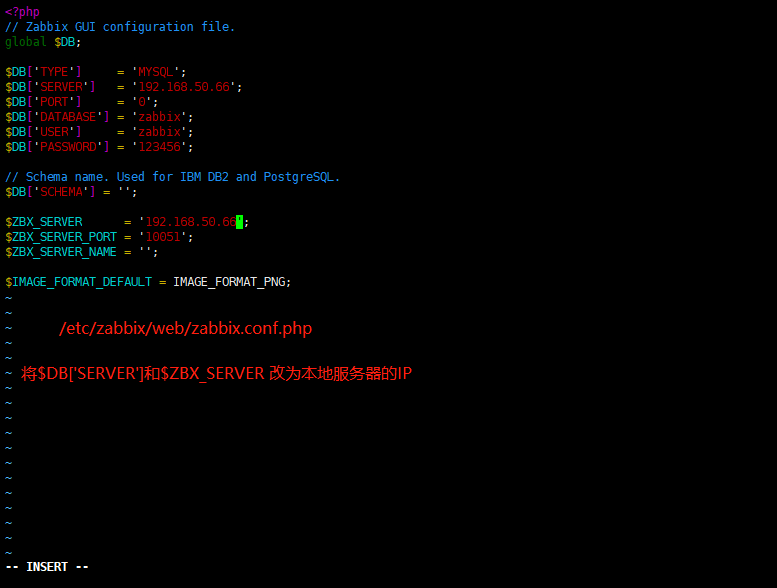
2.更改zabbix的web配置文件
配置文件名:zabbix.conf.php
可以通过find / -name "zabbix.conf.php"查找,之后按照下图进行修改
3.数据库授权
一般问题不会在这,因为安装之前已经授权了,但由于刚才修改了web文件,需要重新授权
mysql -uroot -p123456
mysql> grant all privileges on zabbix.* to zabbix@'%' identified by 123456;
mysql> flush privileges;
mysql> exit
4.检查dns,并修改
1.修改DNS
vim /etc/hosts
2.重启nginx
systemctl restart nginx
5.检查配置文件
vim /etc/zabbix/zabbix_server.conf
DBHost=192.168.50.66
DBName=zabbix
DBUser=zabbix
DBPassword=123456
6.重启服务
systemctl restart zabbix-agent.service zabbix-server.service nginx php-fpm.service mysqld.service
7.登录web界面
http://192.168.50.66/zabbix
本文来自博客园,作者:Lin-Grocery,转载请注明原文链接:https://www.cnblogs.com/moniter/articles/12305160.html


 浙公网安备 33010602011771号