Silverlight自定义粒子特效
从网络上看到一处转载的Silverlight效果_粒子效果的小教程,在此收藏一下:
以下是五角星效果:
1. 首先在Interactivity\ParticlesBehavior 中加入ParticleShape.cs:

其中包含ParticleShape 枚举:
public enum ParticleShape
{
   Circle,
   Square,
   Star4,
   Star5,
   Star8,
   Custom
}
2. 下面来修改ParticlesBehavior.cs 程序:
2.1. 添加ParticleShape、CustomShapePathData 属性:
[Category("Shape")]
public ParticleShape ParticleShape
{
   get { return (ParticleShape)GetValue(ParticleShapeProperty); }
   set { SetValue(ParticleShapeProperty, value); }
}
public static readonly DependencyProperty ParticleShapeProperty =
   DependencyProperty.Register("ParticleShape", typeof(ParticleShape),
   typeof(ParticlesBehavior), null);

[Category("Shape")]
public string CustomShapePathData
{
   get { return (string)GetValue(CustomShapePathDataProperty); }
   set { SetValue(CustomShapePathDataProperty, value); }
}
public static readonly DependencyProperty CustomShapePathDataProperty =
   DependencyProperty.Register("CustomShapePathData", typeof(string),
   typeof(ParticlesBehavior), null);
2.2. 初始化ParticleShape:
public ParticlesBehavior()
{
   ... ...
   this.ParticleShape = ParticleShape.Circle;
}
2.3. 编辑OnShowParticles():
private void OnShowParticles()
{
   ... ...
   p.ParticleShape = ParticleShape;
   p.CustomShapePathData = CustomShapePathData;

   AssociatedObject.Children.Add(p);
}
3. 修改ParticleControl.xaml.cs 程序:
3.1. 同样在ParticleControl 类中添加ParticleShape、CustomShapePathData 属性,在ParticleControl() 方法中初始化ParticleShape。
3.2. 因为粒子形状要继承于Shape,所以将类中所有Ellipse 更改为Shape(其中涉及到SpawnParticle 与UpdateParticles 方法)。
3.3. 在ParticleControl 类中添加星形粒子形状:
private const string star4 = "F1 M 50,-7.62939e-006L 55.1144,41.3803C 56.427,42.2647 57.5178,
                              43.453 58.2861,44.8443L 100,50L 57.8372,55.2111C 57.1358,
                              56.2565 56.2419,57.162 55.2062,57.8767L 50,100L 44.8675,
                              58.4733C 43.3682,57.6757 42.0966,56.5067 41.1753,
                              55.0891L -2.3533e-006,50L 40.7417,44.9645C 41.6922,43.1858 43.166,
                              41.7288 44.9574,40.7991L 50,-7.62939e-006 Z";
private const string star5 = "F1 M 50,7.62939e-006L 38.5,36.7447L -1.95619e-005,36.3271L 31.3926,
                              58.619L 19.0983,95.1057L 50,72.1381L 80.9017,95.1057L 68.6074,
                              58.619L 100,36.3271L 61.5,36.7447L 50,7.62939e-006 Z";
private const string star8 = "F1 M 50,2.28882e-005L 54.558,36.8783C 55.5604,37.239 56.5077,
                              37.7153 57.3837,38.2912L 78.3425,21.6575L 61.6127,42.7374C 62.1035,
                              43.5727 62.5068,44.4656 62.81,45.4035L 100,50L 62.4628,
                              54.6395C 62.1585,55.3832 61.7896,56.0936 61.3631,56.7638L 76.3839,
                              76.3838L 56.6316,61.2618C 56.0088,61.6151 55.355,61.9202 54.6754,
                              62.172L 50,100L 45.3246,62.1719C 44.605,61.9053 43.9144,
                              61.579 43.2589,61.1989L 21.6575,78.3425L 38.7024,56.8655C 38.2481,
                              56.1656 37.8571,55.4209 37.5374,54.6395L 4.31164e-005,50L 37.1902,
                              45.4035C 37.4815,44.5022 37.8652,43.6425 38.3303,42.8356L 23.6162,
                              23.6161L 42.7073,38.232C 43.5578,37.6826 44.4742,37.2266 45.442,
                              36.8783L 50,2.28882e-005 Z";
3.4. 创建CreateShape 方法:
private Shape CreateShape()
{
   string pathData = "";

   switch (ParticleShape)
   {
      case ParticleShape.Circle:
           return new Ellipse();

      case ParticleShape.Square:
           return new Rectangle();

      case ParticleShape.Star4:
           pathData = star4;
      break;

      case ParticleShape.Star5:
           pathData = star5;
      break;

      case ParticleShape.Star8:
           pathData = star8;
      break;

      case ParticleShape.Custom:
           if (string.IsNullOrEmpty(CustomShapePathData))
              return new Ellipse();
           else
              pathData = CustomShapePathData;
      break;

      default:
      return new Ellipse();
   }

   string xamlPath = string.Format(
        "<Path xmlns='http://schemas.microsoft.com/winfx/2006/xaml/presentation' " +
        "xmlns:x='http://schemas.microsoft.com/winfx/2006/xaml' " +
        "Data='{0}' Stretch='Fill'/>", pathData);

   Path path = (Path)System.Windows.Markup.XamlReader.Load(xamlPath);

   return path;
}
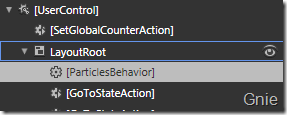
4. 编译后进入Blend,选择LayoutRoot 中的ParticlesBehavior:
点选ShowParticles 中的EventTrigger,即可调整Shape 类型:
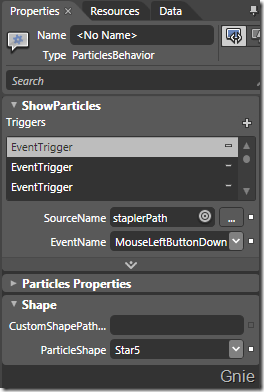
当然也可在CustomShapePathData 中自定义形状:

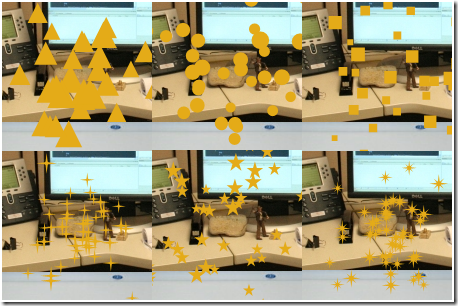
选择相应的形状后即可实现以下效果:
源代码下载:http://cid-c75f4e27adfe5bbc.skydrive.live.com/self.aspx/GnieTech/FindObject4.zip
>>>>>>>>>>>>>>>>>>>>>>>>>>>>>>>>>>>>>>>>>>>>>>>>>>>>>>>>>>>>>
相关阅读:
跟老外学Silverlight游戏 之四 粒子特效
前几篇一直在Blend中工作没体现出开发者的作用,本篇将为订书器(Stapler)添加自定义粒子效果,当订书器被点击时产生更好的视觉效果。其中将使用到nerdplusart 的Silverlight Particle Generator 粒子特效工具。
-在结束本章内容后,点击Stapler 和Candies 将达到以下效果:
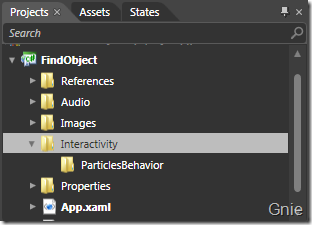
1. 在Projects面板中新增Interactivity 文件夹,再为Interactivity 新增ParticlesBehavior 子文件夹:
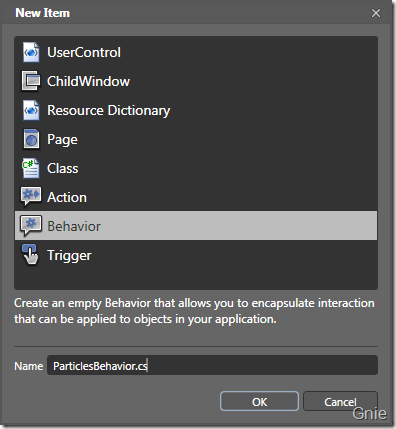
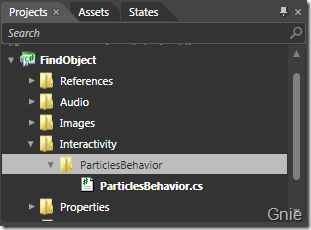
2. 右键ParticlesBehavior文件夹->Add New Item->Behavior,添加ParticlesBehavior:
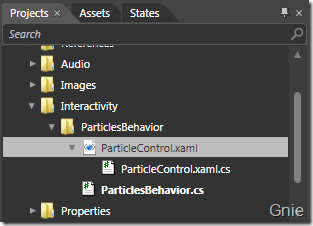
3. 下载Silverlight Particle Generator 源代码,将代码中的ParticleControl.xaml 和ParticleControl.xaml.cs 文件加入(Add Existing Item)到ParticlesBehavior 文件夹:
4. 右键项目点击“Edit in Visual Studio”,对PaticlesBehavior.cs进行编辑来跟踪鼠标移动位置。将ParticlesBehavior 类声明改为Behavior<Canvas>,通过修改后AssociatedObject 类型将成为Canvas。在OnAttached 和OnDetaching 方法中分别添加和删除MouseMove 事件,当鼠标移动时便可记录下当前鼠标位置:
public class ParticlesBehavior : Behavior<Canvas>
{
   private Point currentMousePosition;

   public ParticlesBehavior()
   {
      this.ShowParticles = new ActionCommand(this.OnShowParticles);
   }

   protected override void OnAttached()
   {
      base.OnAttached();
      AssociatedObject.MouseMove += new MouseEventHandler(AssociatedObject_MouseMove);
   }

   protected override void OnDetaching()
   {
      base.OnDetaching();
      AssociatedObject.MouseMove -= new MouseEventHandler(AssociatedObject_MouseMove);
   }

   void AssociatedObject_MouseMove(object sender, MouseEventArgs e)
   {
      currentMousePosition = e.GetPosition(null);
   }

   public ICommand ShowParticles
   {
      get;
      private set;
   }

   private void OnShowParticles()
   {
      ParticleControl p = new ParticleControl();
      p.OffsetX = currentMousePosition.X;
      p.OffsetY = currentMousePosition.Y;
      AssociatedObject.Children.Add(p);
   }
}
-
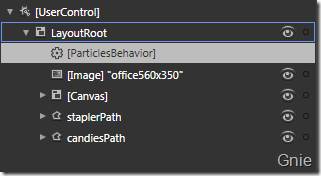
5. VS里编译后回到Blend,在Assets->Behavior 中将会看到ParticlesBehavior 选项,将ParticlesBehavior 加入LayoutRoot中:
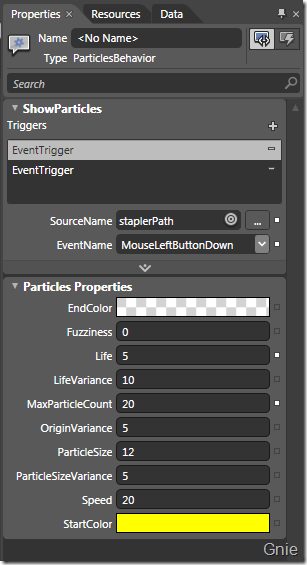
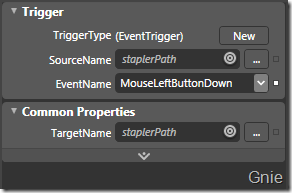
点击Triggers右侧的“+”按钮添加新EventTrigger;点击EventTrigger将SourceName设为staplerPath,EventName设为MouseLeftButtonDown;再次点击“+”为可为其他物品添加ParticlesBehavior特效。另,在ParticlesBehavior.cs中增加一些代码,便可出现下图中Particles Properties设置窗口(详情可下载源代码):
6. 在Blend中F5,点击图片中的订书器(Stapler)便会出现粒子效果(但其不会自动消失),再点击Candies也会出现粒子效果,问题是所有的粒子效果仍然不能消失。打开ParticleControl.xaml.cs 进行编辑:
a. 在ParticleControl 类中定义int 型totalParticlesCreated
b. 将this.particles.Count 替换为totalParticlesCreated
c. 在SpawnParticle方法最后添加totalParticlesCreated++
至此粒子效果就会自动消失了。
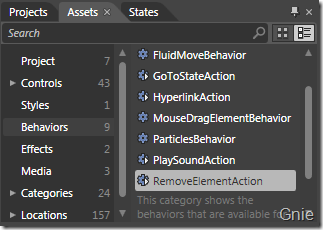
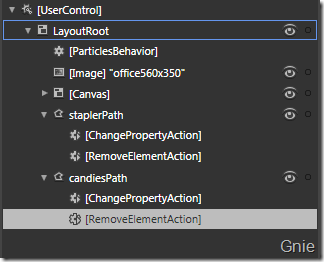
7. 最后为staplerPath添加RemoveElementAction,目的是为了每个物品只能点击一次:
将SourceName 和TargetName 都设置为staplerPath,EventName依然为MouseLeftButtonDown:

