
前言 --- 安装虚拟机及CentOS 7
前言 --- 安装虚拟机及CentOS7
一、CentOS7版本安装(解压安装)
镜像链接:https://pan.baidu.com/s/1E-L-O74flvloYVwI9Oi7Vg
提取码:eyn3
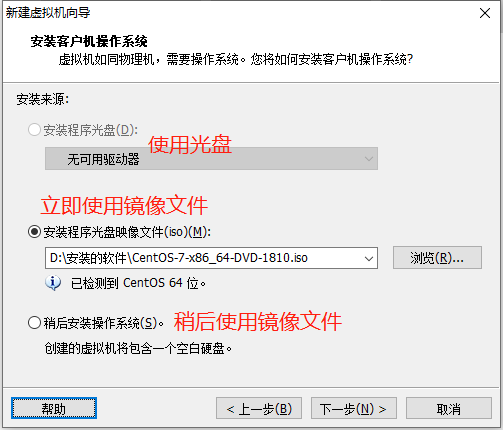
注释:镜像文件.iso结尾镜像文件
- 镜像文件就是"一种特殊格式的压缩包"
- 它将特定的一系列文件按照一定的格式制作成单一的文件
- 以方便用户下载和使用,例如一个操作系统、游戏等
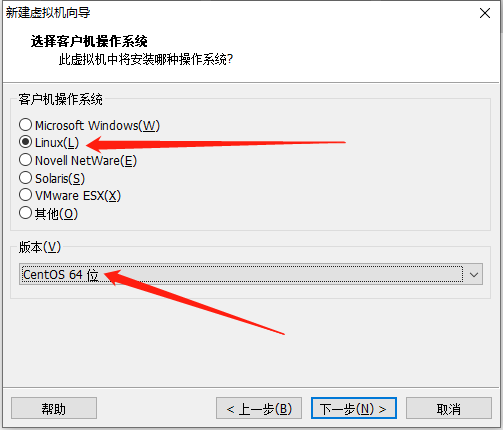
二、安装虚拟机
1. 打开虚拟机

2. 创建虚拟机的具体步骤
第一部分 --- 安装vm虚拟机


注:
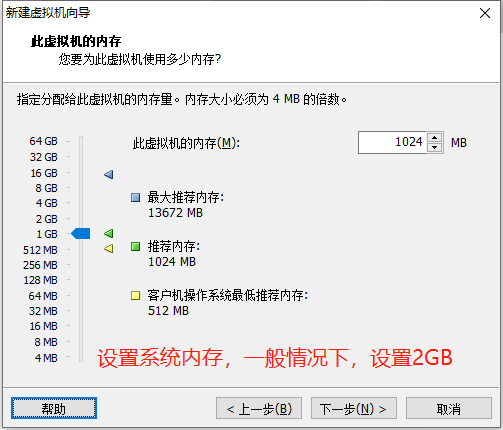
- 一般情况下,虚拟机的cpu不能超过宿主主机(2个就好)
- 虚拟系统内存一般 1-2G
VMware workstation的三种网络连接模式
桥接模式:
-
- 虚拟机与真机处于同一LAN中
- 连接的是 VMnet 0 虚拟交换机,此时虚拟机相当于网络上的一台独立计算机与主机一样,会分配独立的IP地址,
并且处于同一LAN中, 虚拟机和宿主机之间可以相互访问
- 优点:直接可以上外网,不需要主机转发
- 缺点: 浪费
仅主机模式:
- 虚拟机只能与宿主机以及其他虚拟机通信,不能与外网通信
- 连接的是 Vmnet 1 虚拟交换机,此时虚拟机只能与宿主机上的虚拟机及宿主机互访, 也就是不能上Internet
- 优点:安全性高
- 缺点: 不能上外网
NAT模式:
- 虚拟机👉vmnet 8👉NAT(虚拟)路由👉真机的本地网卡👉真实的交换机-👉真实的路由器-👉internet
使用 Vmnet 8虚拟交换机,此时虚拟机可以通过主机单向访问同一局域网上的其他主机,其他主机不能访问虚拟机。
通过宿主机转发的方式上网, 节省 IP(使用自己的虚拟网卡,有自己的一套IP资源)
接上 -- 虚拟机的安装流程


注:
LAN区段的ip地址 172.16.1.0(172.16 . .)最好选择172.16.1.0
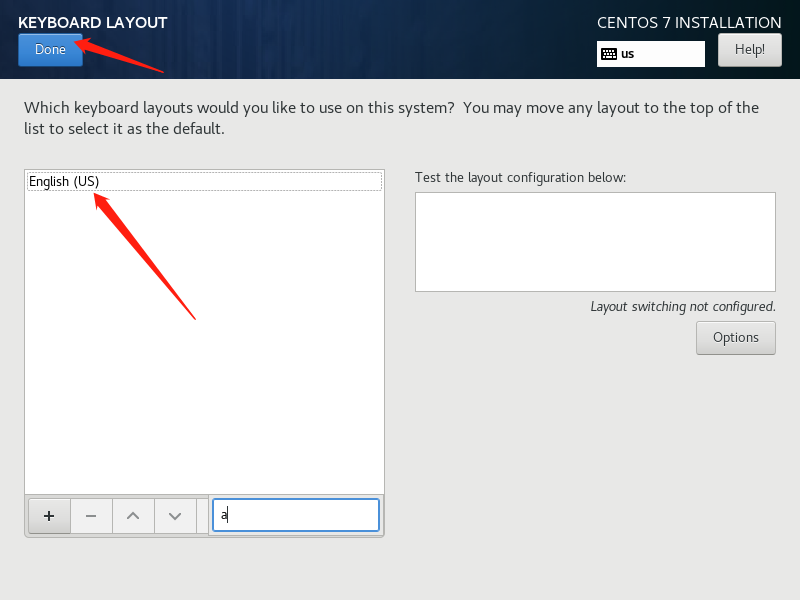
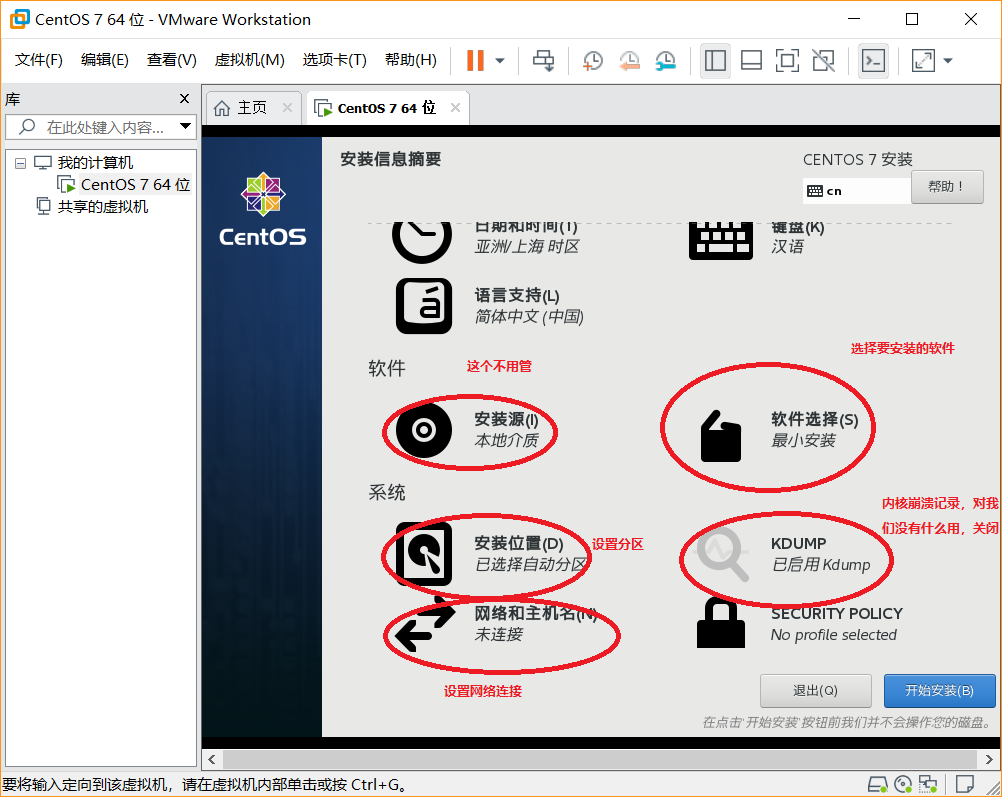
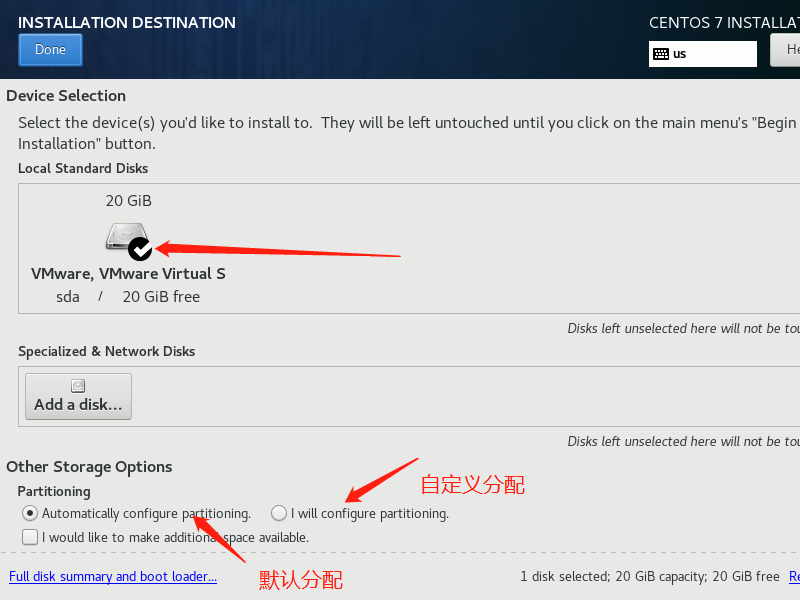
第二部分---安装虚拟机


注:
在Centos 7之前的版本的网卡名称默认是eth0,之后默认ensxxx, 如果希望使用eth0,则需要修改Linux系统内核参数
默认修改网卡名字etho与eth1 (net.ifnames=0 biosdevname=0)


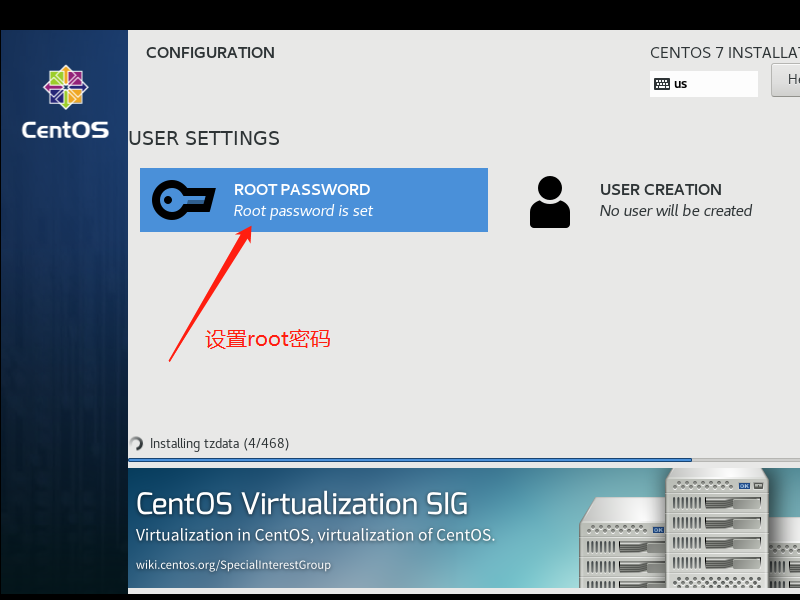
注:
安装完成后重新启动即可(reboot)
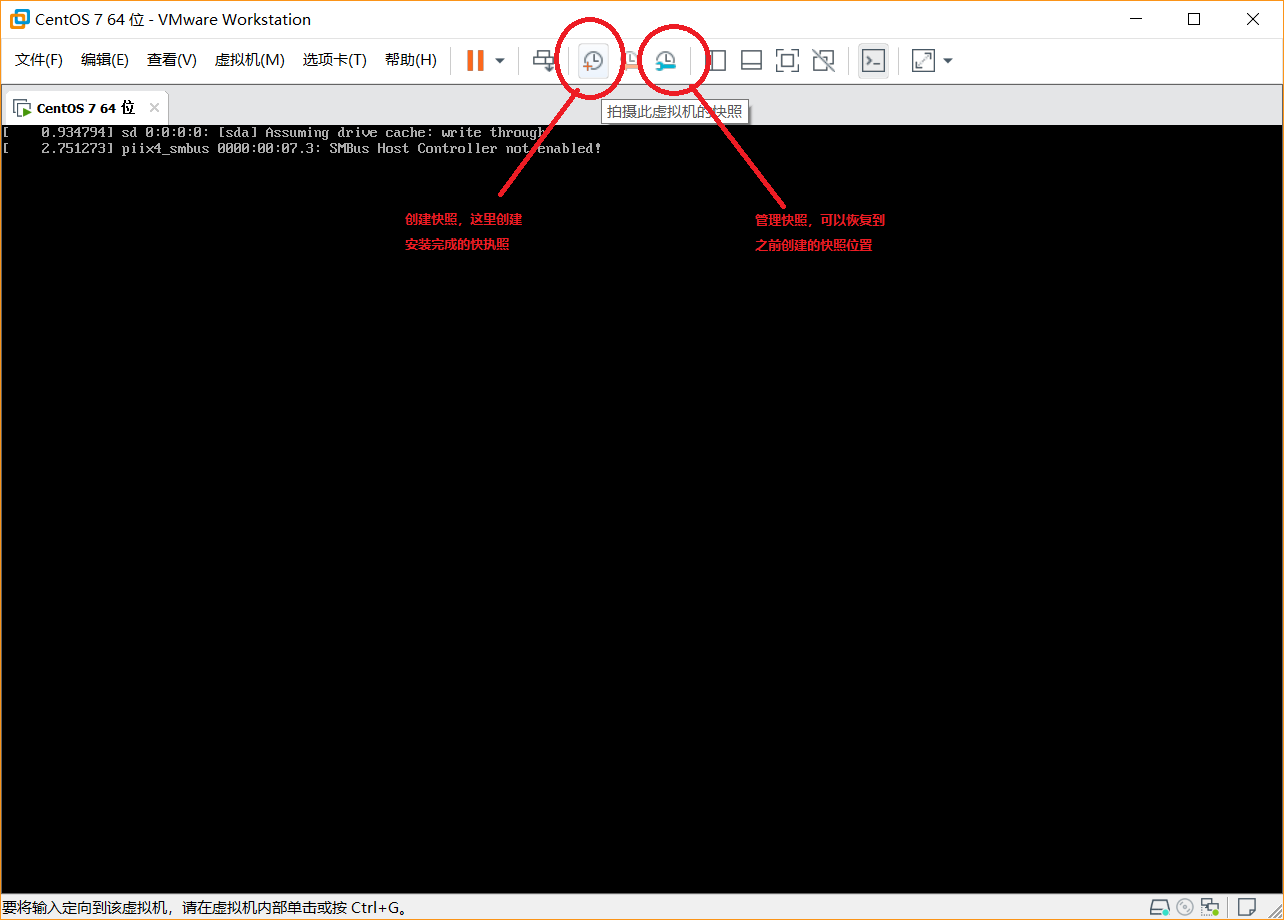
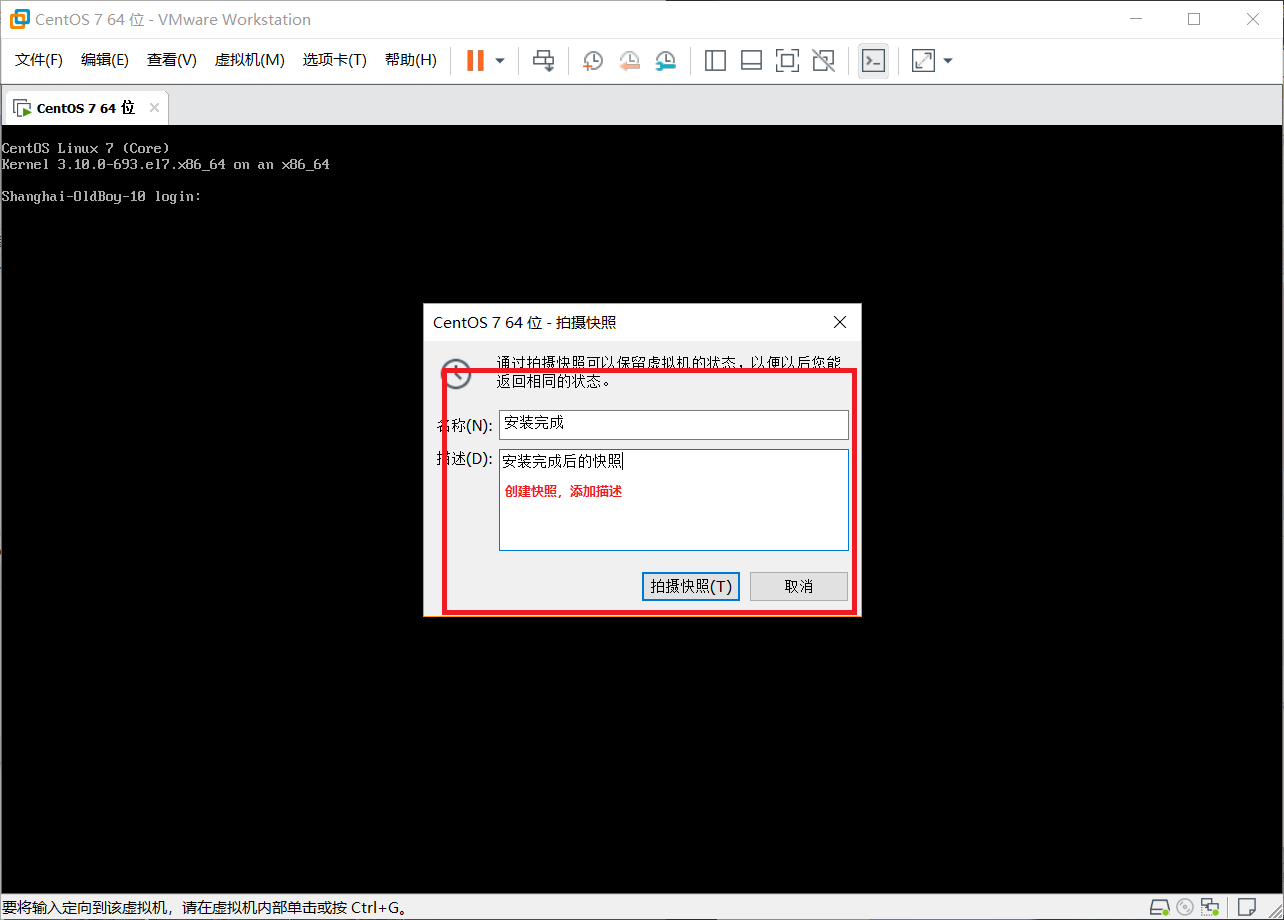
第三部分 快照
第四部分 克隆

注:
克隆的结果跟原来的系统完全一致。

 浙公网安备 33010602011771号