
分享知识-快乐自己:SpringMVC 结合使用拦截器(判断是否用户是否已登陆)
基础拦截器操作:
拦截器是一种AOP操作实现,那么在AOP之中用户一定不需要去关注拦截器的存在,用户只需要按照自己已经习惯的处理方式进行代码的编写即可。
首先我们先创建一个自定义的拦截器:
package integration.uitl;
import integration.bean.MlqUser;
import org.springframework.web.servlet.ModelAndView;
import org.springframework.web.servlet.handler.HandlerInterceptorAdapter;
import javax.servlet.http.HttpServletRequest;
import javax.servlet.http.HttpServletResponse;
import javax.servlet.http.HttpSession;
public class SysInterceptor extends HandlerInterceptorAdapter {
    /**
     * 进入拦截器后首先进入的方法
     * 返回false则不再继续执行
     * 返回true则继续执行
     */
    @Override
    public boolean preHandle(HttpServletRequest request,
                             HttpServletResponse response,Object handler)throws Exception
    {
        System.out.println("我是拦截器:我证明我进来了");
        HttpSession session=request.getSession();
        MlqUser userInfo = (MlqUser)session.getAttribute("UserInfo");
        if(userInfo==null)
        {
            System.out.println("我证明用户没有登录");
           response.sendRedirect(request.getContextPath()+"/401.jsp");
           return false;
        }
        System.out.println("我证明用户已经登录");
        return  true;
    }
    /**
     * 生成视图时执行,可以用来处理异常,并记录在日志中
     */
    @Override
    public void afterCompletion(HttpServletRequest request,
                                HttpServletResponse response,
                                Object arg2, Exception exception){
                //-----------------//
    }
    /** -
     * 生成视图之前执行,可以修改ModelAndView
     */
    @Override
    public void postHandle(HttpServletRequest request,
                           HttpServletResponse response,
                           Object arg2, ModelAndView arg3)
            throws Exception{
            //----------------------------//
    }
}
接下来我们来配置核心文件:CustomInterceptor.xml
<?xml version="1.0" encoding="UTF-8"?>
<beans xmlns="http://www.springframework.org/schema/beans"
       xmlns:xsi="http://www.w3.org/2001/XMLSchema-instance"
       xmlns:aop="http://www.springframework.org/schema/aop"
       xmlns:tx="http://www.springframework.org/schema/tx"
       xmlns:mvc="http://www.springframework.org/schema/mvc"
       xmlns:context="http://www.springframework.org/schema/context"
       xsi:schemaLocation="http://www.springframework.org/schema/beans
                       http://www.springframework.org/schema/beans/spring-beans.xsd
                       http://www.springframework.org/schema/aop
                       http://www.springframework.org/schema/aop/spring-aop.xsd
                       http://www.springframework.org/schema/tx
                       http://www.springframework.org/schema/tx/spring-tx-3.2.xsd
                       http://www.springframework.org/schema/mvc
                       http://www.springframework.org/schema/mvc/spring-mvc.xsd
                       http://www.springframework.org/schema/context
                       http://www.springframework.org/schema/context/spring-context-3.2.xsd">
    <!--自定义拦截器-->
    <mvc:interceptors>
        <mvc:interceptor>
            <mvc:mapping path="/sys/**"/>
            <bean class="integration.uitl.SysInterceptor"></bean>
        </mvc:interceptor>
    </mvc:interceptors>
</beans>
下面我们来说明一下: "/sys/**" 的意思:就是说我要拦截所有以 /sys 开头的访问路径,因为我Controller层 是这样编写的(可根据自己需求更改)
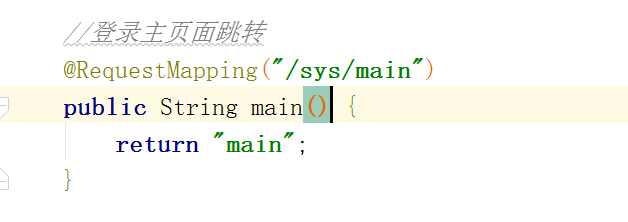
(加载时机:当我们直接访问 /sys/main 的时候,会先走我们自定义的拦截器。此时从Session中获取用户对象信息。若是有信息则是已经登陆了,直接返回 true 通过。否则就 重新跳转到登陆页面,返回 False)
Face your past without regret. Handle your present with confidence.Prepare for future without fear. keep the faith and drop the fear.
面对过去无怨无悔,把握现在充满信心,备战未来无所畏惧。保持信念,克服恐惧!一点一滴的积累,一点一滴的沉淀,学技术需要不断的积淀!

 浙公网安备 33010602011771号