Ubuntu修改网络配置命令
以eth0为例
1. 以DHCP方式配置网卡
编辑文件: /etc/network/interfaces:
sudo vi /etc/network/interfaces
并用下面的行来替换有关eth0的行:
# The primary network interface,
# use DHCP to find our address
auto eth0
iface eth0 inet dhcp

用下面的命令使网络设置生效:
sudo /etc/init.d/networking restart
当然,也可以在命令行下直接输入下面的命令来获取地址
sudo dhclient eth0
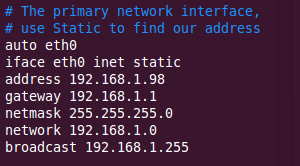
2. 为网卡配置静态IP地址
编辑文件: /etc/network/interfaces:
sudo vi /etc/network/interfaces
# The primary network interface,
# use Static to find our address
auto eth0
iface eth0 inet static
address 192.168.1.98
gateway 192.168.1.1
netmask 255.255.255.0
network 192.168.1.0
broadcast 192.168.1.255

用下面的命令使网络设置生效:
sudo /etc/init.d/networking restart
注: 生效后,需要配置DNS后才可上网(步骤5)
3. 设定第二个IP地址(虚拟IP地址)
编辑文件/etc/network/interfaces:
sudo vi /etc/network/interfaces
auto eth0:1
iface eth0:1 inet static
address 192.168.1.60
netmask 255.255.255.0
network x.x.x.x
broadcast x.x.x.x
gateway x.x.x.x
根据你的情况填上所有诸如address,netmask,network,broadcast和gateways等信息.
用下面的命令使网络设置生效:
sudo /etc/init.d/networking restart
4. 设置主机名称(hostname)
使用下面的命令来查看当前主机的主机名称:
sudo /bin/hostname
使用下面的命令来设置当前主机的主机名称:
sudo /bin/hostname newname
系统启动时,它会从/etc/hostname来读取主机的名称.
关于设置主机名称的更多信息,请访问这里
5. 配置DNS
首先,你可以在/etc/hosts中加入一些主机名称和这些主机名称对应的IP地址
要访问DNS 服务器来进行查询,需要设置/etc/resolv.conf文件.
假设DNS服务器的IP地址是192.168.1.1
编辑文件: /etc/hosts
sudo vi /etc/hosts
编辑内容如下:
nameserver 192.168.1.1

用下面的命令使网络设置生效:
sudo /etc/init.d/networking restart
推荐参考:
英文原文:http://www.ubuntugeek.com/ubuntu-networking-configuration-using-command-line.html


