


nginx搭建不同网段负载均衡
1.准备工作,准备源码包

网络规划:
  nginx1:192.168.192.128
  nginx2:192.168.192.129
   nginx:浮动ip 192.168.192.130
tomcat1:192.168.193.128
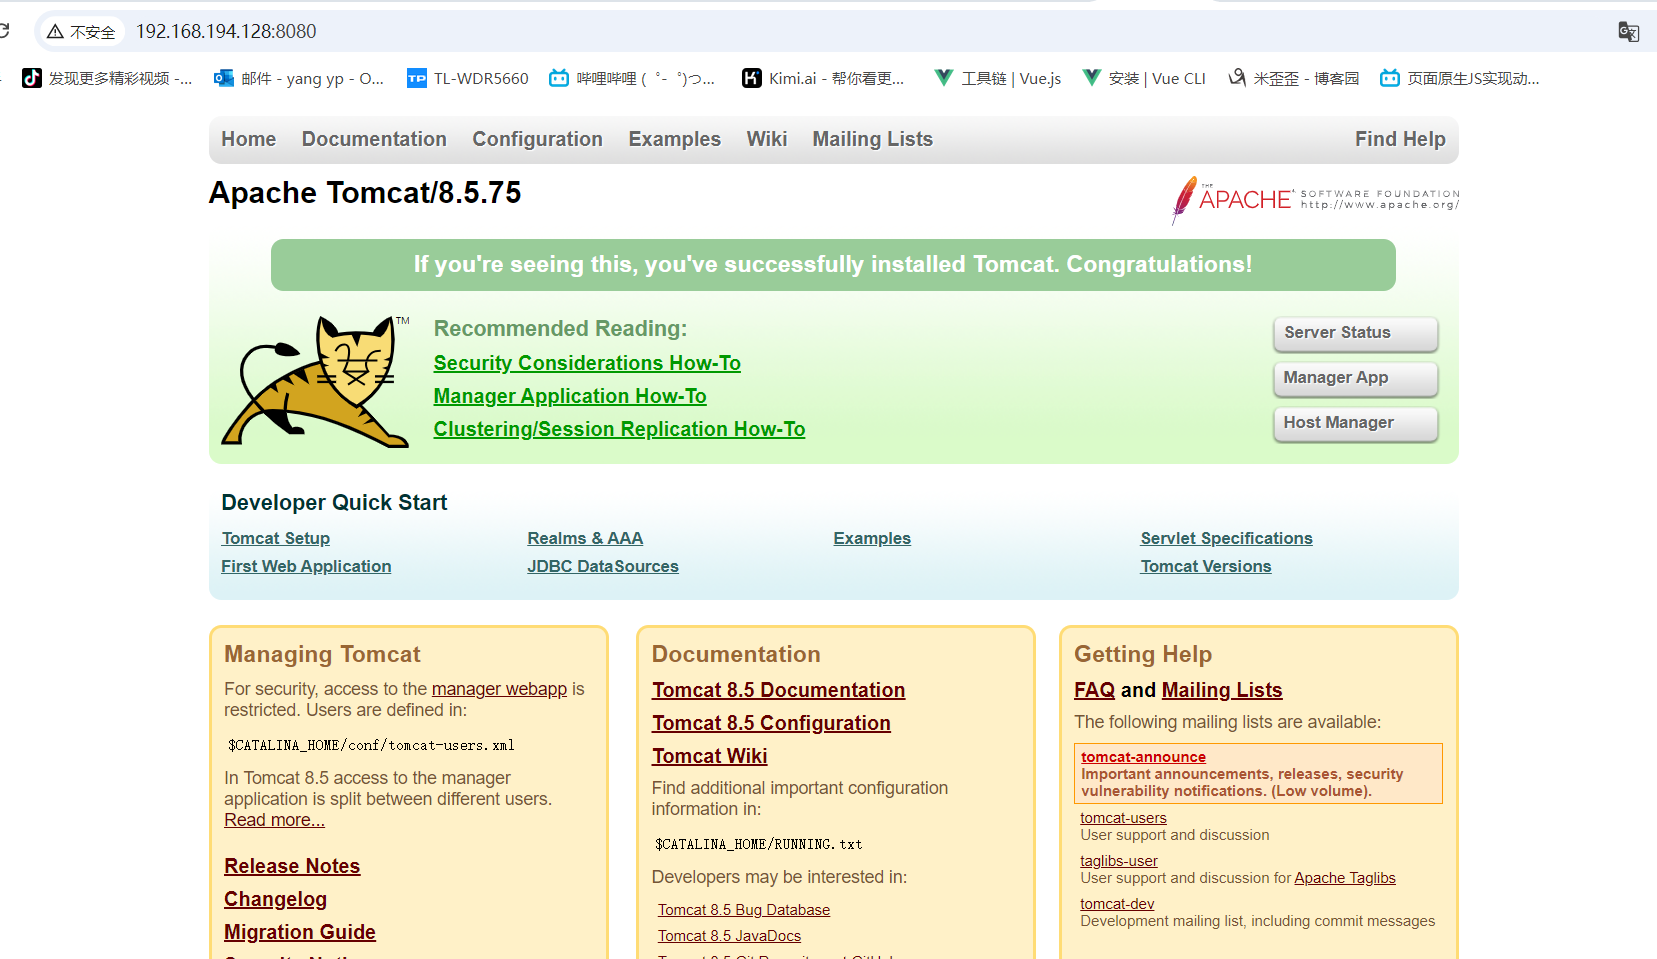
tomcat1:192.168.194.128
操作系统环境:centos7
2.修改操作系统yum源为阿里云(华为欧拉系统不需要这个步骤,但是在安装欧拉系统的时候需要安装兼容包和开发环境)
cp /etc/yum.repos.d/CentOS-Base.repo /etc/yum.repos.d/CentOS-Base.repo.backup
wget -O /etc/yum.repos.d/CentOS-Base.repo http://mirrors.aliyun.com/repo/Centos-7.repo
yum clean all
yum makecache
wget -O /etc/yum.repos.d/CentOS-Base.repo http://mirrors.aliyun.com/repo/Centos-7.repo
yum makecache
3.安装编译环境(华为欧拉系统不需要这个步骤,但是在安装欧拉系统的时候需要安装兼容包和开发环境)
yum install zlib zlib-delvel
yum install openssl openssl-devel
yum install gcc-c++
yum install zlib zlib-delvel
yum install openssl openssl-devel
yum -y install make zlib zlib-devel gcc-c++ libtool openssl openssl-devel
4.分别解压源码包安装(本次app应用为web应用,以tomcat为例)
4.1:tomcat和jdk为应用服务器的应用
解压安装
tar -xvzf jdk-8u271-linux-x64.tar.gz
mv jdk1.8.0_271 /usr/local
修改jdk环境变量
export JAVA_HOME=/usr/local/jdk1.8.0_271
export PATH=$JAVA_HOME/bin:$PATH
service fireworkd stop
source /etc/profile
4.2解压tomcat
tar -xvzf apache-tomcat-8.5.75.tar.gz
并启动tomcat
cd /root/apache-tomcat-8.5.75/bin
./start.sh(启动)
./stop(停止)
配置tomcat自动启动:
参考:https://www.cnblogs.com/miwaiwai/p/18445922
4.3停止防火墙
service fireworkd stop
vi /etc/selinux/config 为disabled
systemctl disable firewalld
firewall-cmd --state
5.nginx安装
5.1先安装流控插件pcre-8.45.zip
解压:unzip pcre-8.45.zip
cd pcre-8.45
./configure
make
make install
5.2安装nginx
tar -xvzf nginx-1.24.0.tar.gz
cd nginx-1.24.0
./configure
make
make install
5.3配置
路径:/usr/local/nginx/conf/nginx.conf

[root@localhost conf]# cat nginx.conf
#user  nobody;
worker_processes  8;

#error_log  logs/error.log;
#error_log  logs/error.log  notice;
#error_log  logs/error.log  info;

#pid        logs/nginx.pid;


events {
    worker_connections  1024;
}


http {
    include       mime.types;
    default_type  application/octet-stream;

    #log_format  main  '$remote_addr - $remote_user [$time_local] "$request" '
    #                  '$status $body_bytes_sent "$http_referer" '
    #                  '"$http_user_agent" "$http_x_forwarded_for"';

    #access_log  logs/access.log  main;

    sendfile        on;
    #tcp_nopush     on;

    #keepalive_timeout  0;
    keepalive_timeout  65;

    #gzip  on;
    gzip on;
    gzip_min_length 1k;
    gzip_buffers 16 64k;
    gzip_http_version 1.1;
    gzip_comp_level 6;
    gzip_types text/xml text/javascript text/css text/plain application/json application/xml application/javascript;
    gzip_vary on;

    upstream app {
        server 192.168.193.128:8080;
        server 192.168.194.128:8080;
        #ip_hash;
    }

    server {
        listen       8081;
        server_name  app;

        #charset koi8-r;

        #access_log  logs/host.access.log  main;

        location / {
            #root   html; #定义服务器的默认网站根目录位置
            #index  index.html index.htm; #定义首页索引文件的名称
            proxy_pass http://app; #请求转向backend_server 定义的服务器列表
            client_max_body_size 1000m;    #允许客户端请求的最大单文件字节数
            client_body_buffer_size 128k;  #缓冲区代理缓冲用户端请求的最大字节数

            proxy_connect_timeout 90s;  #nginx跟后端服务器连接超时时间(代理连接超时)
            proxy_send_timeout 120s;        #后端服务器数据回传时间(代理发送超时)
            proxy_read_timeout 90s;         #连接成功后,后端服务器响应时间(代理接收超时)
            proxy_buffer_size 128k;             #设置代理服务器(nginx)保存用户头信息的缓冲区大小
            proxy_buffers 4 256k;               #proxy_buffers缓冲区,网页平均在32k以下的话,这样设置
            #proxy_busy_buffers_size 256k;    #高负荷下缓冲大小(proxy_buffers*2)
            #proxy_temp_file_write_size 64k;  #设定缓存文件夹大小,大于这个值,将从upstream服务器传

            #后端的Web服务器可以通过X-Forwarded-For获取用户真实IP
            #proxy_set_header x-forwarded-for $remote_addr;
            proxy_set_header x-real-ip $remote_addr;
        }
        #location / {
            #root   /home/ftpuser/www;
            #index  index.html index.htm;
        #}

        #error_page  404              /404.html;

        # redirect server error pages to the static page /50x.html
        #
        error_page   500 502 503 504  /50x.html;
        location = /50x.html {
            root   html;
        }

        # proxy the PHP scripts to Apache listening on 127.0.0.1:80
        #
        #location ~ \.php$ {
        #    proxy_pass   http://127.0.0.1;
        #}

        # pass the PHP scripts to FastCGI server listening on 127.0.0.1:9000
        #
        #location ~ \.php$ {
        #    root           html;
        #    fastcgi_pass   127.0.0.1:9000;
        #    fastcgi_index  index.php;
        #    fastcgi_param  SCRIPT_FILENAME  /scripts$fastcgi_script_name;
        #    include        fastcgi_params;
        #}

        # deny access to .htaccess files, if Apache's document root
        # concurs with nginx's one
        #
        #location ~ /\.ht {
        #    deny  all;
        #}
    }


    # another virtual host using mix of IP-, name-, and port-based configuration
    #
    #server {
    #    listen       8000;
    #    listen       somename:8080;
    #    server_name  somename  alias  another.alias;

    #    location / {
    #        root   html;
    #        index  index.html index.htm;
    #    }
    #}


    # HTTPS server
    #
    #server {
    #    listen       443 ssl;
    #    server_name  localhost;

    #    ssl_certificate      cert.pem;
    #    ssl_certificate_key  cert.key;

    #    ssl_session_cache    shared:SSL:1m;
    #    ssl_session_timeout  5m;

    #    ssl_ciphers  HIGH:!aNULL:!MD5;
    #    ssl_prefer_server_ciphers  on;

    #    location / {
    #        root   html;
    #        index  index.html index.htm;
    #    }
    #}

}
[root@localhost conf]#
5.4启动ngxin
启动: /usr/local/nginx/sbin/nginx
停止:/usr/local/nginx/sbin/nginx -s stop
5.5:测试
1.通过nginx访问web应用

通过app1:192.168.193.128:8080访问

通过app1:192.168.194.128:8080访问
tomcat1服务器日志查看:

tomcat2服务器日志查看:

5.6nginx2的配置方法与nginx1一样,不在赘述了
5.7将nginx加入到自启动
[root@nginx1 conf]# cat /usr/lib/systemd/system/nginx.service
[Unit]
Description=nginx
After=network.target

[Service]
Type=forking
ExecStart=/usr/local/nginx/sbin/nginx
ExecReload=/usr/local/nginx/sbin/nginx -s reload
ExecStop=/usr/local/nginx/sbin/nginx -s stop
PrivateTmp=true

[Install]
WantedBy=multi-user.target
[root@nginx1 conf]#
加入服务
systemctl enable nginx
systemctl daemon-reload
停止服务
systemctl stop nginx(如果不能停止,请用这个命令/usr/local/nginx/sbin/nginx -s stop停止)
启动服务
systemctl start nginx
6.keepalived配置
网络规划:
  nginx1:192.168.192.128
  nginx2:192.168.192.129
   nginx:浮动ip 192.168.192.130
6.1更新为网易的yum源这几个rpm包,或者直接安装rpm包(未测试)
keepalived-2.2.4-2.oe2203.x86_64
lm_sensors-3.6.0-5.oe2203.x86_64
net-snmp-1:5.9.1-5.oe2203.x86_64
net-snmp-libs-1:5.9.1-5.oe2203.x86_64
pcre-8.45-2.oe2203.x86_64(这个在之前安装nginx已经安装过,再装一遍也没有关系)

rpm -ivh
rpm -ivh  pcre-devel-8.45-5.oe2203sp3.x86_64.rpm
rpm -ivh keepalived-2.2.4-2.oe2203sp3.x86_64.rpm
rpm -ivh lm_sensors-3.6.0-7.oe2203sp3.x86_64.rpm
rpm -ivh net-snmp-5.9.1-6.oe2203sp3.x86_64.rpm
rpm -ivh net-snmp-libs-5.9.1-6.oe2203sp3.x86_64.rpm
如果需要通过yum安装,yum源用网易的yum,本人是通过yum方式安装
 mv /etc/yum.repos.d/openEuler.repo /etc/yum.repos.d/openEuler.repo.bak
 rm -rf /etc/yum.repos.d/openEuler.repo
[ vi /etc/resolv.conf
# Generated by NetworkManager
nameserver 8.8.8.8
nameserver 8.8.4.4
yum clean all
yum makecache
修改yum源配置文件:
[root@nginx1 cache]# vi /etc/yum.repos.d/openEuler.repo
[root@nginx1 cache]# cat /etc/yum.repos.d/openEuler.repo
#generic-repos is licensed under the Mulan PSL v2.
#You can use this software according to the terms and conditions of the Mulan PSL v2.
#You may obtain a copy of Mulan PSL v2 at:
#    http://license.coscl.org.cn/MulanPSL2
#THIS SOFTWARE IS PROVIDED ON AN "AS IS" BASIS, WITHOUT WARRANTIES OF ANY KIND, EITHER EXPRESS OR
#IMPLIED, INCLUDING BUT NOT LIMITED TO NON-INFRINGEMENT, MERCHANTABILITY OR FIT FOR A PARTICULAR
#PURPOSE.
#See the Mulan PSL v2 for more details.

[OS]
name=OS
baseurl=https://mirrors.163.com/openeuler/openEuler-22.03-LTS/OS/$basearch/
enabled=1
gpgcheck=1
gpgkey=https://mirrors.163.com/openeuler/openEuler-22.03-LTS/OS/$basearch/RPM-GPG-KEY-openEuler

[everything]
name=everything
baseurl=https://mirrors.163.com/openeuler/openEuler-22.03-LTS/everything/$basearch/
enabled=1
gpgcheck=1
gpgkey=https://mirrors.163.com/openeuler/openEuler-22.03-LTS/everything/$basearch/RPM-GPG-KEY-openEuler

[EPOL]
name=EPOL
baseurl=https://mirrors.163.com/openeuler/openEuler-22.03-LTS/EPOL/main/$basearch/
enabled=1
gpgcheck=1
gpgkey=https://mirrors.163.com/openeuler/openEuler-22.03-LTS/OS/$basearch/RPM-GPG-KEY-openEuler

[debuginfo]
name=debuginfo
baseurl=https://mirrors.163.com/openeuler/openEuler-22.03-LTS/debuginfo/$basearch/
enabled=1
gpgcheck=1
gpgkey=https://mirrors.163.com/openeuler/openEuler-22.03-LTS/debuginfo/$basearch/RPM-GPG-KEY-openEuler

[source]
name=source
baseurl=https://mirrors.163.com/openeuler/openEuler-22.03-LTS/source/
enabled=1
gpgcheck=1
gpgkey=https://mirrors.163.com/openeuler/openEuler-22.03-LTS/source/RPM-GPG-KEY-openEuler

[update]
name=update
baseurl=https://mirrors.163.com/openeuler/openEuler-22.03-LTS/update/$basearch/
enabled=1
gpgcheck=1
gpgkey=https://mirrors.163.com/openeuler/openEuler-22.03-LTS/OS/$basearch/RPM-GPG-KEY-openEuler
[root@nginx1 cache]#
yum install keepalived
配置检查脚本:
/usr/local/nginx/conf/CheckNginx.sh
[root@nginx2 ~]# cat /usr/local/nginx/conf/CheckNginx.sh
#!/bin/bash
systemctl status nginx | grep "active (running)" > /dev/null

if [ $? -ne 0 ]; then
    systemctl restart nginx &> /dev/null
    sleep 1
    systemctl status nginx | grep "active (running)" > /dev/null
    if [ $? -ne 0 ]; then
        systemctl stop keepalived
    fi
fi
修改keepalived的配置文件(keepalived1和keepalived2配置一样)
[root@nginx1 ~]#   cat /etc/keepalived/keepalived.conf
global_defs {
   router_id LVS_DEVEL2
}
vrrp_script chk_ngx {
        script "/usr/local/nginx/conf/CheckNginx.sh"
}

vrrp_instance VI_1 {
    state BACKUP
    interface ens33
    virtual_router_id 51
    priority 99
    advert_int 1
    authentication {
        auth_type PASS
        auth_pass 1111
    }
    virtual_ipaddress {
        192.168.192.130
    }
    track_script {
        chk_ngx
    }

}
systemctl start keepalived
systemctl start nginx
启动停止命令:
systemctl start keepalived
systemctl stop keepalived
systemctl restart keepalived
systemctl status keepalived
查看keeepalived的浮动ip是否已经绑定好
[root@nginx1 ~]# ip addr
1: lo: <LOOPBACK,UP,LOWER_UP> mtu 65536 qdisc noqueue state UNKNOWN group default qlen 1000
    link/loopback 00:00:00:00:00:00 brd 00:00:00:00:00:00
    inet 127.0.0.1/8 scope host lo
       valid_lft forever preferred_lft forever
    inet6 ::1/128 scope host
       valid_lft forever preferred_lft forever
2: ens33: <BROADCAST,MULTICAST,UP,LOWER_UP> mtu 1500 qdisc fq_codel state UP group default qlen 1000
    link/ether 00:0c:29:71:a8:fa brd ff:ff:ff:ff:ff:ff
    inet 192.168.192.128/24 brd 192.168.192.255 scope global noprefixroute ens33
       valid_lft forever preferred_lft forever
    inet 192.168.192.130/32 scope global ens33
       valid_lft forever preferred_lft forever
    inet6 fe80::20c:29ff:fe71:a8fa/64 scope link noprefixroute
       valid_lft forever preferred_lft forever
[root@nginx1 ~]#
 最后做检查:
重启所有keepalive +nginx机器
  1>ps -ef |grep nginx
  2>ps -ef|grep keepalived
  3>通过页面访问nginx的浮动地址192.168.192.130
    3.1》是否够能正常访问
    3.2》关闭一个nginx+keepalived机器看看,nginx浮动ip是否能访问正常,浮动ip是否在2台机器之间进行切换(命令 ip add)
     以上2个步骤需要在2台nginx分别进行测试
  我在自己机器测试都是ok的,不在截图了
ouler系统的网络命令
systemctl stop NetworkManager
systemctl start NetworkManager
systemctl status NetworkManager
systemctl restart NetworkManager
nmcli connection down ens33
nmcli connection up ens33
nmcli connection show


【推荐】国内首个AI IDE,深度理解中文开发场景,立即下载体验Trae
【推荐】编程新体验,更懂你的AI,立即体验豆包MarsCode编程助手
【推荐】抖音旗下AI助手豆包,你的智能百科全书,全免费不限次数
【推荐】轻量又高性能的 SSH 工具 IShell:AI 加持,快人一步
· 25岁的心里话
· 闲置电脑爆改个人服务器(超详细) #公网映射 #Vmware虚拟网络编辑器
· 零经验选手,Compose 一天开发一款小游戏!
· 通过 API 将Deepseek响应流式内容输出到前端
· AI Agent开发,如何调用三方的API Function,是通过提示词来发起调用的吗