Cookie和Session
博客资料,基础知识请参考!
Cookie
这里通过一个用户登录的例子来学习cookie。
首先在Django项目中创建一个项目:myWeb。主要编写如下几个文件:
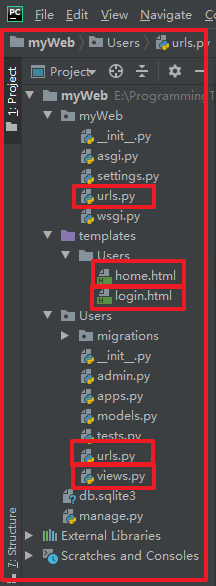
- 首先编写url部分,路由映射。


 1 """myWeb URL Configuration
 2
 3 The `urlpatterns` list routes URLs to views. For more information please see:
 4     https://docs.djangoproject.com/en/3.0/topics/http/urls/
 5 Examples:
 6 Function views
 7     1. Add an import:  from my_app import views
 8     2. Add a URL to urlpatterns:  path('', views.home, name='home')
 9 Class-based views
10     1. Add an import:  from other_app.views import Home
11     2. Add a URL to urlpatterns:  path('', Home.as_view(), name='home')
12 Including another URLconf
13     1. Import the include() function: from django.urls import include, path
14     2. Add a URL to urlpatterns:  path('blog/', include('blog.urls'))
15 """
16 from django.contrib import admin
17 from django.urls import *
18 from Users import urls as users_urls
19
20 urlpatterns = [
21     path('admin/', admin.site.urls),
22     path('Users/', include(users_urls)),
23 ]
1 from django.urls import path
2 from Users import views
3
4
5 urlpatterns = [
6     path('login/', views.login),
7     path('logout/', views.logout),
8     path('home/', views.home),
9 ]
对于多个app情况下的项目,就要设置路由映射,myWeb中的url指向各个子app的url。
- 然后编写html页面
 1 <!DOCTYPE html>
 2 <html lang="en">
 3 <head>
 4     <meta charset="UTF-8">
 5     <title>首页</title>
 6 </head>
 7 <body>
 8 <div>
 9     <a href="/Users/logout/">注销</a>
10     <p>
11         home
12     </p>
13 </div>
14 </body>
15 </html>
 1 <!DOCTYPE html>
 2 <html lang="en">
 3 <head>
 4     <meta charset="UTF-8">
 5     <title>用户登录</title>
 6 </head>
 7 <body>
 8 <div>
 9     <form action="{{ request.get_full_path }}" method="post"> <!--{{ request.get_full_path }}的作用就是获取地址栏中输入的地址-->
10         <p>
11             用户名:
12             <input type="text" name="user">
13         </p>
14         <p>
15             密码:
16             <input type="password" name="pwd">
17         </p>
18         <button type="submit">提交</button>
19     </form>
20 </div>
21 </body>
22 </html>
home.html是主页面,里面的主要功能是注销。
login.html是登录界面。
- 最后编写views.html
 1 from django.shortcuts import *
 2
 3 # Create your views here.
 4
 5
 6 # 这里是定义一个装饰器。
 7 # 假设函数A和B都需要一个公共的功能,只要把这个功能写在装饰器中,
 8 # 然后直接在A和B函数上面加上“@装饰器名”,就可以引用这个功能了,简化代码。
 9 def login_required(fn):
10     def inner(request, *args, **kwargs):
11         if not request.COOKIES.get('is_login') == '1':  # 如果没有收到这样的cookie,就重新回到首页
12             next = request.path_info  # 登录成功后,便设置一个cookie,若当前页面没有该cookie,则判定为未登录,记录当前页面的地址,一遍登录之后,直接跳到该地址。
13             return redirect('/Users/login/?next={}'.format(next))
14         ret = fn(request, *args, **kwargs)
15         return ret
16     return inner
17
18
19 # 登录
20 def login(request):
21     if request.method == 'POST':
22         user = request.POST.get('user')
23         pwd = request.POST.get('pwd')
24         if user == 'du' and pwd == '000000':
25             next = request.GET.get('next')
26             if next:
27                 ret = redirect(next)
28             else:
29                 ret = redirect('/Users/home/')
30             ret.set_cookie('is_login', '1')  # 设置登录成功的cookie
31             return ret
32     return render(request, 'Users/login.html')
33
34
35 def logout(request):
36     ret = redirect('/Users/login/')
37     ret.delete_cookie('is_login')  # 注销后,删除登录后的cookie.
38     return ret
39
40
41 # 首页
42 @login_required
43 def home(request):
44     return render(request, 'Users/home.html')
- 首先用户在地址栏中输入地址 http://127.0.0.1:8000/Users/login/ ,根据 url ,程序执行到 views.py 中的 login 函数。 login 函数中执行代码到 login.html 中,在 login.html 中,他会通过 {{ request.get_full_path }} 获取到当前输入地址 /Users/login/ 。
- 用户若是直接输入地址登录,就不会做其他操作,直接进入登录界面,但是用户若先进入B界面的话而没有先登录,程序会通过装饰器判定用户未登录,因为登录成功的话,登陆函数会设置一个 cookie:{'is_login','1'} 。因为没有判定登录,所以返回到登录界面。但是此时程序会通过装饰器中的 next = request.path_info 记录下刚刚的网址,之后当用户登录成功之后,便直接跳转到刚刚的界面。这就是 cookie 的一个作用。
- 装饰器的作用主要是为了简化代码,不免不必要的操作。
- 注销功能,就是用于清除 cookie 。
Session
Session和Cookie操作差不多,不过Session是要将数据存储到数据库中。而不是存储到浏览器上,具体操作看博客顶部的参考链接。
