ASP.NET Core的身份认证框架IdentityServer4--(2)API跟WEB端配置
API配置
可以使用ASP.NET Core Web API模板。同样,我们建议您控制端口并使用与之前一样的方法来配置Kestrel和启动配置文件。端口配置为http://localhost:5001。
在项目Api中添加一个IdentityController控制器代码如下:
[Route("identity")]
[Authorize]
public class IdentityController : ControllerBase
{
    [HttpGet]
    public IActionResult Get()
    {
        return new JsonResult(from c in User.Claims select new { c.Type, c.Value });
    }
}
稍后将使用此控制器来测试授权要求,并通过API返回的数据显示身份声明。
配置AccessTokenValidation
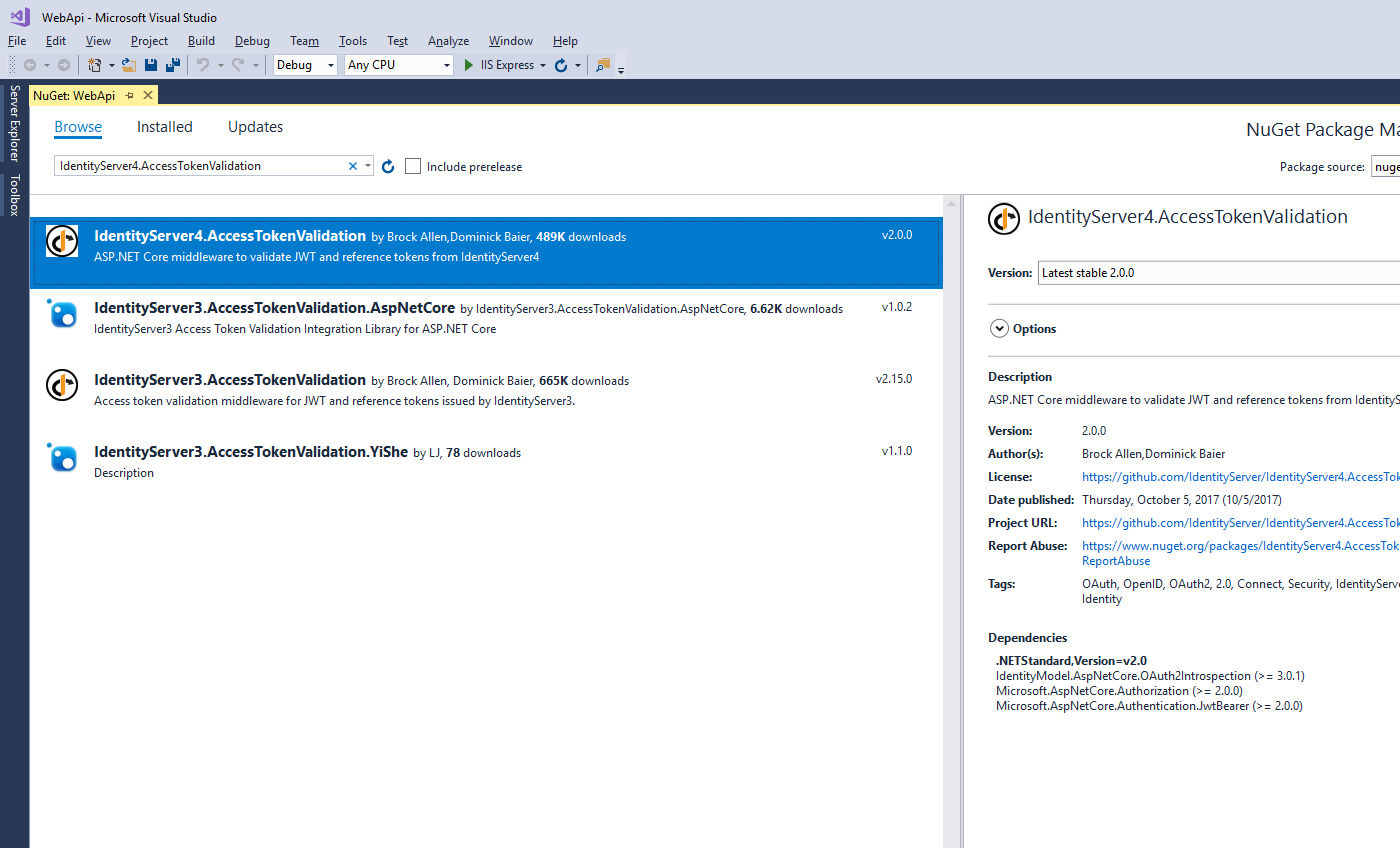
添加NuGet包IdentityServer4.AccessTokenValidation到项目中

更新Startup.cs代码如下:
namespace API
{
    public class Startup
    {
        public Startup(IConfiguration configuration)
        {
            Configuration = configuration;
        }

        public IConfiguration Configuration { get; }

        // This method gets called by the runtime. Use this method to add services to the container.
        public void ConfigureServices(IServiceCollection services)
        {
            services.AddMvcCore()
               .AddAuthorization()//添加身份验证服务
               .AddJsonFormatters();
            //AddAuthentication将身份验证服务添加到DI并配置"Bearer"为默认方案
            services.AddAuthentication("Bearer")
                    .AddIdentityServerAuthentication(options =>
                    {
                        options.Authority = "http://localhost:5000";//identifyServer服务地址
                        options.RequireHttpsMetadata = false;//是否使用https

                        options.ApiName = "api1";//进行身份验证的API资源的名称
                    });
        }

        // This method gets called by the runtime. Use this method to configure the HTTP request pipeline.
        public void Configure(IApplicationBuilder app, IHostingEnvironment env)
        {
            if (env.IsDevelopment())
            {
                app.UseDeveloperExceptionPage();
            }
            //将身份验证中间件添加到管道中
            app.UseAuthentication();

            app.UseMvc();
        }
    }
}
AddAuthentication将认证服务添加到DI并配置"Bearer"为默认方案。AddIdentityServerAuthentication将IdentityServer访问令牌验证处理程序添加到DI以供验证服务使用。 UseAuthentication将认证中间件添加到请求管道中,以便每次调用主机时自动执行认证。
如果您使用浏览器导航到控制器(http://localhost:5001/identity),则应该获得401状态码。这意味着您的API需要一个凭证。
就是这样,API现在由IdentityServer保护。
WEB配置
最后一步是编写一个客户端请求访问令牌,然后使用此令牌访问该API。
IdentityServer中的令牌端点实现了OAuth 2.0协议,您可以使用原始HTTP访问它。然而,我们有一个名为IdentityModel的客户端库,它将协议交互封装在易于使用的API中。
官方源码参考地址:点击这里
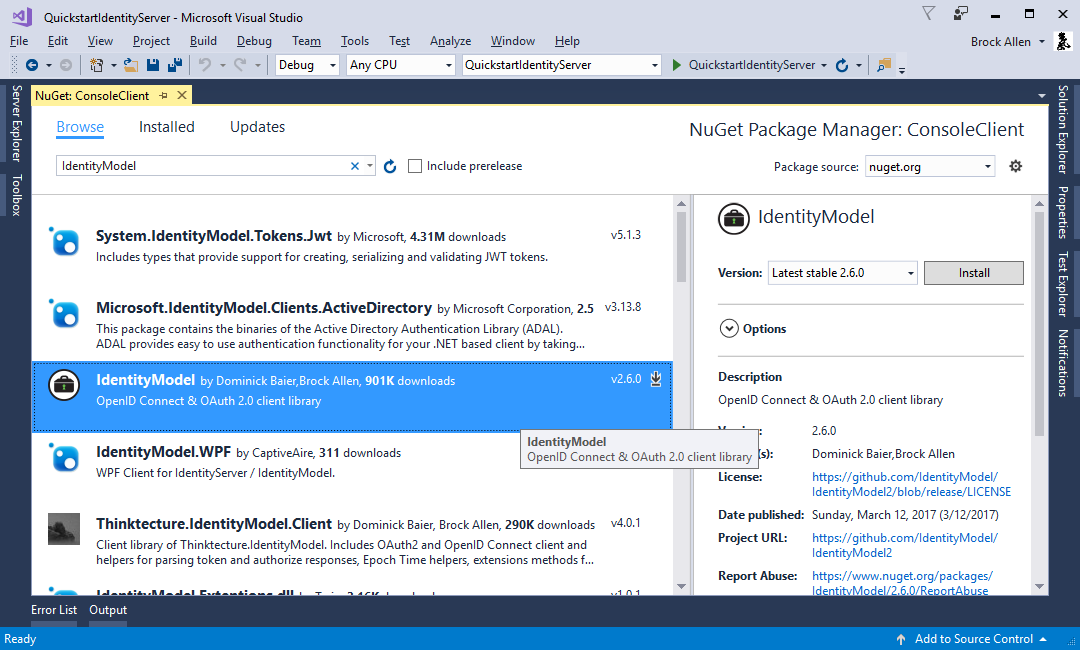
将 NuGet包IdentityModel添加到您的应用程序。

IdentityModel包含一个用于发现端点的客户端库。这样你只需要知道IdentityServer的访问地址 - 实际的端点地址可以从元数据中读取
// 从元数据中发现端口
var disco = await DiscoveryClient.GetAsync("http://localhost:5000");
if (disco.IsError)
{
    Console.WriteLine(disco.Error);
    return;
}
接着你可以使用 TokenClient 来请求令牌。为了创建一个该类型的实例,你需要传入令牌端点地址、客户端id和密码。
然后你可以使用 RequestClientCredentialsAsync 方法来为你的目标 API 请求一个令牌:
// 请求令牌
var tokenClient = new TokenClient(disco.TokenEndpoint, "client", "secret");
var tokenResponse = await tokenClient.RequestClientCredentialsAsync("api1");
if (tokenResponse.IsError)
{
    Console.WriteLine(tokenResponse.Error);
    return;
}
Console.WriteLine(tokenResponse.Json);
最后调用API。
为了发送访问令牌到 API,你一般要使用 HTTP 授权 header。这可以通过 SetBearerToken 扩展方法来实现:
// 调用api
var client = new HttpClient();
client.SetBearerToken(tokenResponse.AccessToken);
var response = await client.GetAsync("http://localhost:5001/identity");
if (!response.IsSuccessStatusCode)
{
    Console.WriteLine(response.StatusCode);
}
else
{
    var content = await response.Content.ReadAsStringAsync();
    Console.WriteLine(JArray.Parse(content));
}
依次启动项目QuickstartIdentityServer、API、WEB
最后查看输出结果

注意:默认情况下,访问令牌将包含关于作用域,生命周期(nbf和exp),客户端ID(client_id)和发行者名称(iss)的声明。


