TOMCAT
参考:http://blog.oldboyedu.com/java-tomcat/
一,Tomcat简介
Tomcat是Apache软件基金会(Apache Software Foundation)的Jakarta 项目中的一个核心项目,由Apache、Sun和其他一些公司及个人共同开发而成。
Tomcat服务器是一个免费的开放源代码的Web应用服务器,属于轻量级应用服务器,在中小型系统和并发访问用户不是很多的场合下被普遍使用,是开发和调试JSP程序的首选。
Tomcat和Nginx、Apache(httpd)、lighttpd等Web服务器一样,具有处理HTML页面的功能,另外它还是一个Servlet和JSP容器,独立的Servlet容器是Tomcat的默认模式。不过,Tomcat处理静态HTML的能力不如Nginx/Apache服务器。
二,安装TOMCAT
先安装java环境
上传jar包jdk-8u60-linux-x64.tar.gz apache-tomcat-8.0.27.tar.gz
配置java环境
tar -xf jdk-8u60-linux-x64.tar.gz
mv jdk1.8.0_60/ /application/
cd /application/
mv jdk1.8.0_60/ jdk
sed -i.ori '$a export JAVA_HOME=/application/jdk\nexport PATH=$JAVA_HOME/bin:$JAVA_HOME/jre/bin:$PATH\nexport CLASSPATH=.$CLASSPATH:$JAVA_HOME/lib:$JAVA_HOME/jre/lib:$JAVA_HOME/lib/tools.jar' /etc/profile
source /etc/profile
验证
java -version

解压配置tomcat
tar -xf apache-tomcat-8.0.27.tar.gz
mv apache-tomcat-8.0.27 /application/tomcat
echo 'export TOMCAT_HOME=/application/tomcat'>>/etc/profile
source /etc/profile
三,TOMCAT目录介绍
tree tomcat/ -L 1
tomcat/
├── bin                            #启动关闭 sh是linux系统下使用的 bat是window下使用的
├── conf                          #配置文件
├── lib                             #存放web应用能访问的JAR包
├── LICENSE
├── logs                          #日志文件
├── NOTICE
├── RELEASE-NOTES
├── RUNNING.txt
├── temp                         #临时文件
├── webapps                  #Web应用程序跟目录
└── work                         #用以产生由JSP编译出的Servlet的.java和.class文件
web程序跟目录
drwxr-xr-x. 14 root root 4096 4月  28 06:56 docs              #tomcat帮助文档
drwxr-xr-x.  6 root root   83 4月  28 06:56 examples          #web应用实例
drwxr-xr-x.  5 root root   87 4月  28 06:56 host-manager      #管理
drwxr-xr-x.  5 root root  103 4月  28 06:56 manager          #管理
drwxr-xr-x.  3 root root 4096 4月  28 06:56 ROOT              #默认网站根目录
四,启动和关闭tomcat
/application/tomcat/bin/startup.sh
/application/tomcat/bin/shutdown.sh
默认启动端口为8080
netstat -tunlp|grep java

通过web界面访问
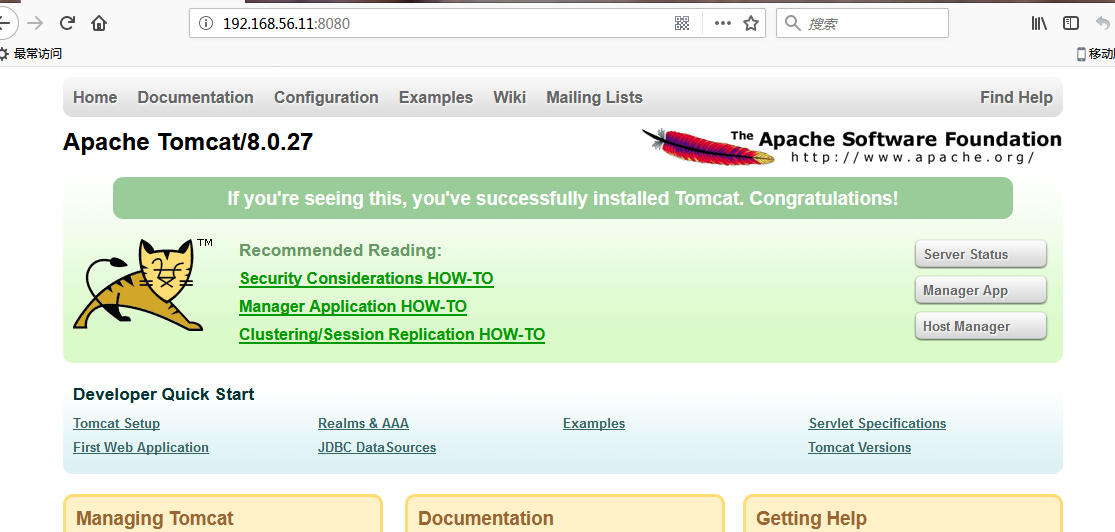
默认访问的首页位置为/application/tomcat/webapps/ROOT/index.jsp
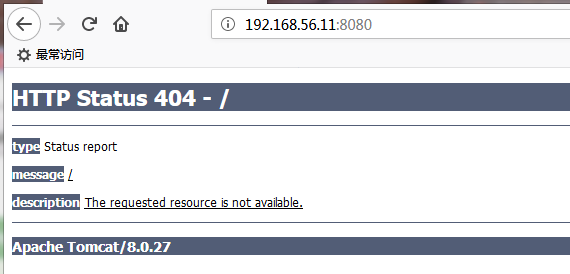
假如删除访问会出现404找不到文件提示
启动日志
tail -f /application/tomcat/logs/catalina.out
PS:catalina.out日志会每天自动切割,但是不会清除分割后的日子,运行时间久了使用重定向>清空,不要直接删除文件
localhost_access_log.2018-04-28.txt为访问日志

五,tomcat管理
测试用,生产不要用
Tomcat管理功能用于对Tomcat自身以及部署在Tomcat上的应用进行管理的web应用。在默认情况下是处于禁用状态的。如果需要开启这个功能,就需要配置管理用户,即配置前面说过的tomcat-users.xml。
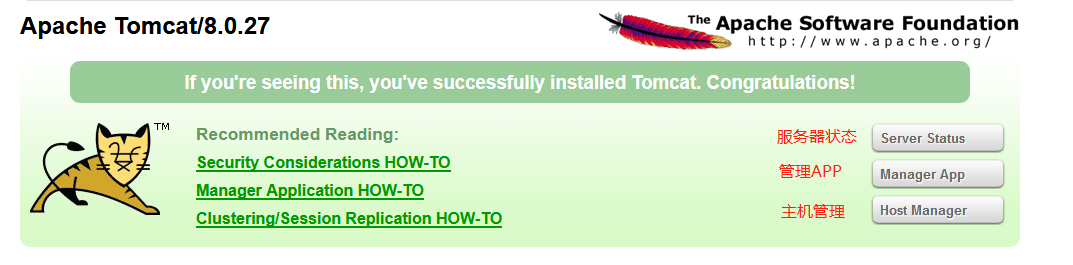
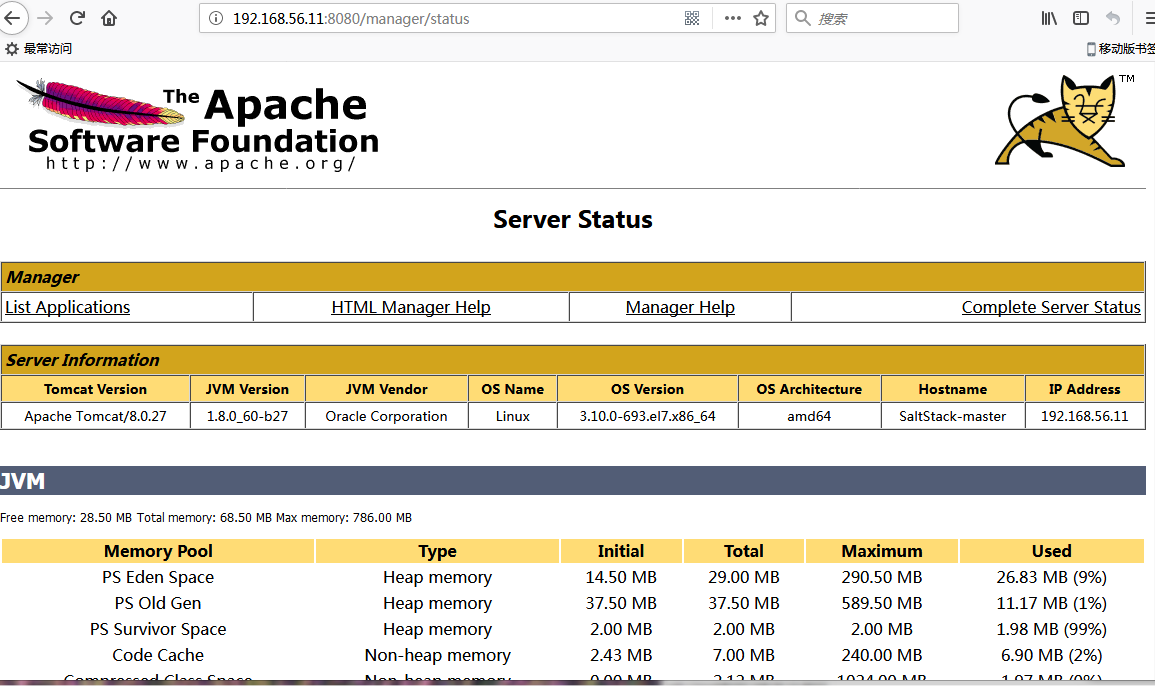
点击Server Status出现页面需要输入用户名和密码
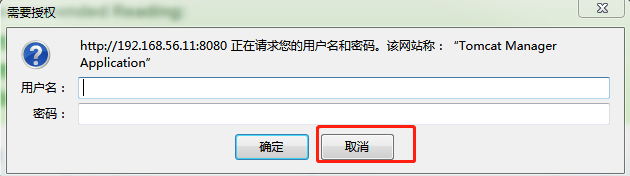
取消报401没有认证错误,并且告诉怎么配置
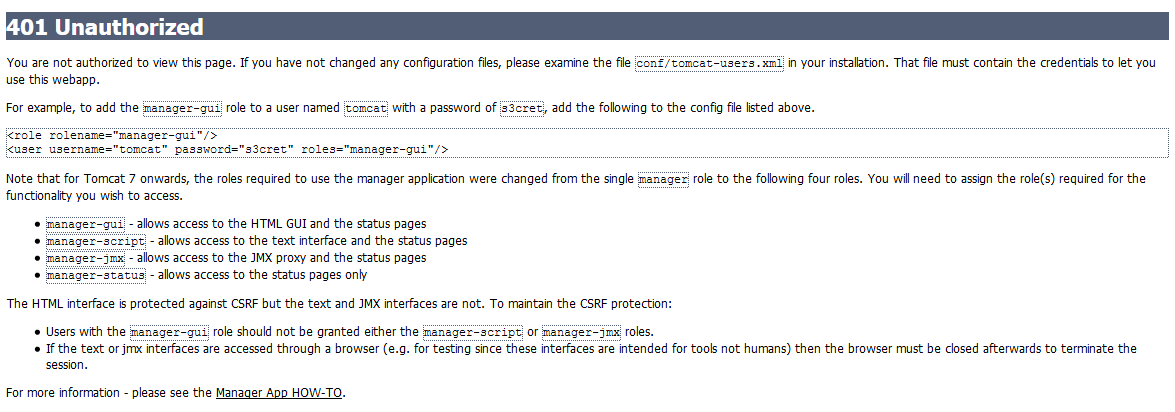
修改配置文件/application/tomcat/conf/tomcat-users.xml
在</tomcat-users>前面加三行
<role rolename="manager-gui"/>
<role rolename="admin-gui"/>
<user username="tomcat" password="tomcat" roles="manager-gui,admin-gui"/>
重启tomcat
/application/tomcat/bin/shutdown.sh
/application/tomcat/bin/startup.sh
然后输入用户名tomcat和密码tomcat访问
通过web端关闭应用
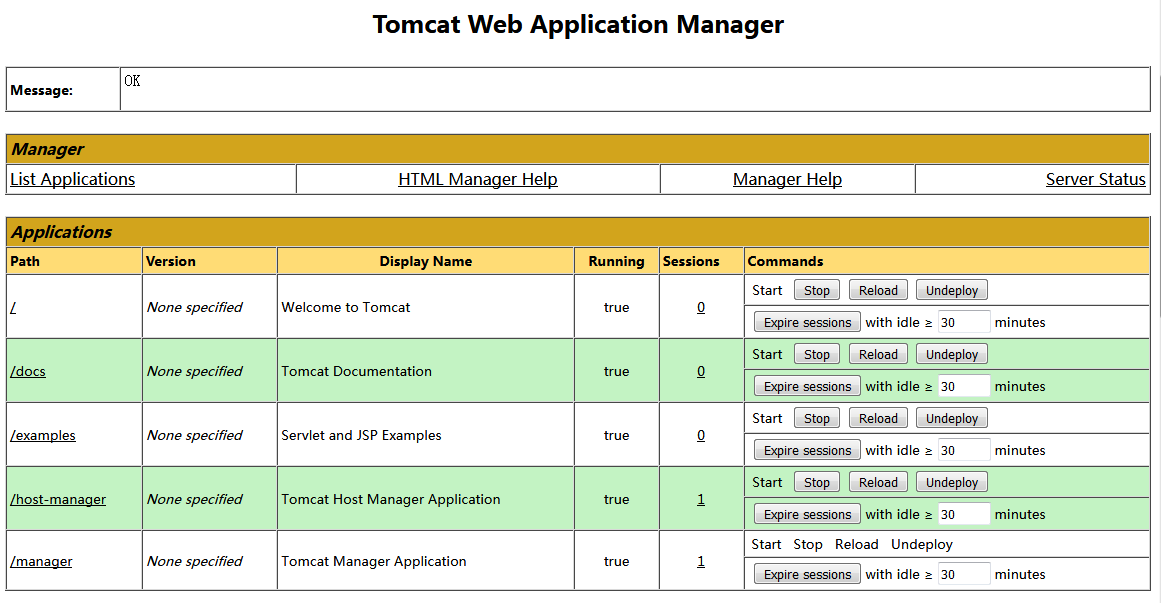
可以上传war包

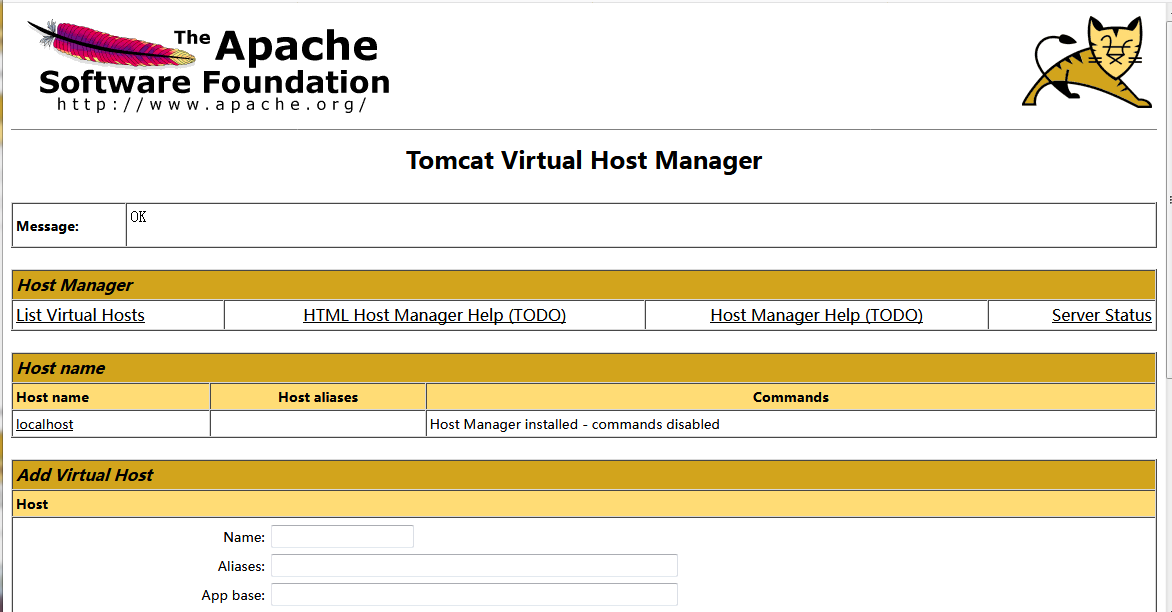
添加虚拟主机
类似于nginx的虚拟主机,生产中不常用,因为tomcat主要处理动态请求,生产中一个tomcat就是一个站点,如果有多个站点就启动多个tomcat(一般一个tomcat分配内存1.5-2G)类似于MySQL多实例
tomcat生产优化: 把docs examples host-manager manager全部移除,ROOT目录下所有文件移除,然后在打一个tar包统一用于生产主机
六,tomcat配置文件
配置文件路径
/application/tomcat/conf/server.xml
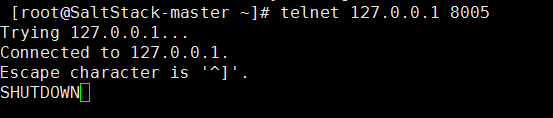
使用本机往8005端口发送SHUTDOWN关闭tomcat

自动解压和加载

配置文件注释
<?xml version='1.0' encoding='utf-8'?>
<!--
<Server>元素代表整个容器,是Tomcat实例的顶层元素.由org.apache.catalina.Server接口来定义.它包含一个<Service>元素.并且它不能做为任何元素的子元素.
    port指定Tomcat监听shutdown命令端口.终止服务器运行时,必须在Tomcat服务器所在的机器上发出shutdown命令.该属性是必须的.
    shutdown指定终止Tomcat服务器运行时,发给Tomcat服务器的shutdown监听端口的字符串.该属性必须设置
-->
<Server port="8005" shutdown="SHUTDOWN">
  <Listener className="org.apache.catalina.startup.VersionLoggerListener" />
  <Listener className="org.apache.catalina.core.AprLifecycleListener" SSLEngine="on" />
  <Listener className="org.apache.catalina.core.JreMemoryLeakPreventionListener" />
  <Listener className="org.apache.catalina.mbeans.GlobalResourcesLifecycleListener" />
  <Listener className="org.apache.catalina.core.ThreadLocalLeakPreventionListener" />
  <GlobalNamingResources>
    <Resource name="UserDatabase" auth="Container"
              type="org.apache.catalina.UserDatabase"
              description="User database that can be updated and saved"
              factory="org.apache.catalina.users.MemoryUserDatabaseFactory"
              pathname="conf/tomcat-users.xml" />
  </GlobalNamingResources>
  <!--service服务组件-->
  <Service name="Catalina">
    <!--
    connector:接收用户请求,类似于httpd的listen配置监听端口.
        port指定服务器端要创建的端口号,并在这个端口监听来自客户端的请求。
        address:指定连接器监听的地址,默认为所有地址(即0.0.0.0)
        protocol连接器使用的协议,支持HTTP和AJP。AJP(Apache Jserv Protocol)专用于tomcat与apache建立通信的, 在httpd反向代理用户请求至tomcat时使用(可见Nginx反向代理时不可用AJP协议)。
        minProcessors服务器启动时创建的处理请求的线程数
        maxProcessors最大可以创建的处理请求的线程数
        enableLookups如果为true,则可以通过调用request.getRemoteHost()进行DNS查询来得到远程客户端的实际主机名,若为false则不进行DNS查询,而是返回其ip地址
        redirectPort指定服务器正在处理http请求时收到了一个SSL传输请求后重定向的端口号
        acceptCount指定当所有可以使用的处理请求的线程数都被使用时,可以放到处理队列中的请求数,超过这个数的请求将不予处理
        connectionTimeout指定超时的时间数(以毫秒为单位)
    -->
    <Connector port="8080" protocol="HTTP/1.1"
               connectionTimeout="20000"
               redirectPort="8443" />
    <Connector port="8009" protocol="AJP/1.3" redirectPort="8443" />
    <!--engine,核心容器组件,catalina引擎,负责通过connector接收用户请求,并处理请求,将请求转至对应的虚拟主机host
        defaultHost指定缺省的处理请求的主机名,它至少与其中的一个host元素的name属性值是一样的
    -->
    <Engine name="Catalina" defaultHost="localhost">
      <!--Realm表示存放用户名,密码及role的数据库-->
      <Realm className="org.apache.catalina.realm.LockOutRealm">
        <Realm className="org.apache.catalina.realm.UserDatabaseRealm"
               resourceName="UserDatabase"/>
      </Realm>
      <!--
      host表示一个虚拟主机
        name指定主机名
        appBase应用程序基本目录,即存放应用程序的目录.一般为appBase="webapps" ,相对于CATALINA_HOME而言的,也可以写绝对路径。
        unpackWARs如果为true,则tomcat会自动将WAR文件解压,否则不解压,直接从WAR文件中运行应用程序
        autoDeploy:在tomcat启动时,是否自动部署。
        xmlValidation:是否启动xml的校验功能,一般xmlValidation="false"。
        xmlNamespaceAware:检测名称空间,一般xmlNamespaceAware="false"。
      -->
      <Host name="localhost"  appBase="webapps"
            unpackWARs="true" autoDeploy="true">
        <!--
        Context表示一个web应用程序,通常为WAR文件
            docBase应用程序的路径或者是WAR文件存放的路径,也可以使用相对路径,起始路径为此Context所属Host中appBase定义的路径。
            path表示此web应用程序的url的前缀,这样请求的url为http://localhost:8080/path/****
            reloadable这个属性非常重要,如果为true,则tomcat会自动检测应用程序的/WEB-INF/lib 和/WEB-INF/classes目录的变化,自动装载新的应用程序,可以在不重启tomcat的情况下改变应用程序
        -->
        <Context path="" docBase="" debug=""/>
        <Valve className="org.apache.catalina.valves.AccessLogValve" directory="logs"
               prefix="localhost_access_log" suffix=".txt"
               pattern="%h %l %u %t "%r" %s %b" />
      </Host>
    </Engine>
  </Service>
七,WEB站点部署
上线的代码有两种方式,第一种方式是直接将程序目录放在webapps目录下面,这种方式大家已经明白了,就不多说了。第二种方式是使用开发工具将程序打包成war包,然后上传到webapps目录下面。下面让我们见识一下这种方式。
上传war包
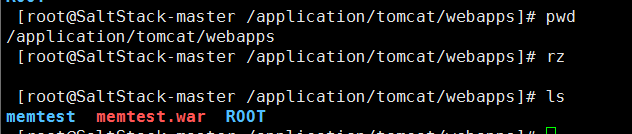
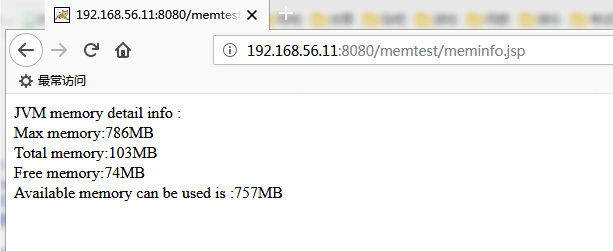
上传后会自动解压
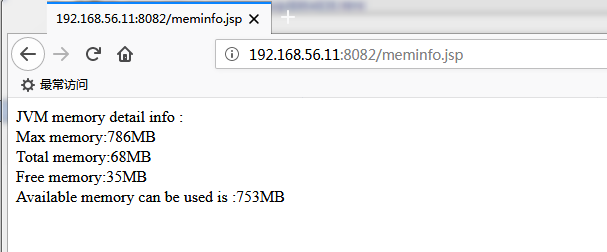
web访问http://192.168.56.11:8080/memtest/meminfo.jsp
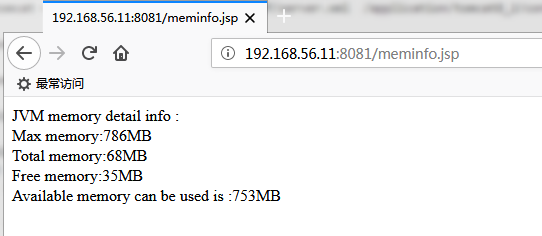
tomcat多实例
复制两份原tomcat
cd /application/
cp -a tomcat/ tomcat8_1
cp -a tomcat/ tomcat8_2
修改配置文件
  mkdir -p /data/www/www/ROOT
  cp /application/tomcat/webapps/memtest/meminfo.jsp /data/www/www/ROOT/
 sed -i '22s#8005#8011#;69s#8080#8081#;123s#appBase=".*"# appBase="/data/www/www"#' /application/tomcat8_1/conf/server.xml
 sed -i '22s#8005#8012#;69s#8080#8082#;123s#appBase=".*"# appBase="/data/www/www"#' /application/tomcat8_2/conf/server.xml
 diff /application/tomcat/conf/server.xml  /application/tomcat8_1/conf/server.xml
启动
for i in {1..2};do /application/tomcat8_$i/bin/startup.sh;done
查看

web访问
tomcat集群
使用nginx反向代理tomcat即可(nginx反向代理配置不详述)
tomcat安装JPress
JPress,一个wordpress的java代替版本,使用JFinal开发。 需要maven支持
tar -xf apache-maven-3.3.9-bin.tar.gz -C /application/
ln -s /application/apache-maven-3.3.9/ /application/maven
vim /etc/profile在尾部添加
export MAVEN_HOME=/application/maven
export PATH="$MAVEN_HOME/bin:$PATH"
设置生效
source /etc/profile
验证

上传jar包
会自动解压
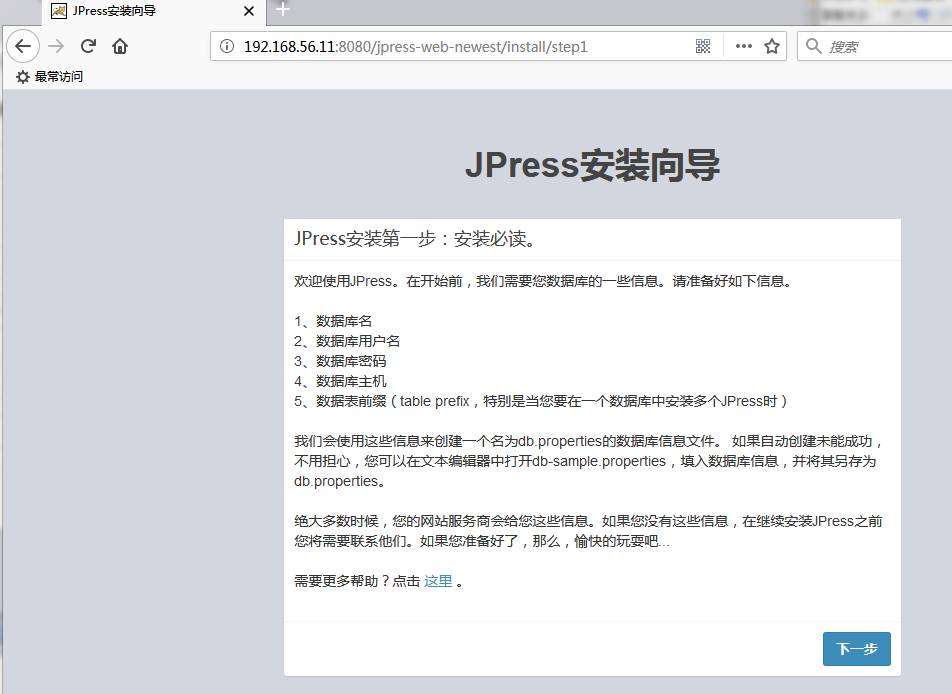
在浏览器安装


tomcat监控
使用脚本找出前五个最忙的进程
通用脚本,假如那台服务器CPU高直接执行把报错发给开发
#!/bin/bash
# @Function
# Find out the highest cpu consumed threads of java, and print the stack of these threads.
#
# @Usage
#   $ ./show-busy-java-threads
#
# @online-doc https://github.com/oldratlee/useful-scripts/blob/master/docs/java.md#beer-show-busy-java-threads
# @author Jerry Lee (oldratlee at gmail dot com)
# @author superhj1987 (superhj1987 at 126 dot com)

readonly PROG="`basename $0`"
readonly -a COMMAND_LINE=("$0" "$@")
# Get current user name via whoami command
#   See https://www.lifewire.com/current-linux-user-whoami-command-3867579
# Because if run command by `sudo -u`, env var $USER is not rewritten/correct, just inherited from outside!
readonly USER="`whoami`"

################################################################################
# util funtions
################################################################################

# NOTE: $'foo' is the escape sequence syntax of bash
readonly ec=$'\033' # escape char
readonly eend=$'\033[0m' # escape end

colorPrint() {
    local color=$1
    shift

    # if stdout is console, turn on color output.
    [ -t 1 ] && echo "$ec[1;${color}m$@$eend" || echo "$@"

    [ -n "$append_file" ] && echo "$@" >> "$append_file"
}

redPrint() {
    colorPrint 31 "$@"
}

greenPrint() {
    colorPrint 32 "$@"
}

yellowPrint() {
    colorPrint 33 "$@"
}

bluePrint() {
    colorPrint 36 "$@"
}

normalPrint() {
    echo "$@"
    [ -n "$append_file" ] && echo "$@" >> "$append_file"
}

fatal() {
    redPrint "$@" 1>&2
    exit 1
}

usage() {
    [ -n "$1" -a "$1" != 0 ] && local out=/dev/stderr || local out=/dev/stdout

    > $out cat <<EOF
Usage: ${PROG} [OPTION]... [delay [count]]
Find out the highest cpu consumed threads of java, and print the stack of these threads.

Example:
  ${PROG}       # show busy java threads info
  ${PROG} 1     # update every 1 second, (stop by eg: CTRL+C)
  ${PROG} 3 10  # update every 3 seconds, update 10 times

Options:
  -p, --pid <java pid>      find out the highest cpu consumed threads from the specifed java process,
                            default from all java process.
  -c, --count <num>         set the thread count to show, default is 5
  -a, --append-file <file>  specify the file to append output as log
  -s, --jstack-path <path>  specify the path of jstack command
  -F, --force               set jstack to force a thread dump
                            use when jstack <pid> does not respond (process is hung)
  -m, --mix-native-frames   set jstack to print both java and native frames (mixed mode)
  -l, --lock-info           set jstack with long listing. Prints additional information about locks
  -h, --help                display this help and exit
  delay                     the delay between updates in seconds
  count                     the number of updates
                            delay/count arguments imitates the style of vmstat command
EOF

    exit $1
}

################################################################################
# Check os support
################################################################################

uname | grep '^Linux' -q || fatal "Error: $PROG only support Linux, not support `uname` yet!"

################################################################################
# parse options
################################################################################

readonly ARGS=`getopt -n "$PROG" -a -o p:c:a:s:Fmlh -l count:,pid:,append-file:,jstack-path:,force,mix-native-frames,lock-info,help -- "$@"`
[ $? -ne 0 ] && usage 1
eval set -- "${ARGS}"

while true; do
    case "$1" in
    -c|--count)
        count="$2"
        shift 2
        ;;
    -p|--pid)
        pid="$2"
        shift 2
        ;;
    -a|--append-file)
        append_file="$2"
        shift 2
        ;;
    -s|--jstack-path)
        jstack_path="$2"
        shift 2
        ;;
    -F|--force)
        force=-F
        shift 1
        ;;
    -m|--mix-native-frames)
        mix_native_frames=-m
        shift 1
        ;;
    -l|--lock-info)
        more_lock_info=-l
        shift 1
        ;;
    -h|--help)
        usage
        ;;
    --)
        shift
        break
        ;;
    esac
done
count=${count:-5}

update_delay=${1:-0}
[ -z "$1" ] && update_count=1 || update_count=${2:-0}
[ $update_count -lt 0 ] && update_count=0

################################################################################
# check the existence of jstack command
################################################################################

if [ -n "$jstack_path" ]; then
    [ -f "$jstack_path" ] || fatal "Error: $jstack_path is NOT found!"
    [ -x "$jstack_path" ] || fatal "Error: $jstack_path is NOT executalbe!"
elif which jstack &> /dev/null; then
    jstack_path="`which jstack`"
else
    [ -z "$JAVA_HOME" ] && fatal "Error: jstack not found on PATH and No JAVA_HOME setting! Use -s option set jstack path manually."
    [ -f "$JAVA_HOME/bin/jstack" ] || fatal "Error: jstack not found on PATH and \$JAVA_HOME/bin/jstack($JAVA_HOME/bin/jstack) file does NOT exists! Use -s option set jstack path manually."
    [ -x "$JAVA_HOME/bin/jstack" ] || fatal "Error: jstack not found on PATH and \$JAVA_HOME/bin/jstack($JAVA_HOME/bin/jstack) is NOT executalbe! Use -s option set jstack path manually."
    jstack_path="$JAVA_HOME/bin/jstack"
fi

################################################################################
# biz logic
################################################################################

readonly uuid=`date +%s`_${RANDOM}_$$

cleanupWhenExit() {
    rm /tmp/${uuid}_* &> /dev/null
}
trap "cleanupWhenExit" EXIT

printStackOfThreads() {
    local line
    local counter=0
    while IFS=" " read -a line ; do
        local pid=${line[0]}
        local threadId=${line[1]}
        local threadId0x="0x`printf %x ${threadId}`"
        local pcpu=${line[3]}
        local user=${line[4]}

        ((counter++))
        local jstackFile=/tmp/${uuid}_${pid}
        [ -f "${jstackFile}" ] || {
            if [ "${user}" == "${USER}" ]; then
                # run without sudo, when java process user is current user
                "$jstack_path" ${force} $mix_native_frames $more_lock_info ${pid} > ${jstackFile}
            elif [ $UID == 0 ]; then
                # if java process user is not current user, must run jstack with sudo
                sudo -u "${user}" "$jstack_path" ${force} $mix_native_frames $more_lock_info ${pid} > ${jstackFile}
            else
                # current user is not root user, so can not run with sudo; print error message and rerun suggestion
                redPrint "[$counter] Fail to jstack busy(${pcpu}%) thread(${threadId}/${threadId0x}) stack of java process(${pid}) under user(${user})."
                redPrint "User of java process($user) is not current user($USER), need sudo to rerun:"
                yellowPrint "    sudo ${COMMAND_LINE[@]}"
                normalPrint
                continue
            fi || {
                redPrint "[$counter] Fail to jstack busy(${pcpu}%) thread(${threadId}/${threadId0x}) stack of java process(${pid}) under user(${user})."
                normalPrint
                rm ${jstackFile}
                continue
            }
        }

        bluePrint "[$counter] Busy(${pcpu}%) thread(${threadId}/${threadId0x}) stack of java process(${pid}) under user(${user}):"

        if [ -n "$mix_native_frames" ]; then
            local sed_script="/--------------- $threadId ---------------/,/^---------------/ {
                /--------------- $threadId ---------------/b # skip first seperator line
                /^---------------/s/.*// # replace sencond seperator line to empty line
                p
            }"
        elif [ -n "$force" ]; then
            local sed_script="/^Thread ${threadId}:/,/^$/p"
        else
            local sed_script="/nid=${threadId0x} /,/^$/p"
        fi
        sed "$sed_script" -n ${jstackFile} | tee ${append_file:+-a "$append_file"}
    done
}

headInfo() {
    echo ================================================================================
    echo "$(date "+%Y-%m-%d %H:%M:%S.%N") [$((i+1))/$update_count]: ${COMMAND_LINE[@]}"
    echo ================================================================================
    echo
}

# if update_count <= 0, infinite loop till user interupted (eg: CTRL+C)
for ((i = 0; update_count <= 0 || i < update_count; ++i)); do
    [ "$i" -gt 0 ] && sleep "$update_delay"

    [ -n "$append_file" ] && headInfo >> "$append_file"
    [ "$update_count" -ne 1 ] && headInfo

    # use wide output(unlimited width), avoid trunk user column to username_fo+ or $uid alike
    ps -wwLeo pid,lwp,comm,pcpu,user --no-headers | {
        [ -z "${pid}" ] &&
        awk '$3=="java"{print $0}' ||
        awk -v "pid=${pid}" '$1==pid,$3=="java"{print $0}'
    } | sort -k4,4 -r -n | head -n "${count}" | printStackOfThreads
done

zabbix监控tomcat
开启tomcat远程监控的功能
/application/tomcat/bin/catalina.sh
CATALINA_OPTS="-Dcom.sun.management.jmxremote -Dcom.sun.management.jmxremote.authenticate=false -Dcom.sun.management.jmxremote.ssl=false -Dcom.sun.management.jmxremote.port=12345"
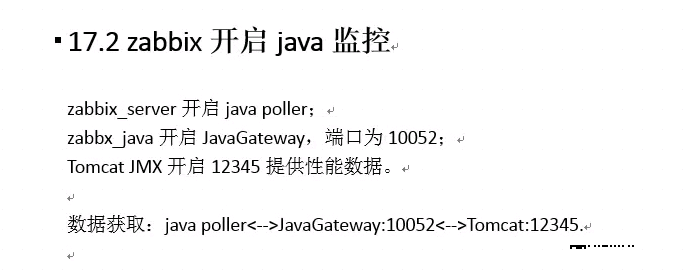
zabbix server的java支持
编译加上--enable-jave参数,或者yum安装zabbix-java-gateway
启动zabbix-java-gateway
systemctl start zabbix-java-gateway
验证

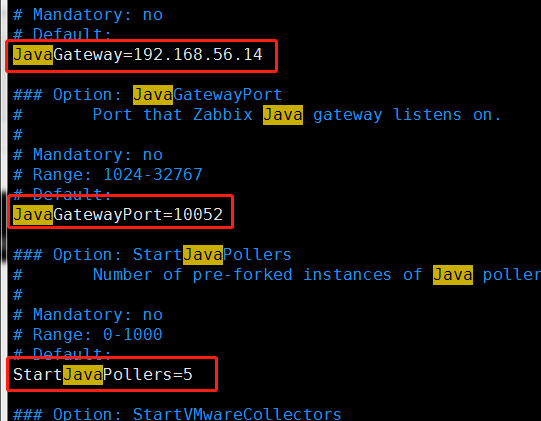
修改配置文件/etc/zabbix/zabbix_server.conf
重启zabbix-server
systemctl restart zabbix-server
验证(有这五个进程代表正常)
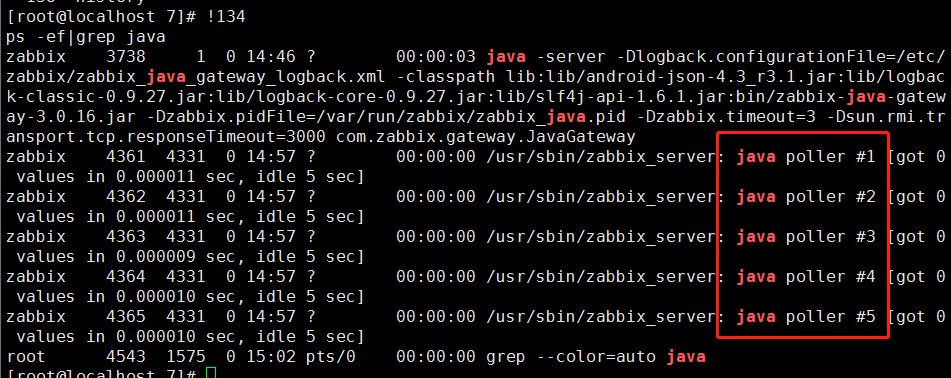
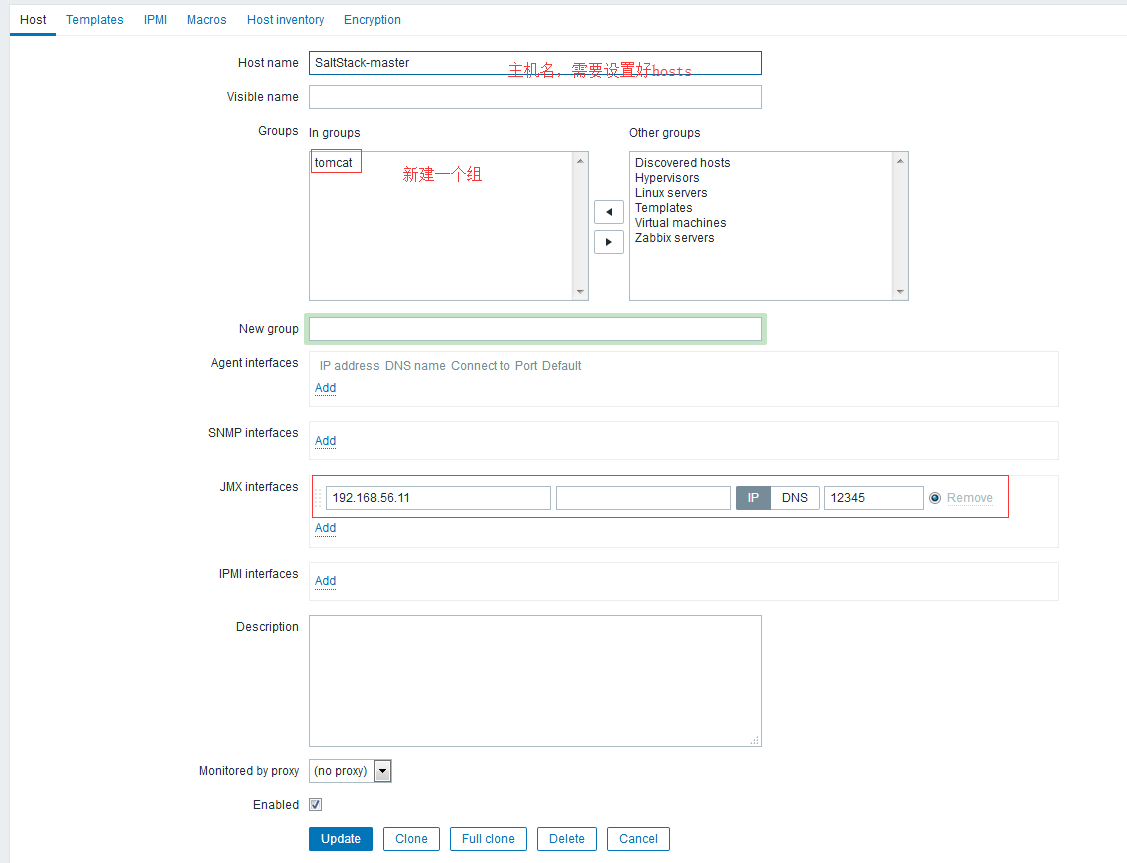
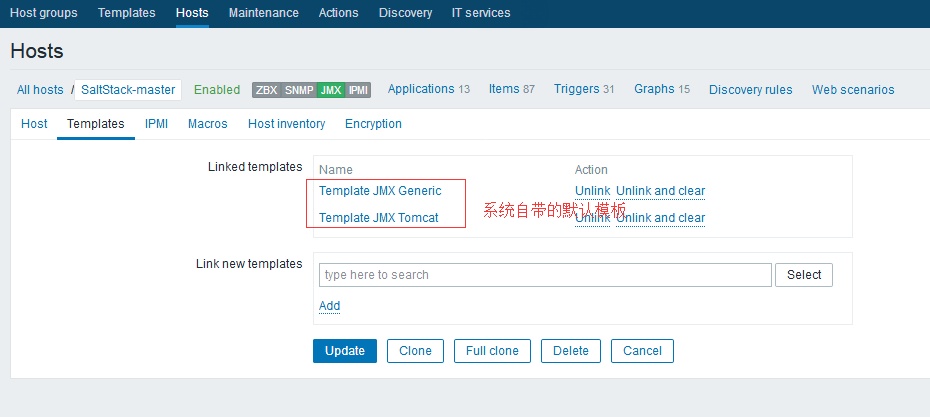
在zabbix页面添加jvm监控
tomcat调优
安全优化
降权启动
复制tomcat文件夹至普通用户文件夹并且授权给普通用户然后切换到普通用户即可使用普通用户启动tomcat
telnet管理端口保护
把默认的8005端口改成其他端口,关闭命令默认是SHUTDOWN可以修改成其他的
ajp连接端口保护
注释8009端口哪行
禁用管理端
删除默认的doc,managed目录
其他优化
性能优化
屏蔽dns查询 enableLookup=“false”
    <Connector  port="8081" protocol="HTTP/1.1"
               connectionTimeout="6000" enableLookups="false" acceptCount="800"
               redirectPort="8443" />
jvm调优
tomcat最吃内存,只要内存够,就跑的很快
如果系统资源有限,那就需要进行调优,提高资源利用率
优化catalina.sh配置文件。在catalina.sh配置文件中添加以下代码:
JAVA_OPTS="-Djava.awt.headless=true -Dfile.encoding=UTF-8 -server -Xms1024m -Xmx1024m -XX:NewSize=512m -XX:MaxNewSize=512m -XX:PermSize=512m -XX:MaxPermSize=512m"
server:一定要作为第一个参数,在多个CPU时性能佳
-Xms:初始堆内存Heap大小,使用的最小内存,cpu性能高时此值应设的大一些
-Xmx:初始堆内存heap最大值,使用的最大内存
上面两个值是分配JVM的最小和最大内存,取决于硬件物理内存的大小,建议均设为物理内存的一半。
-XX:PermSize:设定内存的永久保存区域
-XX:MaxPermSize:设定最大内存的永久保存区域
-XX:MaxNewSize:
-Xss 15120 这使得JBoss每增加一个线程(thread)就会立即消耗15M内存,而最佳值应该是128K,默认值好像是512k.
+XX:AggressiveHeap 会使得 Xms没有意义。这个参数让jvm忽略Xmx参数,疯狂地吃完一个G物理内存,再吃尽一个G的swap。
-Xss:每个线程的Stack大小
-verbose:gc 现实垃圾收集信息
-Xloggc:gc.log 指定垃圾收集日志文件
-Xmn:young generation的heap大小,一般设置为Xmx的3、4分之一
-XX:+UseParNewGC :缩短minor收集的时间
-XX:+UseConcMarkSweepGC :缩短major收集的时间

 浙公网安备 33010602011771号