

Kubernetes之使用kubeadm部署
参考:https://www.cnblogs.com/caoxb/p/11243472.html
部署需要的脚本下载
1 | git clone https://gitee.com/liuyueming/k8s-kubeadm.git |
部署虚拟机规划
1 2 3 | 192.168.1.11 k8s-master192.168.1.12 k8s-node1192.168.1.13 k8s-node2 |
备注:第1步~第8步,所有的节点都要操作,第9、10步Master节点操作,第11步Node节点操作。
如果第9、10、11步操作失败,可以通过 kubeadm reset 命令来清理环境重新安装。
1,关闭防火墙
1 2 | systemctl stop firewalldsystemctl disable firewalld |
2,关闭selinux
1 | setenforce 0 |
修改
1 | /etc/selinux/config |
修改
1 | SELINUX=disabled |
3,关闭swapoff
1 | swapoff -a |
查看是否关闭
1 | free |

4,设置主机名和hosts
修改主机名并修改/etc/hosts
1 2 3 | 192.168.1.11 k8s-master192.168.1.12 k8s-node1192.168.1.13 k8s-node2 |
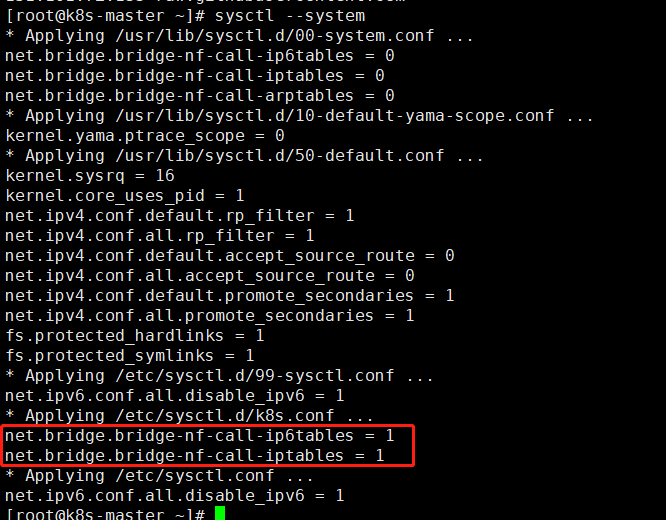
5,将桥接的IPV4流量传递到iptables的链
1 2 3 4 5 | #cat > /etc/sysctl.d/k8s.conf << EOFnet.bridge.bridge-nf-call-ip6tables = 1net.bridge.bridge-nf-call-iptables = 1EOF#sysctl --system |
6,安装docker
设置国内源并且安装
1 2 | # wget https://mirrors.aliyun.com/docker-ce/linux/centos/docker-ce.repo -O/etc/yum.repos.d/docker-ce.repo#yum -y install docker-ce-18.06.1.ce-3.el7 |
启动
1 2 | #systemctl enable docker#systemctl start docker |
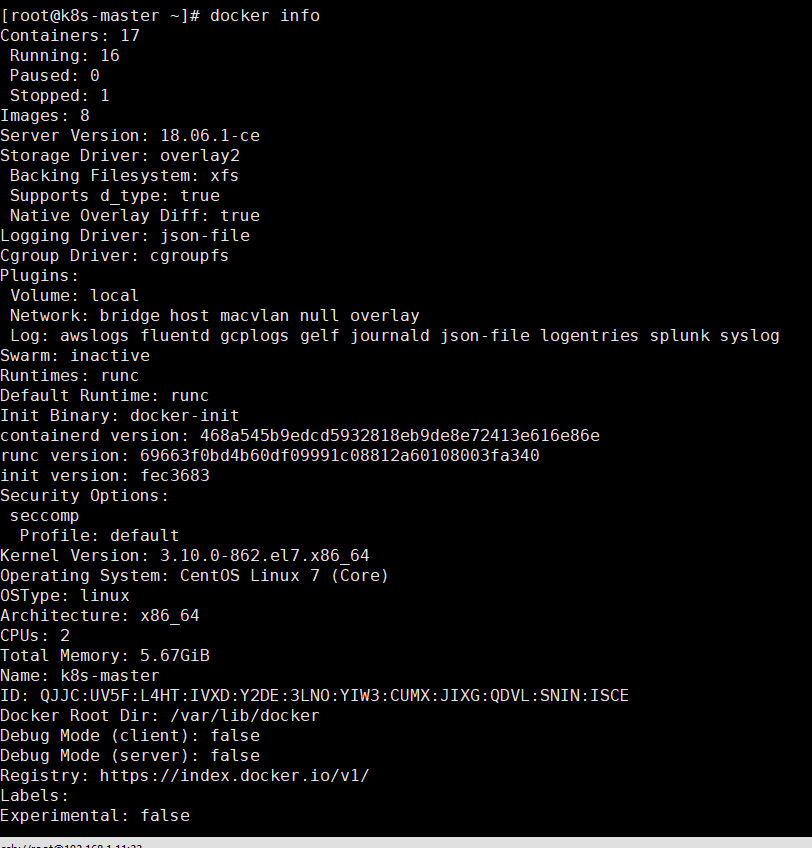
查看版本
1 | docker info |
7,添加阿里云YUM软件源
1 2 3 4 5 6 7 8 9 | cat <<EOF > /etc/yum.repos.d/kubernetes.repo[kubernetes]name=Kubernetesbaseurl=https://mirrors.aliyun.com/kubernetes/yum/repos/kubernetes-el7-x86_64/enabled=1gpgcheck=1repo_gpgcheck=1gpgkey=https://mirrors.aliyun.com/kubernetes/yum/doc/yum-key.gpg https://mirrors.aliyun.com/kubernetes/yum/doc/rpm-package-key.gpgEOF |
8,安装kubeadm,kubelet和kubectl
在部署kubernetes时,要求master node和worker node上的版本保持一致,否则会出现版本不匹配导致奇怪的问题出现。本文将介绍如何在CentOS系统上,使用yum安装指定版本的Kubernetes。
本次指定安装1.15.0版本
1 | yum -y install kubelet-1.15.0 kubeadm-1.15.0 kubectl-1.15.0 |
9,部署kubernetes master
初始化kubeadm
1 2 3 4 5 6 | kubeadm init \--apiserver-advertise-address=192.168.1.11 \--image-repository registry.aliyuncs.com/google_containers \--kubernetes-version v1.15.0 \ --service-cidr=10.1.0.0/16 \ --pod-network-cidr=10.244.0.0/16 |
PS:--apiserver-advertise-address参数指定master主机ip
--image-repository指定源为阿里云
1 | --kubernetes-version指定版本号<br> --service-cidr#指定proxy的网段 |
1 | --pod-network-cidr指定pod的网段 |
出现以下提示表示初始化正确

建议至少2 cpu ,2G
查看镜像
1 | docker images |

使用kubectl工具,按照提示执行以下命令
1 2 3 | mkdir -p $HOME/.kube sudo cp -i /etc/kubernetes/admin.conf $HOME/.kube/config sudo chown $(id -u):$(id -g) $HOME/.kube/config |
设置自启动
1 2 | systemctl status kubeletsystemctl start kubelet |
PS:kubeadm不是需要开机启动kubelet否则集群不启动
下面可以使用kubectl命令了
1 | kubectl get node |

是没有准备状态
10,安装Pod网络插件
1 | kubectl apply -f https://raw.githubusercontent.com/coreos/flannel/a70459be0084506e4ec919aa1c114638878db11b/Documentation/kube-flannel.yml |

如提示无法无法连接设置host
1 | 151.101.72.133 raw.githubusercontent.com |
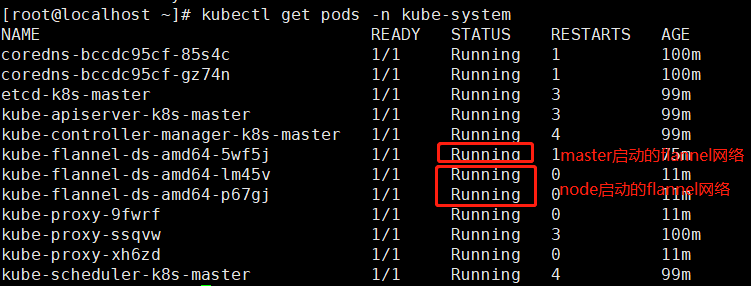
查看部署是否成功
1 | kubectl get pods -n kube-system |

如果下载镜像或者其他原因导致没有正常running可以删除在试一次
1 | kubectl delete -f kube-flannel.yml |
等一会再查看
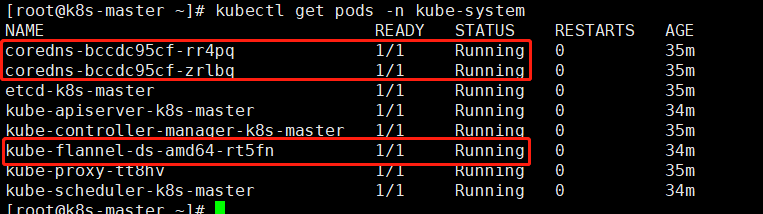
master处于准备好状态

如果安装失败了重新清理环境再次安装
1 | kubeadm reset |
需要输入y确定
11,node加入集群
在node节点输入
1 2 | kubeadm join 192.168.1.11:6443 --token xzkdip.74o642dhjuuw68ud \ --discovery-token-ca-cert-hash sha256:d695ea721c93c54c38579f69ac8f4e2adec3c7b457f75bc6689e806ad39d1b81 |
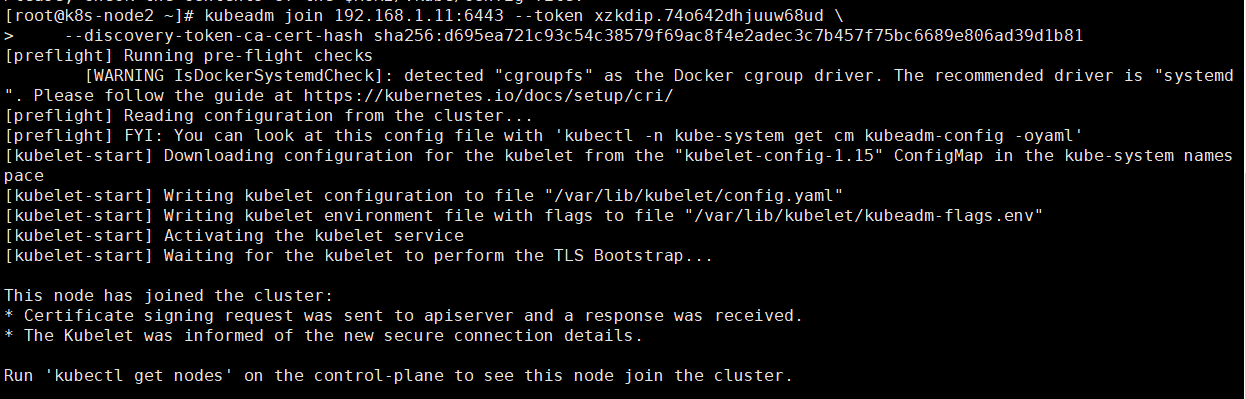
通过master节点查看node发现已经加入集群
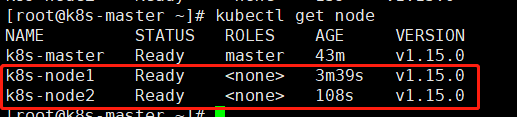
如果没有显示Ready状态可以在master查看
两个node节点的flannel需要显示Running状态如果是其他错误状态可能是网络原因导致镜像未下载,需要在node节点重置一下再运行加入集群命令
1 | kubeadm reset |
12,测试kubernetes集群
在master上面创建运行
1 2 3 4 5 6 | #创建一个deployment名称为nginx使用镜像未nginxkubectl create deployment nginx --image=nginx#创建一个service对应的deloyment为nginx 集群内部端口为80对外使用NodePort暴露端口kubectl expose deployment nginx --port=80 --type=NodePort#查看pod和svckubectl get pod,svc |
如果pod无法启动可以使用以下命令查看日志判断原因,最后参数为pod名称
1 | kubectl describe pod nginx-554b9c67f9-9kv6x |
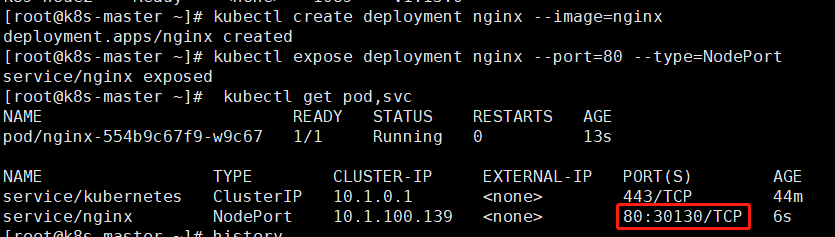
通过web页面访问
1 | http://192.168.1.11:30130/ |
13,安装dashboard
下载dashboard.yaml
1 | wget https://raw.githubusercontent.com/kubernetes/dashboard/v1.10.1/src/deploy/recommended/kubernetes-dashboard.yaml |
修改

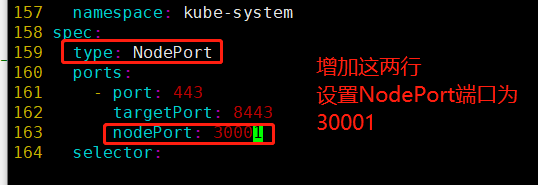
修改后的文档内容
1 2 3 4 5 6 7 8 9 10 11 12 13 14 15 16 17 18 19 20 21 22 23 24 25 26 27 28 29 30 31 32 33 34 35 36 37 38 39 40 41 42 43 44 45 46 47 48 49 50 51 52 53 54 55 56 57 58 59 60 61 62 63 64 65 66 67 68 69 70 71 72 73 74 75 76 77 78 79 80 81 82 83 84 85 86 87 88 89 90 91 92 93 94 95 96 97 98 99 100 101 102 103 104 105 106 107 108 109 110 111 112 113 114 115 116 117 118 119 120 121 122 123 124 125 126 127 128 129 130 131 132 133 134 135 136 137 138 139 140 141 142 143 144 145 146 147 148 149 150 151 152 153 154 155 156 157 158 159 160 161 162 163 164 165 | # Copyright 2017 The Kubernetes Authors.## Licensed under the Apache License, Version 2.0 (the "License");# you may not use this file except in compliance with the License.# You may obtain a copy of the License at## http://www.apache.org/licenses/LICENSE-2.0## Unless required by applicable law or agreed to in writing, software# distributed under the License is distributed on an "AS IS" BASIS,# WITHOUT WARRANTIES OR CONDITIONS OF ANY KIND, either express or implied.# See the License for the specific language governing permissions and# limitations under the License.# ------------------- Dashboard Secret ------------------- #apiVersion: v1kind: Secretmetadata: labels: k8s-app: kubernetes-dashboard name: kubernetes-dashboard-certs namespace: kube-systemtype: Opaque---# ------------------- Dashboard Service Account ------------------- #apiVersion: v1kind: ServiceAccountmetadata: labels: k8s-app: kubernetes-dashboard name: kubernetes-dashboard namespace: kube-system---# ------------------- Dashboard Role & Role Binding ------------------- #kind: RoleapiVersion: rbac.authorization.k8s.io/v1metadata: name: kubernetes-dashboard-minimal namespace: kube-systemrules: # Allow Dashboard to create 'kubernetes-dashboard-key-holder' secret.- apiGroups: [""] resources: ["secrets"] verbs: ["create"] # Allow Dashboard to create 'kubernetes-dashboard-settings' config map.- apiGroups: [""] resources: ["configmaps"] verbs: ["create"] # Allow Dashboard to get, update and delete Dashboard exclusive secrets.- apiGroups: [""] resources: ["secrets"] resourceNames: ["kubernetes-dashboard-key-holder", "kubernetes-dashboard-certs"] verbs: ["get", "update", "delete"] # Allow Dashboard to get and update 'kubernetes-dashboard-settings' config map.- apiGroups: [""] resources: ["configmaps"] resourceNames: ["kubernetes-dashboard-settings"] verbs: ["get", "update"] # Allow Dashboard to get metrics from heapster.- apiGroups: [""] resources: ["services"] resourceNames: ["heapster"] verbs: ["proxy"]- apiGroups: [""] resources: ["services/proxy"] resourceNames: ["heapster", "http:heapster:", "https:heapster:"] verbs: ["get"]---apiVersion: rbac.authorization.k8s.io/v1kind: RoleBindingmetadata: name: kubernetes-dashboard-minimal namespace: kube-systemroleRef: apiGroup: rbac.authorization.k8s.io kind: Role name: kubernetes-dashboard-minimalsubjects:- kind: ServiceAccount name: kubernetes-dashboard namespace: kube-system---# ------------------- Dashboard Deployment ------------------- #kind: DeploymentapiVersion: apps/v1metadata: labels: k8s-app: kubernetes-dashboard name: kubernetes-dashboard namespace: kube-systemspec: replicas: 1 revisionHistoryLimit: 10 selector: matchLabels: k8s-app: kubernetes-dashboard template: metadata: labels: k8s-app: kubernetes-dashboard spec: containers: - name: kubernetes-dashboard #image: k8s.gcr.io/kubernetes-dashboard-amd64:v1.10.1 image: lizhenliang/kubernetes-dashboard-amd64:v1.10.1 ports: - containerPort: 8443 protocol: TCP args: - --auto-generate-certificates # Uncomment the following line to manually specify Kubernetes API server Host # If not specified, Dashboard will attempt to auto discover the API server and connect # to it. Uncomment only if the default does not work. # - --apiserver-host=http://my-address:port volumeMounts: - name: kubernetes-dashboard-certs mountPath: /certs # Create on-disk volume to store exec logs - mountPath: /tmp name: tmp-volume livenessProbe: httpGet: scheme: HTTPS path: / port: 8443 initialDelaySeconds: 30 timeoutSeconds: 30 volumes: - name: kubernetes-dashboard-certs secret: secretName: kubernetes-dashboard-certs - name: tmp-volume emptyDir: {} serviceAccountName: kubernetes-dashboard # Comment the following tolerations if Dashboard must not be deployed on master tolerations: - key: node-role.kubernetes.io/master effect: NoSchedule---# ------------------- Dashboard Service ------------------- #kind: ServiceapiVersion: v1metadata: labels: k8s-app: kubernetes-dashboard name: kubernetes-dashboard namespace: kube-systemspec: type: NodePort ports: - port: 443 targetPort: 8443 nodePort: 30001 selector: k8s-app: kubernetes-dashboard |
修改以后安装
1 | kubectl apply -f kubernetes-dashboard.yaml |

查看是否运行
1 | kubectl get pods -n kube-system |
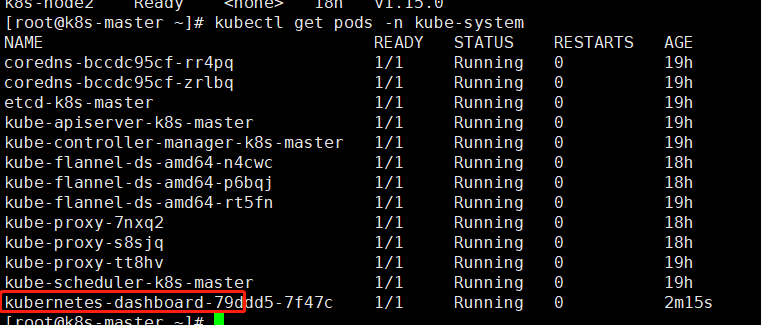
启动了30001端口

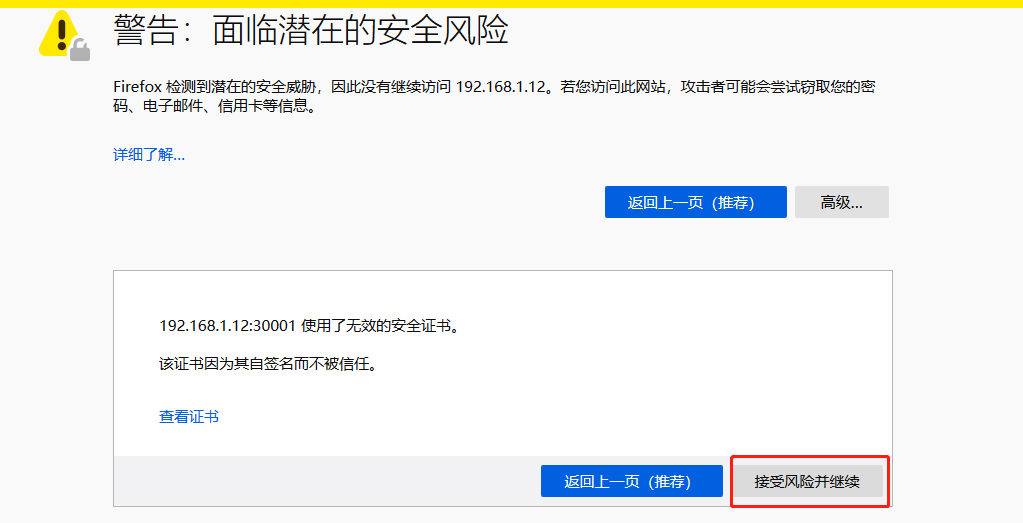
需要使用https访问
1 | https://192.168.1.12:30001/ |
页面不信任
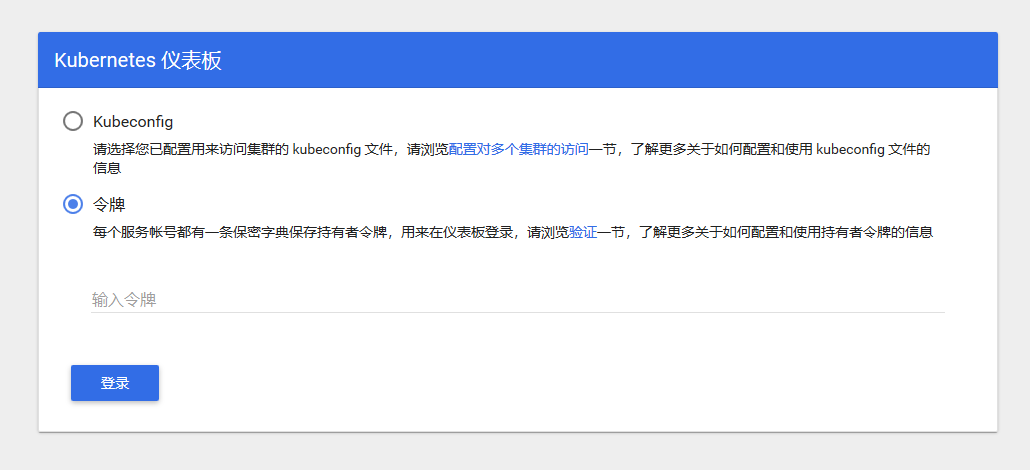
使用令牌登录,下面创建用户和生成令牌
创建面向应用的用户
1 | kubectl create serviceaccount dashboard-admin -n kube-system |
集群角色绑定,设置最高的管理员权限
1 | kubectl create clusterrolebinding dashboard-admin --clusterrole=cluster-admin --serviceaccount=kube-system:dashboard-admin |
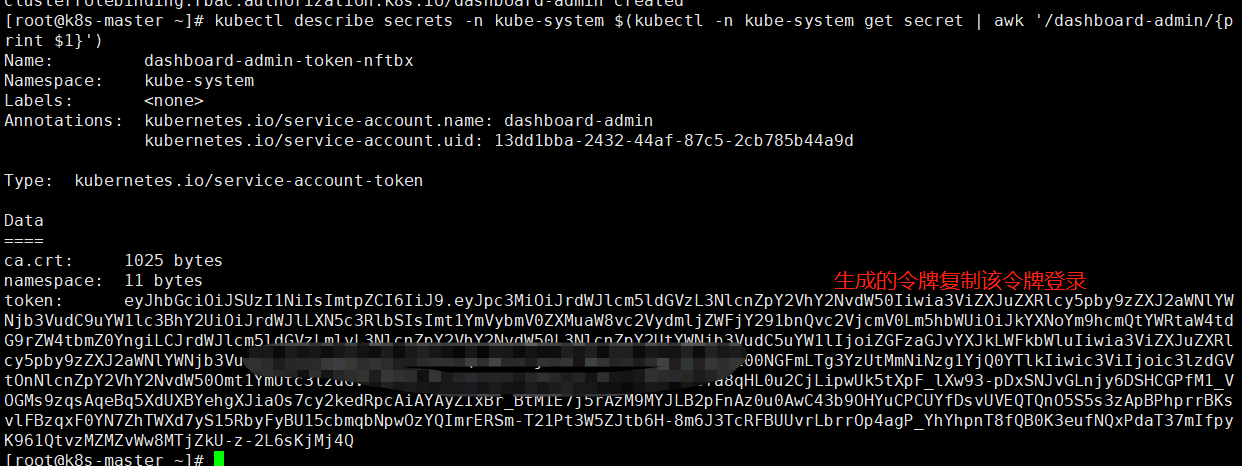
获取登录的token令牌
1 | kubectl describe secrets -n kube-system $(kubectl -n kube-system get secret | awk '/dashboard-admin/{print $1}') |


【推荐】国内首个AI IDE,深度理解中文开发场景,立即下载体验Trae
【推荐】编程新体验,更懂你的AI,立即体验豆包MarsCode编程助手
【推荐】抖音旗下AI助手豆包,你的智能百科全书,全免费不限次数
【推荐】轻量又高性能的 SSH 工具 IShell:AI 加持,快人一步
· SQL Server 2025 AI相关能力初探
· Linux系列:如何用 C#调用 C方法造成内存泄露
· AI与.NET技术实操系列(二):开始使用ML.NET
· 记一次.NET内存居高不下排查解决与启示
· 探究高空视频全景AR技术的实现原理
· 阿里最新开源QwQ-32B,效果媲美deepseek-r1满血版,部署成本又又又降低了!
· AI编程工具终极对决:字节Trae VS Cursor,谁才是开发者新宠?
· 开源Multi-agent AI智能体框架aevatar.ai,欢迎大家贡献代码
· Manus重磅发布:全球首款通用AI代理技术深度解析与实战指南
· 被坑几百块钱后,我竟然真的恢复了删除的微信聊天记录!
2018-12-17 Ansible自动化运维之介绍安装与简单使用