Docker Compose一键部署Nginx反向代理Tomcat集群
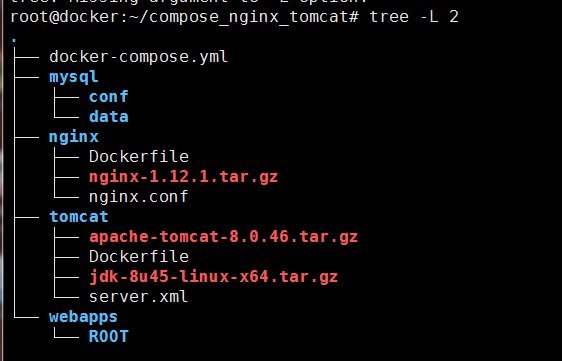
目录结构如下
mysql/conf/my.cnf
[mysqld]
user=mysql
port=3306
datadir=/var/lib/mysql
socket=/var/lib/mysql/mysql.sock
pid-file=/var/run/mysql/mysql.pid
log_error=/var/log/mysql/error.log
character_set_server = utf8
max_connections=3600
nginx/Dockerfile
FROM centos:6
MAINTAINER lizhenliang
RUN yum install -y gcc gcc-c++ make openssl-devel pcre-devel
ADD nginx-1.12.1.tar.gz /tmp
RUN cd /tmp/nginx-1.12.1 && ./configure --prefix=/usr/local/nginx && make -j 2 && make install
RUN rm -f /usr/local/nginx/conf/nginx.conf
COPY nginx.conf /usr/local/nginx/conf

EXPOSE 80
CMD ["/usr/local/nginx/sbin/nginx", "-g", "daemon off;"]
nginx/nginx.conf
user  root;
worker_processes  auto;

error_log  logs/error.log  info;

pid        logs/nginx.pid;


events {
    use epoll;
}

http {

    include       mime.types;
    default_type  application/octet-stream;

    log_format  main '$remote_addr - $remote_user [$time_local] "$request" '
                      '$status $body_bytes_sent "$http_referer" '
                      '"$http_user_agent" "$http_x_forwarded_for"';

    access_log logs/access.log main;
    sendfile        on;
    keepalive_timeout  65;

    upstream www.example.com {
        #ip_hash;
        server tomcat01:8080;
	server tomcat02:8080;
	server tomcat03:8080;
    }

    server {
        listen 80;
        server_name localhost;

	location / {
	    proxy_pass http://www.example.com;
	}

        location ~ \.(html|css|js|jpg|png|gif)$ {
            root /opt/webapps/ROOT;
        }
    }
}
tomcat/Dockerfile
FROM centos:6
MAINTAINER lizhenliang
ADD jdk-8u45-linux-x64.tar.gz /usr/local
ENV JAVA_HOME /usr/local/jdk1.8.0_45
ADD apache-tomcat-8.0.46.tar.gz /usr/local
COPY server.xml /usr/local/apache-tomcat-8.0.46/conf

EXPOSE 8080
ENTRYPOINT ["/usr/local/apache-tomcat-8.0.46/bin/catalina.sh", "run"]
docker-compose.yml
version: '3'
services:
  nginx:
    hostname: nginx
    build:
      context: ./nginx
      dockerfile: Dockerfile
    ports:
      - 80:80
    links:
      - tomcat01:tomcat01
      - tomcat02:tomcat02
      - tomcat03:tomcat03
    volumes:
      - ./webapps:/opt/webapps
    depends_on:
      - mysql
      - tomcat01
      - tomcat02
      - tomcat03

  tomcat01:
    hostname: tomcat01
    build: ./tomcat
    links:
      - mysql:mysql-db
    volumes:
      - ./webapps:/usr/local/apache-tomcat-8.0.46/webapps

  tomcat02:
    hostname: tomcat02
    build: ./tomcat
    links:
      - mysql:mysql-db
    volumes:
      - ./webapps:/usr/local/apache-tomcat-8.0.46/webapps

  tomcat03:
    hostname: tomcat03
    build: ./tomcat
    links:
      - mysql:mysql-db
    volumes:
      - ./webapps:/usr/local/apache-tomcat-8.0.46/webapps

  mysql:
    hostname: mysql
    image: mysql:5.6
    ports:
      - 3306:3306
    volumes:
      - ./mysql/conf:/etc/mysql/conf.d
      - ./mysql/data:/var/lib/mysql
    environment:
      MYSQL_ROOT_PASSWORD: 123456
      MYSQL_DATABASE: db
      MYSQL_USER: user
      MYSQL_PASSWORD: user123
构建在后台运行
docker-compose up -d
webapps的ROOT目录放一个jsp文档index.jsp
启动后访问测试
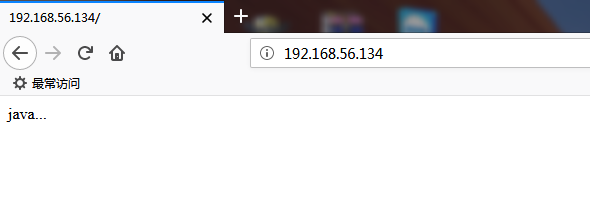
其实后端是三台tomcat提供服务
进入nginx容器修改nginx配置文件
docker exec -it compose_nginx_tomcat_nginx_1 bash
添加内容显示后端代理的地址

PS:修改后需要退出容器使用docker-compose restart重启才能使配置生效,在容器内重启nginx不生效
刷新即可看到负载均衡
停止运行的容器
docker-compose stop

 浙公网安备 33010602011771号