
实验1:SDN拓扑实验
实验1:SDN拓扑实验
一、实验目的
- 能够使用源码安装Mininet;
- 能够使用Mininet的可视化工具生成拓扑;
- 能够使用Mininet的命令行生成特定拓扑;
- 能够使用Mininet交互界面管理SDN拓扑;
- 能够使用Python脚本构建SDN拓扑。
二、实验环境
- 下载虚拟机软件Oracle VisualBox 或 VMware;
- 在虚拟机中安装Ubuntu 20.04 Desktop amd64;
三、实验要求
(一)基本要求
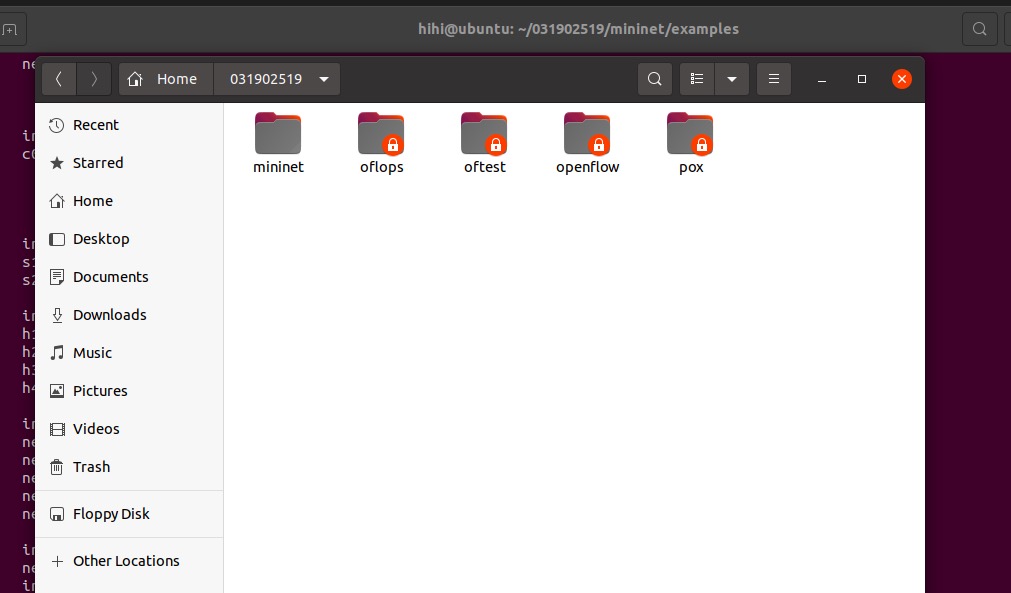
- 在Ubuntu系统的home目录下创建一个目录,目录命名为学号。
- 在创建的目录下,完成Mininet的源码安装。
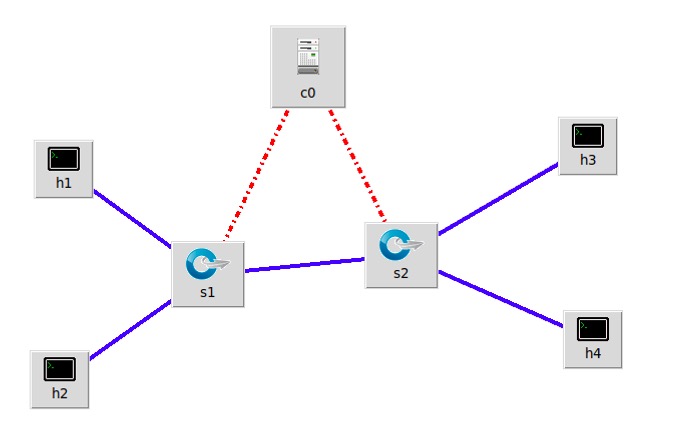
- 使用Mininet可视化工具,生成下图所示的拓扑,并保存拓扑文件名为学号.py。
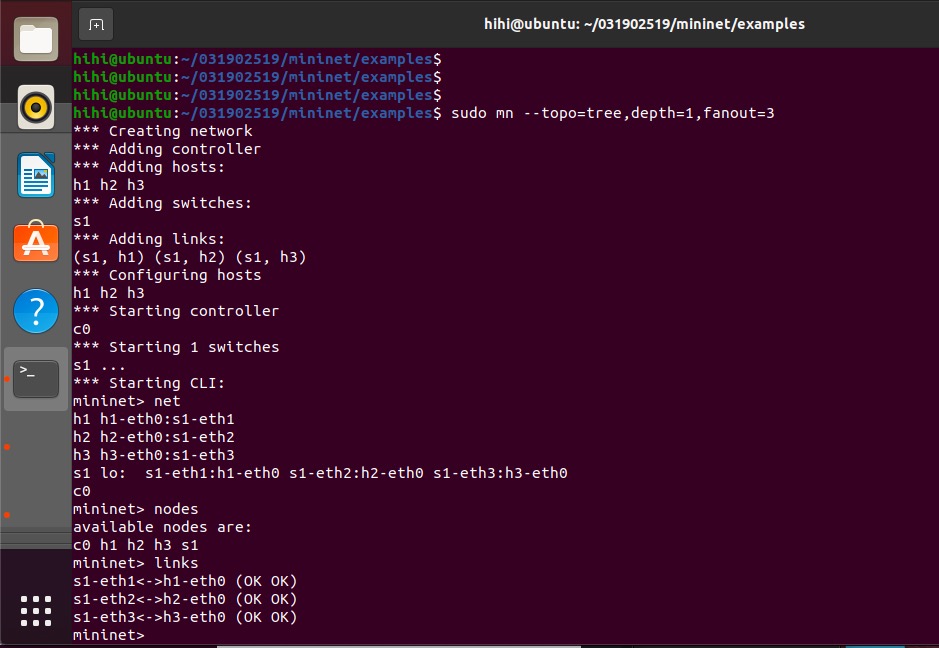
- 使用Mininet的命令行生成如下拓扑:
- 3台交换机,每个交换机连接1台主机,3台交换机连接成一条线。

- 3台主机,每个主机都连接到同1台交换机上。
- 3台交换机,每个交换机连接1台主机,3台交换机连接成一条线。
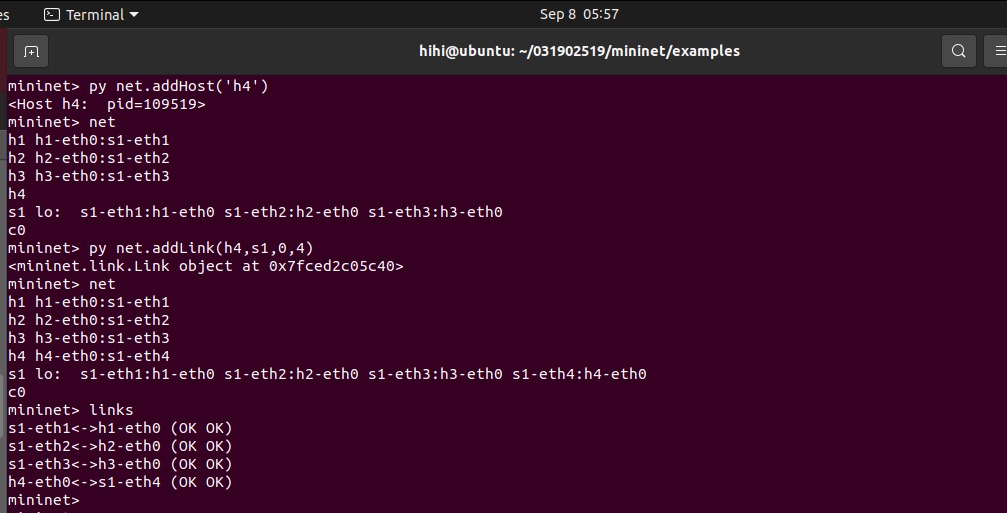
- 在4 b)的基础上,在Mininet交互界面上新增1台主机并且连接到交换机上,再测试新拓扑的连通性。
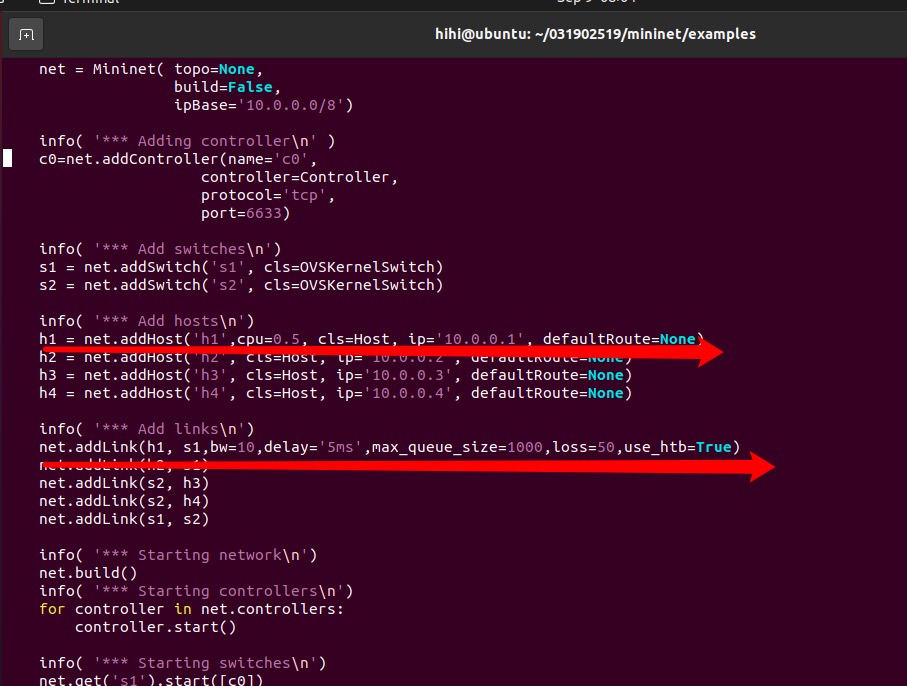
- 编辑(一)中第3步保存的Python脚本,添加如下网络性能限制,生成拓扑:
- h1的cpu最高不超过50%;
- h1和s1之间的链路带宽为10,延迟为5ms,最大队列大小为1000,损耗率50。
进阶要求
-
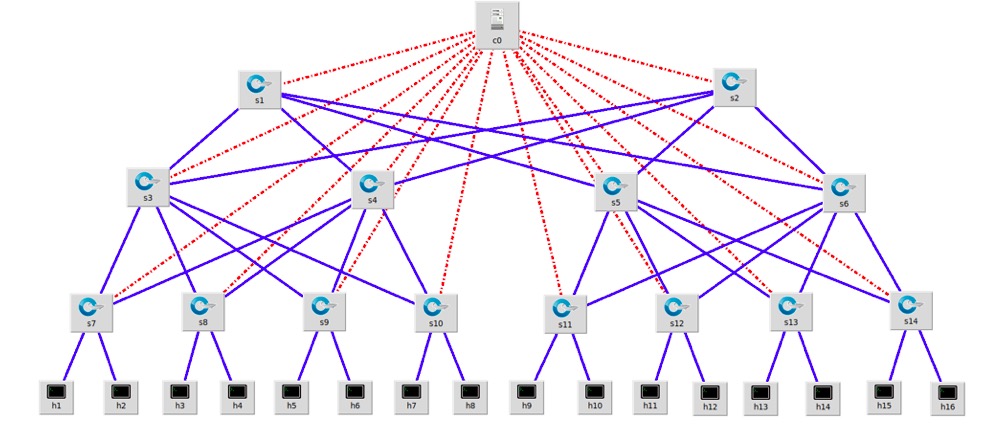
编写Python脚本,生成如下数据中心网络拓扑,要求:
-
编写.py拓扑文件,命名为“学号_fattree.py”;
-
必须通过Mininet的custom参数载入上述文件,不得直接使用miniedit.py生成的.py文件;
-
设备名称必须和下图一致;
-
使用Python的循环功能实现,不得在代码中手工直接添加设备和链路。
-
python代码如下
from mininet.topo import Topo
from mininet.net import Mininet
from mininet.node import RemoteController,CPULimitedHost
from mininet.link import TCLink
from mininet.util import dumpNodeConnections

class MyTopo( Topo ):
    def __init__(self):
        #initilize topology
        Topo.__init__(self)

        f1=2
        f2=f1*2
        f3=f2*2
        s1=[]
        s2=[]
        s3=[]
        # set up the firt floor of switch, and then put in the s1
        for i in range(f1):
            sw=self.addSwitch('s{}'.format(i+1))
            s1.append(sw)

        #set up the second floor of switch, and then put in the s2
        for i in range(f2):
            sw=self.addSwitch('s{}'.format(i+1+f1))
            s2.append(sw)

        #set up the third floor of switch , and then put in the s3
        for i in range(f3):
            sw=self.addSwitch('s{}'.format(i+1+f2+f1))
            s3.append(sw)


        #switch of s1 connect the switch of s2
        for g in range(f1):
            for m in range(f2):
                self.addLink(s1[g],s2[m])

        #the first  half of switch in the array-s2 connect the fist half of s3'switch
        #the second half of switch in the array-s2 connect the seocnd half of s3'swicth
        for i in range(f2):
            if i<int(f2/2):
                for k in range(int(f3/2)):
                    self.addLink(s2[i],s3[k])
            else:
                for t in range(int(f3/2),f3):
                    self.addLink(s2[i],s3[t])


        #add the host ,and then connect the swicth of s3
        node=2
        count=1
        for i in range(f3):
            for b in range(node):
                host = self.addHost('h{}'.format(count))
                self.addLink(s3[i],host)
                count+=1


topos = { 'mytopo': ( lambda: MyTopo() ) }
-
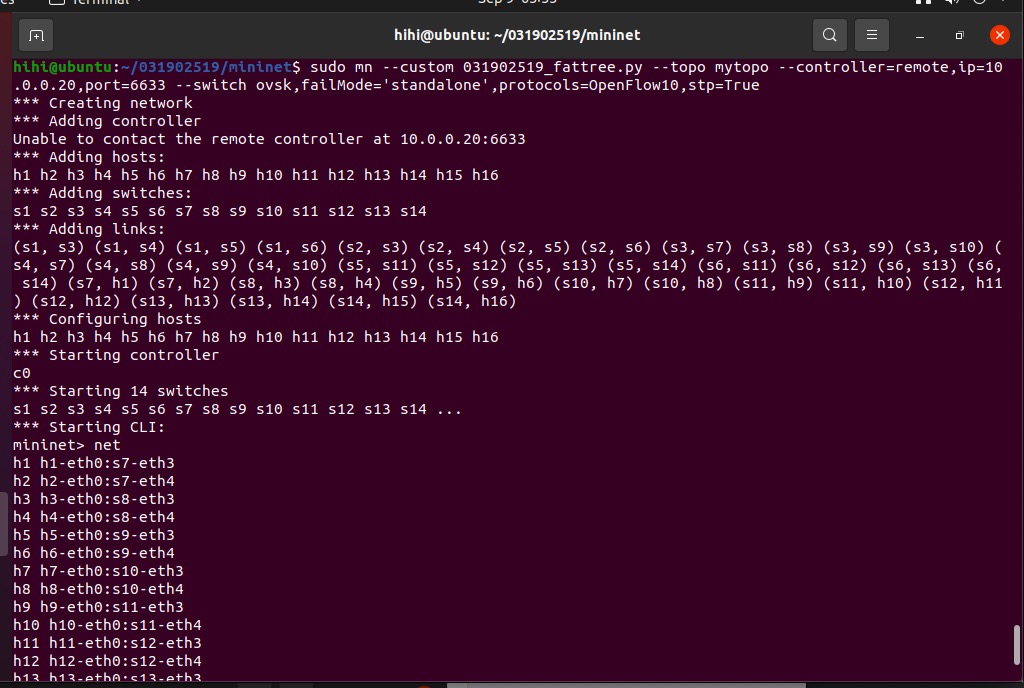
执行情况如下:


四、实验心得
掌握了解了linux操作系统下的一些指令的使用。提高了自己独立解决问题的能力,如ubuntu和vm的安装起初并不是那么顺利,网络上寻找各种下载资源,以及相关设置要求;实验按照老师pdf一步步做下来,大体上很顺利,但也有一些难点无法解决,如一些抛出异常错误,controller服务器没有关掉而继续运行其他的网络----通过搜索得知要要指令sudo mn -c先将之前的controller关闭才可以运行接下来的网络;进阶是通过vim编辑器进行python脚本的编写,期间学会了python的相关语法和vim编辑器的安装,以及编辑器下一些指令的使用。总之,这次实验学会了不少知识。

 浙公网安备 33010602011771号