vue2.0中引入UEditor的一些坑。。。。
开发后台系统的时候,富文本编辑器肯定是必不可少的,然后呢~在天朝当然要属百度编辑器(UEditor)最成熟了,功能全面,文档齐全(相对),ui优美(。。。,对于程序员来说)等等许多方面(MMP,还不是因为有中文文档和国人使用经验参考),所以使用百度编辑器就是不二之选了,早前再angular1的项目中使用过UE,主要是由后端配置好用,直接扔一个demo给我们,照着插入就OK了,现在呢,只能自己封装个组件咯,网上其实已经有很多关于在vue项目中引入UE的博文了,我也是看着那些博文摸索过来的,也遇到了一些文中没有提到的坑,所以记录一下,希望有用;
-
vue项目中引入UE的方式:
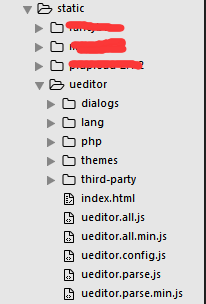
首先,当然是去官网把ue的本地下载下来,使用vue-cli构建项目的话通常都是把外部插件放到static文件夹中,所以目录就会呈现如下:
 无视前面几个文件夹
 -
配置Ueditor.config.js
主要的还是
···var URL = window.UEDITOR_HOME_URL || '/static/ueditor/';···
其他的配置大可看看官方文档设置一下,常用的默认宽高、默认功能按钮、层级(zIndex,我就遇到过这个坑。。)
- 创建components
在components中创建基础的vue组件模板,引入ueditor的主要文件,然后就是一些初始话的设置,这里就直接上代码了,网上也都一样
<template>
  <div>
    <!--下面通过传递进来的id完成初始化-->
    <script :id="randomId"  type="text/plain"></script>
  </div>
</template>

<script>
    //主体文件引入
    import '../../../static/ueditor/ueditor.config.js'
    import '../../../static/ueditor/ueditor.all.min.js'
    import '../../../static/ueditor/lang/zh-cn/zh-cn.js'

export default {
    name: 'UE',
    props: {
        value: {
            default: function() {
                return ''
            }
        },
        //配置可以传递进来
        ueditorConfig: {}
    },
    data() {
        return {
            //每个编辑器生成不同的id,以防止冲突
            randomId: 'editor_' + (Math.random() * 100000000000000000),
            //编辑器实例
            instance: null,
            ready: false,
        };
    },
    watch: {
        value: function(val, oldVal) {
            if (val != null  && this.ready) {
                this.instance = UE.getEditor(this.randomId, this.ueditorConfig);
                this.instance.setContent(val);
            }
        }
    },
    //此时--el挂载到实例上去了,可以初始化对应的编辑器了
    mounted() {
        this.initEditor();
    },

    beforeDestroy() {
        // 组件销毁的时候,要销毁 UEditor 实例
        if(this.instance !== null && this.instance.destroy) {
            this.instance.destroy();
        }
    },
    methods: {
        initEditor() {
            const _this = this;
            //dom元素已经挂载上去了
            this.$nextTick(() => {
                this.instance = UE.getEditor(this.randomId, this.ueditorConfig);
                // 绑定事件,当 UEditor 初始化完成后,将编辑器实例通过自定义的 ready 事件交出去
                this.instance.addListener('ready', () => {
                    this.ready = true;
                    this.$emit('ready', this.instance);
                });
            });
        },
        setText(con) {
            this.instance = UE.getEditor(this.randomId, this.ueditorConfig);
            this.instance.setContent(con);
        },
    }
};

</script>

<style>
</style>
使用方式:
<template>
    <div class="box-container">
        <Ueditor @ready="editorReady" ref="ue" :value="defaultMSG" :ueditorConfig="config" style="width:100%;"></Ueditor>
    </div>
</template>
<script>
    import Ueditor from '@/components/Ueditor';
    export default {
        data() {
          return {
            defaultMSG: null,
            form: {
                content: ''
            },
            config: {
                initialFrameHeight: 500
            }
          };
        },
        created() {
            this.getInfo();
        },
        components: {
            Ueditor
        },
        methods: {
            getInfo() {
                getCategoryInfo(this.form.cateId).then(res => {
                    if (res.message =='SUCCESS') {
                        this.form = Object.assign({}, res.data);
                        this.defaultMSG = this.form.content;
                    } else {
                        this.$message({
                          message: res.message,
                          type: 'error',
                          duration: 5 * 1000
                        });
                    }
                })
            },

            editorReady(instance) {
                instance.setContent(this.form.content);
                instance.addListener('contentChange', () => {
                    this.form.content = instance.getContent();
                });
            },

        }
    }
</script>
<style scoped lang="scss">

</style>
- 这样基本上就可以将百度编辑器引入到各个页面中去了,这是修改后的版本,介绍下遇到的坑
第一个问题:异步请求的数据如何赋值到content中去:
这一步也跟一个之前遇到的坑有关,就是:vue2父组件传递props异步数据到子组件的问题,之后在整理下再发个博文吧;
为什么会有这个问题呢? 因为之前傻乎乎的在ueditor组件上绑定的值是 form.content,然后监听contentChange时赋值给的还是form.content,这样就导致了内容一直刷新,使得光标会自动跳到最前方,错误的示范如下:
//在使用中:
 <Ueditor @ready="editorReady" ref="ue" :value="form.content" :ueditorConfig="config" style="width:100%;"></Ueditor>

editorReady(instance) {

    instance.setContent(this.form.content);
    instance.addListener('contentChange', () => {
        this.form.content = instance.getContent();
    });
},
   //就这样,在ueditor中已经watch了value,导致form.content一变,就处罚setContent,然后又触发了contentChange事件,又赋值了一遍。。。。如此就导致内容一直更新,光标一直会移动到最前放。。。所以,最主要的问题还是在父级组件中设置一个defaultMSG来保存默认值,作为第一次内容的填充,填充完之后的修改就不关它啥事了。。。
第二个问题:使用watch添加默认值的时候,在watch触发时,ueditor却还没有ready,会导致报错,各种奇葩的错,所以呢,

添加一个ready属性,在initEditor的时候监听ready事件,在其中赋值 this.ready = true;就可以避免那些乱七八糟的错误了。
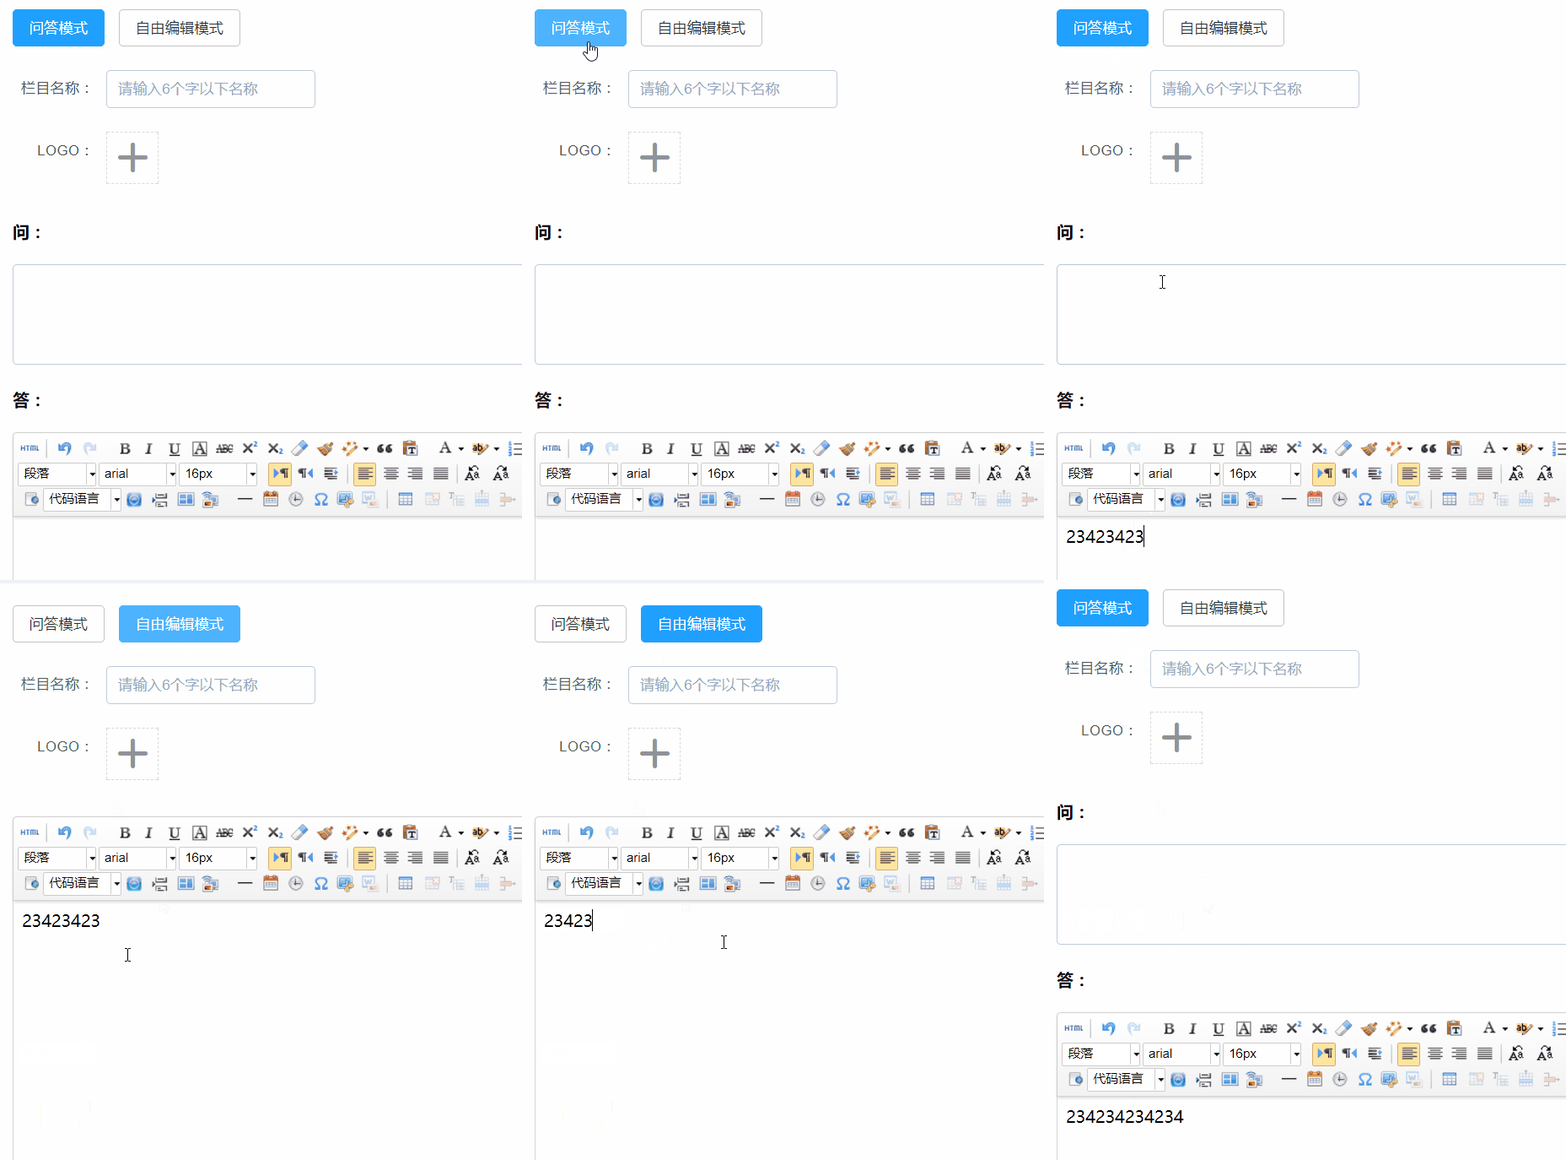
第三个问题:在一个没有默认值的时候,需要清空content的内容时,设置defaultMSG为空是不行的,如下效果,要再切换时清空content

这时候就要用到我们在组件内添加的setText method了,使用的是vue的$refs.组件ref名来获取组件实例,并可以使用methods中的方法
this.$refs.ue.setText(''); //ue是父级在组件上加的 ref="ue"属性
第四个问题: 百度编辑器层级问题
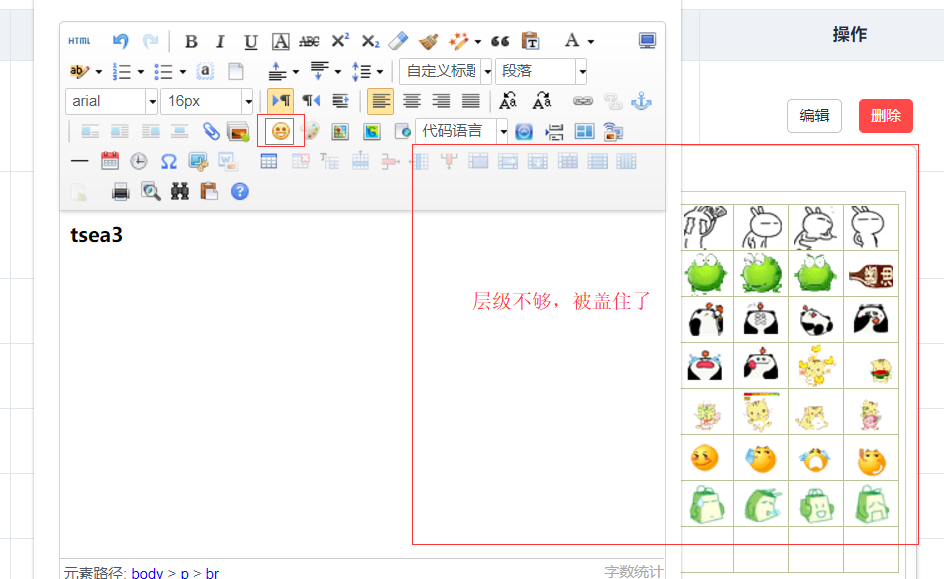
我将百度编辑器放置在element-ui的dialog中,dialog组件默认层级是2000,这就导致了UE中一些定位的下拉框层级不够,被隐藏在了下面,比如表情,字体,字号这些设置,
经过一番查找,发现UE中有个配置项 zIndex用于设置ueditor编辑器层级的基数,瞬间解决~~

哦哦,对了,还有ueditor文件上传这块的内容,由于我们用的是阿里云服务器保存图片,所以ueditor自带的上传图片功能就不能使用了,要自定义功能,这部分等下篇博文再写把,没什么干货,都是自己踩的坑,希望有用,谢谢。


