
Kubeadm高可用安装k8s 1.20.2集群
- 1. 什么是K8S
k8s全称kubernetes,这个名字大家应该都不陌生,k8s是为容器服务而生的一个可移植容器的编排管理工具,越来越多的公司正在拥抱k8s,并且当前k8s已经主导了云业务流程,推动了微服务架构等热门技术的普及和落地,正在如火如荼的发展。那么称霸容器领域的k8s究竟是有什么魔力呢?
首先,我们从容器技术谈起,在容器技术之前,大家开发用虚拟机比较多,比如vmware和openstack,我们可以使用虚拟机在我们的操作系统中模拟出多台子电脑(Linux),子电脑之间是相互隔离的,但是虚拟机对于开发和运维人员而言,存在启动慢,占用空间大,不易迁移的缺点。举一个我亲身经历过的场景吧,之前在vmware中开发了一个线下平台,为了保证每次能够顺利使用,我们就把这个虚拟机导出为OVF,然后随身携带,用的时候在服务器中部署,这里就充分体现了虚拟机的缺点。
接着,容器化技术应运而生,它不需要虚拟出整个操作系统,只需要虚拟一个小规模的环境即可,而且启动速度很快,除了运行其中应用以外,基本不消耗额外的系统资源。Docker是应用最为广泛的容器技术,通过打包镜像,启动容器来创建一个服务。但是随着应用越来越复杂,容器的数量也越来越多,由此衍生了管理运维容器的重大问题,而且随着云计算的发展,云端最大的挑战,容器在漂移。在此业务驱动下,k8s问世,提出了一套全新的基于容器技术的分布式架构领先方案,在整个容器技术领域的发展是一个重大突破与创新。
那么,K8S实现了什么?
从架构设计层面,我们关注的可用性,伸缩性都可以结合k8s得到很好的解决,如果你想使用微服务架构,搭配k8s,真的是完美,再从部署运维层面,服务部署,服务监控,应用扩容和故障处理,k8s都提供了很好的解决方案。
具体来说,主要包括以下几点:
- 服务发现与调度
- 负载均衡
- 服务自愈
- 服务弹性扩容
- 横向扩容
- 存储卷挂载
总而言之,k8s可以使我们应用的部署和运维更加方便
kubeadm是Kubernetes项目自带的及集群构建工具,负责执行构建一个最小化的可用集群以及将其启动等的必要基本步骤,kubeadm是Kubernetes集群全生命周期的管理工具,可用于实现集群的部署、升级、降级及拆除。kubeadm部署Kubernetes集群是将大部分资源以pod的方式运行,例如(kube-proxy、kube-controller-manager、kube-scheduler、kube-apiserver、flannel)都是以pod方式运行。
Kubeadm仅关心如何初始化并启动集群,余下的其他操作,例如安装Kubernetes Dashboard、监控系统、日志系统等必要的附加组件则不在其考虑范围之内,需要管理员自行部署。
Kubeadm集成了Kubeadm init和kubeadm join等工具程序,其中kubeadm init用于集群的快速初始化,其核心功能是部署Master节点的各个组件,而kubeadm join则用于将节点快速加入到指定集群中,它们是创建Kubernetes集群最佳实践的“快速路径”。另外,kubeadm token可于集群构建后管理用于加入集群时使用的认证令牌(token),而kubeadm reset命令的功能则是删除集群构建过程中生成的文件以重置回初始状态
Kubeadm安装方式自1.14版本以后,安装方法几乎没有任何变化,此博客可以尝试安装最新的k8s集群,centos采用的是7.x版本
表1-1 高可用Kubernetes集群规划
| 主机名 | IP地址 | 说明 |
|---|---|---|
| k8s-master01 ~ 03 | 192.168.40.100 ~ 103 | master节点 * 3 |
| k8s-master-lb | 192.168.40.200 | keepalived虚拟IP |
| k8s-node01 ~ 02 | 192.168.40.110 ~ 111 | worker节点 * 2 |
| 配置信息 | 备注 |
|---|---|
| 系统版本 | CentOS 7.9 |
| Docker版本 | 19.03.x |
| Pod网段 | 172.168.0.0/12 |
| Service网段 | 10.96.0.0/12 |
所有节点配置hosts,修改/etc/hosts如下:
[root@k8s-master01 ~]# cat /etc/hosts
192.168.40.100 k8s-master01
192.168.40.101 k8s-master02
192.168.40.102 k8s-master03
192.168.40.200 k8s-master-lb # 如果不是高可用集群,该IP为Master01的IP
192.168.40.110 k8s-node01
192.168.40.111 k8s-node02
curl -o /etc/yum.repos.d/CentOS-Base.repo https://mirrors.aliyun.com/repo/Centos-7.repo
yum install -y yum-utils device-mapper-persistent-data lvm2
yum-config-manager --add-repo https://mirrors.aliyun.com/docker-ce/linux/centos/docker-ce.repo

cat <<EOF > /etc/yum.repos.d/kubernetes.repo
[kubernetes]
name=Kubernetes
baseurl=https://mirrors.aliyun.com/kubernetes/yum/repos/kubernetes-el7-x86_64/
enabled=1
gpgcheck=1
repo_gpgcheck=1
gpgkey=https://mirrors.aliyun.com/kubernetes/yum/doc/yum-key.gpg https://mirrors.aliyun.com/kubernetes/yum/doc/rpm-package-key.gpg
EOF

sed -i -e '/mirrors.cloud.aliyuncs.com/d' -e '/mirrors.aliyuncs.com/d' /etc/yum.repos.d/CentOS-Base.repo
必备工具安装
yum install wget jq psmisc vim net-tools telnet yum-utils device-mapper-persistent-data lvm2 git -y
systemctl disable --now firewalld
systemctl disable --now dnsmasq
systemctl disable --now NetworkManager                        ####公有云可以不关闭

setenforce 0
sed -i 's#SELINUX=enforcing#SELINUX=disabled#g' /etc/sysconfig/selinux
sed -i 's#SELINUX=enforcing#SELINUX=disabled#g' /etc/selinux/config
swapoff -a && sysctl -w vm.swappiness=0
sed -ri '/^[^#]*swap/s@^@#@' /etc/fstab
rpm -ivh http://mirrors.wlnmp.com/centos/wlnmp-release-centos.noarch.rpm
yum install ntpdate -y
ln -sf /usr/share/zoneinfo/Asia/Shanghai /etc/localtime
echo 'Asia/Shanghai' >/etc/timezone
ntpdate time2.aliyun.com
crontab -e

*/5 * * * * /usr/sbin/ntpdate time2.aliyun.com
ulimit -SHn 65535
vim /etc/security/limits.conf

# 末尾添加如下内容
* soft nofile 655360
* hard nofile 131072
* soft nproc 655350
* hard nproc 655350
* soft memlock unlimited
* hard memlock unlimited
ssh-keygen -t rsa
for i in k8s-master01 k8s-master02 k8s-master03 k8s-node01 k8s-node02;do ssh-copy-id -i .ssh/id_rsa.pub $i;done
yum update -y --exclude=kernel* && reboot
cd /root
wget https://mirror.rackspace.com/elrepo/kernel/el7/x86_64/RPMS/kernel-ml-devel-4.19.12-1.el7.elrepo.x86_64.rpm
wget https://mirror.rackspace.com/elrepo/kernel/el7/x86_64/RPMS/kernel-ml-4.19.12-1.el7.elrepo.x86_64.rpm
从master01节点传到其他节点
for i in k8s-master02 k8s-master03 k8s-node01 k8s-node02;do scp kernel-ml-4.19.12-1.el7.elrepo.x86_64.rpm kernel-ml-devel-4.19.12-1.el7.elrepo.x86_64.rpm $i:/root/ ; done
cd /root && yum localinstall -y kernel-ml*
grub2-set-default  0 && grub2-mkconfig -o /etc/grub2.cfg
grubby --args="user_namespace.enable=1" --update-kernel="$(grubby --default-kernel)"
[root@k8s-master01 ~]# grubby --default-kernel
/boot/vmlinuz-4.19.12-1.el7.elrepo.x86_64
[root@k8s-master01 ~]# uname -a
Linux k8s-master01 4.19.12-1.el7.elrepo.x86_64 #1 SMP Fri One 20 18:33:36 EST 2018 x86_64 x86_64 x86_64 GNU/Linux
yum install ipvsadm ipset sysstat conntrack libseccomp -y
modprobe -- ip_vs
modprobe -- ip_vs_rr
modprobe -- ip_vs_wrr
modprobe -- ip_vs_sh
modprobe -- nf_conntrack
4.19版本以上添加
vim /etc/modules-load.d/ipvs.conf
# 加入以下内容
ip_vs
ip_vs_lc
ip_vs_wlc
ip_vs_rr
ip_vs_wrr
ip_vs_lblc
ip_vs_lblcr
ip_vs_dh
ip_vs_sh
ip_vs_fo
ip_vs_nq
ip_vs_sed
ip_vs_ftp
ip_vs_sh
nf_conntrack
ip_tables
ip_set
xt_set
ipt_set
ipt_rpfilter
ipt_REJECT
ipip
然后执行
systemctl enable --now systemd-modules-load.service
cat <<EOF > /etc/sysctl.d/k8s.conf
net.ipv4.ip_forward = 1
net.bridge.bridge-nf-call-iptables = 1
net.bridge.bridge-nf-call-ip6tables = 1
fs.may_detach_mounts = 1
vm.overcommit_memory=1
vm.panic_on_oom=0
fs.inotify.max_user_watches=89100
fs.file-max=52706963
fs.nr_open=52706963
net.netfilter.nf_conntrack_max=2310720

net.ipv4.tcp_keepalive_time = 600
net.ipv4.tcp_keepalive_probes = 3
net.ipv4.tcp_keepalive_intvl =15
net.ipv4.tcp_max_tw_buckets = 36000
net.ipv4.tcp_tw_reuse = 1
net.ipv4.tcp_max_orphans = 327680
net.ipv4.tcp_orphan_retries = 3
net.ipv4.tcp_syncookies = 1
net.ipv4.tcp_max_syn_backlog = 16384
net.ipv4.ip_conntrack_max = 65536
net.ipv4.tcp_max_syn_backlog = 16384
net.ipv4.tcp_timestamps = 0
net.core.somaxconn = 16384
EOF
sysctl --system
reboot
lsmod | grep --color=auto -e ip_vs -e nf_conntrack
本博客主要安装的是集群中用到的各种组件,比如Docker-ce、Kubernetes各组件等。
所有节点安装Docker-ce 19.03
yum install docker-ce-19.03.* -y
温馨提示:
由于新版kubelet建议使用systemd,所以可以把docker的CgroupDriver改成systemd
mkdir /etc/docker
cat > /etc/docker/daemon.json <<EOF
{
  "exec-opts": ["native.cgroupdriver=systemd"]
}
EOF
systemctl daemon-reload && systemctl enable --now docker
yum list kubeadm.x86_64 --showduplicates | sort -r
yum install kubeadm-1.20.2.* -y
cat >/etc/sysconfig/kubelet<<EOF
KUBELET_EXTRA_ARGS="--cgroup-driver=systemd --pod-infra-container-image=registry.cn-hangzhou.aliyuncs.com/google_containers/pause-amd64:3.2"
EOF
systemctl daemon-reload
systemctl enable --now kubelet
yum install keepalived haproxy -y
[root@k8s-master01 ~]# vim /etc/haproxy/haproxy.cfg
global
  maxconn  2000
  ulimit-n  16384
  log  127.0.0.1 local0 err
  stats timeout 30s

defaults
  log global
  mode  http
  option  httplog
  timeout connect 5000
  timeout client  50000
  timeout server  50000
  timeout http-request 15s
  timeout http-keep-alive 15s

frontend monitor-in
  bind *:33305
  mode http
  option httplog
  monitor-uri /monitor

frontend k8s-master
  bind 0.0.0.0:16443
  bind 127.0.0.1:16443
  mode tcp
  option tcplog
  tcp-request inspect-delay 5s
  default_backend k8s-master

backend k8s-master
  mode tcp
  option tcplog
  option tcp-check
  balance roundrobin
  default-server inter 10s downinter 5s rise 2 fall 2 slowstart 60s maxconn 250 maxqueue 256 weight 100
  server k8s-master01    192.168.40.100:6443  check
  server k8s-master02    192.168.40.101:6443  check
  server k8s-master03    192.168.40.102:6443  check
所有Master节点配置KeepAlived,配置不一样,注意区分 [root@k8s-master01 ~]# vim /etc/keepalived/keepalived.conf ,注意每个节点的IP和网卡(interface参数)
[root@k8s-master01 ~]# vim /etc/keepalived/keepalived.conf
! Configuration File for keepalived
global_defs {
    router_id LVS_DEVEL
script_user root
    enable_script_security
}
vrrp_script chk_apiserver {
    script "/etc/keepalived/check_apiserver.sh"
    interval 5
    weight -5
    fall 2
rise 1
}
vrrp_instance VI_1 {
    state MASTER
    interface ens33
    mcast_src_ip 192.168.40.100
    virtual_router_id 51
    priority 101
    advert_int 2
    authentication {
        auth_type PASS
        auth_pass K8SHA_KA_AUTH
    }
    virtual_ipaddress {
        192.168.40.200
    }
    track_script {
       chk_apiserver
    }
}
Master02节点的配置
[root@k8s-master02 ~]# vim /etc/keepalived/keepalived.conf

! Configuration File for keepalived
global_defs {
    router_id LVS_DEVEL
script_user root
    enable_script_security
}
vrrp_script chk_apiserver {
    script "/etc/keepalived/check_apiserver.sh"
   interval 5
    weight -5
    fall 2
rise 1
}
vrrp_instance VI_1 {
    state BACKUP
    interface ens33
    mcast_src_ip 192.168.40.101
    virtual_router_id 51
    priority 100
    advert_int 2
    authentication {
        auth_type PASS
        auth_pass K8SHA_KA_AUTH
    }
    virtual_ipaddress {
        192.168.40.200
    }
    track_script {
       chk_apiserver
    }
}
Master03节点的配置
[root@k8s-master03 ~]# vim /etc/keepalived/keepalived.conf

! Configuration File for keepalived
global_defs {
    router_id LVS_DEVEL
script_user root
    enable_script_security
}
vrrp_script chk_apiserver {
    script "/etc/keepalived/check_apiserver.sh"
 interval 5
    weight -5
    fall 2
rise 1
}
vrrp_instance VI_1 {
    state BACKUP
    interface ens33
    mcast_src_ip 192.168.40.102
    virtual_router_id 51
    priority 100
    advert_int 2
    authentication {
        auth_type PASS
        auth_pass K8SHA_KA_AUTH
    }
    virtual_ipaddress {
        192.168.40.200
    }
    track_script {
       chk_apiserver
    }
}
所有master节点配置KeepAlived健康检查文件
[root@k8s-master01 keepalived]# vim /etc/keepalived/check_apiserver.sh
#!/bin/bash

err=0
for k in $(seq 1 3)
do
    check_code=$(pgrep haproxy)
    if [[ $check_code == "" ]]; then
        err=$(expr $err + 1)
        sleep 1
        continue
    else
        err=0
        break
    fi
done

if [[ $err != "0" ]]; then
    echo "systemctl stop keepalived"
    /usr/bin/systemctl stop keepalived
    exit 1
else
    exit 0
fi
所有master添加权限
chmod +x /etc/keepalived/check_apiserver.sh
[root@k8s-master01 ~]# systemctl daemon-reload
[root@k8s-master01 ~]# systemctl enable --now haproxy
[root@k8s-master01 ~]# systemctl enable --now keepalived
重要:如果安装了keepalived和haproxy,需要测试keepalived是否是正常的
测试VIP
[root@k8s-master01 ~]# ping 192.168.40.200 -c 4
PING 192.168.40.200 (192.168.40.200) 56(84) bytes of data.
64 bytes from 192.168.40.200: icmp_seq=1 ttl=64 time=0.464 ms
64 bytes from 192.168.40.200: icmp_seq=2 ttl=64 time=0.063 ms
64 bytes from 192.168.40.200: icmp_seq=3 ttl=64 time=0.062 ms
64 bytes from 192.168.40.200: icmp_seq=4 ttl=64 time=0.063 ms

--- 192.168.40.200 ping statistics ---
4 packets transmitted, 4 received, 0% packet loss, time 3106ms
rtt min/avg/max/mdev = 0.062/0.163/0.464/0.173 ms
[root@k8s-master01 ~]# telnet 192.168.40.200 16443
Trying 192.168.40.200...
Connected to 192.168.40.200.
Escape character is '^]'.
Connection closed by foreign host.
如果ping不通且telnet没有出现 ] ,则认为VIP不可以,不可在继续往下执行,需要排查keepalived的问题,比如防火墙和selinux,haproxy和keepalived的状态,监听端口等
所有节点查看防火墙状态必须为disable和inactive:systemctl status firewalld
所有节点查看selinux状态,必须为disable:getenforce
master节点查看haproxy和keepalived状态:systemctl status keepalived haproxy
master节点查看监听端口:netstat -lntp
Master01节点创建kubeadm-config.yaml配置文件如下:
Master01:(# 注意,如果不是高可用集群,192.168.40.200:16443改为master01的地址,16443改为apiserver的端口,默认是6443,注意更改v1.18.5自己服务器kubeadm的版本:kubeadm version)
[root@k8s-master01 keepalived]# vim kubeadm-config.yaml

apiVersion: kubeadm.k8s.io/v1beta2
bootstrapTokens:
- groups:
  - system:bootstrappers:kubeadm:default-node-token
  token: 7t2weq.bjbawausm0jaxury
  ttl: 24h0m0s
  usages:
  - signing
  - authentication
kind: InitConfiguration
localAPIEndpoint:
  advertiseAddress: 192.168.40.100
  bindPort: 6443
nodeRegistration:
  criSocket: /var/run/dockershim.sock
  name: k8s-master01
  taints:
  - effect: NoSchedule
    key: node-role.kubernetes.io/master
---
apiServer:
  certSANs:
  - 192.168.40.200
  timeoutForControlPlane: 4m0s
apiVersion: kubeadm.k8s.io/v1beta2
certificatesDir: /etc/kubernetes/pki
clusterName: kubernetes
controlPlaneEndpoint: 192.168.40.200:16443
controllerManager: {}
dns:
  type: CoreDNS
etcd:
  local:
    dataDir: /var/lib/etcd
imageRepository: registry.cn-hangzhou.aliyuncs.com/google_containers
kind: ClusterConfiguration
kubernetesVersion: v1.20.0
networking:
  dnsDomain: cluster.local
  podSubnet: 172.168.0.0/12
  serviceSubnet: 10.96.0.0/12
scheduler: {}
更新kubeadm文件
kubeadm config migrate --old-config kubeadm-config.yaml --new-config new.yaml
kubeadm config images pull --config /root/new.yaml
systemctl enable --now kubelet (如果启动失败无需管理,初始化成功以后即可启动)
kubeadm init --config /root/new.yaml --upload-certs
如果初始化失败,重置后再次初始化,命令如下
kubeadm reset -f ; ipvsadm --clear ; rm -rf ~/.kube
Your Kubernetes control-plane has initialized successfully!

To start using your cluster, you need to run the following as a regular user:

  mkdir -p $HOME/.kube
  sudo cp -i /etc/kubernetes/admin.conf $HOME/.kube/config
  sudo chown $(id -u):$(id -g) $HOME/.kube/config

Alternatively, if you are the root user, you can run:

  export KUBECONFIG=/etc/kubernetes/admin.conf

You should now deploy a pod network to the cluster.
Run "kubectl apply -f [podnetwork].yaml" with one of the options listed at:
  https://kubernetes.io/docs/concepts/cluster-administration/addons/

You can now join any number of the control-plane node running the following command on each as root:

  kubeadm join 192.168.40.200:16443 --token 7t2weq.bjbawausm0jaxury \
    --discovery-token-ca-cert-hash sha256:a331f5be163bf8c31f0216f37d9adc221daafd9e10ad835e34671605c51d3093 \
    --control-plane --certificate-key e99ca34b778bb14b78698b8bbaffce9fac88862095f906d57f1a8778ac904dbe

Please note that the certificate-key gives access to cluster sensitive data, keep it secret!
As a safeguard, uploaded-certs will be deleted in two hours; If necessary, you can use
"kubeadm init phase upload-certs --upload-certs" to reload certs afterward.

Then you can join any number of worker nodes by running the following on each as root:

kubeadm join 192.168.40.200:16443 --token 7t2weq.bjbawausm0jaxury \
    --discovery-token-ca-cert-hash sha256:a331f5be163bf8c31f0216f37d9adc221daafd9e10ad835e34671605c51d3093
cat <<EOF >> /root/.bashrc
export KUBECONFIG=/etc/kubernetes/admin.conf
EOF
source /root/.bashrc
 [root@k8s-master01 ~]# kubectl get nodes
NAME           STATUS     ROLES                  AGE   VERSION
k8s-master01   NotReady   control-plane,master   74s   v1.20.2
[root@k8s-master01 ~]# kubectl get pods -n kube-system -o wide
NAME                                   READY     STATUS    RESTARTS   AGE       IP              NODE
coredns-777d78ff6f-kstsz               0/1       Pending   0          14m       <none>          <none>
coredns-777d78ff6f-rlfr5               0/1       Pending   0          14m       <none>          <none>
etcd-k8s-master01                      1/1       Running   0          14m       192.168.40.100   k8s-master01
kube-apiserver-k8s-master01            1/1       Running   0          13m       192.168.40.100   k8s-master01
kube-controller-manager-k8s-master01   1/1       Running   0          13m       192.168.40.100   k8s-master01
kube-proxy-8d4qc                       1/1       Running   0          14m       192.168.40.100   k8s-master01
kube-scheduler-k8s-master01            1/1       Running   0          13m       192.168.40.100   k8s-master01
初始化其他master加入集群(master02、master03执行下面命令就可)
  kubeadm join 192.168.40.200:16443 --token 7t2weq.bjbawausm0jaxury \
    --discovery-token-ca-cert-hash sha256:a331f5be163bf8c31f0216f37d9adc221daafd9e10ad835e34671605c51d3093 \
    --control-plane --certificate-key e99ca34b778bb14b78698b8bbaffce9fac88862095f906d57f1a8778ac904dbe
如果token过期后(超过2个小时没加入)就生成新的token,正常不需要:
kubeadm token create --print-join-command
Master需要生成--certificate-key
kubeadm init phase upload-certs --upload-certs
kubeadm join 192.168.40.200:16443 --token 7t2weq.bjbawausm0jaxury \
    --discovery-token-ca-cert-hash sha256:a331f5be163bf8c31f0216f37d9adc221daafd9e10ad835e34671605c51d3093
[root@k8s-master01]# kubectl  get node
NAME           STATUS     ROLES                  AGE     VERSION
k8s-master01   NotReady   control-plane,master   8m53s   v1.20.2
k8s-master02   NotReady   control-plane,master   2m25s   v1.20.2
k8s-master03   NotReady   control-plane,master   31s     v1.20.2
k8s-node01     NotReady   <none>                 32s     v1.20.2
k8s-node02     NotReady   <none>                 88s     v1.20.2
vim calico-etcd.yaml


---
# Source: calico/templates/calico-etcd-secrets.yaml
# The following contains k8s Secrets for use with a TLS enabled etcd cluster.
# For information on populating Secrets, see http://kubernetes.io/docs/user-guide/secrets/
apiVersion: v1
kind: Secret
type: Opaque
metadata:
  name: calico-etcd-secrets
  namespace: kube-system
data:
  # Populate the following with etcd TLS configuration if desired, but leave blank if
  # not using TLS for etcd.
  # The keys below should be uncommented and the values populated with the base64
  # encoded contents of each file that would be associated with the TLS data.
  # Example command for encoding a file contents: cat <file> | base64 -w 0
  # etcd-key: null
  # etcd-cert: null
  # etcd-ca: null
---
# Source: calico/templates/calico-config.yaml
# This ConfigMap is used to configure a self-hosted Calico installation.
kind: ConfigMap
apiVersion: v1
metadata:
  name: calico-config
  namespace: kube-system
data:
  # Configure this with the location of your etcd cluster.
  etcd_endpoints: "http://<ETCD_IP>:<ETCD_PORT>"
  # If you're using TLS enabled etcd uncomment the following.
  # You must also populate the Secret below with these files.
  etcd_ca: ""   # "/calico-secrets/etcd-ca"
  etcd_cert: "" # "/calico-secrets/etcd-cert"
  etcd_key: ""  # "/calico-secrets/etcd-key"
  # Typha is disabled.
  typha_service_name: "none"
  # Configure the backend to use.
  calico_backend: "bird"
  # Configure the MTU to use for workload interfaces and tunnels.
  # - If Wireguard is enabled, set to your network MTU - 60
  # - Otherwise, if VXLAN or BPF mode is enabled, set to your network MTU - 50
  # - Otherwise, if IPIP is enabled, set to your network MTU - 20
  # - Otherwise, if not using any encapsulation, set to your network MTU.
  veth_mtu: "1440"

  # The CNI network configuration to install on each node. The special
  # values in this config will be automatically populated.
  cni_network_config: |-
    {
      "name": "k8s-pod-network",
      "cniVersion": "0.3.1",
      "plugins": [
        {
          "type": "calico",
          "log_level": "info",
          "etcd_endpoints": "__ETCD_ENDPOINTS__",
          "etcd_key_file": "__ETCD_KEY_FILE__",
          "etcd_cert_file": "__ETCD_CERT_FILE__",
          "etcd_ca_cert_file": "__ETCD_CA_CERT_FILE__",
          "mtu": __CNI_MTU__,
          "ipam": {
              "type": "calico-ipam"
          },
          "policy": {
              "type": "k8s"
          },
          "kubernetes": {
              "kubeconfig": "__KUBECONFIG_FILEPATH__"
          }
        },
        {
          "type": "portmap",
          "snat": true,
          "capabilities": {"portMappings": true}
        },
        {
          "type": "bandwidth",
          "capabilities": {"bandwidth": true}
        }
      ]
    }

---
# Source: calico/templates/calico-kube-controllers-rbac.yaml

# Include a clusterrole for the kube-controllers component,
# and bind it to the calico-kube-controllers serviceaccount.
kind: ClusterRole
apiVersion: rbac.authorization.k8s.io/v1
metadata:
  name: calico-kube-controllers
rules:
  # Pods are monitored for changing labels.
  # The node controller monitors Kubernetes nodes.
  # Namespace and serviceaccount labels are used for policy.
  - apiGroups: [""]
    resources:
      - pods
      - nodes
      - namespaces
      - serviceaccounts
    verbs:
      - watch
      - list
      - get
  # Watch for changes to Kubernetes NetworkPolicies.
  - apiGroups: ["networking.k8s.io"]
    resources:
      - networkpolicies
    verbs:
      - watch
      - list
---
kind: ClusterRoleBinding
apiVersion: rbac.authorization.k8s.io/v1
metadata:
  name: calico-kube-controllers
roleRef:
  apiGroup: rbac.authorization.k8s.io
  kind: ClusterRole
  name: calico-kube-controllers
subjects:
- kind: ServiceAccount
  name: calico-kube-controllers
  namespace: kube-system
---

---
# Source: calico/templates/calico-node-rbac.yaml
# Include a clusterrole for the calico-node DaemonSet,
# and bind it to the calico-node serviceaccount.
kind: ClusterRole
apiVersion: rbac.authorization.k8s.io/v1
metadata:
  name: calico-node
rules:
  # The CNI plugin needs to get pods, nodes, and namespaces.
  - apiGroups: [""]
    resources:
      - pods
      - nodes
      - namespaces
    verbs:
      - get
  - apiGroups: [""]
    resources:
      - endpoints
      - services
    verbs:
      # Used to discover service IPs for advertisement.
      - watch
      - list
  # Pod CIDR auto-detection on kubeadm needs access to config maps.
  - apiGroups: [""]
    resources:
      - configmaps
    verbs:
      - get
  - apiGroups: [""]
    resources:
      - nodes/status
    verbs:
      # Needed for clearing NodeNetworkUnavailable flag.
      - patch

---
apiVersion: rbac.authorization.k8s.io/v1
kind: ClusterRoleBinding
metadata:
  name: calico-node
roleRef:
  apiGroup: rbac.authorization.k8s.io
  kind: ClusterRole
  name: calico-node
subjects:
- kind: ServiceAccount
  name: calico-node
  namespace: kube-system

---
# Source: calico/templates/calico-node.yaml
# This manifest installs the calico-node container, as well
# as the CNI plugins and network config on
# each master and worker node in a Kubernetes cluster.
kind: DaemonSet
apiVersion: apps/v1
metadata:
  name: calico-node
  namespace: kube-system
  labels:
    k8s-app: calico-node
spec:
  selector:
    matchLabels:
      k8s-app: calico-node
  updateStrategy:
    type: RollingUpdate
    rollingUpdate:
      maxUnavailable: 1
  template:
    metadata:
      labels:
        k8s-app: calico-node
    spec:
      nodeSelector:
        kubernetes.io/os: linux
      hostNetwork: true
      tolerations:
        # Make sure calico-node gets scheduled on all nodes.
        - effect: NoSchedule
          operator: Exists
        # Mark the pod as a critical add-on for rescheduling.
        - key: CriticalAddonsOnly
          operator: Exists
        - effect: NoExecute
          operator: Exists
      serviceAccountName: calico-node
      # Minimize downtime during a rolling upgrade or deletion; tell Kubernetes to do a "force
      # deletion": https://kubernetes.io/docs/concepts/workloads/pods/pod/#termination-of-pods.
      terminationGracePeriodSeconds: 0
      priorityClassName: system-node-critical
      initContainers:
        # This container installs the CNI binaries
        # and CNI network config file on each node.
        - name: install-cni
          image: registry.cn-beijing.aliyuncs.com/dotbalo/cni:v3.15.3
          command: ["/install-cni.sh"]
          env:
            # Name of the CNI config file to create.
            - name: CNI_CONF_NAME
              value: "10-calico.conflist"
            # The CNI network config to install on each node.
            - name: CNI_NETWORK_CONFIG
              valueFrom:
                configMapKeyRef:
                  name: calico-config
                  key: cni_network_config
            # The location of the etcd cluster.
            - name: ETCD_ENDPOINTS
              valueFrom:
                configMapKeyRef:
                  name: calico-config
                  key: etcd_endpoints
            # CNI MTU Config variable
            - name: CNI_MTU
              valueFrom:
                configMapKeyRef:
                  name: calico-config
                  key: veth_mtu
            # Prevents the container from sleeping forever.
            - name: SLEEP
              value: "false"
          volumeMounts:
            - mountPath: /host/opt/cni/bin
              name: cni-bin-dir
            - mountPath: /host/etc/cni/net.d
              name: cni-net-dir
            - mountPath: /calico-secrets
              name: etcd-certs
          securityContext:
            privileged: true
        # Adds a Flex Volume Driver that creates a per-pod Unix Domain Socket to allow Dikastes
        # to communicate with Felix over the Policy Sync API.
        - name: flexvol-driver
          image: registry.cn-beijing.aliyuncs.com/dotbalo/pod2daemon-flexvol:v3.15.3
          volumeMounts:
          - name: flexvol-driver-host
            mountPath: /host/driver
          securityContext:
            privileged: true
      containers:
        # Runs calico-node container on each Kubernetes node. This
        # container programs network policy and routes on each
        # host.
        - name: calico-node
          image: registry.cn-beijing.aliyuncs.com/dotbalo/node:v3.15.3
          env:
            # The location of the etcd cluster.
            - name: ETCD_ENDPOINTS
              valueFrom:
                configMapKeyRef:
                  name: calico-config
                  key: etcd_endpoints
            # Location of the CA certificate for etcd.
            - name: ETCD_CA_CERT_FILE
              valueFrom:
                configMapKeyRef:
                  name: calico-config
                  key: etcd_ca
            # Location of the client key for etcd.
            - name: ETCD_KEY_FILE
              valueFrom:
                configMapKeyRef:
                  name: calico-config
                  key: etcd_key
            # Location of the client certificate for etcd.
            - name: ETCD_CERT_FILE
              valueFrom:
                configMapKeyRef:
                  name: calico-config
                  key: etcd_cert
            # Set noderef for node controller.
            - name: CALICO_K8S_NODE_REF
              valueFrom:
                fieldRef:
                  fieldPath: spec.nodeName
            # Choose the backend to use.
            - name: CALICO_NETWORKING_BACKEND
              valueFrom:
                configMapKeyRef:
                  name: calico-config
                  key: calico_backend
            # Cluster type to identify the deployment type
            - name: CLUSTER_TYPE
              value: "k8s,bgp"
            # Auto-detect the BGP IP address.
            - name: IP
              value: "autodetect"
            # Enable IPIP
            - name: CALICO_IPV4POOL_IPIP
              value: "Always"
            # Enable or Disable VXLAN on the default IP pool.
            - name: CALICO_IPV4POOL_VXLAN
              value: "Never"
            # Set MTU for tunnel device used if ipip is enabled
            - name: FELIX_IPINIPMTU
              valueFrom:
                configMapKeyRef:
                  name: calico-config
                  key: veth_mtu
            # Set MTU for the VXLAN tunnel device.
            - name: FELIX_VXLANMTU
              valueFrom:
                configMapKeyRef:
                  name: calico-config
                  key: veth_mtu
            # Set MTU for the Wireguard tunnel device.
            - name: FELIX_WIREGUARDMTU
              valueFrom:
                configMapKeyRef:
                  name: calico-config
                  key: veth_mtu
            # The default IPv4 pool to create on startup if none exists. Pod IPs will be
            # chosen from this range. Changing this value after installation will have
            # no effect. This should fall within `--cluster-cidr`.
            # - name: CALICO_IPV4POOL_CIDR
            #   value: "192.168.0.0/16"
            # Disable file logging so `kubectl logs` works.
            - name: CALICO_DISABLE_FILE_LOGGING
              value: "true"
            # Set Felix endpoint to host default action to ACCEPT.
            - name: FELIX_DEFAULTENDPOINTTOHOSTACTION
              value: "ACCEPT"
            # Disable IPv6 on Kubernetes.
            - name: FELIX_IPV6SUPPORT
              value: "false"
            # Set Felix logging to "info"
            - name: FELIX_LOGSEVERITYSCREEN
              value: "info"
            - name: FELIX_HEALTHENABLED
              value: "true"
          securityContext:
            privileged: true
          resources:
            requests:
              cpu: 250m
          livenessProbe:
            exec:
              command:
              - /bin/calico-node
              - -felix-live
              - -bird-live
            periodSeconds: 10
            initialDelaySeconds: 10
            failureThreshold: 6
          readinessProbe:
            exec:
              command:
              - /bin/calico-node
              - -felix-ready
              - -bird-ready
            periodSeconds: 10
          volumeMounts:
            - mountPath: /lib/modules
              name: lib-modules
              readOnly: true
            - mountPath: /run/xtables.lock
              name: xtables-lock
              readOnly: false
            - mountPath: /var/run/calico
              name: var-run-calico
              readOnly: false
            - mountPath: /var/lib/calico
              name: var-lib-calico
              readOnly: false
            - mountPath: /calico-secrets
              name: etcd-certs
            - name: policysync
              mountPath: /var/run/nodeagent
      volumes:
        # Used by calico-node.
        - name: lib-modules
          hostPath:
            path: /lib/modules
        - name: var-run-calico
          hostPath:
            path: /var/run/calico
        - name: var-lib-calico
          hostPath:
            path: /var/lib/calico
        - name: xtables-lock
          hostPath:
            path: /run/xtables.lock
            type: FileOrCreate
        # Used to install CNI.
        - name: cni-bin-dir
          hostPath:
            path: /opt/cni/bin
        - name: cni-net-dir
          hostPath:
            path: /etc/cni/net.d
        # Mount in the etcd TLS secrets with mode 400.
        # See https://kubernetes.io/docs/concepts/configuration/secret/
        - name: etcd-certs
          secret:
            secretName: calico-etcd-secrets
            defaultMode: 0400
        # Used to create per-pod Unix Domain Sockets
        - name: policysync
          hostPath:
            type: DirectoryOrCreate
            path: /var/run/nodeagent
        # Used to install Flex Volume Driver
        - name: flexvol-driver-host
          hostPath:
            type: DirectoryOrCreate
            path: /usr/libexec/kubernetes/kubelet-plugins/volume/exec/nodeagent~uds
---

apiVersion: v1
kind: ServiceAccount
metadata:
  name: calico-node
  namespace: kube-system

---
# Source: calico/templates/calico-kube-controllers.yaml
# See https://github.com/projectcalico/kube-controllers
apiVersion: apps/v1
kind: Deployment
metadata:
  name: calico-kube-controllers
  namespace: kube-system
  labels:
    k8s-app: calico-kube-controllers
spec:
  # The controllers can only have a single active instance.
  replicas: 1
  selector:
    matchLabels:
      k8s-app: calico-kube-controllers
  strategy:
    type: Recreate
  template:
    metadata:
      name: calico-kube-controllers
      namespace: kube-system
      labels:
        k8s-app: calico-kube-controllers
    spec:
      nodeSelector:
        kubernetes.io/os: linux
      tolerations:
        # Mark the pod as a critical add-on for rescheduling.
        - key: CriticalAddonsOnly
          operator: Exists
        - key: node-role.kubernetes.io/master
          effect: NoSchedule
      serviceAccountName: calico-kube-controllers
      priorityClassName: system-cluster-critical
      # The controllers must run in the host network namespace so that
      # it isn't governed by policy that would prevent it from working.
      hostNetwork: true
      containers:
        - name: calico-kube-controllers
          image: registry.cn-beijing.aliyuncs.com/dotbalo/kube-controllers:v3.15.3
          env:
            # The location of the etcd cluster.
            - name: ETCD_ENDPOINTS
              valueFrom:
                configMapKeyRef:
                  name: calico-config
                  key: etcd_endpoints
            # Location of the CA certificate for etcd.
            - name: ETCD_CA_CERT_FILE
              valueFrom:
                configMapKeyRef:
                  name: calico-config
                  key: etcd_ca
            # Location of the client key for etcd.
            - name: ETCD_KEY_FILE
              valueFrom:
                configMapKeyRef:
                  name: calico-config
                  key: etcd_key
            # Location of the client certificate for etcd.
            - name: ETCD_CERT_FILE
              valueFrom:
                configMapKeyRef:
                  name: calico-config
                  key: etcd_cert
            # Choose which controllers to run.
            - name: ENABLED_CONTROLLERS
              value: policy,namespace,serviceaccount,workloadendpoint,node
          volumeMounts:
            # Mount in the etcd TLS secrets.
            - mountPath: /calico-secrets
              name: etcd-certs
          readinessProbe:
            exec:
              command:
              - /usr/bin/check-status
              - -r
      volumes:
        # Mount in the etcd TLS secrets with mode 400.
        # See https://kubernetes.io/docs/concepts/configuration/secret/
        - name: etcd-certs
          secret:
            secretName: calico-etcd-secrets
            defaultMode: 0400

---

apiVersion: v1
kind: ServiceAccount
metadata:
  name: calico-kube-controllers
  namespace: kube-system

---
# Source: calico/templates/calico-typha.yaml

---
# Source: calico/templates/configure-canal.yaml

---
# Source: calico/templates/kdd-crds.yaml
sed -i 's#etcd_endpoints: "http://<ETCD_IP>:<ETCD_PORT>"#etcd_endpoints: "https://192.168.40.100:2379,https://192.168.40.101:2379,https://192.168.40.102:2379"#g' calico-etcd.yaml

ETCD_CA=`cat /etc/kubernetes/pki/etcd/ca.crt | base64 | tr -d '\n'`
ETCD_CERT=`cat /etc/kubernetes/pki/etcd/server.crt | base64 | tr -d '\n'`
ETCD_KEY=`cat /etc/kubernetes/pki/etcd/server.key | base64 | tr -d '\n'`
sed -i "s@# etcd-key: null@etcd-key: ${ETCD_KEY}@g; s@# etcd-cert: null@etcd-cert: ${ETCD_CERT}@g; s@# etcd-ca: null@etcd-ca: ${ETCD_CA}@g" calico-etcd.yaml

sed -i 's#etcd_ca: ""#etcd_ca: "/calico-secrets/etcd-ca"#g; s#etcd_cert: ""#etcd_cert: "/calico-secrets/etcd-cert"#g; s#etcd_key: "" #etcd_key: "/calico-secrets/etcd-key" #g' calico-etcd.yaml

POD_SUBNET=`cat /etc/kubernetes/manifests/kube-controller-manager.yaml | grep cluster-cidr= | awk -F= '{print $NF}'`

sed -i 's@# - name: CALICO_IPV4POOL_CIDR@- name: CALICO_IPV4POOL_CIDR@g; s@#   value: "192.168.0.0/16"@  value: '"${POD_SUBNET}"'@g' calico-etcd.yaml
kubectl apply -f calico-etcd.yaml
[root@k8s-master01 ~]# kubectl  get po -n kube-system
NAME                                       READY   STATUS    RESTARTS   AGE
calico-kube-controllers-5f6d4b864b-pwvnb   1/1     Running   0          3m29s
calico-node-5lz9m                          1/1     Running   0          3m29s
calico-node-8z4bg                          1/1     Running   0          3m29s
calico-node-lmzvf                          1/1     Running   0          3m29s
calico-node-mpngv                          1/1     Running   0          3m29s
calico-node-vmqsl                          1/1     Running   0          3m29s
coredns-54d67798b7-8525g                   1/1     Running   0          39m
coredns-54d67798b7-fxs72                   1/1     Running   0          39m
etcd-k8s-master01                          1/1     Running   0          39m
etcd-k8s-master02                          1/1     Running   0          33m
etcd-k8s-master03                          1/1     Running   0          31m
kube-apiserver-k8s-master01                1/1     Running   0          39m
kube-apiserver-k8s-master02                1/1     Running   0          33m
kube-apiserver-k8s-master03                1/1     Running   0          30m
kube-controller-manager-k8s-master01       1/1     Running   1          39m
kube-controller-manager-k8s-master02       1/1     Running   0          33m
kube-controller-manager-k8s-master03       1/1     Running   0          31m
kube-proxy-hnkmj                           1/1     Running   0          39m
kube-proxy-jk4dm                           1/1     Running   0          32m
kube-proxy-nbcg2                           1/1     Running   0          32m
kube-proxy-qv9k7                           1/1     Running   0          32m
kube-proxy-x6xdc                           1/1     Running   0          33m
kube-scheduler-k8s-master01                1/1     Running   1          39m
kube-scheduler-k8s-master02                1/1     Running   0          33m
kube-scheduler-k8s-master03                1/1     Running   0          30m
在新版的Kubernetes中系统资源的采集均使用Metrics-server,可以通过Metrics采集节点和Pod的内存、磁盘、CPU和网络的使用率
将Master01节点的front-proxy-ca.crt复制到所有Node节点
scp /etc/kubernetes/pki/front-proxy-ca.crt k8s-node01:/etc/kubernetes/pki/front-proxy-ca.crt
scp /etc/kubernetes/pki/front-proxy-ca.crt k8s-node02:/etc/kubernetes/pki/front-proxy-ca.crt
[root@k8s-master01 ~]# vim comp.yaml
apiVersion: v1
kind: ServiceAccount
metadata:
  labels:
    k8s-app: metrics-server
  name: metrics-server
  namespace: kube-system
---
apiVersion: rbac.authorization.k8s.io/v1
kind: ClusterRole
metadata:
  labels:
    k8s-app: metrics-server
    rbac.authorization.k8s.io/aggregate-to-admin: "true"
    rbac.authorization.k8s.io/aggregate-to-edit: "true"
    rbac.authorization.k8s.io/aggregate-to-view: "true"
  name: system:aggregated-metrics-reader
rules:
  - apiGroups:
      - metrics.k8s.io
    resources:
      - pods
      - nodes
    verbs:
      - get
      - list
      - watch
---
apiVersion: rbac.authorization.k8s.io/v1
kind: ClusterRole
metadata:
  labels:
    k8s-app: metrics-server
  name: system:metrics-server
rules:
  - apiGroups:
      - ""
    resources:
      - pods
      - nodes
      - nodes/stats
      - namespaces
      - configmaps
    verbs:
      - get
      - list
      - watch
---
apiVersion: rbac.authorization.k8s.io/v1
kind: RoleBinding
metadata:
  labels:
    k8s-app: metrics-server
  name: metrics-server-auth-reader
  namespace: kube-system
roleRef:
  apiGroup: rbac.authorization.k8s.io
  kind: Role
  name: extension-apiserver-authentication-reader
subjects:
  - kind: ServiceAccount
    name: metrics-server
    namespace: kube-system
---
apiVersion: rbac.authorization.k8s.io/v1
kind: ClusterRoleBinding
metadata:
  labels:
    k8s-app: metrics-server
  name: metrics-server:system:auth-delegator
roleRef:
  apiGroup: rbac.authorization.k8s.io
  kind: ClusterRole
  name: system:auth-delegator
subjects:
  - kind: ServiceAccount
    name: metrics-server
    namespace: kube-system
---
apiVersion: rbac.authorization.k8s.io/v1
kind: ClusterRoleBinding
metadata:
  labels:
    k8s-app: metrics-server
  name: system:metrics-server
roleRef:
  apiGroup: rbac.authorization.k8s.io
  kind: ClusterRole
  name: system:metrics-server
subjects:
  - kind: ServiceAccount
    name: metrics-server
    namespace: kube-system
---
apiVersion: v1
kind: Service
metadata:
  labels:
    k8s-app: metrics-server
  name: metrics-server
  namespace: kube-system
spec:
  ports:
    - name: https
      port: 443
      protocol: TCP
      targetPort: https
  selector:
    k8s-app: metrics-server
---
apiVersion: apps/v1
kind: Deployment
metadata:
  labels:
    k8s-app: metrics-server
  name: metrics-server
  namespace: kube-system
spec:
  selector:
    matchLabels:
      k8s-app: metrics-server
  strategy:
    rollingUpdate:
      maxUnavailable: 0
  template:
    metadata:
      labels:
        k8s-app: metrics-server
    spec:
      containers:
        - args:
            - --cert-dir=/tmp
            - --secure-port=4443
            - --metric-resolution=30s
            - --kubelet-insecure-tls
            - --kubelet-preferred-address-types=InternalIP,ExternalIP,Hostname
            - --requestheader-client-ca-file=/etc/kubernetes/pki/front-proxy-ca.crt # change to front-proxy-ca.crt for kubeadm
            - --requestheader-username-headers=X-Remote-User
            - --requestheader-group-headers=X-Remote-Group
            - --requestheader-extra-headers-prefix=X-Remote-Extra-
          image: registry.cn-beijing.aliyuncs.com/dotbalo/metrics-server:v0.4.1
          imagePullPolicy: IfNotPresent
          livenessProbe:
            failureThreshold: 3
            httpGet:
              path: /livez
              port: https
              scheme: HTTPS
            periodSeconds: 10
          name: metrics-server
          ports:
            - containerPort: 4443
              name: https
              protocol: TCP
          readinessProbe:
            failureThreshold: 3
            httpGet:
              path: /readyz
              port: https
              scheme: HTTPS
            periodSeconds: 10
          securityContext:
            readOnlyRootFilesystem: true
            runAsNonRoot: true
            runAsUser: 1000
          volumeMounts:
            - mountPath: /tmp
              name: tmp-dir
            - name: ca-ssl
              mountPath: /etc/kubernetes/pki
      nodeSelector:
        kubernetes.io/os: linux
      priorityClassName: system-cluster-critical
      serviceAccountName: metrics-server
      volumes:
        - emptyDir: {}
          name: tmp-dir
        - name: ca-ssl
          hostPath:
            path: /etc/kubernetes/pki
---
apiVersion: apiregistration.k8s.io/v1
kind: APIService
metadata:
  labels:
    k8s-app: metrics-server
  name: v1beta1.metrics.k8s.io
spec:
  group: metrics.k8s.io
  groupPriorityMinimum: 100
  insecureSkipTLSVerify: true
  service:
    name: metrics-server
    namespace: kube-system
  version: v1beta1
  versionPriority: 100
[root@k8s-master01 ~]# kubectl  create -f comp.yaml
serviceaccount/metrics-server created
clusterrole.rbac.authorization.k8s.io/system:aggregated-metrics-reader created
clusterrole.rbac.authorization.k8s.io/system:metrics-server created
rolebinding.rbac.authorization.k8s.io/metrics-server-auth-reader created
clusterrolebinding.rbac.authorization.k8s.io/metrics-server:system:auth-delegator created
clusterrolebinding.rbac.authorization.k8s.io/system:metrics-server created
service/metrics-server created
deployment.apps/metrics-server created
apiservice.apiregistration.k8s.io/v1beta1.metrics.k8s.io created
[root@k8s-master01 ~]# kubectl  top node
NAME           CPU(cores)   CPU%   MEMORY(bytes)   MEMORY%
k8s-master01   109m         2%     1296Mi          33%
k8s-master02   99m          2%     1124Mi          29%
k8s-master03   104m         2%     1082Mi          28%
k8s-node01     55m          1%     761Mi           19%
k8s-node02     53m          1%     663Mi           17%
[root@k8s-master01 ~]# mkdir dashboard
[root@k8s-master01 dashboard]# vim dashboard.yaml
# Copyright 2017 The Kubernetes Authors.
#
# Licensed under the Apache License, Version 2.0 (the "License");
# you may not use this file except in compliance with the License.
# You may obtain a copy of the License at
#
#     http://www.apache.org/licenses/LICENSE-2.0
#
# Unless required by applicable law or agreed to in writing, software
# distributed under the License is distributed on an "AS IS" BASIS,
# WITHOUT WARRANTIES OR CONDITIONS OF ANY KIND, either express or implied.
# See the License for the specific language governing permissions and
# limitations under the License.

apiVersion: v1
kind: Namespace
metadata:
  name: kubernetes-dashboard

---

apiVersion: v1
kind: ServiceAccount
metadata:
  labels:
    k8s-app: kubernetes-dashboard
  name: kubernetes-dashboard
  namespace: kubernetes-dashboard

---

kind: Service
apiVersion: v1
metadata:
  labels:
    k8s-app: kubernetes-dashboard
  name: kubernetes-dashboard
  namespace: kubernetes-dashboard
spec:
  ports:
    - port: 443
      targetPort: 8443
  selector:
    k8s-app: kubernetes-dashboard

---

apiVersion: v1
kind: Secret
metadata:
  labels:
    k8s-app: kubernetes-dashboard
  name: kubernetes-dashboard-certs
  namespace: kubernetes-dashboard
type: Opaque

---

apiVersion: v1
kind: Secret
metadata:
  labels:
    k8s-app: kubernetes-dashboard
  name: kubernetes-dashboard-csrf
  namespace: kubernetes-dashboard
type: Opaque
data:
  csrf: ""

---

apiVersion: v1
kind: Secret
metadata:
  labels:
    k8s-app: kubernetes-dashboard
  name: kubernetes-dashboard-key-holder
  namespace: kubernetes-dashboard
type: Opaque

---

kind: ConfigMap
apiVersion: v1
metadata:
  labels:
    k8s-app: kubernetes-dashboard
  name: kubernetes-dashboard-settings
  namespace: kubernetes-dashboard

---

kind: Role
apiVersion: rbac.authorization.k8s.io/v1
metadata:
  labels:
    k8s-app: kubernetes-dashboard
  name: kubernetes-dashboard
  namespace: kubernetes-dashboard
rules:
  # Allow Dashboard to get, update and delete Dashboard exclusive secrets.
  - apiGroups: [""]
    resources: ["secrets"]
    resourceNames: ["kubernetes-dashboard-key-holder", "kubernetes-dashboard-certs", "kubernetes-dashboard-csrf"]
    verbs: ["get", "update", "delete"]
    # Allow Dashboard to get and update 'kubernetes-dashboard-settings' config map.
  - apiGroups: [""]
    resources: ["configmaps"]
    resourceNames: ["kubernetes-dashboard-settings"]
    verbs: ["get", "update"]
    # Allow Dashboard to get metrics.
  - apiGroups: [""]
    resources: ["services"]
    resourceNames: ["heapster", "dashboard-metrics-scraper"]
    verbs: ["proxy"]
  - apiGroups: [""]
    resources: ["services/proxy"]
    resourceNames: ["heapster", "http:heapster:", "https:heapster:", "dashboard-metrics-scraper", "http:dashboard-metrics-scraper"]
    verbs: ["get"]

---

kind: ClusterRole
apiVersion: rbac.authorization.k8s.io/v1
metadata:
  labels:
    k8s-app: kubernetes-dashboard
  name: kubernetes-dashboard
rules:
  # Allow Metrics Scraper to get metrics from the Metrics server
  - apiGroups: ["metrics.k8s.io"]
    resources: ["pods", "nodes"]
    verbs: ["get", "list", "watch"]

---

apiVersion: rbac.authorization.k8s.io/v1
kind: RoleBinding
metadata:
  labels:
    k8s-app: kubernetes-dashboard
  name: kubernetes-dashboard
  namespace: kubernetes-dashboard
roleRef:
  apiGroup: rbac.authorization.k8s.io
  kind: Role
  name: kubernetes-dashboard
subjects:
  - kind: ServiceAccount
    name: kubernetes-dashboard
    namespace: kubernetes-dashboard

---

apiVersion: rbac.authorization.k8s.io/v1
kind: ClusterRoleBinding
metadata:
  name: kubernetes-dashboard
roleRef:
  apiGroup: rbac.authorization.k8s.io
  kind: ClusterRole
  name: kubernetes-dashboard
subjects:
  - kind: ServiceAccount
    name: kubernetes-dashboard
    namespace: kubernetes-dashboard

---

kind: Deployment
apiVersion: apps/v1
metadata:
  labels:
    k8s-app: kubernetes-dashboard
  name: kubernetes-dashboard
  namespace: kubernetes-dashboard
spec:
  replicas: 1
  revisionHistoryLimit: 10
  selector:
    matchLabels:
      k8s-app: kubernetes-dashboard
  template:
    metadata:
      labels:
        k8s-app: kubernetes-dashboard
    spec:
      containers:
        - name: kubernetes-dashboard
          image: registry.cn-beijing.aliyuncs.com/dotbalo/dashboard:v2.0.4
          imagePullPolicy: Always
          ports:
            - containerPort: 8443
              protocol: TCP
          args:
            - --auto-generate-certificates
            - --namespace=kubernetes-dashboard
            # Uncomment the following line to manually specify Kubernetes API server Host
            # If not specified, Dashboard will attempt to auto discover the API server and connect
            # to it. Uncomment only if the default does not work.
            # - --apiserver-host=http://my-address:port
          volumeMounts:
            - name: kubernetes-dashboard-certs
              mountPath: /certs
              # Create on-disk volume to store exec logs
            - mountPath: /tmp
              name: tmp-volume
          livenessProbe:
            httpGet:
              scheme: HTTPS
              path: /
              port: 8443
            initialDelaySeconds: 30
            timeoutSeconds: 30
          securityContext:
            allowPrivilegeEscalation: false
            readOnlyRootFilesystem: true
            runAsUser: 1001
            runAsGroup: 2001
      volumes:
        - name: kubernetes-dashboard-certs
          secret:
            secretName: kubernetes-dashboard-certs
        - name: tmp-volume
          emptyDir: {}
      serviceAccountName: kubernetes-dashboard
      nodeSelector:
        "kubernetes.io/os": linux
      # Comment the following tolerations if Dashboard must not be deployed on master
      tolerations:
        - key: node-role.kubernetes.io/master
          effect: NoSchedule

---

kind: Service
apiVersion: v1
metadata:
  labels:
    k8s-app: dashboard-metrics-scraper
  name: dashboard-metrics-scraper
  namespace: kubernetes-dashboard
spec:
  ports:
    - port: 8000
      targetPort: 8000
  selector:
    k8s-app: dashboard-metrics-scraper

---

kind: Deployment
apiVersion: apps/v1
metadata:
  labels:
    k8s-app: dashboard-metrics-scraper
  name: dashboard-metrics-scraper
  namespace: kubernetes-dashboard
spec:
  replicas: 1
  revisionHistoryLimit: 10
  selector:
    matchLabels:
      k8s-app: dashboard-metrics-scraper
  template:
    metadata:
      labels:
        k8s-app: dashboard-metrics-scraper
      annotations:
        seccomp.security.alpha.kubernetes.io/pod: 'runtime/default'
    spec:
      containers:
        - name: dashboard-metrics-scraper
          image: registry.cn-beijing.aliyuncs.com/dotbalo/metrics-scraper:v1.0.4
          ports:
            - containerPort: 8000
              protocol: TCP
          livenessProbe:
            httpGet:
              scheme: HTTP
              path: /
              port: 8000
            initialDelaySeconds: 30
            timeoutSeconds: 30
          volumeMounts:
            - mountPath: /tmp
              name: tmp-volume
          securityContext:
            allowPrivilegeEscalation: false
            readOnlyRootFilesystem: true
            runAsUser: 1001
            runAsGroup: 2001
      serviceAccountName: kubernetes-dashboard
      nodeSelector:
        "kubernetes.io/os": linux
      # Comment the following tolerations if Dashboard must not be deployed on master
      tolerations:
        - key: node-role.kubernetes.io/master
          effect: NoSchedule
      volumes:
        - name: tmp-volume
          emptyDir: {}
[root@k8s-master01 dashboard]# vim dashboard-user.yaml

apiVersion: v1
kind: ServiceAccount
metadata:
  name: admin-user
  namespace: kube-system
---
apiVersion: rbac.authorization.k8s.io/v1
kind: ClusterRoleBinding
metadata:
  name: admin-user
  annotations:
    rbac.authorization.kubernetes.io/autoupdate: "true"
roleRef:
  apiGroup: rbac.authorization.k8s.io
  kind: ClusterRole
  name: cluster-admin
subjects:
- kind: ServiceAccount
  name: admin-user
  namespace: kube-system
[root@k8s-master01 dashboard]# kubectl  create -f .
serviceaccount/admin-user created
clusterrolebinding.rbac.authorization.k8s.io/admin-user created
namespace/kubernetes-dashboard created
serviceaccount/kubernetes-dashboard created
service/kubernetes-dashboard created
secret/kubernetes-dashboard-certs created
secret/kubernetes-dashboard-csrf created
secret/kubernetes-dashboard-key-holder created
configmap/kubernetes-dashboard-settings created
role.rbac.authorization.k8s.io/kubernetes-dashboard created
clusterrole.rbac.authorization.k8s.io/kubernetes-dashboard created
rolebinding.rbac.authorization.k8s.io/kubernetes-dashboard created
clusterrolebinding.rbac.authorization.k8s.io/kubernetes-dashboard created
deployment.apps/kubernetes-dashboard created
service/dashboard-metrics-scraper created
deployment.apps/dashboard-metrics-scraper created
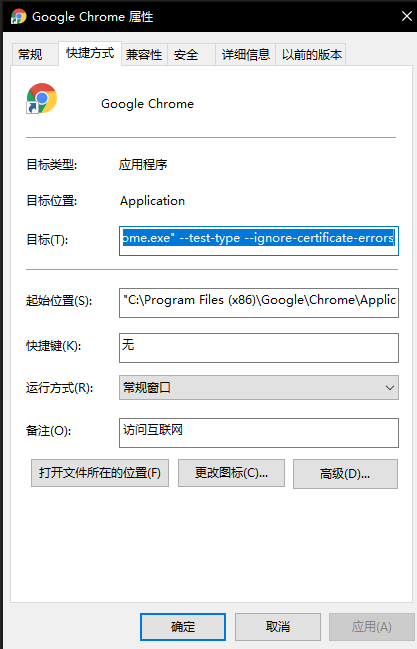
--test-type --ignore-certificate-errors
kubectl edit svc kubernetes-dashboard -n kubernetes-dashboard
将 type:ClusterIP更改的ClusterIP为 NodePort
kubectl get svc kubernetes-dashboard -n kubernetes-dashboard
访问Dashboard:https://192.168.40.200:28282(请更改28282为自己的端口)
[root@k8s-master01 ~]# kubectl -n kube-system describe secret $(kubectl -n kube-system get secret | grep admin-user | awk '{print $1}')
Name:         admin-user-token-r4vcp
Namespace:    kube-system
Labels:       <none>
Annotations:  kubernetes.io/service-account.name: admin-user
              kubernetes.io/service-account.uid: 2112796c-1c9e-11e9-91ab-000c298bf023

Type:  kubernetes.io/service-account-token

Data
====
ca.crt:     1025 bytes
namespace:  11 bytes
token:      eyJhbGciOiJSUzI1NiIsImtpZCI6IiJ9.eyJpc3MiOiJrdWJlcm5ldGVzL3NlcnZpY2VhY2NvdW50Iiwia3ViZXJuZXRlcy5pby9zZXJ2aWNlYWNjb3VudC9uYW1lc3BhY2UiOiJrdWJlLXN5c3RlbSIsImt1YmVybmV0ZXMuaW8vc2VydmljZWFjY291bnQvc2VjcmV0Lm5hbWUiOiJhZG1pbi11c2VyLXRva2VuLXI0dmNwIiwia3ViZXJuZXRlcy5pby9zZXJ2aWNlYWNjb3VudC9zZXJ2aWNlLWFjY291bnQubmFtZSI6ImFkbWluLXVzZXIiLCJrdWJlcm5ldGVzLmlvL3NlcnZpY2VhY2NvdW50L3NlcnZpY2UtYWNjb3VudC51aWQiOiIyMTEyNzk2Yy0xYzllLTExZTktOTFhYi0wMDBjMjk4YmYwMjMiLCJzdWIiOiJzeXN0ZW06c2VydmljZWFjY291bnQ6a3ViZS1zeXN0ZW06YWRtaW4tdXNlciJ9.bWYmwgRb-90ydQmyjkbjJjFt8CdO8u6zxVZh-19rdlL_T-n35nKyQIN7hCtNAt46u6gfJ5XXefC9HsGNBHtvo_Ve6oF7EXhU772aLAbXWkU1xOwQTQynixaypbRIas_kiO2MHHxXfeeL_yYZRrgtatsDBxcBRg-nUQv4TahzaGSyK42E_4YGpLa3X3Jc4t1z0SQXge7lrwlj8ysmqgO4ndlFjwPfvg0eoYqu9Qsc5Q7tazzFf9mVKMmcS1ppPutdyqNYWL62P1prw_wclP0TezW1CsypjWSVT4AuJU8YmH8nTNR1EXn8mJURLSjINv6YbZpnhBIPgUGk1JYVLcn47w
将token值输入到token后,单击登录即可访问Dashboard
将Kube-proxy改为ipvs模式,因为在初始化集群的时候注释了ipvs配置,所以需要自行修改一下:
在master01节点执行
kubectl edit cm kube-proxy -n kube-system

mode: “ipvs”
kubectl patch daemonset kube-proxy -p "{\"spec\":{\"template\":{\"metadata\":{\"annotations\":{\"date\":\"`date +'%s'`\"}}}}}" -n kube-system
[root@k8s-master01 ~]# curl 127.0.0.1:10249/proxyMode
ipvs
注意事项
注意:kubeadm安装的集群,证书有效期默认是一年。master节点的kube-apiserver、kube-scheduler、kube-controller-manager、etcd都是以容器运行的。可以通过kubectl get po -n kube-system查看。
启动和二进制不同的是,
kubelet的配置文件在/etc/sysconfig/kubelet和/var/lib/kubelet/config.yaml
其他组件的配置文件在/etc/Kubernetes/manifests目录下,比如kube-apiserver.yaml,该yaml文件更改后,kubelet会自动刷新配置,也就是会重启pod。不能再次创建该文件
Kubeadm安装后,master节点默认不允许部署pod,可以通过以下方式打开:
查看Taints:
[root@k8s-master01 ~]# kubectl  describe node -l node-role.kubernetes.io/master=  | grep Taints
Taints:             node-role.kubernetes.io/master:NoSchedule
Taints:             node-role.kubernetes.io/master:NoSchedule
Taints:             node-role.kubernetes.io/master:NoSchedule
删除Taint:
[root@k8s-master01 ~]# kubectl  taint node  -l node-role.kubernetes.io/master node-role.kubernetes.io/master:NoSchedule-
node/k8s-master01 untainted
node/k8s-master02 untainted
node/k8s-master03 untainted
[root@k8s-master01 ~]# kubectl  describe node -l node-role.kubernetes.io/master=  | grep Taints
Taints:             <none>
Taints:             <none>
Taints:             <none>
本文分享完毕,感谢支持点赞~~

 浙公网安备 33010602011771号