vscode使用技巧汇总帖(visual studio code)
1.vscode选中变量后高亮显示的颜色
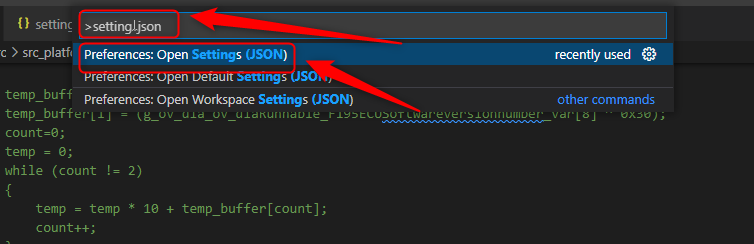
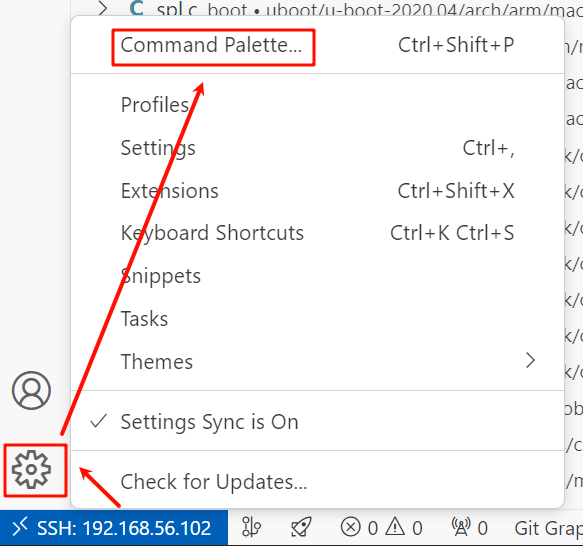
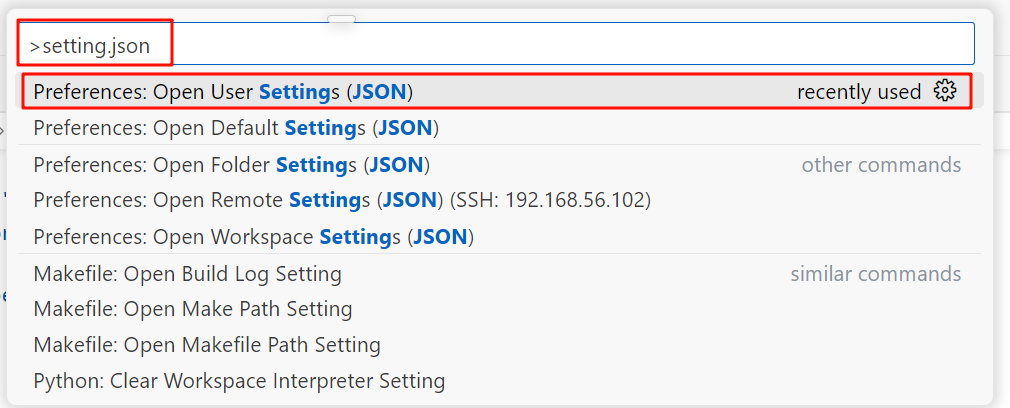
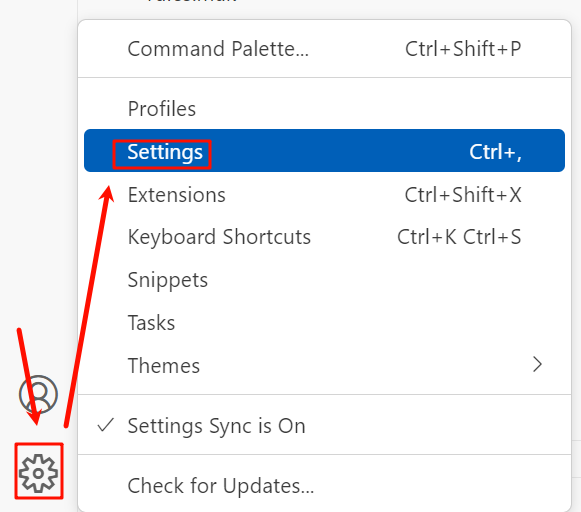
setting->command Palettre...

在输入框里输入setting.json,选择Preferences:Open Settings(JSON)
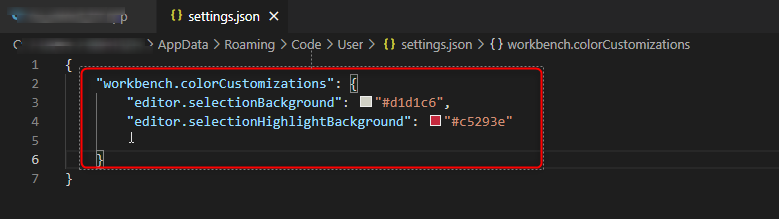
添加如下文本,并保存
参考:https://www.helloworld.net/p/7818308288
2.VS Code配置选中后相同内容高亮功能_类似于source insight 中的shift+F8高亮功能
highlight-words插件
参考:https://blog.csdn.net/u013171226/article/details/108868425
3.vs code经过一系列设置后,这些个人信息保存路径如下
C:\Users\pcName\AppData\Roaming\Code\User( 注意替换pcName为自己电脑设置的名称)
目前我本机的配置如下
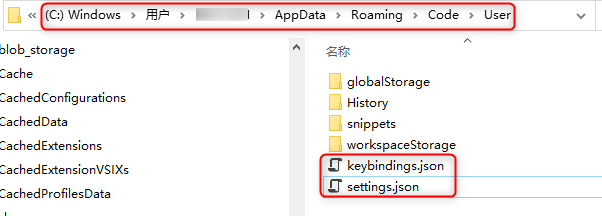
也可以通过gui打开相同的文件
keybindings.json

// Place your key bindings in this file to override the defaultsauto[]
[
    {
        "key": "ctrl+right",
        "command": "workbench.action.navigateForward"
    },
    {
        "key": "ctrl+left",
        "command": "workbench.action.navigateBack"
    },
    {
        "key": "f8",
        "command": "highlightwords.addHighlight"
    },
    {
        "key": "ctrl+enter",
        "command": "editor.action.revealDeclaration"
    },
    {
        "key": "ctrl+k",
        "command": "editor.action.marker.nextInFiles",
        "when": "editorFocus"
    },
    {
        "key": "ctrl+l",
        "command": "PowerShell.RunSelection",
        "when": "editorTextFocus && editorLangId == 'powershell'"
    }
]
settings.json
{
    "workbench.colorCustomizations": {
        //"editor.selectionBackground": "#d1d1c6",
        //"editor.selectionHighlightBackground": "#c5293e"
    },
    "editor.hover.enabled": false,
    "editor.minimap.enabled": false,
    "workbench.startupEditor": "none",
    "[python]": {
        "editor.formatOnType": true
    },
    "editor.fontSize": 14,
    "workbench.colorTheme": "Default Light Modern",
    "remote.SSH.remotePlatform": {
        "192.168.56.101": "linux",
        "192.168.56.102": "linux",
        "192.168.56.103": "linux"
    },
    "git.repositoryScanMaxDepth": 10,
    "window.zoomLevel": 0.5,
    "security.workspace.trust.untrustedFiles": "open",
    "terminal.integrated.copyOnSelection": true,
    "cmake.configureOnOpen": true,
    "files.exclude": {
        //for m55h project, it is softlink, so exclude these three.
        "**/rootfs/rootfs/lib/modules/4.19.125/source/**": true, //rootfs/rootfs/lib/modules/4.19.125/source     ->      kernel/linux/linux-4.19.125
        "**/rootfs/rootfs/lib/modules/4.19.125/build/**": true,  //rootfs/rootfs/lib/modules/4.19.125/build      ->      kernel/linux/linux-4.19.125
        "**/rootfs/rootfs/lib32/**": true,                       //rootfs/rootfs/lib32                           ->      rootfs/rootfs/lib
        "**/kernel/linux/linux-4.19.125/scripts/dtc/include-prefixes/**": true,       //all sub directory under kernel/linux/linux-4.19.125/scripts/dtc/include-prefixes are softlink
        // "**/.DS_Store": false,
        // "**/.git": false,
        // "**/.hg": false,
        // "**/.svn": false,
        // "**/CVS": false,
        // "**/Thumbs.db": false
    },
    "search.exclude": {
        //for current project, it is softlink, so exclude these three.
        "**/rootfs/rootfs/lib/modules/4.19.125/source/**": true, //rootfs/rootfs/lib/modules/4.19.125/source     ->      kernel/linux/linux-4.19.125
        "**/rootfs/rootfs/lib/modules/4.19.125/build/**": true,  //rootfs/rootfs/lib/modules/4.19.125/build      ->      kernel/linux/linux-4.19.125
        "**/rootfs/rootfs/lib32/**": true,                       //rootfs/rootfs/lib32                           ->      rootfs/rootfs/lib
        "**/kernel/linux/linux-4.19.125/scripts/dtc/include-prefixes/**": true,       //all sub directory under kernel/linux/linux-4.19.125/scripts/dtc/include-prefixes are softlink
        // "**/*.code-search": false,
        // "**/bower_components": false,
        // "**/node_modules": false
    },
    "C_Cpp.intelliSenseEngine": "Tag Parser",
    "cmake.showOptionsMovedNotification": false,
    "json.schemas": [

    ]

}
4.在source control下面显示 内嵌的git repo
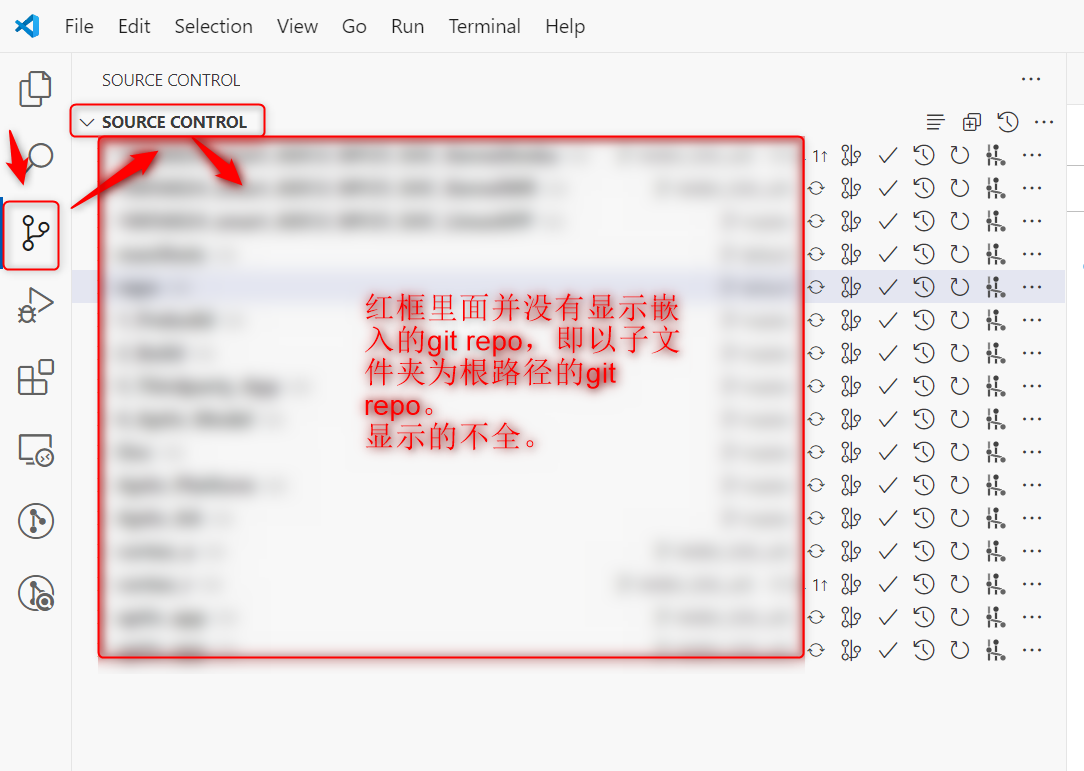
打开setting,在里面搜索git.repositoryScanMaxDepth,并设置成 你想要的检测深度,即可,这里我设置成了10。

参考:https://github.com/microsoft/vscode/issues/161797
5.How To Always Open Files in New Tab in VSCode
https://www.automationdojos.com/how-to-always-open-files-in-new-tab-in-vscode/
6.vscode中通过ssh连接服务器时,不需要每次都输入密码
https://www.cnblogs.com/midhillzhou/p/18081415
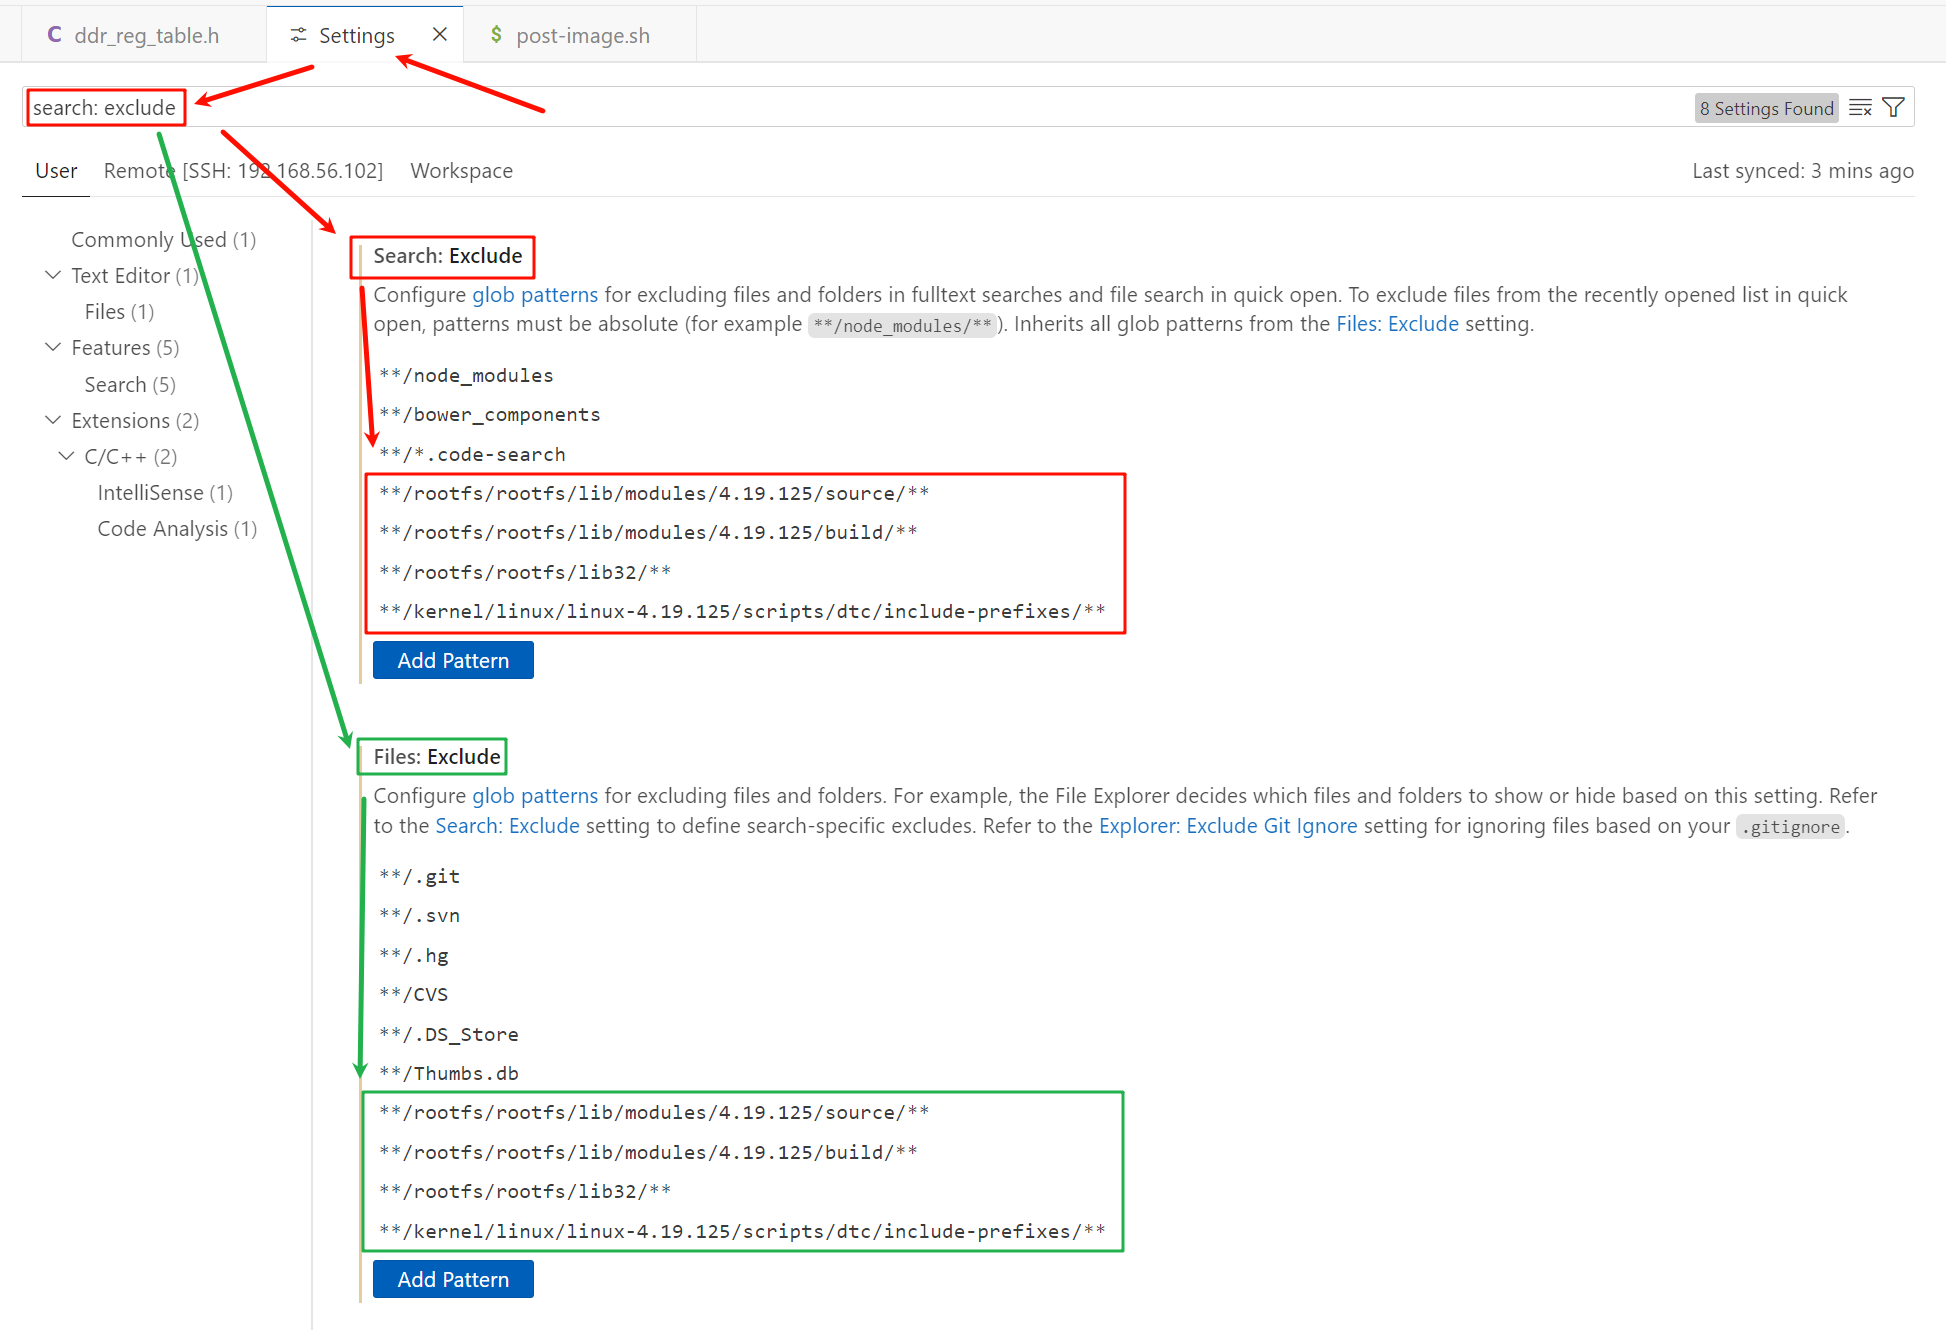
7.在搜索结果中,忽略某些文件夹
可以按如下方式进行添加,也可以直接到setting.json中添加,更加本质化,具体参看上面第3节中的setting.json文件。
8.vscode跳转到定义的性能问题
8.1 在文件-首选项-设置中搜索C_Cpp.intelliSenseEngine
8.2 指定使用的引擎为Tag Parser
参考:https://blog.csdn.net/gzxb1995/article/details/137675838


【推荐】国内首个AI IDE,深度理解中文开发场景,立即下载体验Trae
【推荐】编程新体验,更懂你的AI,立即体验豆包MarsCode编程助手
【推荐】抖音旗下AI助手豆包,你的智能百科全书,全免费不限次数
【推荐】轻量又高性能的 SSH 工具 IShell:AI 加持,快人一步
· winform 绘制太阳,地球,月球 运作规律
· 震惊!C++程序真的从main开始吗?99%的程序员都答错了
· AI与.NET技术实操系列(五):向量存储与相似性搜索在 .NET 中的实现
· 超详细:普通电脑也行Windows部署deepseek R1训练数据并当服务器共享给他人
· 【硬核科普】Trae如何「偷看」你的代码?零基础破解AI编程运行原理