Ocelot(一)-微服务网关
参考: Ocelot官方文档
Ocelot是什么:
Ocelot是.NET下最常用的轻量型微服务网关,主要是用来组织.NETCORE 的微服务为统一服务入口,业务服务实际上是不对外网开放的,统一使用微服务网关进行访问。
Ocelot设置:
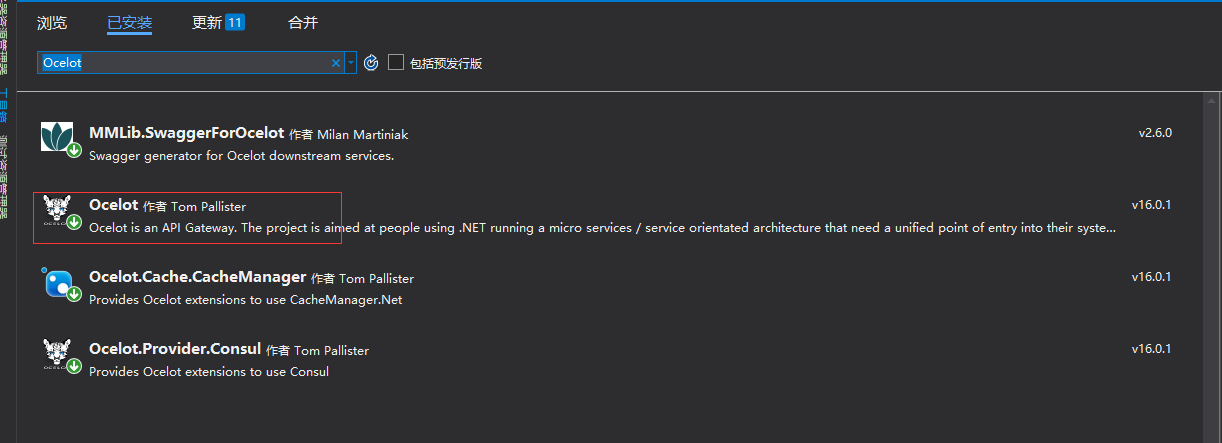
创建一个netcore webapi项目 添加ocelot引用:

cache和consul 缓存和服务发现暂时不使用,可以不添加.
项目启动文件Program和StartUp代码如下:
Program.cs
using Microsoft.AspNetCore.Hosting;
using Microsoft.Extensions.Configuration;
using Microsoft.Extensions.Hosting;
using Microsoft.Extensions.Logging;
using NLog.Web;

namespace GetwayService
{
    public class Program
    {
        public static void Main(string[] args)
        {
            CreateHostBuilder(args).Build().Run();
        }

        /// <summary>
        /// 使用startup初始化
        /// </summary>
        /// <param name="args"></param>
        /// <returns></returns>
        public static IHostBuilder CreateHostBuilder(string[] args) =>
         Host.CreateDefaultBuilder(args)
            .ConfigureLogging((context, loggingBuilder) =>
            {

                loggingBuilder.ClearProviders();
                loggingBuilder.AddDebug();//添加显示到控制台
                loggingBuilder.AddConsole();
            })
             .ConfigureAppConfiguration((hostingContext, config) =>
             {
                 //config.SetBasePath(hostingContext.HostingEnvironment.ContentRootPath)
                 //    .AddJsonFile("appsettings.json", true, true);
                     config.AddJsonFile("ocelot.json");
             })
            .ConfigureWebHostDefaults(webBuilder =>
            {
                webBuilder.UseUrls();//配置urls
                webBuilder.UseStartup<Startup>();
            }).UseNLog();


    }

}
StartUp.cs
using Microsoft.AspNetCore.Builder;
using Microsoft.AspNetCore.Hosting;
using Microsoft.Extensions.Configuration;
using Microsoft.Extensions.DependencyInjection;
using Ocelot.DependencyInjection;
using Ocelot.Middleware;

namespace GetwayService
{
    public class Startup
    {
        public Startup(IConfiguration configuration)
        {
            Configuration = configuration;
        }

        public IConfiguration Configuration { get; }

        // This method gets called by the runtime. Use this method to add services to the container.
        public void ConfigureServices(IServiceCollection services)
        {

            services.AddOcelot();
            services.AddControllers();
        }

        // This method gets called by the runtime. Use this method to configure the HTTP request pipeline.
        public void Configure(IApplicationBuilder app, IWebHostEnvironment env)
        {

            //app.UseHttpsRedirection();

            app.UseOcelot().Wait();

            app.UseRouting();

            app.UseAuthorization();

            app.UseEndpoints(endpoints =>
            {
                endpoints.MapControllers();
            });
        }
    }
}
添加完后我们开始配置json文件ocelot。
1.转发设置:
非常简单不需要在业务服务商进行任何配置只需要创建一个ocelot项目,配置ocelot.json文件即可,ocelot可以配置发现服务Consul使用,也可以直接配置服务地址,不使用发现服务,这里为了入门学习暂时不使用发现服务(服务比较多的情况下推荐使用Consul).
如下所示,这里创建了一个转发服务,当访问http://localhost:8001/goods/***时,全部转发到http://localhost:7001路径下.
ocelot.json:
{
  "Routes": [
    {
      "DownstreamPathTemplate": "/{url}", //跳转到localhost:7001根路由下
      "DownstreamScheme": "http",
      "DownstreamHostAndPorts": [
        {
          "Host": "localhost",
          "Port": 7001
        }
      ],
      "UpstreamPathTemplate": "/goods/{url}", //网关地址+/goods
      "UpstreamHttpMethod": [ "POST", "PUT", "GET","DELETE"]
    }
  ],
  "GlobalConfiguration": {
    "BaseUrl": "http://localhost:8001"//网关访问地址也是网关程序的端口地址
  }
}
参数解析:
ocelot主要的json参数:
GlobalConfiguration和Routes:

  GlobalConfiguration网关入口设置,和业务服务无关,用于外部访问

  Routes路由设置:配置网关服务接收到HTTP请求后的转发规则。

Routes参数:
Upstream***:表示网关路由
Downstream***:表示下游业务地址,也就是实际的目录网址.
DownstreamHostAndPorts:下游业务服务器,可以配置多组,使用负载均衡.
如上图所示,一个简单的转发就完成了.


 浙公网安备 33010602011771号