
Linux Web服务器Nginx
一、web服务是什么?

web服务是一种服务导向架构的技术,通过标准的Web协议提供服务,目的是保证不同平台的应用服务可以互操作。 根据W3C的定义,Web服务应当是一个软件系统,用以支持网络间不同机器的互动操作。网络服务通常是许多应用程序接口所组成的,它们透过网络,例如国际互联网的远程服务器端,执行客户所提交服务的请求。
二、常见的web服务器软件
apache

Apache是世界使用排名第一的Web服务器软件。它可以运行在几乎所有广泛使用的计算机平台上,由于其跨平台和安全性被广泛使用,是最流行的Web服务器端软件之一。它快速、可靠并且可通过简单的API扩充,将Perl/Python等解释器编译到服务器中。
nginx

Nginx是一款轻量级的Web 服务器/反向代理服务器及电子邮件(IMAP/POP3)代理服务器,在BSD-like 协议下发行。其特点是占有内存少,并发能力强,事实上nginx的并发能力在同类型的网页服务器中表现较好,中国大陆使用nginx网站用户有:百度、京东、新浪、网易、腾讯、淘宝等。
网络模型及其对比
apache使用select模型
nginx使用epoll模型
三、Nginx命令
-
-v :打印版本号

-
-V :打印版本号及配置项

-
-t :检查配置文件

-
-T :测试配置文件并启动
-
-q :打印错误日志
-
-s [选项] : 操作进程
[root@web01 ~]# nginx -s stop # 停止 [root@web01 ~]# nginx -s quit # 退出 [root@web01 ~]# nginx -s reopen # 重启 [root@web01 ~]# nginx -s reload # 重载 -
-p :指定nginx的工作目录
-
-e :指定错误日志路径
-
-c : 指定配置文件的路径
-
-g : 设置一个全局的Nginx配置项
[root@web01 ~]# nginx -g 'daemon off;'
四、Nginx配置文件
#user  nobody;
worker_processes  1;

#error_log  logs/error.log;
#error_log  logs/error.log  notice;
#error_log  logs/error.log  info;

#pid        logs/nginx.pid;

events {
    worker_connections  1024;
}

http {
    include       mime.types;
    default_type  application/octet-stream;

    #log_format  main  '$remote_addr - $remote_user [$time_local] "$request" '
    #                  '$status $body_bytes_sent "$http_referer" '
    #                  '"$http_user_agent" "$http_x_forwarded_for"';

    #access_log  logs/access.log  main;

    sendfile        on;
    #tcp_nopush     on;

    #keepalive_timeout  0;
    keepalive_timeout  65;

    #gzip  on;

    server {
        listen       80;
        server_name  localhost;

        #charset koi8-r;

        #access_log  logs/host.access.log  main;

        location / {
            root   html;
            index  index.html index.htm;
        }

        #error_page  404              /404.html;

        # redirect server error pages to the static page /50x.html
        #
        error_page   500 502 503 504  /50x.html;
        location = /50x.html {
            root   html;
        }
    }
}
- user :指定nginx启动用户
- worker_processes :定义nginx worker进程数
- error_log :错误日志路径
- pid :pid的存放文件路径
- events :模块配置
- worker_connections :每一个worker进程最多同时接入多少个请求
- use : 指定Nginx的网络模型(此项默认不需要配置)
- http : web服务的模块
- include : 加载外部的配置项
- default_type : 如果找不到文件的类型,则按照指定默认类型处理
- log_format : 定义日志格式
log_format json '{"@timestamp":"$time_iso8601",' '"host":"$server_addr",' '"service":"nginxTest",' '"trace":"$upstream_http_ctx_transaction_id",' '"log":"log",' '"clientip":"$remote_addr",' '"remote_user":"$remote_user",' '"request":"$request",' '"http_user_agent":"$http_user_agent",' '"size":$body_bytes_sent,' '"responsetime":$request_time,' '"upstreamtime":"$upstream_response_time",' '"upstreamhost":"$upstream_addr",' '"http_host":"$host",' '"url":"$uri",' '"domain":"$host",' '"xff":"$http_x_forwarded_for",' '"referer":"$http_referer",' '"status":"$status"}'; access_log /var/log/nginx/access.log json ; - sendfile : 高效读取文件
- keepalive_timeout : 长连接保持连接的最大时间
- server : 网址模块
- listen : 监听的端口
- server_name : 定义域名
- location : 访问路径
- root :指定网址路径
- index:指定网址的索引文件
location
Nginx Location可以控制访问网站的路径, 一个server中可以有多个location配置, 多个location的优先级区如下,
| 匹配符 | 匹配规则 | 优先级 |
|---|---|---|
| = | 精确匹配 | 1 |
| ^~ | 以某个字符串开头 | 2 |
| ~ | 区分大小写的正则匹配 | 3 |
| ~* | 不区分大小写的正则匹配 | 3 |
| / | 通用匹配,任何请求都会匹配到 | 4 |
Nginx模块

ngx_http_log_module
该模块以指定的格式写入请求日志,下面是一段官网文档介绍:
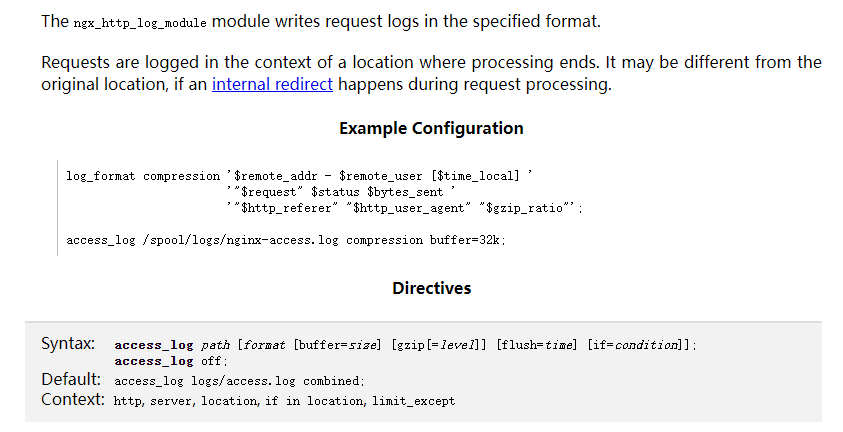
可以在http, server, location, if in location, limit_except上下文中使用。
附上nginx默认日志配置(/etc/nginx/nginx.conf);

简单地说明日志格式化模块中地一些变量,
$remote_addr     # 客户端地址
$remote_user     # 使用auth_basic_module模块定义的用户名
$time_local      # 本地时间
$request         # 客户端请求头信息
$status          # http状态码
$body_bytes_sent # 客户端发送的http响应中包体部分的字节数
$http_referer    # 记录请求的来源地址
$http_user_agent # 访问服务器的操作系统 浏览器
$http_x_forwarded_for # 真实的客户端IP(在反向代理中生效)

[root@web01 nginx]# tail access.log
192.168.15.1 - - [04/Jan/2022:12:25:34 +0800] "GET /mario/sounds/jump.mp3 HTTP/1.1" 404 555 "http://game.xzj.com/mario/" "Mozilla/5.0 (Windows NT 10.0; Win64; x64) AppleWebKit/537.36 (KHTML, like Gecko) Chrome/96.0.4664.110 Safari/537.36 Edg/96.0.1054.62" "-"
ngx_http_access_module
该模块允许限制对某些客户端地址的访问,下面是一段官网文档介绍:

可以在http, server, location, limit_except上下文中使用。
deny表示拒绝,allow表示接受,地址可以是单ip也可以是网段,all表示所有。
规则匹配顺序自上而下,直至匹配到符合条件的第一项停止。
ngx_http_auth_basic_module
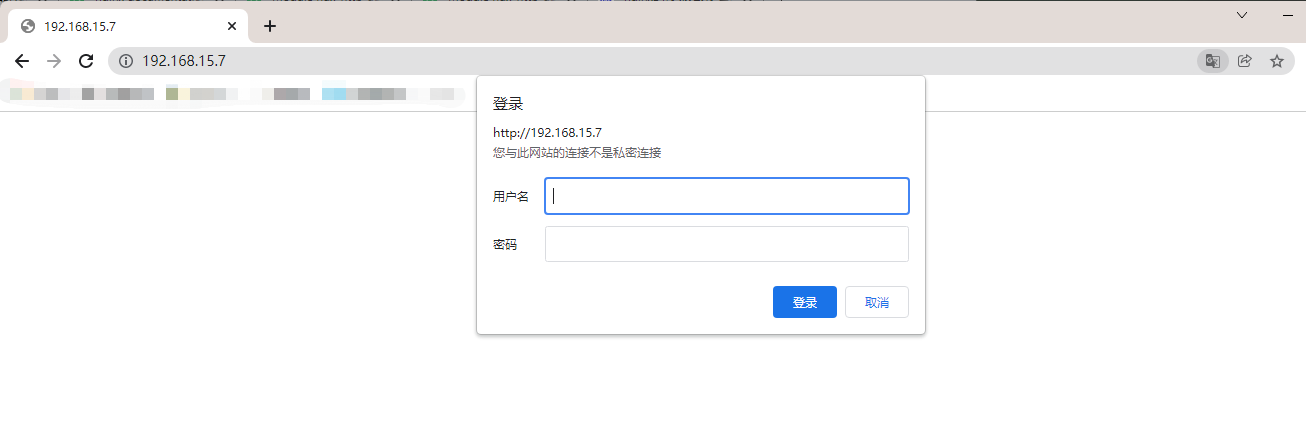
该模块允许通过使用"HTTP 基本身份验证"协议验证用户名和密码来限制对资源的访问,下面是官网文档介绍:
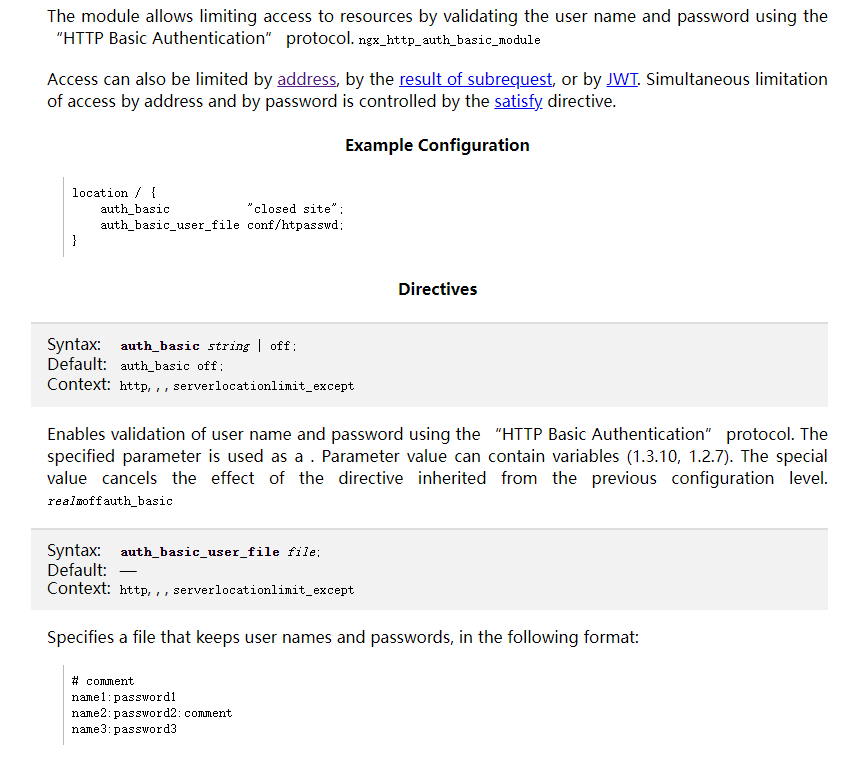
可以在http, server, location, limit_except上下文中使用。
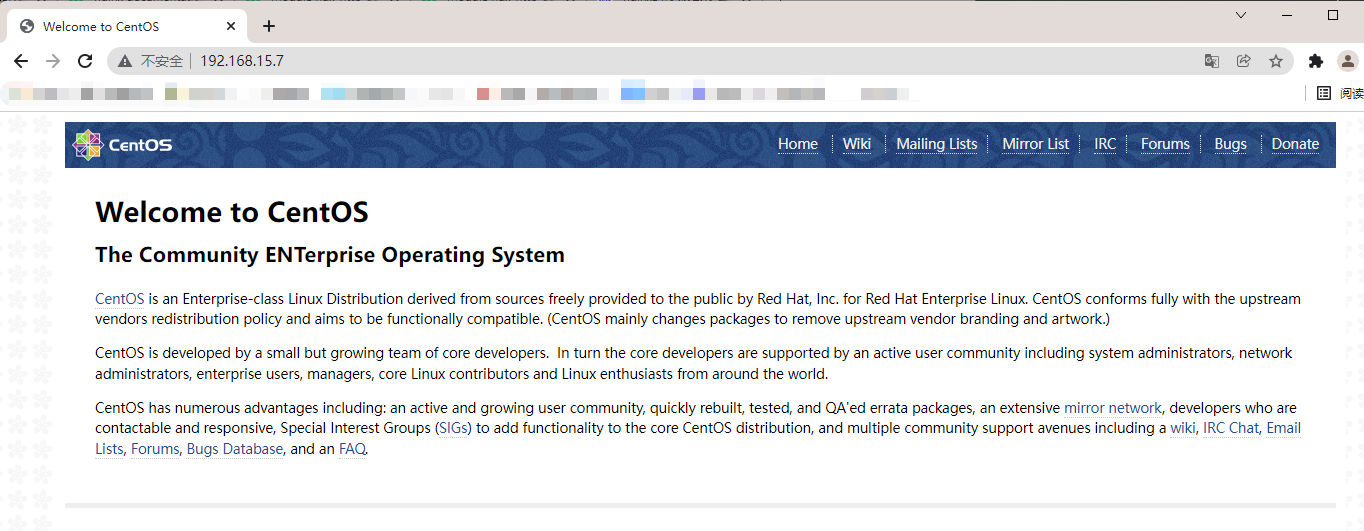
默认我们访问虚拟机可以直接访问,
此时我们下载httpd-tools软件,使用命令htpasswd -c [密码文件目录] [用户名]创建密码文件。
htpasswd -c /etc/nginx/auth test
cat /etc/nginx/auth


接着配置 /etc/nginx/nginx.conf 文件,加入以下配置项;
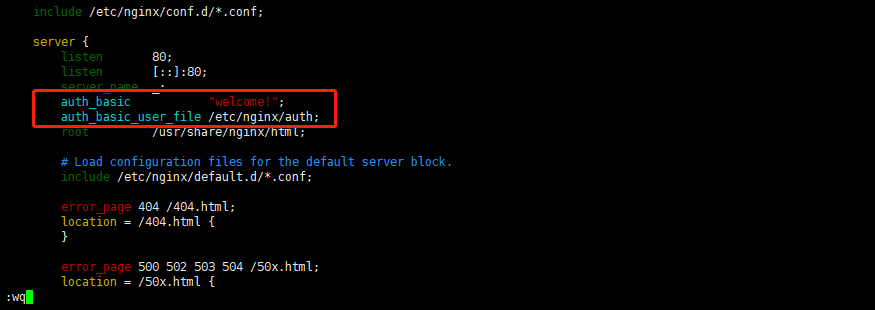
重启nginx访问虚拟机,发现需要您输入用户名密码,如果取消显示401;

ngx_http_autoindex_module
该模块处理以斜杠字符 ('') 结尾的请求,并生成一个目录列表。通常,当ngx_http_index_module模块找不到索引文件时,会将请求传递给模块,下面是官网文档介绍:

可以在http,server,location上下文中使用。
autoindex
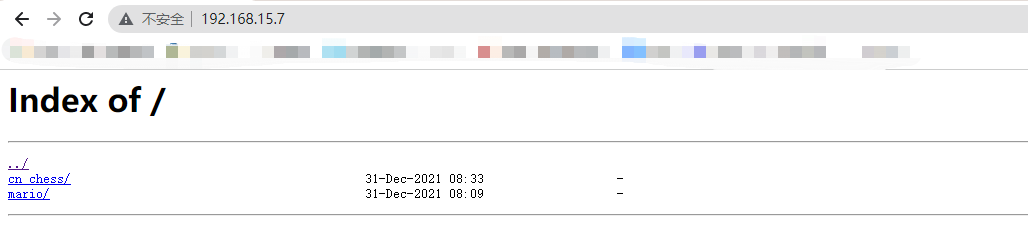
在ngx_http_auth_basic_module模块我们设置用户及密码限制访问,在此基础上我们继续修改一些配置项,如下;
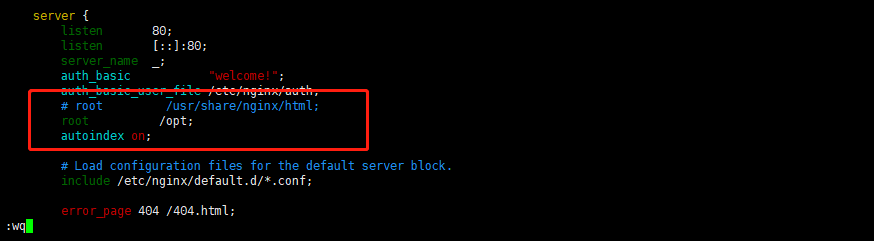
修改好后访问通过浏览器访问虚拟机,输入用户和密码显示如下,
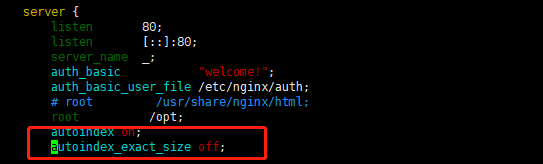
autoindex_exact_size
autoindex_exact_size配置项默认是 on,指定文件在目录列表下的大小是否以字节显示。在opt目录下创建文件夹test,使用 dd 命令创建一个大文件hello.txt,显示如下;

我们设置autoindex_exact_size off;,然后重载配置文件重新访问;

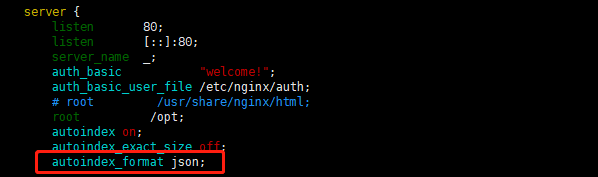
autoindex_format
autoindex_format 指定目录下的文件及文件夹显示格式,格式可以是 html | xml | json | jsonp,默认是autoindex_format html;
此处测试下json格式,改动如下;

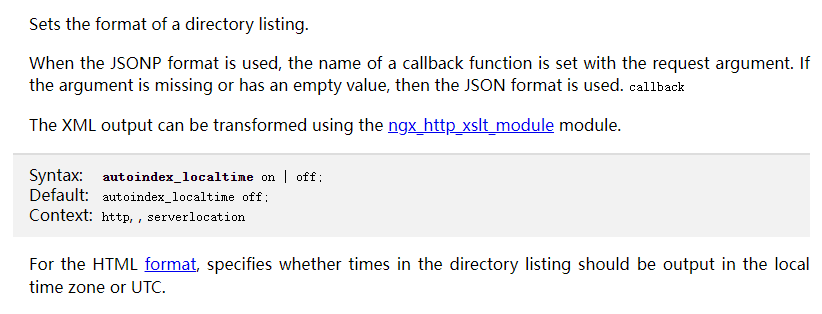
autoindex_localtime
autoindex_localtime指定目录列表中的时间是应以本地时区输出还是UTC时间。默认是autoindex_localtime off;。

接着我们开启本地时间autoindex_localtime on;,效果如下;

ngx_http_stub_status_module
ngx_http_stub_status_module该模块提供对基本状态信息的访问,下面是官网文档介绍:
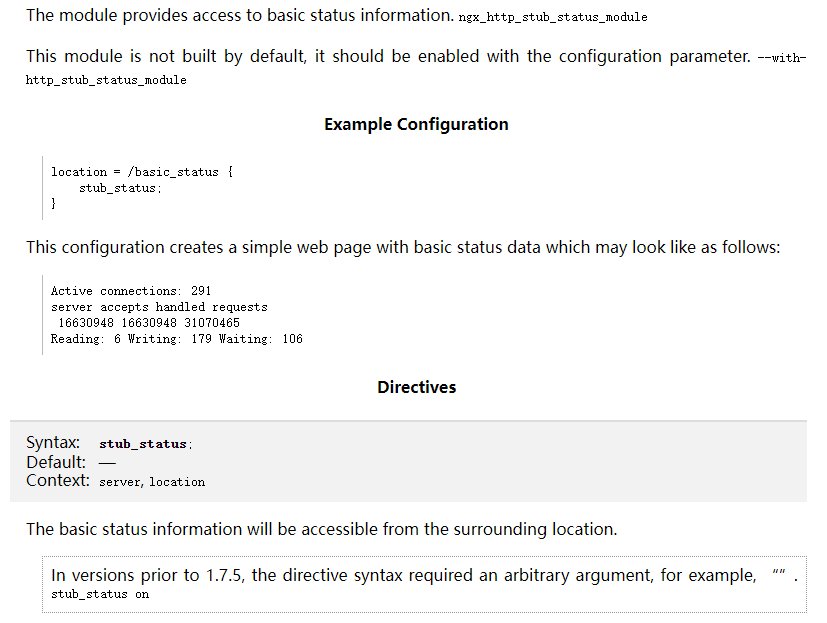
可以在server,location上下文中使用。
我们在/etc/nginx/nginx.conf配置文件server中添加新location,
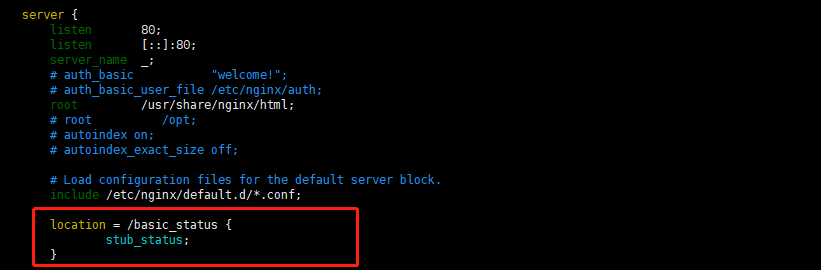
完成后重载配置文件,访问192.168.15.7/basic_status;

根据上图显示内容,介绍字段的含义:
Active connections
当前活动客户端连接数(包括连接数)。Waiting
accepts
接受的客户端连接总数。
handled
已处理连接的总数。通常,参数值与未达到某些资源限制(例如,worker_connections限制)时相同。accepts
requests
客户端请求的总数。
Reading
nginx 正在读取请求标头的当前连接数。
Writing
nginx 将响应写回客户端的当前连接数。
Waiting
等待请求的当前空闲客户端连接数。
ngx_http_limit_conn_module
该模块用于限制每个已定义键的连接数,特别是来自单个 IP 地址的连接数。ngx_http_limit_conn_module并非所有连接都计算在内。仅当连接具有服务器正在处理的请求并且已读取整个请求标头时,才会对连接进行计数。
limit_conn
设置共享内存区域和给定键值允许的最大连接数。当超过此限制时,服务器将在回复请求时返回错误。例如,
limit_conn_zone $remote_addr zone=addr:10m;

server {
    location /download/ {
        limit_conn addr 1;
    }
一次只允许每个 IP 地址连接一个。
ngx_http_limit_req_module
该模块用于限制每个已定义键的请求处理速率,特别是来自单个 IP 地址的请求的处理速率。
limit_req_zone
limit_req_zone设置共享内存区域的参数,该区域将保留各种键的状态。特别是,状态存储当前过多请求数。
使用示例:
limit_req_zone $remote_addr zone=one:10m rate=1r/s;
此处,状态保存在 10 MB 区域"one"中,并且此区域的平均请求处理速率不能超过每秒 1 个请求。
limit_req
设置共享内存区域和请求的最大突发大小。如果请求速率超过为区域配置的速率,则其处理将延迟,以便以定义的速率处理请求。过多的请求会延迟,直到其数量超过最大突发大小,在这种情况下,请求将终止并显示错误。默认情况下,最大突发大小等于零。例如,
http {
    limit_req_zone $remote_addr zone=one:10m rate=1r/s;
    ...
    server {
        ...
        location /search/ {
            limit_req zone=one burst=5;
        }
平均每秒允许不超过 1 个请求,突发不超过 5 个请求。
此处我们可以做个压力测试,发送10000次请求,每次同时发送100次请求;
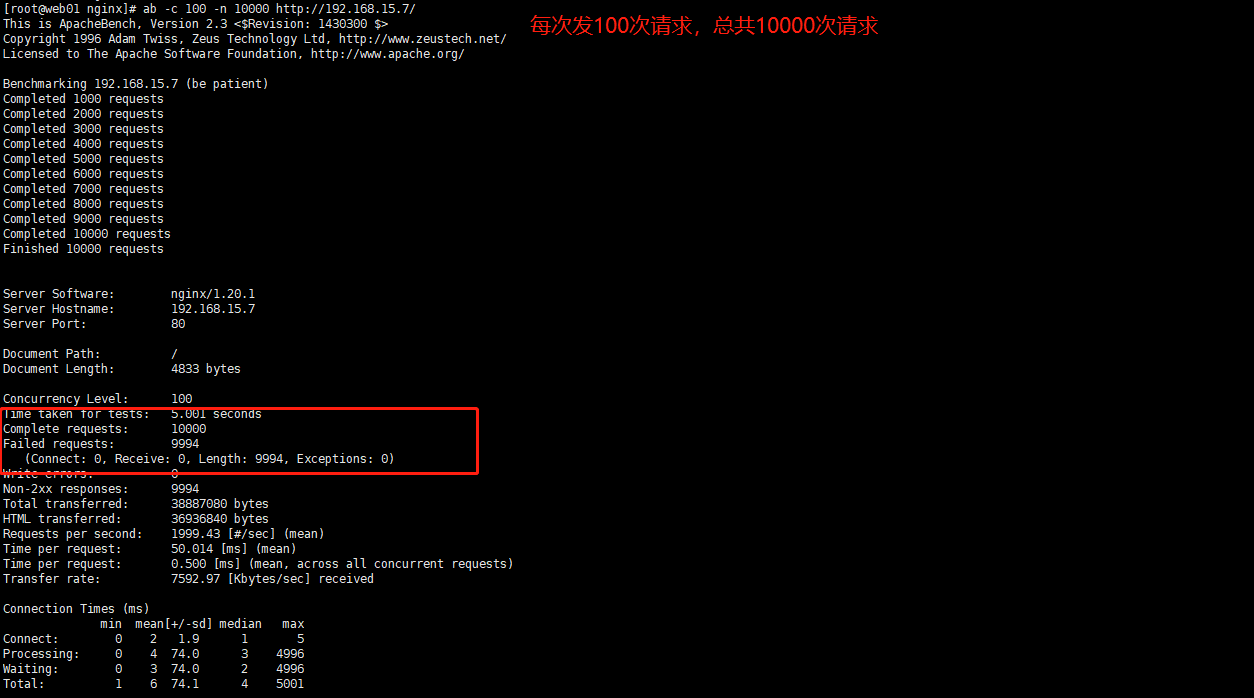
结果显示失败了9994次,是符合我们配置预期的。
部署网站测试
1、将准备好的代码文件放到/opt/mario目录下

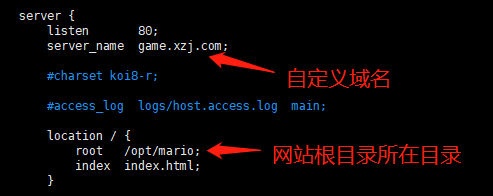
2、编辑nginx配置文件
server {
        listen       80;
        server_name  game.xzj.com;
        location / {
            root   /opt/mario;
            index  index.html;
        }
3、检查配置文件是否正确,并重启nginx
[root@web01 conf.d]# nginx -t
nginx: the configuration file /etc/nginx/nginx.conf syntax is ok
nginx: configuration file /etc/nginx/nginx.conf test is successful
[root@web01 conf.d]# systemctl restart nginx
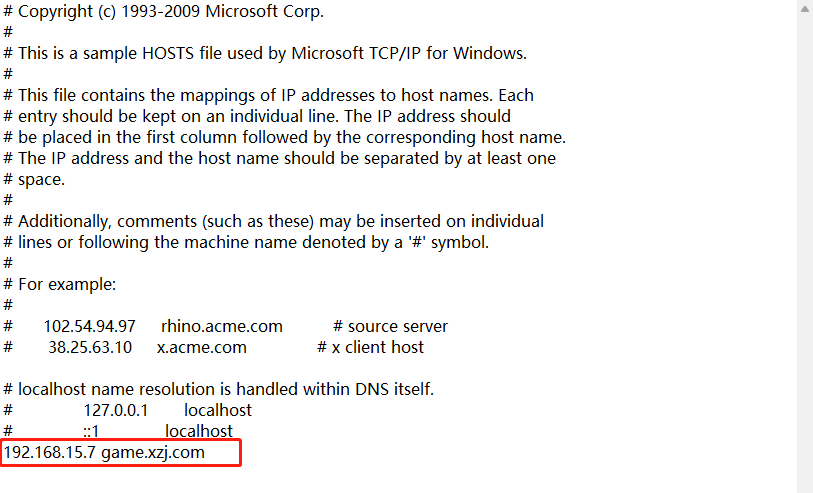
4、域名解析
在本地 windows目录 C:\Windows\System32\drivers\etc\hosts 下添加域名解析
5、访问域名

LNMP架构
LNMP是一套技术的组合,L=Linux、N=Nginx、M=MySQL、P=Python

首先Nginx服务是不能处理动态请求,那么当用户发起动态请求时, Nginx又是如何进行处理的。
- 静态请求:请求的内容是静态文件就是静态请求
1)静态文件:文件上传到服务器,永远不会改变的文件就是静态文件
2)html就是一个标准的静态文件 - 动态请求:请求的内容是动态的就是动态请求
1)不是真实存在服务器上的内容,是通过数据库或者其他服务拼凑成的数据
当用户发起http请求,请求会被Nginx处理,如果是静态资源请求Nginx则直接返回,如果是动态请求Nginx则通过uwsgi协议转交给后端的Python程序处理。
uwsgi

因为nginx不支持wsgi协议,无法直接调用py开发的webApp。
在nginx+uwsgi+Django的框架里,nginx代理+webServer,uwsgi是wsgiServer,Django是webApp。
nginx接收用户请求,并判定哪些转发到uwsgi,uwsgi再去调用pyWebApp。
uwsgi服务部署
1、安装依赖软件及其软件
yum install python3 libxml* python-devel gcc* pcre-devel openssl-devel python3-devel -y

pip3 install django
pip3 install uwsgi
2、创建应用目录
# 在/opt目录下创建django工程
[root@web01 opt]# cd /opt
[root@web01 opt]# django-admin startproject myapp
# 在django工程目录中创建应用app01
[root@web01 opt]# cd myapp
[root@web01 myapp]# django-admin startapp app01
# 修改配置文件
[root@web01 myapp]# vim myapp/settings.py
ALLOWED_HOSTS = ['*'] # 允许所有ip访问
DATABASES = {} # 数据库此时不配置为空
3、在/opt/myapp/目录下创建uwsgi.ini文件
[root@localhost ~]# vim /opt/myapp/uwsgi.ini
# 配置内容如下
######################################
[uwsgi]
# 端口号
socket            = :8000
# 指定项目的目录
chdir           = /opt/myapp
# wsgi文件路径
wsgi-file       = myapp/wsgi.py
# 模块wsgi路径
module          = myapp.wsgi
# 是否开启master进程
master          = true
# 工作进程的最大数目
processes       = 4
# 结束后是否清理文件
vacuum          = true
4、启动uwsgi
# -d : 以守护进程方式运行
# --ini : 指定配置文件路径
# --uid : 指定uid
[root@web01 myapp]# uwsgi -d --ini uwsgi.ini --uid 666
5、由于uwsgi是tcp连接并不是http连接,我们需要配置下nginx
[root@localhost myapp]# vim /etc/nginx/conf.d/myapp.conf
# 编辑内容如下
server {
    listen 80;
    server_name py.myapp.com;
    location / {
        include uwsgi_params;
        uwsgi_pass 127.0.0.1:8000;
        uwsgi_read_timeout 2;
        uwsgi_param UWSGI_SCRIPT myapp.wsgi;
        uwsgi_param UWSGI_CHDIR /opt/myapp;
        index  index.html index.htm;
        client_max_body_size 35m;
    }
}
6、启动或重启nginx并访问网址


