小项目


先在各nginx服务器安装nginx和php
[root@nginx ~]# yum install php-fpm php-mysql nginx -y
[root@nginx2 ~]# yum install nginx php-fpm php-mysql -y
配置各nginx服务器
[root@nginx src]# vim /etc/nginx/nginx.conf
 server {
        listen       80;

        include /etc/nginx/default.d/*.conf;

        location / {
                index index.php index.html index.htm;
                root /data/wordpress;
        }

        location ~ \.php$ {
        root           /data/wordpress;
        fastcgi_pass   127.0.0.1:9000;
        fastcgi_index  index.php;
        fastcgi_param  SCRIPT_FILENAME  $document_root$fastcgi_script_name;
        include        fastcgi_params;
    }
    }


[root@nginx2 src]# vim /etc/nginx/nginx.conf
 server {
        listen       80;

        include /etc/nginx/default.d/*.conf;

        location / {
                index index.php index.html index.htm;
                root /data/wordpress;
        }

        location ~ \.php$ {
        root           /data/wordpress;
        fastcgi_pass   127.0.0.1:9000;
        fastcgi_index  index.php;
        fastcgi_param  SCRIPT_FILENAME  $document_root$fastcgi_script_name;
        include        fastcgi_params;
    }
    }
将wordpress服务放在个nginx服务器的目录下
[root@nginx src]# cd /data/wordpress/
[root@nginx wordpress]# ls

[root@nginx2 src]# cd /data/wordpress/
[root@nginx2 wordpress]# ls
在mariadb服务器安装MySQL并启动服务
[root@mariadb-master ~]# yum install mariadb-server -y
配置mariadb服务,授权一个wordpress用户
MariaDB [(none)]> create database wordpress;
Query OK, 1 row affected (0.00 sec)

MariaDB [(none)]> grant all on wordpress.* to 'wordpress'@'192.168.37.%' identified by 'centos';
Query OK, 0 rows affected (0.00 sec)

MariaDB [(none)]> flush privileges;
在各nginx服务器配置wordpress
[root@nginx2 wordpress]# mv wp-config-sample.php wp-config.php
[root@nginx2 wordpress]# vim wp-config.php
define('DB_NAME', 'wordpress');

/** MySQL数据库用户名 */
define('DB_USER', 'wordpress');

/** MySQL数据库密码 */
define('DB_PASSWORD', 'centos');

/** MySQL主机 */
define('DB_HOST', '192.168.37.23');

/** 创建数据表时默认的文字编码 */
define('DB_CHARSET', 'utf8');


[root@nginx wordpress]# mv wp-config-sample.php wp-config.php
[root@nginx wordpress]# vim wp-config.php
define('DB_NAME', 'wordpress');

/** MySQL数据库用户名 */
define('DB_USER', 'wordpress');

/** MySQL数据库密码 */
define('DB_PASSWORD', 'centos');

/** MySQL主机 */
define('DB_HOST', '192.168.37.23');

/** 创建数据表时默认的文字编码 */
define('DB_CHARSET', 'utf8');
在各haproxy上安装haproxy服务
[root@haproxy ~]# yum install haproxy -y
[root@haproxy2 ~]# yum install haproxy -y
配置haproxy
[root@haproxy2 ~]# vim /etc/haproxy/haproxy.cfg
listen webserver
bind 192.168.37.25:80,192.168.37.100:80
mode http
server web1 192.168.37.21:80 check inter 2s fall 3 rise 5
server web1 192.168.37.22:80 check inter 2s fall 3 rise 5

[root@haproxy ~]# vim /etc/haproxy/haproxy.cfg
listen webserver
bind 192.168.37.24:80,192.168.37.100:80
mode http
server web1 192.168.37.21:80 check inter 2s fall 3 rise 5
server web1 192.168.37.22:80 check inter 2s fall 3 rise 5
在haproxy服务器安装keepalived
[root@haproxy ~]# yum install keepalived -y
[root@haproxy2 ~]#  yum install keepalived -y
配置keepalived
[root@haproxy ~]# vim /etc/keepalived/keepalived.conf
smtp_server 127.0.0.1
   smtp_connect_timeout 30
   router_id LVS_DEVEL
   vrrp_skip_check_adv_addr
   vrrp_strict
   vrrp_iptables
   vrrp_garp_interval 0
   vrrp_gna_interval 0
}

vrrp_instance VI_1 {
    state MASTER
    interface eth0
    virtual_router_id 51
    priority 100
    advert_int 1
    authentication {
        auth_type PASS
        auth_pass 1111
    }
    virtual_ipaddress {
        192.168.37.100 dev eth0 label eth0:1
    }
}


[root@haproxy2 ~]# vim /etc/keepalived/keepalived.conf  router_id LVS_DEVEL
   vrrp_skip_check_adv_addr
   vrrp_strict
   vrrp_iptables
   vrrp_garp_interval 0
   vrrp_gna_interval 0
}

vrrp_instance VI_1 {
    state BACKUP
    interface eth0
    virtual_router_id 51
    priority 80
    advert_int 1
    authentication {
        auth_type PASS
        auth_pass 1111
    }
    virtual_ipaddress {
        192.168.37.100 dev eth0 label eth0:1
    }
}
开启各haproxy的内核参数
[root@haproxy2 ~]# vim /etc/sysctl.conf
net.ipv4.ip_nonlocal_bind = 1

[root@haproxy2 ~]# sysctl -p

[root@haproxy ~]# vim /etc/sysctl.conf
net.ipv4.ip_nonlocal_bind = 1

[root@haproxy ~]# sysctl -p
修改物理机hosts文件
192.168.37.100 www.magedu.com
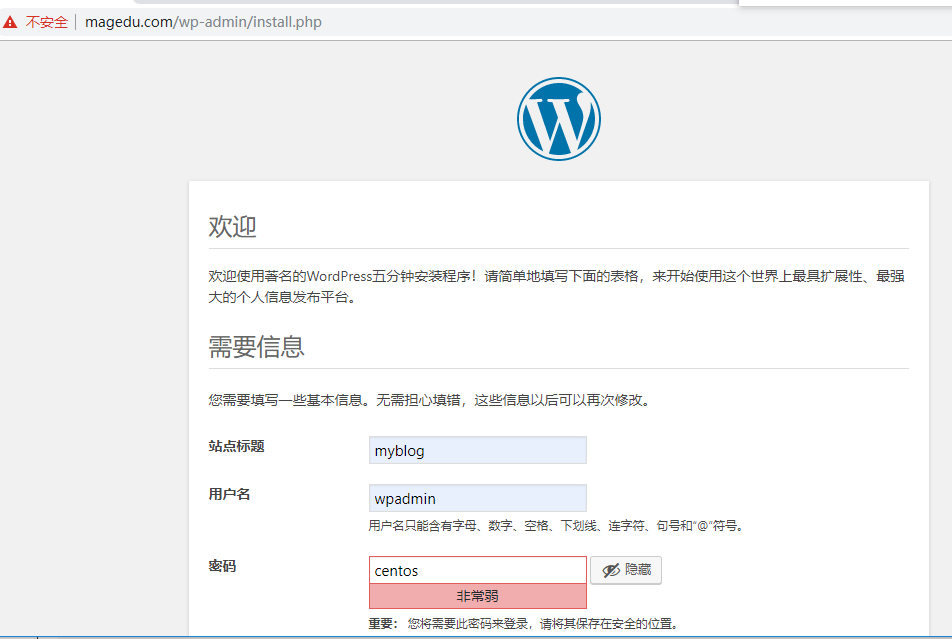
在物理机浏览器配置wordpress
在mairadb-master服务器安装nfs
[root@mariadb-master ~]# yum install nfs-utils -y
配置nfs
[root@mariadb-master ~]# vim /etc/exports
/data/wordpress *(rw,no_root_squash)
[root@mariadb-master ~]# mkdir /data/wordpress
在各nginx添加www用户
[root@nginx wordpress]# groupadd -g 88 www
[root@nginx wordpress]# useradd -u 88 -g 88 www
[root@nginx wordpress]# id www
uid=88(www) gid=88(www) groups=88(www)


[root@nginx2 wordpress]# groupadd -g 88 www
[root@nginx2 wordpress]# useradd -u 88 -g 88 www
配置各nginx服务使用www用户并重启服务
[root@nginx2 wordpress]# vim /etc/nginx/nginx.conf
user www;

[root@nginx2 wordpress]# vim /etc/php-fpm.d/www.conf
user = www
; RPM: Keep a group allowed to write in log dir.
group = www

[root@nginx wordpress]# systemctl restart nginx php-fpm
在各haproxy服务器添加www用户并修改配置文件重启服务
[root@haproxy ~]# groupadd -g 88 www
[root@haproxy ~]# useradd -u 88 -g 88 www
[root@haproxy ~]# vim /etc/haproxy/haproxy.cfg
   user        www
    group       www

[root@haproxy2 ~]# groupadd -g 88 www
[root@haproxy2 ~]# useradd -u 88 -g 88 www

[root@haproxy2 ~]# vim /etc/haproxy/haproxy.cfg
   user        www
    group       www
[root@haproxy2 ~]# systemctl restart haproxy
在各nginx服务器安装nfs-utils包 并配置wordpress
[root@nginx wordpress]# yum install nfs-utils -y
[root@nginx2 wordpress]# yum install nfs-utils -y

[root@nginx wordpress]# mkdir /data/wordpress/wp-content/uploads/[root@nginx2 wordpress]# mkdir /data/wordpress/wp-content/uploads/
[root@nginx wordpress]# chown www.www wp-content/ -R
[root@nginx2 wordpress]# chown www.www wp-content/ -R
在各nginx 服务器挂载nfs
[root@nginx wordpress]# vim /etc/fstab
192.168.37.23:/data/wordpress    /data/wordpress/wp-content/uploads nfs  defaults        0 0
[root@nginx2 wordpress]# vim /etc/fstab
192.168.37.23:/data/wordpress    /data/wordpress/wp-content/uploads nfs  defaults        0 0
重启服务
[root@nginx wordpress]# systemctl restart nginx php-fpm
[root@nginx2 wordpress]# systemctl restart nginx php-fpm
测试
部署Lvs服务器
[root@lvs ~]# yum install keepalived -y
[root@lvs2 ~]# yum install keepalived -y
配置Lvs服务器的配置文件
[root@lvs2 ~]# vim /etc/keepalived/keepalived.conf notification_email_from Alexandre.Cassen@firewall.loc
   smtp_server 127.0.0.1
   smtp_connect_timeout 30
   vrrp_iptables
   router_id LVS_DEVEL
   vrrp_skip_check_adv_addr
   vrrp_strict
   vrrp_garp_interval 0
   vrrp_gna_interval 0
}

vrrp_instance VI_2 {
    state BACKUP
    interface eth0
    virtual_router_id 66
    priority 80
    advert_int 1
    authentication {
        auth_type PASS
        auth_pass 1111
    }
    virtual_ipaddress {
        192.168.37.200 dev eth0 label eth0:1
    }
}
virtual_server 192.168.37.200 80 {
    delay_loop 3
    lb_algo rr
    lb_kind DR
    protocol TCP

    real_server 192.168.37.21 80 {
        weight 1
        TCP_CHECK {
        connect_timeout 5
        nb_get_retry 3
        delay_before_retry 3
        connect_port 80
        }
    }
    real_server 192.168.37.22 80 {
        weight 1
        TCP_CHECK {
        connect_timeout 5
        nb_get_retry 3
        delay_before_retry 3
        connect_port 80
        }
    }

[root@lvs ~]# vim /etc/keepalived/keepalived.conf
   notification_email_from Alexandre.Cassen@firewall.loc
   smtp_server 127.0.0.1
   smtp_connect_timeout 30
   vrrp_iptables
   router_id LVS_DEVEL
   vrrp_skip_check_adv_addr
   vrrp_strict
   vrrp_garp_interval 0
   vrrp_gna_interval 0
}

vrrp_instance VI_2 {
    state MASTER
    interface eth0
    virtual_router_id 66
    priority 100
    advert_int 1
    authentication {
        auth_type PASS
        auth_pass 1111
    }
    virtual_ipaddress {
        192.168.37.200 dev eth0 label eth0:1
    }
}
virtual_server 192.168.37.200 80 {
    delay_loop 3
    lb_algo rr
    lb_kind DR
    protocol TCP

    real_server 192.168.37.21 80 {
        weight 1
        TCP_CHECK {
        connect_timeout 5
        nb_get_retry 3
        delay_before_retry 3
        connect_port 80
        }
    }
    real_server 192.168.37.22 80 {
        weight 1
        TCP_CHECK {
        connect_timeout 5
        nb_get_retry 3
        delay_before_retry 3
        connect_port 80
        }
    }
配置nginx服务器的vip地址
[root@master-mariadb ~]# vim /etc/sysconfig/network-scripts/ifcfg-lo
DEVICE=lo
IPADDR=127.0.0.1
NETMASK=255.0.0.0
NETWORK=127.0.0.0
# If you're having problems with gated making 127.0.0.0/8 a martian,
# you can change this to something else (255.255.255.255, for example)
BROADCAST=127.255.255.255
IPADDR1=192.168.37.200
NETMASK1=255.255.255.255
ONBOOT=yes
NAME=loopback
[root@lam wordpress]# vim /etc/sysconfig/network-scripts/ifcfg-lo
DEVICE=lo
IPADDR=127.0.0.1
NETMASK=255.0.0.0
NETWORK=127.0.0.0
# If you're having problems with gated making 127.0.0.0/8 a martian,
# you can change this to something else (255.255.255.255, for example)
BROADCAST=127.255.255.255
IPADDR1=192.168.37.200
NETMASK1=255.255.255.255
ONBOOT=yes
NAME=loopback
配置Mariadb从服务器
[root@slave-master ~]# yum install mariadb-server -y
[root@slave-master ~]# vim /etc/my.cnf
[mysqld]
skip_name_resolve=ON
innodb_file_per_table=ON
read_only
relay_log=relay-bin
server_id=32
datadir=/var/lib/mysql
socket=/var/lib/mysql/mysql.sock
# Disabling symbolic-links is recommended to prevent assorted security risks
symbolic-links=0
# Settings user and group are ignored when systemd is used.
# If you need to run mysqld under a different user or group,
# customize your systemd unit file for mariadb according to the
# instructions in http://fedoraproject.org/wiki/Systemd

[mysqld_safe]
log-error=/var/log/mariadb/mariadb.log
pid-file=/var/run/mariadb/mariadb.pid

#
# include all files from the config directory
#
!includedir /etc/my.cnf.d
配置mariadb主服务器
[root@mariadb-master wordpress]# vim /etc/my.cnf
[mysqld]
skip_name_resolve=ON
innodb_file_per_table=ON
log_bin=master-bin
server_id=23
datadir=/var/lib/mysql
socket=/var/lib/mysql/mysql.sock
# Disabling symbolic-links is recommended to prevent assorted security risks
symbolic-links=0
# Settings user and group are ignored when systemd is used.
# If you need to run mysqld under a different user or group,
# customize your systemd unit file for mariadb according to the
# instructions in http://fedoraproject.org/wiki/Systemd

[mysqld_safe]
log-error=/var/log/mariadb/mariadb.log
pid-file=/var/run/mariadb/mariadb.pid

#
# include all files from the config directory
#
!includedir /etc/my.cnf.d
在inotify服务器安装rsync
[root@inotify ~]# yum install rsync
在inotify服务器修改rsync的配置文件

[root@inotify ~]# vim /etc/rsyncd.conf
uid = root
gid = root
use chroot = no
max connections = 0
ignore errors
exclude = lost+found/
log file = /var/log/rsyncd.log
pid file = /var/run/rsyncd.pid
lock file = /var/run/rsyncd.lock
reverse lookup = no
hosts allow = 192.168.37.0/24
[backup]
path = /backup/
comment = backup
read only = no
auth users = rsyncuser
secrets file = /etc/rsync.pass

# 具体的参数意思详见本文 inotify+rsync实时同步
服务器端生成验证文件,并修改权限,启动服务
[root@inotify ~]# echo "rsyncuser:centos" > /etc/rsync.pass
[root@inotify ~]# chmod 600 /etc/rsync.pass
[root@inotify ~]# systemctl start rsyncd
在nfs服务器安装inotify-tools包和rsync包
[root@nfs data]# yum install inotify-tools -y
[root@nfs data]# yum install rsync -y
#基于epel源
在nfs服务器配置密码文件并修改权限
[root@nfs data]# echo "centos" > /etc/rsync.pass
[root@nfs data]# chmod 600 /etc/rsync.pass
在nfs服务器配置脚本
[root@nfs data]# vim /etc/inotify_rsync.sh

#!/bin/bash
SRC='/data/'
DEST='rsyncuser@192.168.37.26::backup'
inotifywait -mrq --timefmt '%Y-%m-%d %H:%M' --format '%T %w %f' -e create,delete,moved_to,close_write,attrib ${SRC} |while read DATE TIME DIR FILE;do
FILEPATH=${DIR}${FILE}
rsync -az --delete --password-file=/etc/rsync.pass $SRC $DEST && echo "At ${TIME} on ${DATE}, file $FILEPATH was backuped up via rsync" >> /var/log/changelist.log
done
在nfs服务器安装screen文件
[root@nfs data]# yum install screen -y
用screen去运行脚本
[root@nfs ~]# screen -S inotify      #为screen窗口起个名字
[root@nfs ~]# . /etc/inotify_rsync.sh  #在screen窗口执行命令

[root@nfs ~]# screen -list
There is a screen on:
    28297.inotify    (Detached)
1 Socket in /var/run/screen/S-root.  #  列出screen任务的窗口

[root@nfs ~]# screen -r inotify   # 回到screen窗口里面
在各haproxy的检测脚本
[root@haproxy keepalived]# vim /etc/keepalived/keepalived.conf
vrrp_script check_haproxy {
   script /etc/keepalived/haproxy_check.sh
   interval 2
   timeout 3
   weight -30
}
vrrp_instance VI_1 {
    state MASTER
    interface eth0
    virtual_router_id 51
    priority 100
    advert_int 1
    authentication {
        auth_type PASS
        auth_pass 1111
    }
    virtual_ipaddress {
        192.168.37.100 dev eth0 label eth0:1
    }
    track_script {
         check_haproxy
        notify_master "/etc/keepalived/notify.sh master"
        notify_backup "/etc/keepalived/notify.sh backup"
        notify_fault "/etc/keepalived/notify.sh fault"
}

[root@haproxy keepalived]# vim /etc/keepalived/haproxy_check.sh
#!/bin/bash
killall -0 haproxy &> /dev/null  || exit 1


[root@haproxy keepalived]# vim notify.sh
#!/bin/bash
case $1 in
backup)
systemctl restart haproxy
;;
esac

 浙公网安备 33010602011771号