Powershell 主题美化学习过程
前前言
如果只需要美化,但对其中原理以及学习过程不是跟感兴趣,而且网络环境很好(可以****)的同学可以直接绕道知乎:超酷的 PowerShell 美化指南,本文也根据该分享折腾一番后的心得以及补充。
被吐槽标题有浓浓的90年代电子风了哎,而且第一张图太恶心。贴上一张PD虚拟机里的Powershell吧。但标题真不知道怎么改,东西很杂,只能说是围绕这个主题了。

前言
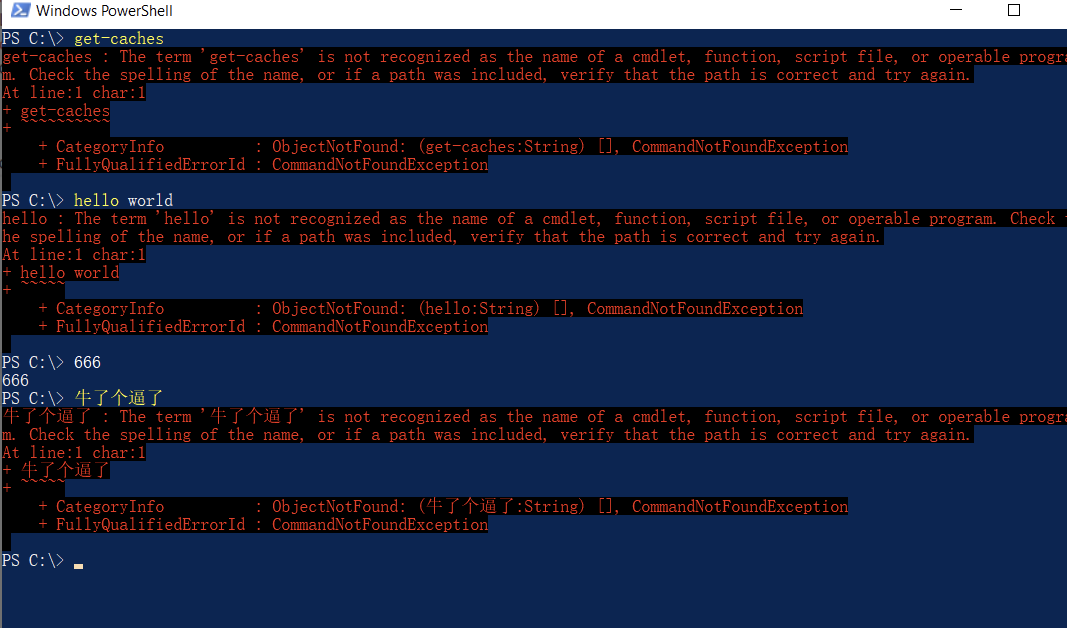
相信不少撸友都有过下面这样一个不堪入目很不友好的界面,我们本着对美好食物的向往以及对更好生活的憧憬,势必要对其进行一番改造,所以有了本文的学习过程。
那么我们来搞事情
0. 准备工作
其实对于下面1/2/3三个步骤,很多撸友基本上是不需要的,只要检查一下即可。
特别是步骤2的Chocolatey,它不是必备的,Powershell自带Install-Module也是可以是,这里只是顺带提个知识点。
1. Powershell脚本签名
参考链接:https://www.pstips.net/powershell-scripts-signature.html
配置windows允许执行没有签名(远程)的Powershell脚本

BTW,这一步是为后面的执行远程powershell脚本安装Chocolatey做准备,如果下载这个脚本下来,在脚本的最后面是有提供签名的其实。
2. Windows的包管理工具Chocolatey
参考链接:https://chocolatey.org/
当然的了,并不是要什么node.js开发,或者是前端开发者,又或者VS开发才要用到包管理工具,windows下(powershell开发/cmd开发)也可以一样有。
用管理员模式启动Powershell,然后执行以下命令。(官网上也有非管理员模式的安装方法,想了解更多的可以查一下)
Set-ExecutionPolicy Bypass -Scope Process -Force; iex ((New-Object System.Net.WebClient).DownloadString('https://chocolatey.org/install.ps1'))
执行完后出现下面这个一般就是表示安装成功,然后最好重启下powershell,毕竟人家提示了嘛。
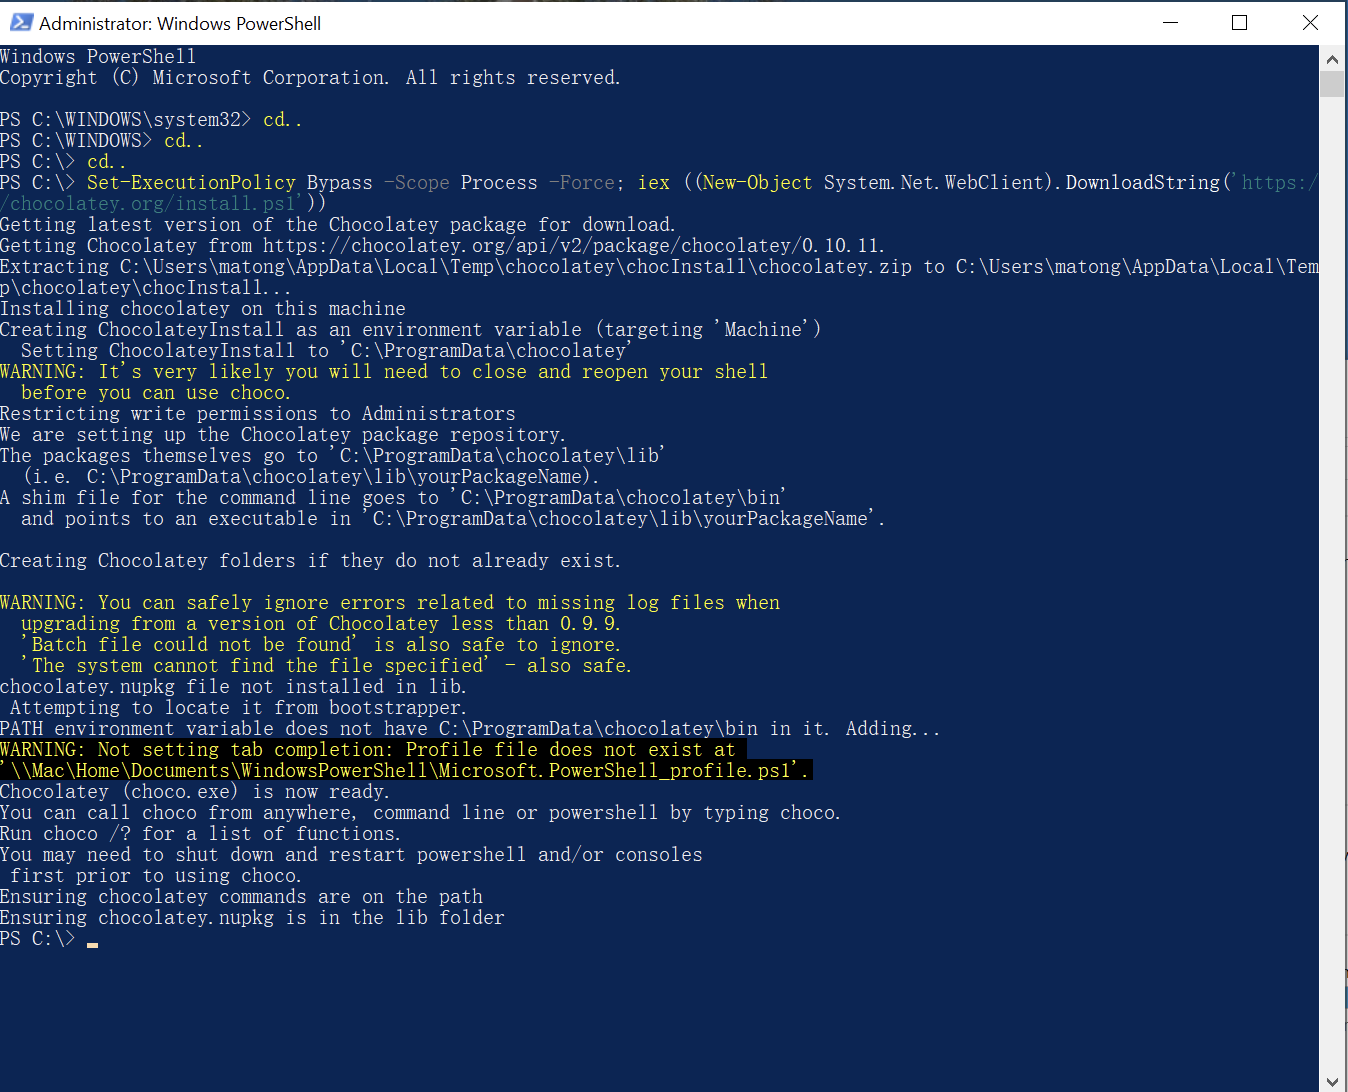
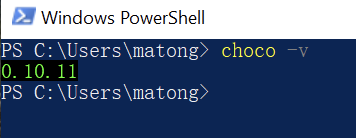
重启好了后验证是否安装成功,敲入choco -v,出现下面的表示成功了(抱歉,这屏幕截图有点怪异,忍着看吧)
3. git
这个东西现在已经是必不可少的工具了,如果你还没用到,请反思为何。
choco install git
git安装就不详细说明了。
3. 字体库
推荐字体库:https://github.com/powerline/fonts
当然,用nerd-fontsy也未必不可,但这里不展开了,太多东西了。
字体库只是为了在目录下多一些舒服点的“图标”而已(其实是字体代替)。
试试跑一下下面的命令
Write-Host "$([char] 0xE0A0; [char] 0xE0A1; [char] 0xE0A2; [char] 0xE0A3; [char] 0xE0B0; [char] 0xE0B1; [char] 0xE0B2; [char] 0xE0B3; [char] 0xE0B8; [char] 0xE0B9; [char] 0xE0BA; [char] 0xE0BB; [char] 0xE0BC; [char] 0xE0BD; [char] 0xE0BE; [char] 0xE0BF;)"
如果出现类似这个,或者干脆方格问号甚至空字符的,那么基本上就需要安装字体支持。

powerline/fonts提供了不少字体,我这里只试了一个,也就是推荐的“大丈夫老师摸摸”“逮虾户”字体,好吧,名字你们说怎么叫就怎么叫。
注意:并不需要下载整个字体库,指需要下载需要用到的DejaVuSansMono就可以了。参考的分享里是把整个字体库都下了下来,但我们并不需要怎么多,反正丰俭由人嘛。
下好后全选ttf文件,右键安装便是。

我选的是安装到所有账户,虽然也只有我一个人在用,反正。。。
好啦,就不说你们下下来为何30几k50几k而且安装失败了,冇眼睇~(下面几个链接混了,没排对,反正都下载都装了就对了,给你链接已经很不错了)
- DejaVu Sans Mono Bold for Powerline.ttf
- DejaVu Sans Mono for Powerline.ttf
- DejaVu Sans Mono Oblique for Powerline.ttf
- DejaVu Sans Mono Bold for Powerline.ttf
装好了别急,还改不了字体。不信你试试。
4. powershell的git集成方案 posh-git
资源链接:https://github.com/dahlbyk/posh-git
本来想用chcoc装的,不知道为何找不到包,那用回Install-Module吧
Install-Module posh-git

这里提示我的NuGet版本不够新,顺便更新下吧。能Yes to all就all啦
5. 基于posh-git的美化主题oh-my-posh
资源链接:https://github.com/JanDeDobbeleer/oh-my-posh
同上继续安装。
Install-Module oh-my-posh

6. 硬货在这里
刚刚前面做的全都是事前准备而已,这里才是真正影响Powershell主题的主要关键。直接复制到Powershell跑一下吧。
Install-Module -Name PSReadLine -Force -SkipPublisherCheck
if (!(Test-Path -Path $PROFILE )) { New-Item -Type File -Path $PROFILE -Force }
@"
#requires -Version 2 -Modules posh-git

function Write-Theme {
    param(
        [bool]
        `$lastCommandFailed,
        [string]
        `$with
    )

    `$lastColor = `$sl.Colors.PromptBackgroundColor
    `$prompt = Write-Prompt -Object `$sl.PromptSymbols.StartSymbol -ForegroundColor `$sl.Colors.PromptForegroundColor -BackgroundColor `$sl.Colors.SessionInfoBackgroundColor

    #check the last command state and indicate if failed
    If (`$lastCommandFailed) {
        `$prompt += Write-Prompt -Object "`$(`$sl.PromptSymbols.FailedCommandSymbol) " -ForegroundColor `$sl.Colors.CommandFailedIconForegroundColor -BackgroundColor `$sl.Colors.SessionInfoBackgroundColor
    }

    #check for elevated prompt
    If (Test-Administrator) {
        `$prompt += Write-Prompt -Object "`$(`$sl.PromptSymbols.ElevatedSymbol) " -ForegroundColor `$sl.Colors.AdminIconForegroundColor -BackgroundColor `$sl.Colors.SessionInfoBackgroundColor
    }

    `$user = [System.Environment]::UserName
    `$computer = [System.Environment]::MachineName
    `$path = Get-FullPath -dir `$pwd
    if (Test-NotDefaultUser(`$user)) {
        `$prompt += Write-Prompt -Object "`$user@`$computer " -ForegroundColor `$sl.Colors.SessionInfoForegroundColor -BackgroundColor `$sl.Colors.SessionInfoBackgroundColor
    }

    if (Test-VirtualEnv) {
        `$prompt += Write-Prompt -Object "`$(`$sl.PromptSymbols.SegmentForwardSymbol) " -ForegroundColor `$sl.Colors.SessionInfoBackgroundColor -BackgroundColor `$sl.Colors.VirtualEnvBackgroundColor
        `$prompt += Write-Prompt -Object "`$(`$sl.PromptSymbols.VirtualEnvSymbol) `$(Get-VirtualEnvName) " -ForegroundColor `$sl.Colors.VirtualEnvForegroundColor -BackgroundColor `$sl.Colors.VirtualEnvBackgroundColor
        `$prompt += Write-Prompt -Object "`$(`$sl.PromptSymbols.SegmentForwardSymbol) " -ForegroundColor `$sl.Colors.VirtualEnvBackgroundColor -BackgroundColor `$sl.Colors.PromptBackgroundColor
    }
    else {
        `$prompt += Write-Prompt -Object "`$(`$sl.PromptSymbols.SegmentForwardSymbol) " -ForegroundColor `$sl.Colors.SessionInfoBackgroundColor -BackgroundColor `$sl.Colors.PromptBackgroundColor
    }

    # Writes the drive portion
    `$prompt += Write-Prompt -Object "`$path " -ForegroundColor `$sl.Colors.PromptForegroundColor -BackgroundColor `$sl.Colors.PromptBackgroundColor

    `$status = Get-VCSStatus
    if (`$status) {
        `$themeInfo = Get-VcsInfo -status (`$status)
        `$lastColor = `$themeInfo.BackgroundColor
        `$prompt += Write-Prompt -Object `$(`$sl.PromptSymbols.SegmentForwardSymbol) -ForegroundColor `$sl.Colors.PromptBackgroundColor -BackgroundColor `$lastColor
        `$prompt += Write-Prompt -Object " `$(`$themeInfo.VcInfo) " -BackgroundColor `$lastColor -ForegroundColor `$sl.Colors.GitForegroundColor
    }

    # Writes the postfix to the prompt
    `$prompt += Write-Prompt -Object `$sl.PromptSymbols.SegmentForwardSymbol -ForegroundColor `$lastColor

    `$timeStamp = Get-Date -UFormat %r
    `$timestamp = "[`$timeStamp]"

    `$prompt += Set-CursorForRightBlockWrite -textLength (`$timestamp.Length + 1)
    `$prompt += Write-Prompt `$timeStamp -ForegroundColor `$sl.Colors.PromptForegroundColor

    `$prompt += Set-Newline

    if (`$with) {
        `$prompt += Write-Prompt -Object "`$(`$with.ToUpper()) " -BackgroundColor `$sl.Colors.WithBackgroundColor -ForegroundColor `$sl.Colors.WithForegroundColor
    }
    `$prompt += Write-Prompt -Object (`$sl.PromptSymbols.PromptIndicator) -ForegroundColor `$sl.Colors.PromptBackgroundColor
    `$prompt += ' '
    `$prompt
}

`$sl = `$global:ThemeSettings #local settings
`$sl.PromptSymbols.StartSymbol = ''
`$sl.PromptSymbols.PromptIndicator = [char]::ConvertFromUtf32(0x276F)
`$sl.PromptSymbols.SegmentForwardSymbol = [char]::ConvertFromUtf32(0xE0B0)
`$sl.Colors.PromptForegroundColor = [ConsoleColor]::White
`$sl.Colors.PromptSymbolColor = [ConsoleColor]::White
`$sl.Colors.PromptHighlightColor = [ConsoleColor]::DarkBlue
`$sl.Colors.GitForegroundColor = [ConsoleColor]::Black
`$sl.Colors.WithForegroundColor = [ConsoleColor]::DarkRed
`$sl.Colors.WithBackgroundColor = [ConsoleColor]::Magenta
`$sl.Colors.VirtualEnvBackgroundColor = [System.ConsoleColor]::Red
`$sl.Colors.VirtualEnvForegroundColor = [System.ConsoleColor]::White
"@>$env:userprofile"\Documents\WindowsPowerShell\Modules\oh-my-posh\2.0.230\Themes\Paradox.psm1"
@"
chcp 65001
Set-PSReadlineOption -EditMode Emacs
function which(`$name) { Get-Command `$name | Select-Object Definition }
function rmrf(`$item) { Remove-Item `$item -Recurse -Force }
function mkfile(`$file) { "" | Out-File `$file -Encoding ASCII }
Import-Module posh-git
Import-Module oh-my-posh
Set-Theme Paradox
"@ > $PROFILE
chcp 65001
Set-PSReadlineOption -EditMode Emacs
Import-Module posh-git
Import-Module oh-my-posh
Set-Theme Paradox
跑完后会发现,终于可以设置字体了。
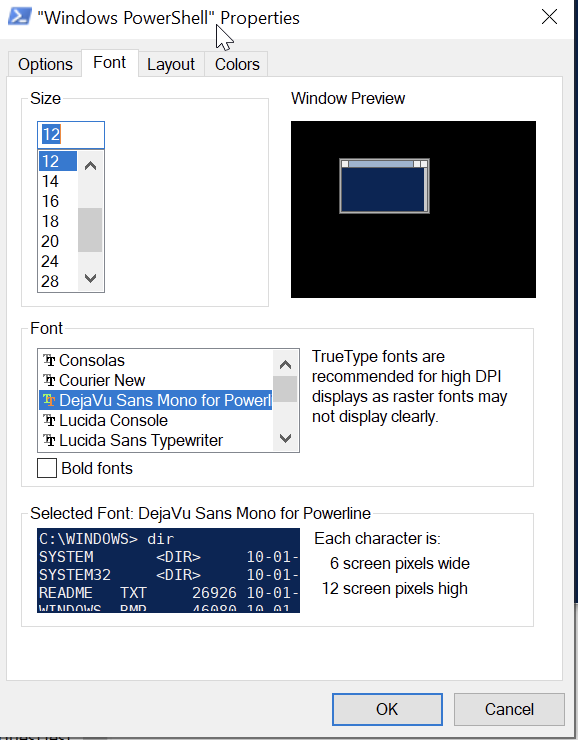
设置好后再跑一下前面检查的的那一段,会有下面这效果,那么就是ok的了。这几个字符能检查安装的字体符合不符合要求。

最终结果
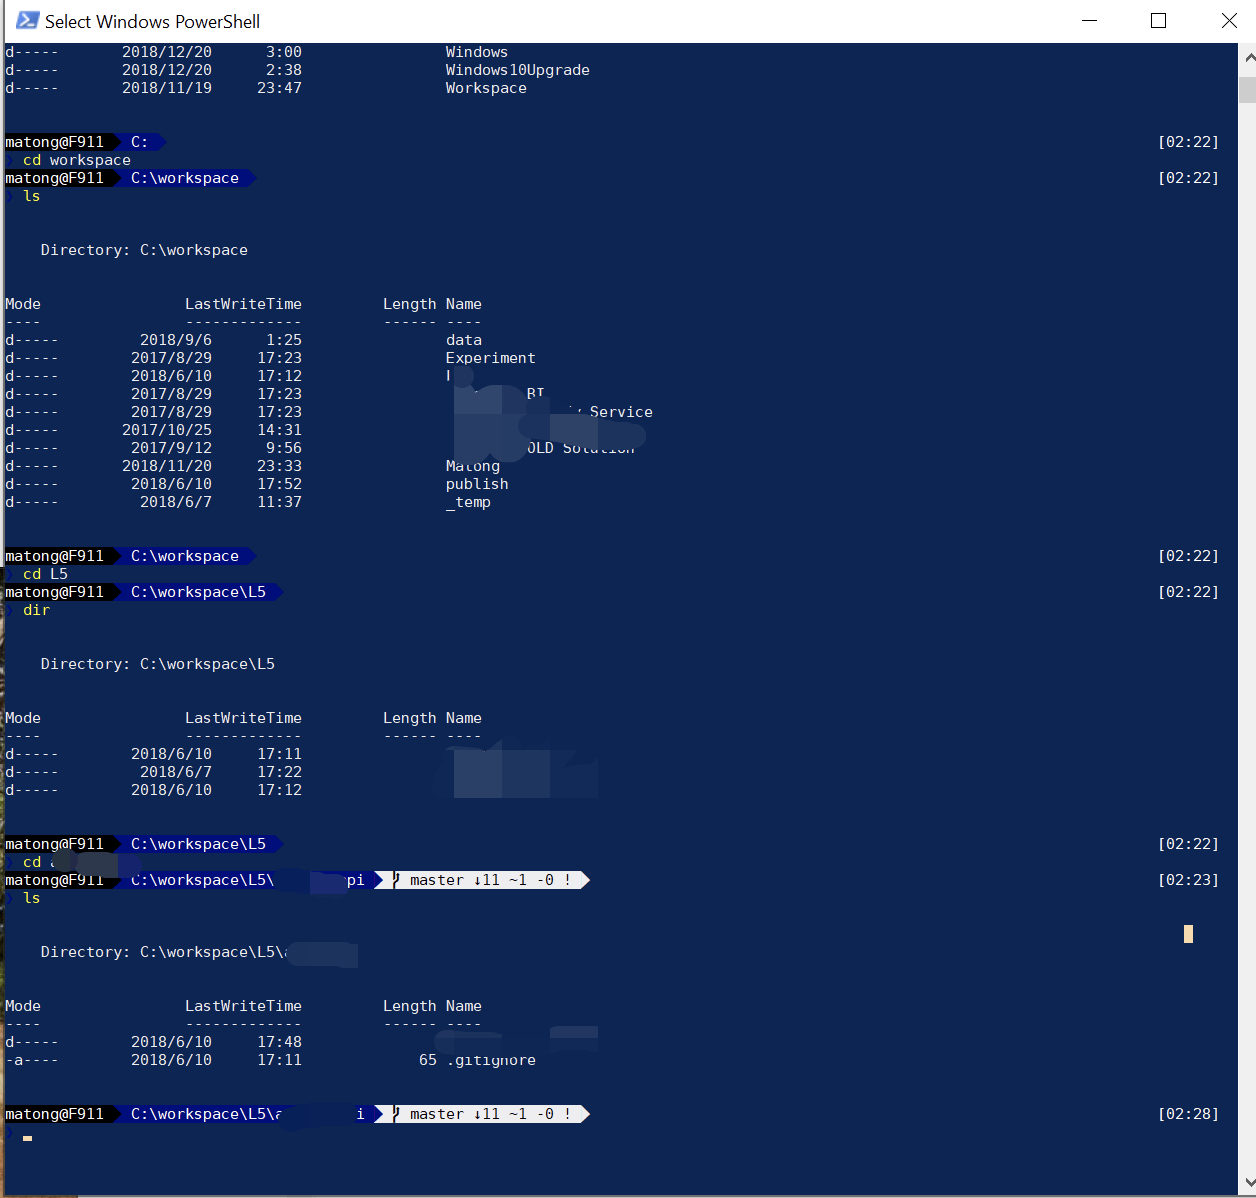
当然,颜色那里还要痛苦一番,网上找点舒服点的配色吧,颜色设置这个地方,越熟悉Photoshop的人会越痛苦,要是你没碰过ps,那么恭喜你,你尝不到这个痛苦,哈哈哈,慢慢品尝吧。
对了,最后面Set-Theme Paradox这里的主题详见主题页面,两个地方记得都要改,每次打开他会跑一次这个的。
总结
马桶的工作量严重不饱和!
嗯,我承认,不然也不会瞎搞这些。
其实说实话,上面这些东西早在十年前,就碰到过,但那个时候连什么叫“包管理工具”是什么都不懂,就算有个人告诉我:“这就是用来管理包的呀”,“哦好的”,然后就没然后了。
关于学习,这个东西还是要多想一步,多求甚解,对自己有好处的。
颜色设置跟字体设置我为何要用界面?(都是UI给害的!)
就是为了吐槽,如果Windows没有这些设置界面,那将会是非常专业的软件!233
参考链接(不分先后,如果缺了麻烦告诉我):


 浙公网安备 33010602011771号