nagios分为监控机和被监控机两类机器
监控主机:gserver150(192.168.111.150)
被监控主机:gserver151(192.168.111.151)
一. 监控机器
1. 创建nagios组和用户
1. 创建nagios组和用户
#groupadd nagcmd
#/usr/sbin/useradd -m nagios
#passwd nagios
#/usr/sbin/usermod -a -G nagcmd nagios
2. 安装nagios软件
#tar zxvf nagios-3.4.3.tar.gz
#./configure --with-command-group=nagcmd
#make all
#make install
#make install
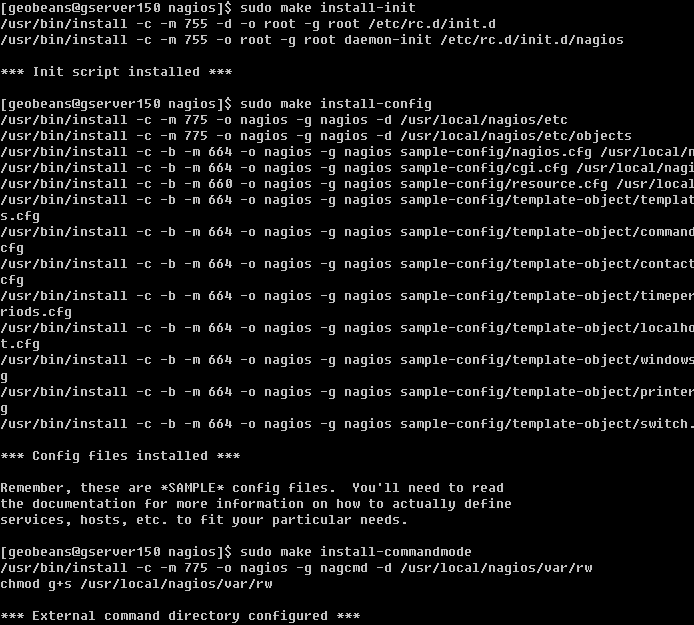
#make install-init
#make install-config
#make install-commandmode

3. 配置nagios
安装完成后配置信息在:/usr/local/nagios/etc
修改 /usr/local/nagios/etc/objects/contacts.cfg文件的email,修改为实际邮件地址。
4. 配置web接口
# make install-webconf

nagios在http上的配置文件为/etc/httpd/conf.d/nagios.conf
将该文件内容补充到httpd的conf的结尾,重启httpd即可。
修改nagiosadmin的密码
#htpasswd -c /usr/local/nagios/etc/htpasswd.users nagiosadmin

新密码为:qwer1234
5. 配置、启动nagios服务

6. 浏览器访问http://192.168.111.150/nagios

7. 安装nagios插件
# ./configure --with-nagios-user=nagios \
--with-nagios-group=nagios \
--with-mysql=/opt/mysql-5.5.29 \
--with-pgsql=/opt/pgsql-9.1.2
#make
#make install
更改httpd.conf中打开cgi module

安装完成后,重新启动apache,就可以看到nagios开始监控本机

二. 被监控机
1. 创建nagios用户
#sudo /usr/sbin/useradd nagios
#sudo passwd nagios

2. 安装nagios插件
#tar zxvf nagios-plugins-1.4.16.tar.gz
#./configure
#make
#make install
安装完成后再/usr/local/nagios下生成两个目录

3. 修改目录权限
#chown nagios.nagios /usr/local/nagios
#chown -R nagios.nagios /usr/local/nagios/libexec
4. 安装nrpe
#tar zxvf nrpe-2.13.tar.gz

#./configure
#make
#make install

安装check_nrpe插件(监控机需安装check_nrpe这个插件,被监控机不需要,安装它是为了测试的目的)
#make install-plugin

安装deamon
#make install-daemon
#make install-daemon

安装配置文件
#make install-daemon-config

现在再查看nagios目录就会发现有4个目录了

5. 安装xinetd
按照安装文档的说明,是将NRPE deamon作为xinetd下的一个服务运行的.在这样的情况下xinetd就必须要先安装好,不过一般系统已经默认装了。
安装xinetd(如果没有安装的话)
#yum install xinetd.x86_64
安装xinetd脚本
#make install-xinetd

编辑/etc/services文件,增加NRPE服务
#vi /etc/services
nrpe 5666/tcp # nrpe

重启xinetd服务
#sudo /sbin/service xinetd restart

用netstat命令查看端口,可以看到 nrpe已经运行
#netstat -at | grep nrpe
#netstat -ant | grep 5666

6.检查nrpe是否工作正常
#/usr/local/nagios/libexec/check_nrpe -H localhost

显示nrpe的版本号,说明nrpe工作正常
三. 在监控机上添加被监控主机
1. 编写cfg_file文件(gserver)
登录gserver150,进入目录/usr/local/nagios/etc/objects,localhost.cfg即为本机的cfg_file。
复制localhost.cfg为gserver151.cfg
并修改gserver151.cfg文件里面的127.0.0.1为192.168.111.151, localhost为gserver151
在service里面的host_name都需要相应的修改为gserver151,附件为配置文件 ![gserver151.cfg]()

屏蔽掉

否则可能出现nagios不能启动的问题。利用下面的命令检查nagios.conf可以发现问题是hostgroup定义重了。

2. 将localhost.cfg设置到gserver150上
打开/usr/local/nagios/etc/nagios.cfg文件,在下面位置添加一行

重启nagios服务
#service nagios restart
即可看到下图。(刚开始gserver151是灰色的,过一会儿nagios获取数据后,开始变为绿色)

四. nagios监控
1. 监控cpu使用率
2. 监控memory使用率
FAQ
1. 如果出现如下提示,说明nagios服务没有启动。

执行以下命令
sudo chkconfig --add nagios
sudo chkconfig nagios on
sudo servcie nagios start
启动nagios服务即可
2. 如果出现以下情况,可能是httpd的cgi模块没有打开,此时需要在httpd.conf中打开mod_cgid.so模块即可


