基于Containerd的k8s部署
一、基础环境准备(所有节点)
1.1、节点规划
| 主机名 | IP地址 | 节点规划 | 操作系统 |
| master | 192.168.43.37 | master | CentOS7.9 |
| node01 | 192.168.43.38 | node | CentOS7.9 |
| node02 | 192.168.43.39 | node | CentOS7.9 |
1.2、修改主机名(按照节点规划执行)
hostnamectl set-hostname master
hostnamectl set-hostname node01
hostnamectl set-hostname node02
1.3、修改host文件
echo '192.168.43.37 master' >> /etc/hosts
echo '192.168.43.38 node01' >> /etc/hosts
echo '192.168.43.39 node02' >> /etc/hosts
1.4、设置防火墙
systemctl stop firewalld&&systemctl disable firewalld
1.5设置SELINUX
sed -i 's#SELINUX=enforcing#SELINUX=disabled#g' /etc/selinux/config
setenforce 0
1.6、配置yum源
cd /etc/yum.repos.d/
mkdir bak
mv *.repo bak
下载repo文件上传
http://mirrors.cloud.tencent.com/repo/centos7_base.repo
安装wget和ntpdate
yum install ntpdate wget -y
1.7、时区及时间同步设置
timedatectl set-timezone Asia/Shanghai
设置时间同步
ntpdate time.windows.com
设置时间同步定时任务
 crontab -e
*/5 * * * *  ntpdate time.windows.com
1.8、关闭swap分区
sed -i '/swap/s/^\(.*\)$/#\1/g' /etc/fstab
swapoff -a
1.9、配置iptables桥接流量
cat > /etc/sysctl.d/kubernetes.conf << EOF
net.bridge.bridge-nf-call-ip6tables = 1
net.bridge.bridge-nf-call-iptables = 1
net.ipv4.ip_forward = 1
EOF
加载br_netfilter
modprobe br_netfilter
sysctl -p /etc/sysctl.d/kubernetes.conf
设置开机启动
cat >> /etc/rc.d/rc.local << EOF
/usr/sbin/modprobe br_netfilter
EOF
修改权限
chmod +x /etc/rc.d/rc.local
立即启动
modprobe br_netfilter
查看是否加载成功
sysctl --system
1.10、开启IPVS
IPVS(IP Virtual Server)是一个用户负载均衡的Linux内核模块,它可以用来替代kube-proxy默认的iptables,IPVS提供了更高效和可扩展的负载均衡,特别适用于大规模的机器环境。
cat > /etc/sysconfig/modules/ipvs.modules <<EOF
#!/bin/bash
modprobe -- ip_vs
modprobe -- ip_vs_rr
modprobe -- ip_vs_wrr
modprobe -- ip_vs_sh
modprobe -- nf_conntrack_ipv4
EOF
授权
chmod 755 /etc/sysconfig/modules/ipvs.modules && bash /etc/sysconfig/modules/ipvs.modules && lsmod | grep -e ip_vs -e nf_conntrack_ipv4
查看是否加载成功
lsmod | grep -e ipvs -e nf_conntrack_ipv4
安装ipset、ipvsadm
yum install ipset ipvsadm -y
二、部署containerd(所有节点执行)
2.1、下载
wget https://github.com/containerd/containerd/releases/download/v1.7.7/cri-containerd-1.7.7-linux-amd64.tar.gz
解压
tar -zxvf cri-containerd-1.7.7-linux-amd64.tar.gz -C /
创建配置文件
mkdir /etc/containerd
containerd config default > /etc/containerd/config.toml
修改配置文件(这一行不修改,导致后面初始化报错,依据报错修改这个3.X版本号)
vi /etc/containerd/config.toml
sandbox_image = "registry.aliyuncs.com/google_containers/pause:3.8"    #修改这一行
修改SystemdCgroup
sed -i 's#SystemdCgroup = false#SystemdCgroup = true#g' /etc/contained/config.toml
设置开机自启动
systemctl daemon-reload
systemctl restart containerd.service
systemctl enable --now containerd
2.2、安装runc
下载 libseccomp(因为runc依赖于libseccomp计算库)
wget https://github.com/opencontainers/runc/releases/download/v1.1.7/libseccomp-2.5.4.tar.gz
解压
tar -zxvf libseccomp-2.5.4.tar.gz
安装依赖包
yum install -y gcc gcc-c++ gperf
安装
 cd libseccomp-2.5.4
./configure
make && make install
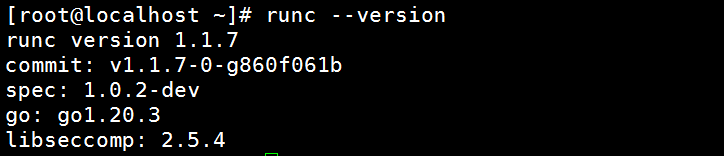
查看是否安装成功
find / -name libseccomp.so

下载runc
wget https://github.com/opencontainers/runc/releases/download/v1.1.7/runc.amd64
为下载的runc赋权
chmod +x runc.amd64
删除contained自带的runc
[root@localhost libseccomp-2.5.4]# whereis runc
runc: /usr/local/sbin/runc
[root@localhost libseccomp-2.5.4]# rm -rf /usr/local/sbin/runc
将runc.amd移动
mv runc.amd64 /usr/local/sbin/runc
运行
重启所有服务器
三、安装Kubernetes
3.1、配置yum源
cat > /etc/yum.repos.d/k8s.repo <<EOF
[kubernetes]
name=Kubernetes
baseurl=https://mirrors.aliyun.com/kubernetes/yum/repos/kubernetes-el7-x86_64/
enabled=1
gpgcheck=0
repo_gpgcheck=0
gpgkey-https://mirrors.aliyun.com/kubernetes/yum/doc/yum-key.gpg
https://mirrors.aliyun.com/kubernetes/yum/doc/rpm-package-key.gpg
EOF
查看是否存储目标镜像
yum clean all
yum makecache
yum list kubeadm.x86_64 --showduplicates
yum -y install kubeadm-1.28.0-0 kubelet-1.28.0-0 kubectl-1.28.0-0
3.2、安装
yum -y install kubeadm-1.28.0-0 kubelet-1.28.0-0 kubectl-1.28.0-0
安装完成启动kubelet
systemctl enable kubelet.service
systemctl start kubelet.service
3.3、配置cgroup驱动改为systemd
 vi /etc/sysconfig/kubelet
KUBELET_EXTRA_ARGS="--cgroup-driver=systemd"
3.4、初始化(只在master节点执行)
此处修改master的IP地址及版本
kubeadm init \
--apiserver-advertise-address=192.168.43.37 \
--image-repository=registry.aliyuncs.com/google_containers \
--kubernetes-version=v1.28.0 \
--service-cidr=10.96.0.0/12 \
--pod-network-cidr=10.244.0.0/16 \
--cri-socket=unix:///var/run/containerd/containerd.sock
出现如下报错(https://blog.csdn.net/qq_47904804/article/details/131030273)
[root@master ~]# kubeadm init \
> --apiserver-advertise-address=192.168.43.37 \
> --image-repository=registry.aliyuncs.com/google_containers \
> --kubernetes-version=v1.28.0 \
> --service-cidr=10.96.0.0/12 \
> --pod-network-cidr=10.244.0.0/16 \
> --cri-socket=unix:///var/run/containerd/containerd.sock
[init] Using Kubernetes version: v1.28.0
[preflight] Running pre-flight checks
error execution phase preflight: [preflight] Some fatal errors occurred:
    [ERROR FileContent--proc-sys-net-bridge-bridge-nf-call-iptables]: /proc/sys/net/bridge/bridge-nf-call-iptables does not exist
[preflight] If you know what you are doing, you can make a check non-fatal with `--ignore-preflight-errors=...`
To see the stack trace of this error execute with --v=5 or higher
解决办法
vi /etc/sysctl.conf

net.bridge.bridge-nf-call-ip6tables = 1
net.bridge.bridge-nf-call-iptables = 1
重新加载
modprobe br_netfilter
sysctl -p
!!!!!!如果初始化失败,需要重新初始化执行如下命令(初始化成功跳过此步骤)
kubeadm reset
rm -rf ~/.kube/  /etc/kubernetes/* var/lib/etcd/*
重新初始化成功
[root@master ~]# kubeadm init --apiserver-advertise-address=192.168.43.37 --image-repository=registry.aliyuncs.com/google_containers --kubernetes-version=v1.28.0 --service-cidr=10.96.0.0/12 --pod-network-cidr=10.244.0.0/16 --cri-socket=unix:///var/run/containerd/containerd.sock
[init] Using Kubernetes version: v1.28.0
[preflight] Running pre-flight checks
[preflight] Pulling images required for setting up a Kubernetes cluster
[preflight] This might take a minute or two, depending on the speed of your internet connection
[preflight] You can also perform this action in beforehand using 'kubeadm config images pull'
[certs] Using certificateDir folder "/etc/kubernetes/pki"
[certs] Generating "ca" certificate and key
[certs] Generating "apiserver" certificate and key
[certs] apiserver serving cert is signed for DNS names [kubernetes kubernetes.default kubernetes.default.svc kubernetes.default.svc.cluster.local master] and IPs [10.96.0.1 192.168.43.37]
[certs] Generating "apiserver-kubelet-client" certificate and key
[certs] Generating "front-proxy-ca" certificate and key
[certs] Generating "front-proxy-client" certificate and key
[certs] Generating "etcd/ca" certificate and key
[certs] Generating "etcd/server" certificate and key
[certs] etcd/server serving cert is signed for DNS names [localhost master] and IPs [192.168.43.37 127.0.0.1 ::1]
[certs] Generating "etcd/peer" certificate and key
[certs] etcd/peer serving cert is signed for DNS names [localhost master] and IPs [192.168.43.37 127.0.0.1 ::1]
[certs] Generating "etcd/healthcheck-client" certificate and key
[certs] Generating "apiserver-etcd-client" certificate and key
[certs] Generating "sa" key and public key
[kubeconfig] Using kubeconfig folder "/etc/kubernetes"
[kubeconfig] Writing "admin.conf" kubeconfig file
[kubeconfig] Writing "kubelet.conf" kubeconfig file
[kubeconfig] Writing "controller-manager.conf" kubeconfig file
[kubeconfig] Writing "scheduler.conf" kubeconfig file
[etcd] Creating static Pod manifest for local etcd in "/etc/kubernetes/manifests"
[control-plane] Using manifest folder "/etc/kubernetes/manifests"
[control-plane] Creating static Pod manifest for "kube-apiserver"
[control-plane] Creating static Pod manifest for "kube-controller-manager"
[control-plane] Creating static Pod manifest for "kube-scheduler"
[kubelet-start] Writing kubelet environment file with flags to file "/var/lib/kubelet/kubeadm-flags.env"
[kubelet-start] Writing kubelet configuration to file "/var/lib/kubelet/config.yaml"
[kubelet-start] Starting the kubelet
[wait-control-plane] Waiting for the kubelet to boot up the control plane as static Pods from directory "/etc/kubernetes/manifests". This can take up to 4m0s
[apiclient] All control plane components are healthy after 7.503764 seconds
[upload-config] Storing the configuration used in ConfigMap "kubeadm-config" in the "kube-system" Namespace
[kubelet] Creating a ConfigMap "kubelet-config" in namespace kube-system with the configuration for the kubelets in the cluster
[upload-certs] Skipping phase. Please see --upload-certs
[mark-control-plane] Marking the node master as control-plane by adding the labels: [node-role.kubernetes.io/control-plane node.kubernetes.io/exclude-from-external-load-balancers]
[mark-control-plane] Marking the node master as control-plane by adding the taints [node-role.kubernetes.io/control-plane:NoSchedule]
[bootstrap-token] Using token: ohvbn8.5ugezvibuyz10dvq
[bootstrap-token] Configuring bootstrap tokens, cluster-info ConfigMap, RBAC Roles
[bootstrap-token] Configured RBAC rules to allow Node Bootstrap tokens to get nodes
[bootstrap-token] Configured RBAC rules to allow Node Bootstrap tokens to post CSRs in order for nodes to get long term certificate credentials
[bootstrap-token] Configured RBAC rules to allow the csrapprover controller automatically approve CSRs from a Node Bootstrap Token
[bootstrap-token] Configured RBAC rules to allow certificate rotation for all node client certificates in the cluster
[bootstrap-token] Creating the "cluster-info" ConfigMap in the "kube-public" namespace
[kubelet-finalize] Updating "/etc/kubernetes/kubelet.conf" to point to a rotatable kubelet client certificate and key
[addons] Applied essential addon: CoreDNS
[addons] Applied essential addon: kube-proxy

Your Kubernetes control-plane has initialized successfully!

To start using your cluster, you need to run the following as a regular user:

  mkdir -p $HOME/.kube
  sudo cp -i /etc/kubernetes/admin.conf $HOME/.kube/config
  sudo chown $(id -u):$(id -g) $HOME/.kube/config

Alternatively, if you are the root user, you can run:

  export KUBECONFIG=/etc/kubernetes/admin.conf

You should now deploy a pod network to the cluster.
Run "kubectl apply -f [podnetwork].yaml" with one of the options listed at:
  https://kubernetes.io/docs/concepts/cluster-administration/addons/

Then you can join any number of worker nodes by running the following on each as root:

kubeadm join 192.168.43.37:6443 --token ohvbn8.5ugezvibuyz10dvq \
    --discovery-token-ca-cert-hash sha256:8cf496d9eda390cf716b67809b025771d1560df9b0c2c46f431f603da5b64b78
按照提示本地执行:
 mkdir -p $HOME/.kube
  sudo cp -i /etc/kubernetes/admin.conf $HOME/.kube/config
  sudo chown $(id -u):$(id -g) $HOME/.kube/config
3.5、从节点加入集群
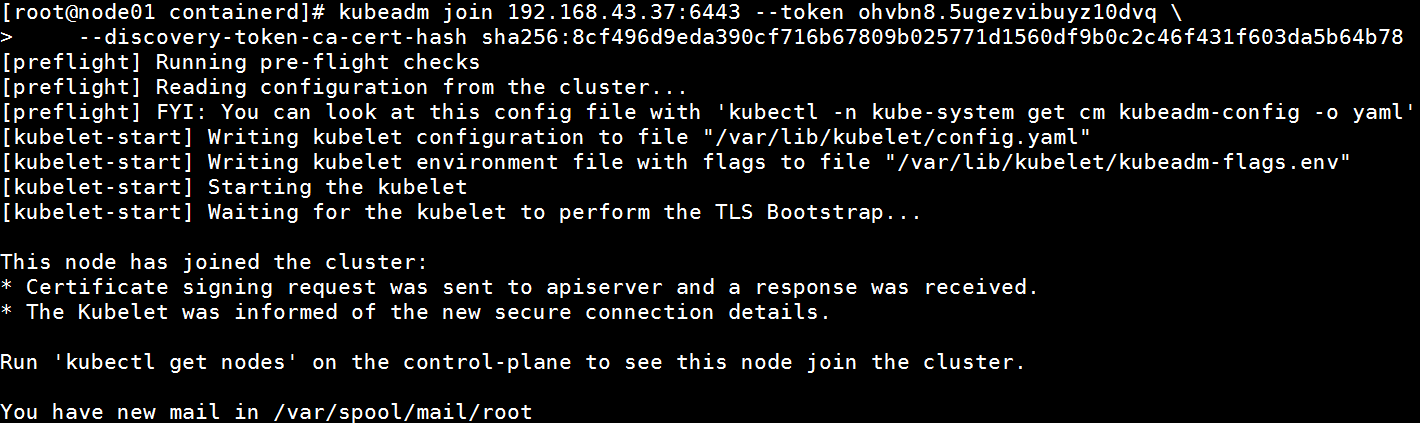
执行主节点生产的命令,两个从节点执行
kubeadm join 192.168.43.37:6443 --token ohvbn8.5ugezvibuyz10dvq \
    --discovery-token-ca-cert-hash sha256:8cf496d9eda390cf716b67809b025771d1560df9b0c2c46f431f603da5b64b78
在主节点查看
[root@master ~]# kubectl get node
NAME     STATUS     ROLES           AGE     VERSION
master   NotReady   control-plane   19m     v1.28.0
node01   NotReady   <none>          2m45s   v1.28.0
node02   NotReady   <none>          2m27s   v1.28.0
3.6、设置kubelet开机自启动
systemctl enable --now kubelet
四、安装Calico插件
4.1、官方网站
https://docs.tigera.io/calico/3.25/getting-started/kubernetes/quickstart
4.2、按照官方网站安装(在master节点)
没有安装前查看节点状态

[root@master ~]# wget https://raw.githubusercontent.com/projectcalico/calico/v3.26.1/manifests/tigera-operator.yaml
安装
[root@master ~]# kubectl create -f tigera-operator.yaml
下载
[root@master ~]# wget https://raw.githubusercontent.com/projectcalico/calico/v3.26.1/manifests/custom-resources.yaml
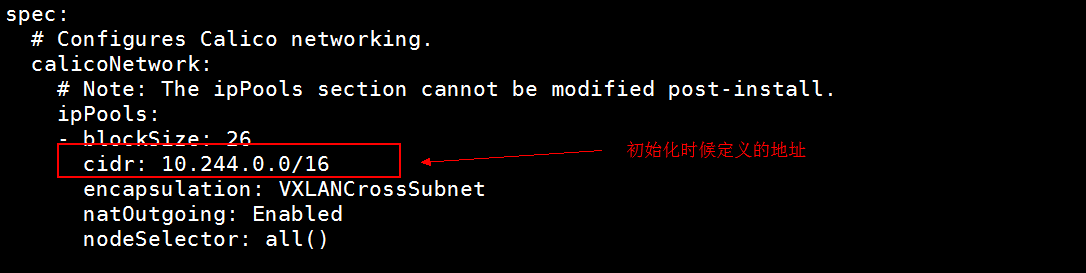
修改地址为自己的pod地址
[root@master ~]# vi custom-resources.yaml
安装
[root@master ~]# kubectl create -f custom-resources.yaml
installation.operator.tigera.io/default created
apiserver.operator.tigera.io/default created
没有报错,安装后查看几点状态
[root@master ~]# kubectl get node
NAME     STATUS   ROLES           AGE   VERSION
master   Ready    control-plane   16h   v1.28.0
node01   Ready    <none>          15h   v1.28.0
node02   Ready    <none>          15h   v1.28.0
https://blog.csdn.net/m0_51510236/article/details/130842122
https://www.cnblogs.com/libruce/p/17687354.html
https://www.yuque.com/echox-dw1a4/tp0mpg/st6ab3nw73kd8rot?singleDoc#

 浙公网安备 33010602011771号