
Nginx学习2
一、Nginx简介
1.1 Nginx概述
nginx是一个高性能的HTTP和反向代理服务器;
1.2 正向代理
客户端需要配置代理服务器。
客户端通过配置或其他方式改为向代理服务器发送请求,并指定目标服务器(原始服务器),然后由代理服务器和原始服务器通信,转交请求并获得的内容,再返回给客户端。正向代理隐藏了真实的客户端,为客户端收发请求,使真实客户端对服务器不可见;
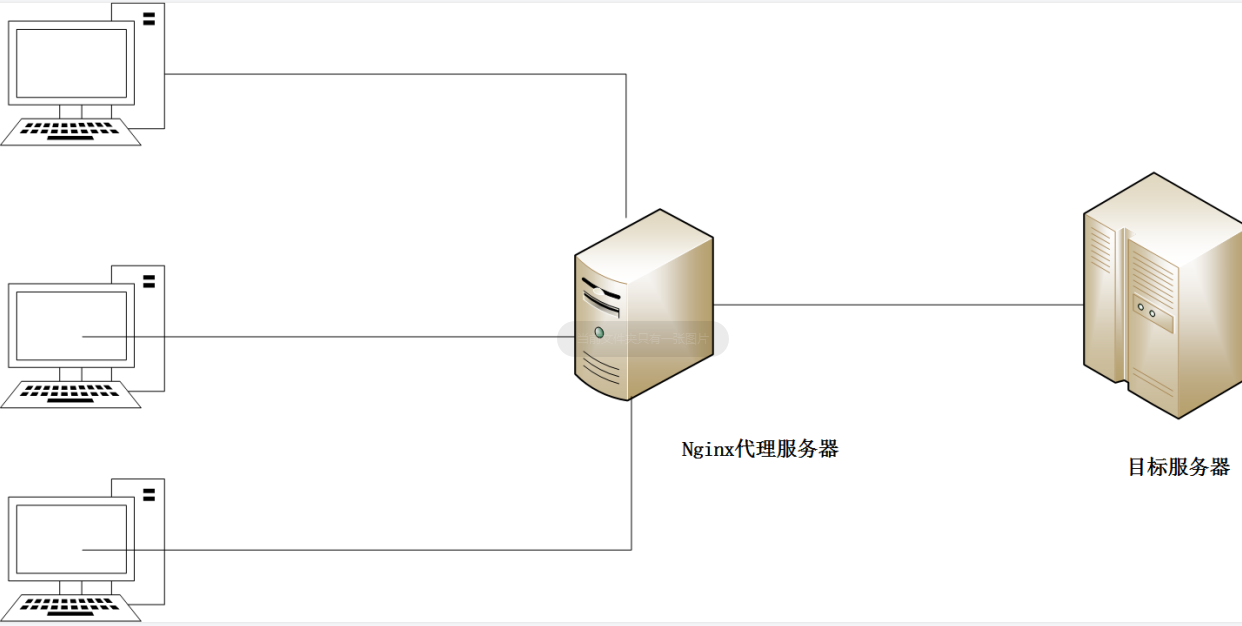
1.3 反向代理
客户端不需要配置任何代理。
反向代理,其实客户端对代理是无感知的,因为客户端不需要任何配置就可以访问,我们只需要将请求发送到反向代理服务器,由反向代理服务器去选择目标服务器获取数据后,在返回给客户端,此时反向代理服务器和目标服务器对外就是一个服务器,暴露的是代理服务器地址,隐藏了真实服务器IP地址。
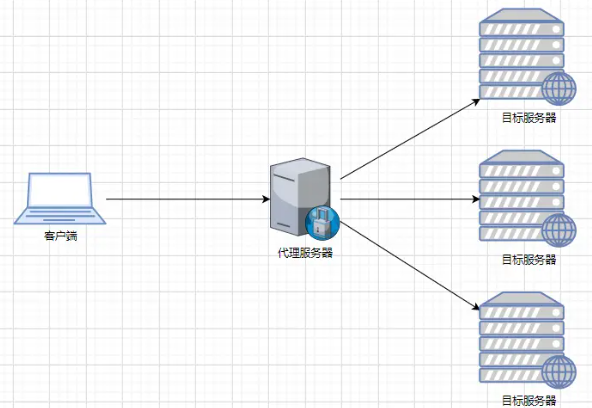
1.4 负载均衡
单个服务器解决不了,我们增加服务器的数量,然后将请求分发到各个服务器上,将原先请求集中到单个服务器上的情况改为将请求分发到多个服务器上,将负载分发到不同的服务器,也就是我们所说的负载均衡。
1.5 动静分离
为了加快服务器的解析速度,可以把动态页面和今天页面有不同的服务器解析,加快解析速度,降低原来单个服务器的压力。
二、Nginx安装
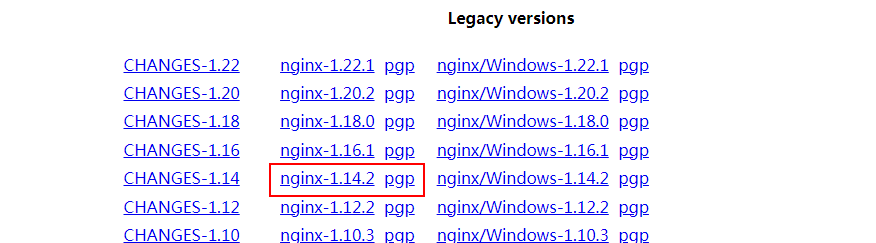
2.1 下载
http://nginx.org/en/download.html
或者直接在系统中下载
wget http://nginx.org/download/nginx-1.14.2.tar.gz
解压
[root@localhost ~]# tar -zxvf nginx-1.14.2.tar.gz
查看解压后的目录
[root@localhost nginx-1.14.2]# ll
total 732
drwxr-xr-x. 6 1001 1001   4096 Oct 24 23:27 auto
-rw-r--r--. 1 1001 1001 288742 Dec  4  2018 CHANGES
-rw-r--r--. 1 1001 1001 440121 Dec  4  2018 CHANGES.ru
drwxr-xr-x. 2 1001 1001    168 Oct 24 23:27 conf        #配置
-rwxr-xr-x. 1 1001 1001   2502 Dec  4  2018 configure
drwxr-xr-x. 4 1001 1001     72 Oct 24 23:27 contrib
drwxr-xr-x. 2 1001 1001     40 Oct 24 23:27 html
-rw-r--r--. 1 1001 1001   1397 Dec  4  2018 LICENSE
drwxr-xr-x. 2 1001 1001     21 Oct 24 23:27 man          #帮忙
-rw-r--r--. 1 1001 1001     49 Dec  4  2018 README
drwxr-xr-x. 9 1001 1001     91 Oct 24 23:27 src           #源代码
2.2 编译安装
指定安装目录
[root@localhost nginx-1.14.2]# ./configure --prefix=/home/zzs/nginx
报错
checking for OS
 + Linux 3.10.0-1062.el7.x86_64 x86_64
checking for C compiler ... not found

./configure: error: C compiler cc is not found
安装依赖包
[root@localhost nginx-1.14.2]# yum -y install make zlib-devel gcc *c++ libtool opensl openssl-devel
安装成功后继续执行,安装成功
[root@localhost nginx-1.14.2]# ./configure --prefix=/home/zzs/nginx


nginx path prefix: "/home/zzs/nginx"
  nginx binary file: "/home/zzs/nginx/sbin/nginx"
  nginx modules path: "/home/zzs/nginx/modules"
  nginx configuration prefix: "/home/zzs/nginx/conf"
  nginx configuration file: "/home/zzs/nginx/conf/nginx.conf"
  nginx pid file: "/home/zzs/nginx/logs/nginx.pid"
  nginx error log file: "/home/zzs/nginx/logs/error.log"
  nginx http access log file: "/home/zzs/nginx/logs/access.log"
  nginx http client request body temporary files: "client_body_temp"
  nginx http proxy temporary files: "proxy_temp"
  nginx http fastcgi temporary files: "fastcgi_temp"
  nginx http uwsgi temporary files: "uwsgi_temp"
  nginx http scgi temporary files: "scgi_temp"
编译后多了一个文件夹
[root@localhost nginx-1.14.2]# cd objs
[root@localhost objs]# ll
total 80
-rw-r--r--. 1 root root 17107 Oct 25 23:07 autoconf.err
-rw-r--r--. 1 root root 39435 Oct 25 23:07 Makefile
-rw-r--r--. 1 root root  6896 Oct 25 23:07 ngx_auto_config.h
-rw-r--r--. 1 root root   657 Oct 25 23:07 ngx_auto_headers.h
-rw-r--r--. 1 root root  5725 Oct 25 23:07 ngx_modules.c             #所有要编译的模块都放在这个文件中
drwxr-xr-x. 9 root root    91 Oct 25 23:07 src
执行编译
[root@localhost nginx-1.14.2]# make
编译完成
objs/ngx_modules.o \
-ldl -lpthread -lcrypt -lpcre -lz \
-Wl,-E
sed -e "s|%%PREFIX%%|/home/zzs/nginx|" \
    -e "s|%%PID_PATH%%|/home/zzs/nginx/logs/nginx.pid|" \
    -e "s|%%CONF_PATH%%|/home/zzs/nginx/conf/nginx.conf|" \
    -e "s|%%ERROR_LOG_PATH%%|/home/zzs/nginx/logs/error.log|" \
    < man/nginx.8 > objs/nginx.8
make[1]: Leaving directory `/root/nginx-1.14.2'
安装
[root@localhost nginx-1.14.2]# make install
完成后显示如下
cp conf/scgi_params \
    '/home/zzs/nginx/conf/scgi_params.default'
test -f '/home/zzs/nginx/conf/nginx.conf' \
    || cp conf/nginx.conf '/home/zzs/nginx/conf/nginx.conf'
cp conf/nginx.conf '/home/zzs/nginx/conf/nginx.conf.default'
test -d '/home/zzs/nginx/logs' \
    || mkdir -p '/home/zzs/nginx/logs'
test -d '/home/zzs/nginx/logs' \
    || mkdir -p '/home/zzs/nginx/logs'
test -d '/home/zzs/nginx/html' \
    || cp -R html '/home/zzs/nginx'
test -d '/home/zzs/nginx/logs' \
    || mkdir -p '/home/zzs/nginx/logs'
make[1]: Leaving directory `/root/nginx-1.14.2'
三、Nginx常用命令
首先进入nginx的命令目录(安装时候的目录)
[root@localhost ~]# cd /home/zzs/nginx/sbin/
3.1启动nginx
[root@localhost sbin]# ./nginx
3.2 查看版本号
[root@localhost sbin]# ./nginx -v
nginx version: nginx/1.14.2
3.3 重新加载配置文件
[root@localhost sbin]# ./nginx -s reload
3.4 关闭nginx
[root@localhost sbin]# ./nginx -s stop
四、Nginx的配置文件
4.1 文件位置
[root@localhost ~]# cd /home/zzs/nginx/conf/
[root@localhost conf]# ls nginx.conf
nginx.conf
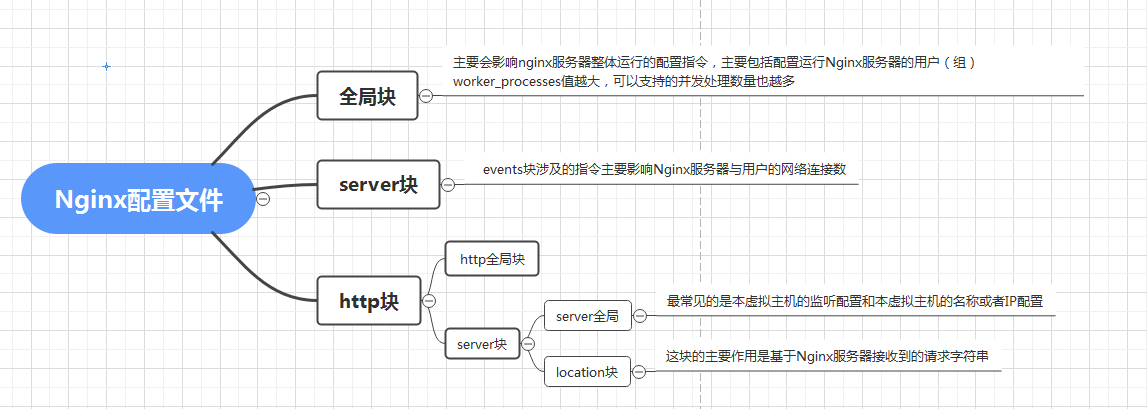
4.2 配置文件说明
第一部分:全局块
从配置文件开始到event块之间,主要会影响nginx服务器整体运行的配置指令,主要包括配置运行Nginx服务器的用户(组),允许生成的work press数,进程PID存放路径,日志存放路径类型已经配置文件的引入等:
#user  nobody;
worker_processes  1;
这是Nginx服务器并发处理服务的关键配置,worker_processes值越大,可以支持的并发处理数量也越多,但是会收到硬件、软件等设备的制约。
第二部分: event块
events {
    worker_connections  1024;
}
events块涉及的指令主要影响Nginx服务器与用户的网络连接,常用的设置包括是否开启对多work process下的网络连接进行序列化,是否允许同事接收多个网络连接,选取那种时间驱动规模小来处理连接请求,每个word process 可以同事支持的最大连接数等。
上述例子表示work process 支持的最大连接数为1024;
第三部分: http块
http {
    include       mime.types;
    default_type  application/octet-stream;
    log_format  main  '$remote_addr - $remote_user [$time_local] "$request" '
                      '$status $body_bytes_sent "$http_referer" '
                      '"$http_user_agent" "$http_x_forwarded_for"';
    sendfile        on;
    keepalive_timeout  65;
    gzip  on;
    server {
        listen       192.168.43.25:8080;
        #server_name  localhost;
        #charset koi8-r;

        access_log  logs/host.access.log  main;

        location / {
            alias  dlib/;
            autoindex on;
            set $limit_rate 10k;
           #root   html;
           #index  index.html index.htm;
        }
        error_page   500 502 503 504  /50x.html;
        location = /50x.html {
            root   html;
        }
    }
}
代理、缓存、日志等
http全局块:包括文件引入、MIME-TYPE定义,日志自定义、连接超时时间、但链路请求数上限等。
server块:这块和虚拟主机有密切关系,虚拟主机从用户角度看,和一台独立的硬件是完全一样的,该技术的产生是为了节省互联网服务器的硬件成本;
每个http块可以包含多个server块,而每个server块就相当于一个虚拟主机;
而每个server块也分为全局server块,以及可以同事包含多个location块。
全局server块:最常见的是本虚拟主机的监听配置和本虚拟主机的名称或者IP配置;
location块:一个server块可以配置多个locatio块;
这块的主要作用是基于Nginx服务器接收到的请求字符串(例如: server_name/uri-string)对虚拟主机名称(也可以是IP别名)之外的字符串(例如 前面/uri-string)进行匹配,对特定的请求镜像处理。地址定西、数据缓存和应对控制等功能,还有许多第三方模块的配置也在这里。
五、Nginx的具体实例
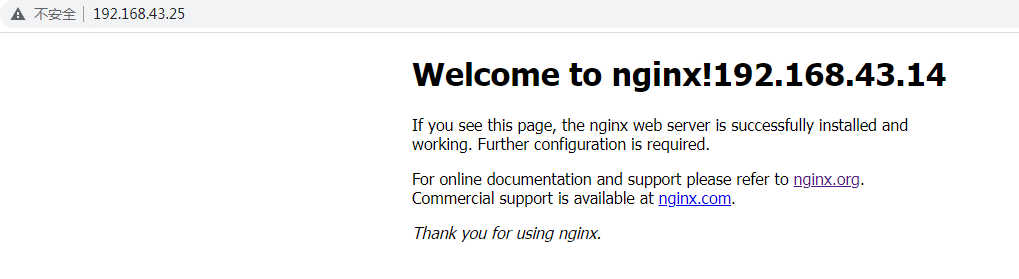
5.1 反向代理
192.168.43.25 反向代理服务器
192.168.43.14 上游目标服务器
修改上游服务器nginx配置:
 server {
        listen       80;
        server_name  192.168.43.25;

        #charset koi8-r;

        #access_log  logs/host.access.log  main;

        location / {
            root   html;
            proxy_pass http://192.168.43.14:80;
测试访问192.168.43.25后跳转到192.168.43.14
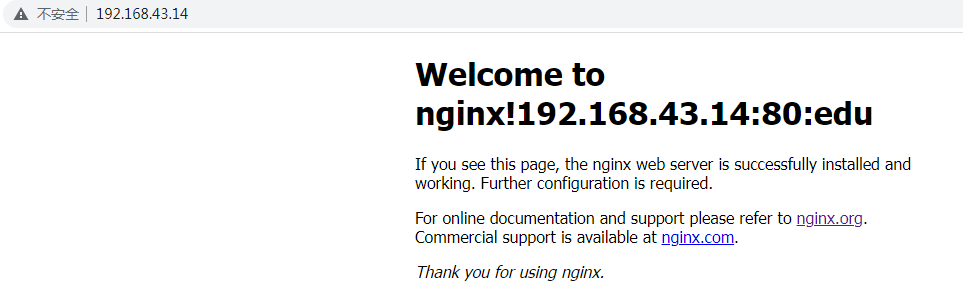
5.2 反向代理实验二(实验失败,先学习,)
192.168.43.14是目标服务器;
192.168.43.25是反向代理服务器;
首先在192.168.43.14上安装两个nginx
[root@localhost zzs]# pwd
/home/zzs
[root@localhost zzs]# ls
nginx  nginx2
启动第一个nginx,端口是80
[root@localhost sbin]# ./nginx -c /home/zzs/conf/nginx.conf
启动第二个,第二个端口是8080
[root@localhost sbin]# ./nginx -c /home/zzs/nginx2/conf/nginx.conf
接下来配置代理服务器192.168.43.25
    server {
        listen       80;
        server_name  192.168.43.25;

        location ~ /edu/ {
            proxy_pass http://192.168.43.14:80;
        }
        location ~ /vod/ {
            proxy_pass http://192.168.43.14:8080;
        }
    }
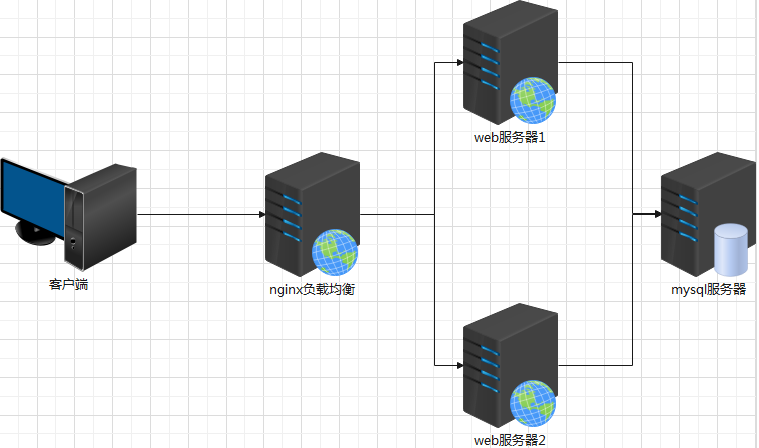
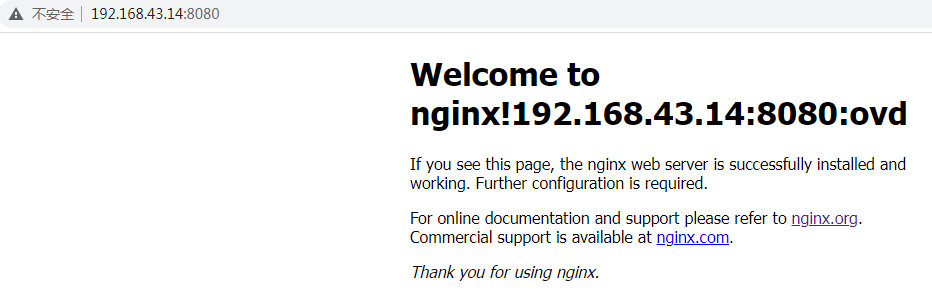
5.3 负责均衡配置
启动两台nginx模拟两台上游服务器:
[root@localhost sbin]# ./nginx -c /home/zzs/nginx/conf/nginx.conf
[root@localhost sbin]#  ./nginx -c /home/zzs/nginx2/conf/nginx.conf
配置分别如下
    server {
        listen       8080;
        server_name  192.168.43.14;

        #charset koi8-r;

        #access_log  logs/host.access.log  main;

        location / {
            #root   html;
            #index  index.html index.htm;
             alias ovd/;
        }
配置二
   server {
        listen       80;
        server_name  localhost;

        #charset koi8-r;

        #access_log  logs/host.access.log  main;

        location / {
           # root   html;
           # index  index.html index.htm;
            alias edu/;
        }
接下来配置nginx负责均衡代理服务器:
配置如下:
    upstream myserver{
       server 192.168.43.14:80;
       server 192.168.43.14:8080;
    }
    server {
        listen       8080;
        server_name  192.168.43.25;

        #charset koi8-r;

        #access_log  logs/host.access.log  main;

        location / {
           # root   html;
            proxy_pass http://myserver;
           # index  index.html index.htm;
        }
访问负责均衡服务器可以看到两个地址交替出现。
六、Nginx高可用配置
两台实验服务器:
服务器一:192.168.43.25
服务器二:192.168.43.14
VIP: 192.168.43.26
两台服务器安装nginx、keepalive
配置25的keepalive配置
global_defs {
   notification_email {
     acassen@firewall.loc
     failover@firewall.loc
     sysadmin@firewall.loc
   }
   notification_email_from Alexandre.Cassen@firewall.loc
   smtp_server 192.168.43.25
   smtp_connect_timeout 30
   router_id LVS_DEVEL
}
vrrp_script chk_http_port {

    script "/usr/local/src/nginx_check.sh"

    interval 2  #(检测脚本执行的间隔)

    weight 2
}
vrrp_instance VI_1 {
    state MASTER    #备份服务器上将 MASTER 改为 BACKUP
    interface ens33 #网卡
    virtual_router_id 51 #主、备机的virtual_router_id必须相同
    priority 100  #主、备机取不同的优先级,主机值较大,备份机值较小
    advert_int 1
    authentication {
        auth_type PASS
        auth_pass 1111
    }
    virtual_ipaddress {
        192.168.43.26  //VRRP H虚拟机地址
    }
}
第二台keepalive配置
global_defs {
   notification_email {
     acassen@firewall.loc
     failover@firewall.loc
     sysadmin@firewall.loc
   }
   notification_email_from Alexandre.Cassen@firewall.loc
   smtp_server 192.168.43.14
   smtp_connect_timeout 30
   router_id LVS_DEVEL
}

vrrp_script chk_http_port {

    script "/usr/local/src/nginx_check.sh"

    interval 2  #(检测脚本执行的间隔)

    weight 2
}
vrrp_instance VI_1 {
    state BACKUP    #备份服务器上将 MASTER 改为 BACKUP
    interface ens33 #网卡
    virtual_router_id 51 #主、备机的virtual_router_id必须相同
    priority 100  #主、备机取不同的优先级,主机值较大,备份机值较小
    advert_int 1
    authentication {
        auth_type PASS
        auth_pass 1111
    }
    virtual_ipaddress {
        192.168.43.26  //VRRP H虚拟机地址
    }
}
检测脚本:
A=`ps -C nginx -no-header |wc -l`
if [ $A -eq 0 ];then
    /home/zzs/nginx/sbin/nginx
    sleep 2
    if [ `ps -C nginx --no-header |wc -l` -eq 0 ];then
       killall keeplived
    fi
fi
启动两台服务器的nginx
[root@localhost sbin]# ./nginx
启动keepalive
[root@localhost ~]# systemctl start keepalived.service
测试
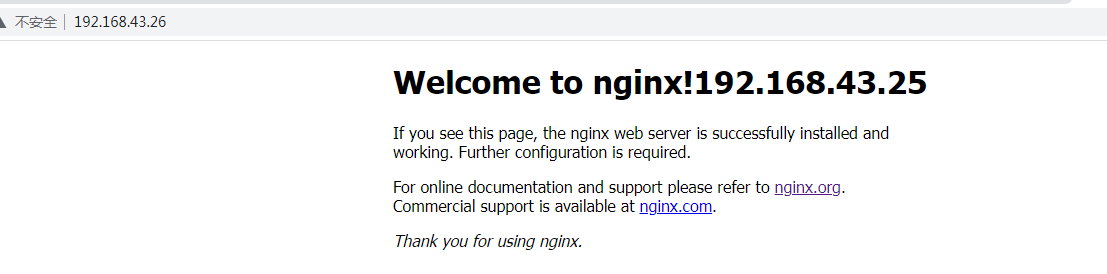
停止主服务器的服务,VIP切换到从服务器。
七、Nginx原理

一个master进程,多个work进程,一个work进程中断,其他work进程继续进行挣钱,实现请求过程不会造成服务中断;
work数量和CPU的数量设置相等是最为适宜的;
参考:
https://www.cnblogs.com/LiuQizhong/p/11757420.html
https://juejin.cn/post/6986512140412649509
https://lnmp.org/nginx.html

 浙公网安备 33010602011771号