docker compose thinkphp5.1 lnmp环境搭建加项目部署全过程
环境
- centos7
- docker 20.10.1
- docker-compose 1.27.4
有关环境搭建,参考:
docker && CentOS-7 :https://www.cnblogs.com/makalochen/p/14230753.html
docker-compose:https://www.cnblogs.com/makalochen/p/14266075.html
搭建需求
- mysql 5.7
- php7.3(包含fpm,并安装thinkphp 5.1的相关扩展)
- nginx(最新)
构建yaml
构建yaml我们肯定要一步步构建,那我们先简单分析一下需求。
- mysql 肯定是要先构建的
- mysql 数据库要做持久化
- msyql root用户密码要自定义
- php 依赖mysql
- nginx 依赖php
1.编写yaml构建mysql
这里我们参考hub上mysql的构建
docker hub:https://hub.docker.com/_/mysql
官方示例
# Use root/example as user/password credentials
version: '3.1'

services:

  db:
    image: mysql
    command: --default-authentication-plugin=mysql_native_password
    restart: always
    environment:
      MYSQL_ROOT_PASSWORD: example

  adminer:
    image: adminer
    restart: always
    ports:
      - 8080:8080
解读
#yaml版本
version:

#定义服务
services:
	#服务名
	db
		#使用镜像构建,没有指定版本就用最新的
		image

		#相当于Dockerfile中的CMD命令
		#会覆盖默认的命令
		#--default-authentication-plugin=mysql_native_password
		#插入本地身份验证
		#参考:https://dev.mysql.com/doc/refman/5.7/en/server-system-variables.html#sysvar_default_authentication_plugin
		command

		#重启策略 always表示总是重新启动
		#参考:https://docs.docker.com/compose/compose-file/compose-file-v3/#restart
		restart

		#环境变量
		#MYSQL_ROOT_PASSWORD 表示root用户密码
		environment
mysql环境变量
官方示例中只用到了MYSQL_ROOT_PASSWORD,但其实还有其他的,
完整的参考:
https://dev.mysql.com/doc/refman/5.7/en/environment-variables.html
常用如下
MYSQL_ROOT_PASSWORD
此变量是必需变量,它指定将为MySQLroot超级用户帐户设置的密码
MYSQL_DATABASE
此变量是可选的,允许您指定在映像启动时要创建的数据库的名称。如果提供了用户名/密码(请参阅下文),则将授予该用户对该数据库的超级用户访问权限(对应于GRANT ALL)。
MYSQL_USER, MYSQL_PASSWORD
这些变量是可选的,与创建新用户和设置该用户的密码一起使用。该MYSQL_DATABASE变量将为该用户授予超级用户权限(请参见上文)。这两个变量都是创建用户所必需的。
请注意,无需使用此机制来创建根超级用户,该用户默认情况下是使用MYSQL_ROOT_PASSWORD变量指定的密码创建的。
构建自定义mysql 5.7 yaml
经过了上满的解读,我们应该已经知道怎么构建mysql的yaml了,但上面解读还不够我们还要做数据持久化这就要用到volumes
可以参考这个配置:
https://www.cnblogs.com/makalochen/p/14266075.html#创建yaml文件
yaml 自定义配置
创建docker-compose.yml文件,文件内容如下
services:
  db:
    image: mysql:5.7
    #表示支持外部访问
    command: --default-authentication-plugin=mysql_native_password
    restart: always
    volumes:
        - db_data:/var/lib/mysql
    #映射到宿主机的端口,测试使用,测试完毕,请注释
    ports:
        - 3306:3306
    environment:
        MYSQL_ROOT_PASSWORD: root

volumes:
    db_data: {}
启动mysql服务
后台启动
docker-compose up -d
启动完成

测试连接
随便用个连接工具连接测试
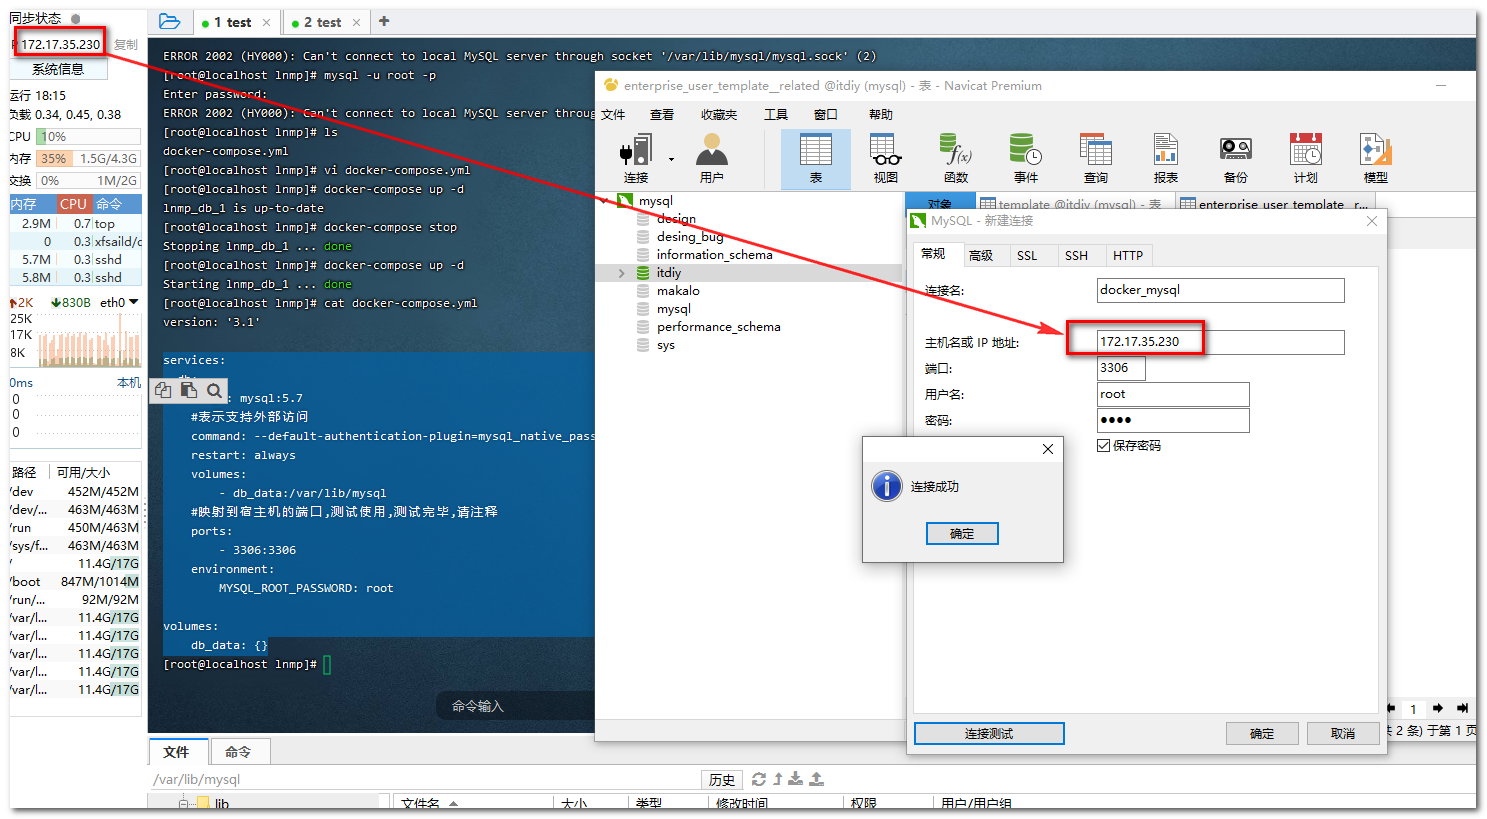
如图连接成功,之后就可以把端口映射注释掉,为了安全考虑
2.在mysql yaml基础上构建php-fpm
docker hub:https://hub.docker.com/_/php?tab=description&page=1&ordering=last_updated&name=fpm
参考:
https://github.com/mikechernev/dockerised-php/blob/master/docker-compose.yml
https://www.jianshu.com/p/b9eab9a265ca?from=timeline&isappinstalled=0
https://github.com/docker-library/php
先说php-fpm服务构建思路
因为搭建需求中写了,要fpm所以镜像的话我们选
7.3-fpm
又因为要支持 thinkphp5.1,所以肯定要安装相关扩展,那么我们看下tp5.1的要求
https://www.kancloud.cn/manual/thinkphp5_1/353948
ThinkPHP5.1的环境要求如下:
- PHP >= 5.6.0
- PDO PHP Extension
- MBstring PHP Extension
也就是说只需要安装两个扩展
关于docker php添加扩展[选看]
php镜像添加扩展主要用到以下几个命令:
- docker-php-source
- docker-php-ext-install
- docker-php-ext-enable
- docker-php-ext-configure
docker-php-source 用于创建或删除 /usr/src/php 目录,PHP 镜像中自带的扩展源码存放的路径:/usr/src/php/ext,
docker-php-ext-install 用于安装并启动 /usr/src/php/ext 目录下的扩展,
docker-php-ext-enable 用于启用扩展,比如通过 pecl 安装的扩展默认是没有启用的,通过这个命令,可以无需到 php.ini 配置文件中去配置,
docker-php-ext-configure 一般都是需要跟 docker-php-ext-install 搭配使用,它的作用就是安装扩展的时候,需要自定义配置时,就可以使用它。
启用扩展库
确保镜像 /usr/src/php/ext 目录存在,如果不存在的话,可以通过下列命令调出镜像默认的扩展库
docker-php-source extract
添加容器扩展库中已有的扩展
在容器中,通过 ls -al /usr/src/php/ext 可以查看扩展库中已有的扩展,并通过下列命令可以直接安装并启用该扩展:
docker-php-ext-install [Package]
如:
docker-php-ext-install mcrypt \
&& docker-php-ext-install mysql \
&& docker-php-ext-install mysqli \
&& docker-php-ext-install pdo_mysql \
&& docker-php-ext-install sockets \
&& docker-php-ext-install bcmath \
&& docker-php-ext-install gettext \
&& docker-php-ext-install soap
安装扩展的时候有时候会提示缺少某些依赖,这时就需要先安装其所需依赖,在执行 docker-php-ext-install
如:
apt-get update \
&& apt-get install -y libmcrypt-dev \
&& apt-get install -y libxml2-dev \
&& apt-get install -y libssl-dev
1234
而对于有些扩展,是需要通过 docker-php-ext-configure 进行配置的,比如安装 PHP 的图像扩展:
apt-get install -y libjpeg-dev \
&& apt-get install -y libpng-dev \
&& apt-get install -y libfreetype6-dev \
&& docker-php-ext-configure gd --with-jpeg-dir --with-png-dir --with-freetype-dir \
&& docker-php-ext-install -j$(nproc) gd
添加容器扩展库中不存在的扩展
通过pecl安装
通过 pecl 安装的扩展默认没有启用,需要执行 docker-php-ext-enable 进行启用。
先在 pecl 上找到需要的扩展,然后执行下列操作:
pecl install [Package]
接着启用该扩展
docker-php-ext-enable [Package]
如:pecl install mongodb && docker-php-ext-enable mongodb
通过下载源码安装
可将下载的扩展源码解压后放置于 /usr/src/php/ext 目录下,然后使用 docker-php-ext-install 命令进行安装,如安装 PHP 的 redis 扩展:
curl -L -o /tmp/redis.tar.gz https://github.com/phpredis/phpredis/archive/$PHPREDIS_VERSION.tar.gz \
    && tar xfz /tmp/redis.tar.gz \
    && rm -r /tmp/redis.tar.gz \
    && mkdir -p /usr/src/php/ext \
    && mv phpredis-$PHPREDIS_VERSION /usr/src/php/ext/redis \
    && docker-php-ext-install redis
删除扩展库
docker-php-source delete
卸载扩展
直接删除 /usr/local/etc/php/conf.d 目录下对应的配置文件
构建自定义mysql 5.7 + php7.3fpm yaml
yaml自定义配置
version: '3.1'

services:
  db:
    image: mysql:5.7
    #表示支持外部访问
    command: --default-authentication-plugin=mysql_native_password
    restart: always
    volumes:
        - db_data:/var/lib/mysql
    #映射到宿主机的端口,测试使用,测试完毕,请注释
    #ports:
    #    - 3306:3306

    networks:
        - lnmp
    environment:
        MYSQL_ROOT_PASSWORD: root
  php-fpm:
    #使用php 7.3-fpm镜像构建
    image: php:7.3-fpm
    #设置依赖
    depends_on:
        - db
    #挂载卷
    volumes:
        #设置代码目录
        - ./code:/code
    #配置网络
    networks:
        - lnmp

volumes:
    db_data: {}
networks:
    lnmp:
启动服务
docker-compose up -d
测试
进入容器,查看扩展
#查看容器
docker ps

#使用容器id进入容器
docker exec -it a208a3b27eac /bin/bash

#进入容器之后查看扩展
php-m
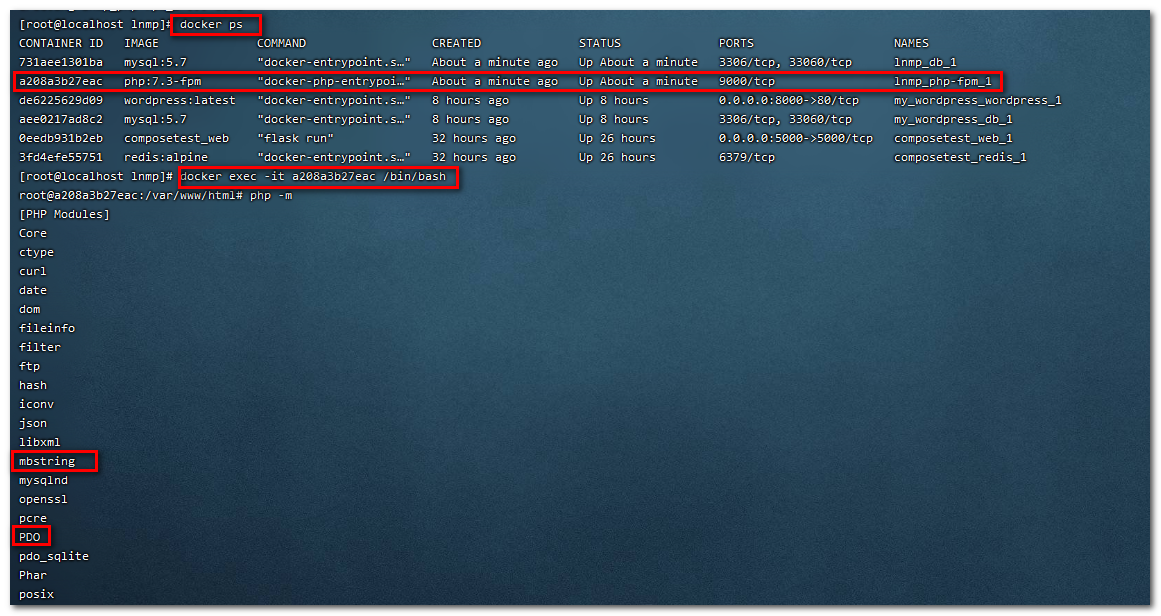
可以看到默认的扩展列表中已经支持这两个扩展,所以我们无需再去安装
上面将当前目录下的code目录挂载到了容器内/code目录
我们写几个简单的测试一下
写上两个php

helloword
<?php
	echo 'hello world'.PHP_EOL;
?>
连接mysql
<?php
$servername = "db";
$username = "root";
$password = "root";

try {
    $conn = new PDO("mysql:host=$servername;", $username, $password);
    echo "连接成功".PHP_EOL;
}
catch(PDOException $e)
{
    echo $e->getMessage().PHP_EOL;
}
?>
进入容器
docker exec -it php-fpm容器id /bin/bash
cd /code/
执行
php test.php
php test_mysql.php
执行结果

可以看到连接mysql失败了,提示没有驱动,那我们就需要将yaml加点东西,安装php的pdo-mysql驱动
关于php fpm 缺少pdo-mysql驱动问题的解决办法
推荐使用方式二
方式一
进入容器,执行
docker exec -it d5d0509878fb /bin/bash
#安装pdo_mysql扩展
docker-php-ext-install pdo pdo_mysql
再次执行测试连接

可以看到连接没问题,但是这种方式,还要进入容器,比较麻烦
方式二
使用dockerfile + yaml
创建php7.3_fpm_dockerfile文件,文件内容如下
FROM php:7.3-fpm
RUN docker-php-ext-install pdo pdo_mysql
修改docker-compose.yml文件内容,为如下内容
version: '3.1'

services:
  db:
    image: mysql:5.7
    #表示支持外部访问
    command: --default-authentication-plugin=mysql_native_password
    restart: always
    volumes:
        - db_data:/var/lib/mysql
    #映射到宿主机的端口,测试使用,测试完毕,请注释
    #ports:
    #    - 3306:3306

    networks:
        - lnmp
    environment:
        MYSQL_ROOT_PASSWORD: root
  php-fpm:
    #使用php 7.3-fpm镜像构建
    #改用dockerfile安装扩展
    #image: php:7.3-fpm

    #dockerfile方式配置
    build:
        #上下文环境,从哪里开始构建
        context: .
        #yaml同级目录下的php7.3_fpm_dockerfile文件
        dockerfile: php7.3_fpm_dockerfile

    #设置依赖
    depends_on:
        - db
    #挂载卷
    volumes:
        #设置代码目录
        - ./code:/code
    #配置网络
    networks:
        - lnmp

volumes:
    db_data: {}
networks:
    lnmp:
启动
#由于使用了dockerfile,所以需要使用--build重构镜像
docker-compose up -d --build
重构后的镜像
第一个为重构后的镜像,下面是原镜像

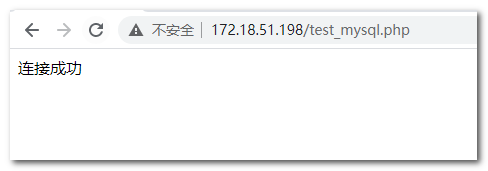
再次执行测试连接

3.在配置好mysql,php-fpm基础上 加上nginx
docker hub :https://hub.docker.com/_/nginx
参考:
https://zhuanlan.zhihu.com/p/97824480?utm_source=wechat_session
https://blog.csdn.net/qq_42114918/article/details/85238011
构建基础yaml
先加上一个最基础的,跑起来
例:
  #ngnix配置
  web:
    #使用最新的nginx镜像
    image: nginx:latest
    #映射端口
    ports:
        - 80:80
    restart: always
    #设置网络
    networks:
        - lnmp
此时完整的yaml
version: '3.1'

services:
  db:
    image: mysql:5.7
    #表示支持外部访问
    command: --default-authentication-plugin=mysql_native_password
    restart: always
    volumes:
        - db_data:/var/lib/mysql
    #映射到宿主机的端口,测试使用,测试完毕,请注释
    #ports:
    #    - 3306:3306

    networks:
        - lnmp
    environment:
        MYSQL_ROOT_PASSWORD: root
  php-fpm:
    #使用php 7.3-fpm镜像构建
    #改用dockerfile安装扩展
    #image: php:7.3-fpm

    #dockerfile方式配置
    build:
        #上下文环境,从哪里开始构建
        context: .
        #yaml同级目录下的php7.3_fpm_dockerfile文件
        dockerfile: php7.3_fpm_dockerfile

    #设置依赖
    depends_on:
        - db
    restart: always
    #挂载卷
    volumes:
        #设置代码目录
        - ./code:/code
    #配置网络
    networks:
        - lnmp

  #ngnix配置
  web:
    #使用最新的nginx镜像
    image: nginx:latest
    #映射端口
    ports:
        - 80:80
    restart: always
    #设置网络
    networks:
        - lnmp
volumes:
    db_data: {}
networks:
    lnmp:
访问
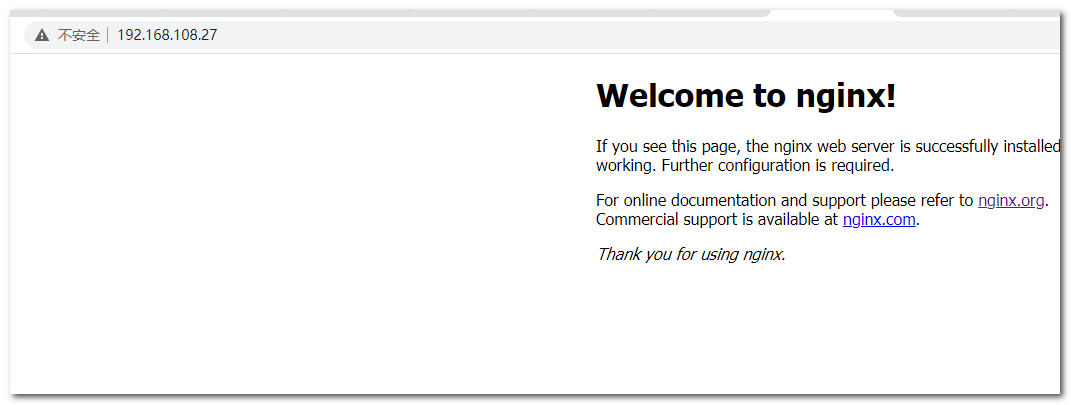
关于nginx版本
原来我决定统一使用最新,但是你会发现nginx各个版本的配置文件位置和设置不一样,所以还是固定一个版本,docker hub目前最新的版本是
1.19.6
那就使用这个版本
关于nginx的配置
官网给出的解释是这样的
$ docker run --name my-custom-nginx-container -v /host/path/nginx.conf:/etc/nginx/nginx.conf:ro -d nginx有关nginx配置文件的语法的信息,请参见官方文档(特别是《入门指南》)。
如果您希望采用默认配置,请使用以下类似内容从运行的nginx容器中复制它:
$ docker run --name tmp-nginx-container -d nginx
$ docker cp tmp-nginx-container:/etc/nginx/nginx.conf /host/path/nginx.conf
$ docker rm -f tmp-nginx-container
从这个命令我们可以知道容器内的配置文件在/etc/nginx/nginx.conf这个位置
我们进入容器看下

可以看到文件内容如下
user  nginx;
worker_processes  1;

error_log  /var/log/nginx/error.log warn;
pid        /var/run/nginx.pid;


events {
    worker_connections  1024;
}


http {
    include       /etc/nginx/mime.types;
    default_type  application/octet-stream;

    log_format  main  '$remote_addr - $remote_user [$time_local] "$request" '
                      '$status $body_bytes_sent "$http_referer" '
                      '"$http_user_agent" "$http_x_forwarded_for"';

    access_log  /var/log/nginx/access.log  main;

    sendfile        on;
    #tcp_nopush     on;

    keepalive_timeout  65;

    #gzip  on;

    include /etc/nginx/conf.d/*.conf;
}
从上面配置文件中,我们得知访问日志和错误日志分别为
/var/log/nginx/access.log
/var/log/nginx/error.log
那我们挂载容器的时候,也需要将日志挂载出来,方便后面的日志排查
复制容器内的配置文件
我们先把这个配置拷贝一份出来,留做备份,防止改到最后恢复不了原始配置
例:
docker cp a0731260e0a9:etc/nginx/nginx.conf /home/lnmp/nginx.conf
可以看到,拷贝成功
修改yaml,限定nginx镜像版本,设置nginx配置文件和日志文件挂载
先将配置文件复制到你要挂载的目录下
如:
我想挂载到/home/lnmp/nginx 目录,那就将刚才复制出来的配置文件拷贝到该目录

注意:不能挂载文件,只能挂载文件夹
此时的yaml
version: '3.1'

services:
  db:
    image: mysql:5.7
    #表示支持外部访问
    command: --default-authentication-plugin=mysql_native_password
    restart: always
    volumes:
        - db_data:/var/lib/mysql
    #映射到宿主机的端口,测试使用,测试完毕,请注释
    #ports:
    #    - 3306:3306

    networks:
        - lnmp
    environment:
        MYSQL_ROOT_PASSWORD: root
  php-fpm:
    #使用php 7.3-fpm镜像构建
    #改用dockerfile安装扩展
    #image: php:7.3-fpm

    #dockerfile方式配置
    build:
        #上下文环境,从哪里开始构建
        context: .
        #yaml同级目录下的php7.3_fpm_dockerfile文件
        dockerfile: php7.3_fpm_dockerfile

    #设置依赖
    depends_on:
        - db
    restart: always
    #挂载卷
    volumes:
        #设置代码目录
        - ./code:/code
    #配置网络
    networks:
        - lnmp

  #ngnix配置
  web:
    #使用1.19.6镜像
    image: nginx:1.19.6
    #映射端口
    ports:
        - 80:80
    depends_on:
        - php-fpm
    restart: always
    #设置网络
    networks:
        - lnmp

    #设置挂载
    volumes:
        #配置文件挂载
        - /home/lnmp/nginx/nginx.conf:/etc/nginx/nginx.conf
        #日志目录挂载
        - /home/lnmp/nginx/log:/var/log/nginx
volumes:
    db_data: {}
networks:
    lnmp:
再次启动
可以看到启动和访问都没问题
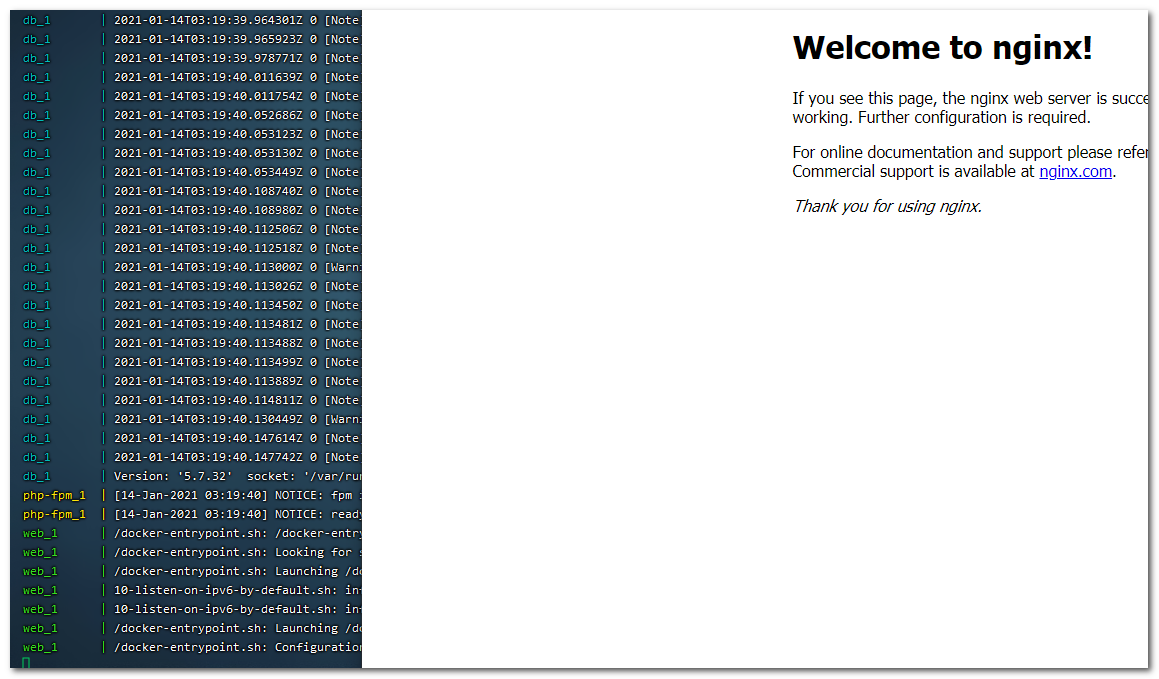
并且日志已经有了
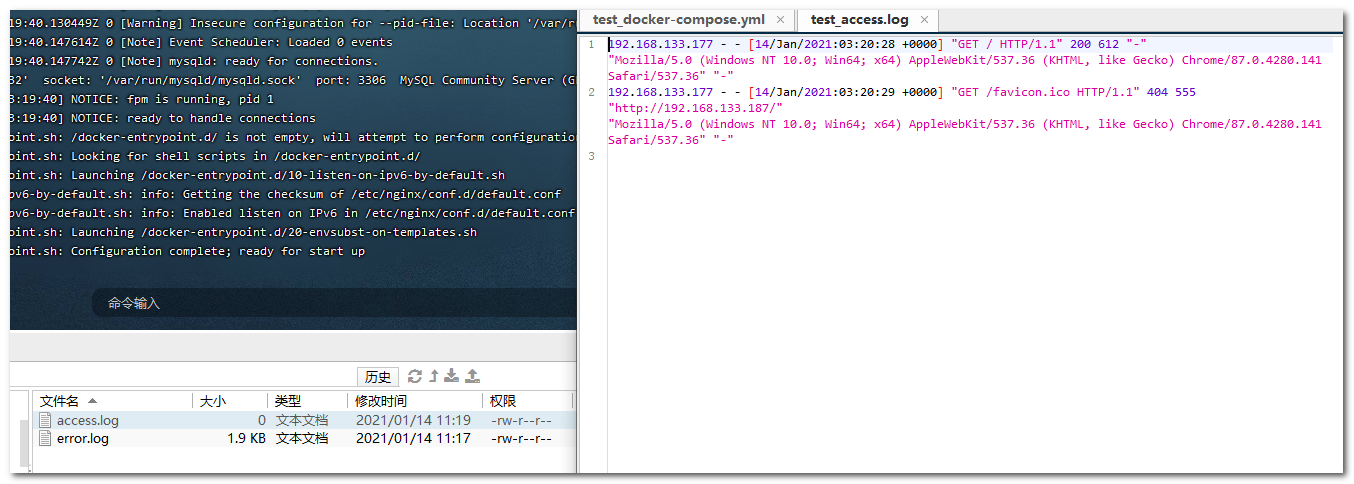
配置nginx 将请求转发给php-fpm 容器处理
在上面我们已经mysql,php-fpm nginx 都配置好了,并且单独可以正常运行,php 连mysql也已经可以了,但是nginx 怎么将请求转发给php-fpm容器处理呢(其实就是设置代理),现在我们来配置
官网参考:
http://nginx.org/en/docs/beginners_guide.html#fastcgi
仔细看官方给出的配置里面有句
include /etc/nginx/conf.d/*.conf;
说明还加载这个路径的配置,我们进去看看这个里面有啥、

进去之后,发现只有一个配置文件,看看里面是啥
文件内容
server {
    listen       80;
    listen  [::]:80;
    server_name  localhost;

    #charset koi8-r;
    #access_log  /var/log/nginx/host.access.log  main;

    location / {
        root   /usr/share/nginx/html;
        index  index.html index.htm;
    }

    #error_page  404              /404.html;

    # redirect server error pages to the static page /50x.html
    #
    error_page   500 502 503 504  /50x.html;
    location = /50x.html {
        root   /usr/share/nginx/html;
    }

    # proxy the PHP scripts to Apache listening on 127.0.0.1:80
    #
    #location ~ \.php$ {
    #    proxy_pass   http://127.0.0.1;
    #}

    # pass the PHP scripts to FastCGI server listening on 127.0.0.1:9000
    #
    #location ~ \.php$ {
    #    root           html;
    #    fastcgi_pass   127.0.0.1:9000;
    #    fastcgi_index  index.php;
    #    fastcgi_param  SCRIPT_FILENAME  /scripts$fastcgi_script_name;
    #    include        fastcgi_params;
    #}

    # deny access to .htaccess files, if Apache's document root
    # concurs with nginx's one
    #
    #location ~ /\.ht {
    #    deny  all;
    #}
}
原来是代理配置,这个代理配置可以写到nginx的主配置文件中,但现在官方将代理配置分离出来之后在主配置文件中引入了,那我们也遵循这个配置先将这个目录复制出来然后通过容器卷挂载,方便后面的修改
复制容器的内的代理配置
例
docker cp 65c71c175277:/etc/nginx/conf.d /home/lnmp/nginx

挂载代理配置
上面将代理配置已经复制出来了,现在就修改yaml的挂载了
例:
version: '3.1'

services:
  db:
    image: mysql:5.7
    #表示支持外部访问
    command: --default-authentication-plugin=mysql_native_password
    restart: always
    volumes:
        - db_data:/var/lib/mysql
    #映射到宿主机的端口,测试使用,测试完毕,请注释
    #ports:
    #    - 3306:3306

    networks:
        - lnmp
    environment:
        MYSQL_ROOT_PASSWORD: root
  php-fpm:
    #使用php 7.3-fpm镜像构建
    #改用dockerfile安装扩展
    #image: php:7.3-fpm

    #dockerfile方式配置
    build:
        #上下文环境,从哪里开始构建
        context: .
        #yaml同级目录下的php7.3_fpm_dockerfile文件
        dockerfile: php7.3_fpm_dockerfile

    #设置依赖
    depends_on:
        - db
    restart: always
    #挂载卷
    volumes:
        #设置代码目录
        - ./code:/code
    #配置网络
    networks:
        - lnmp

  #ngnix配置
  web:
    #使用1.19.6镜像
    image: nginx:1.19.6
    #映射端口
    ports:
        - 80:80
    depends_on:
        - php-fpm
    restart: always
    #设置网络
    networks:
        - lnmp

    #设置挂载
    volumes:
        #主配置文件挂载
        - /home/lnmp/nginx/nginx.conf:/etc/nginx/nginx.conf
        #其他配置目录挂载
        - /home/lnmp/nginx/conf.d:/etc/nginx/conf.d
        #日志目录挂载
        - /home/lnmp/nginx/log:/var/log/nginx
volumes:
    db_data: {}
networks:
    lnmp:
测试:
修改宿主机配置,看容器内会不会同步,如图创建一个文件,容器内同步出现,说明没问题

修改代理配置
上面已经将代理配置挂载到了宿主机,现在我们直接在宿主机修改就好
在/nginx/conf.d/default.conf加入下面的配置,我们先使用上面的例子配置,稍作修改
官方例子
# pass the PHP scripts to FastCGI server listening on 127.0.0.1:9000
#
#location ~ \.php$ {
#    root           html;
#    fastcgi_pass   127.0.0.1:9000;
#    fastcgi_index  index.php;
#    fastcgi_param  SCRIPT_FILENAME  /scripts$fastcgi_script_name;
#    include        fastcgi_params;
#}
添加
location ~ \.php$ {
    #代码目录
    root           /code;
    #修改为phpfpm容器
    fastcgi_pass   php-fpm:9000;
    fastcgi_index  index.php;
    fastcgi_param  SCRIPT_FILENAME  /scripts$fastcgi_script_name;
    include        fastcgi_params;
}
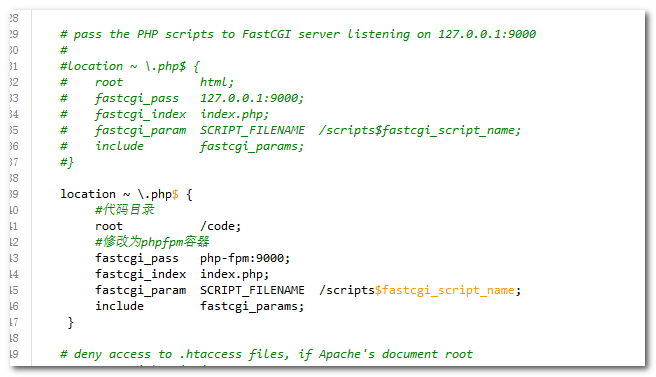
nginx服务 挂载代码目录,测试
上面已经将php的nginx代理设置好了,现在将我们在上面写的简单代码目录挂载到容器的/code目录(代理设置的也是这个目录),然后访问测试
设置代码目录挂载后的yaml
version: '3.1'

services:
  db:
    image: mysql:5.7
    #表示支持外部访问
    command: --default-authentication-plugin=mysql_native_password
    restart: always
    volumes:
        - db_data:/var/lib/mysql
    #映射到宿主机的端口,测试使用,测试完毕,请注释
    #ports:
    #    - 3306:3306

    networks:
        - lnmp
    environment:
        MYSQL_ROOT_PASSWORD: root
  php-fpm:
    #使用php 7.3-fpm镜像构建
    #改用dockerfile安装扩展
    #image: php:7.3-fpm

    #dockerfile方式配置
    build:
        #上下文环境,从哪里开始构建
        context: .
        #yaml同级目录下的php7.3_fpm_dockerfile文件
        dockerfile: php7.3_fpm_dockerfile

    #设置依赖
    depends_on:
        - db
    restart: always
    #挂载卷
    volumes:
        #设置代码目录
        - ./code:/code
    #配置网络
    networks:
        - lnmp

  #ngnix配置
  web:
    #使用1.19.6镜像
    image: nginx:1.19.6
    #映射端口
    ports:
        - 80:80
    depends_on:
        - php-fpm
    restart: always
    #设置网络
    networks:
        - lnmp

    #设置挂载
    volumes:
        #主配置文件挂载
        - /home/lnmp/nginx/nginx.conf:/etc/nginx/nginx.conf
        #其他配置目录挂载
        - /home/lnmp/nginx/conf.d:/etc/nginx/conf.d
        #日志目录挂载
        - /home/lnmp/nginx/log:/var/log/nginx
        #代码目录挂载
        - /home/lnmp/code:/code
volumes:
    db_data: {}
networks:
    lnmp:
重启启动测试
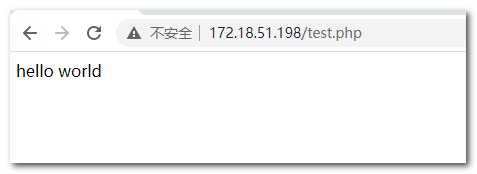
访问test.php
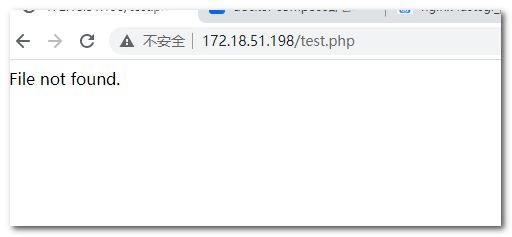
访问不了,这是为什么的
使用$document_root,配置代码根目录
上面访问不了是因为没有配置代码根目录,参考
http://nginx.org/en/docs/beginners_guide.html#fastcgi
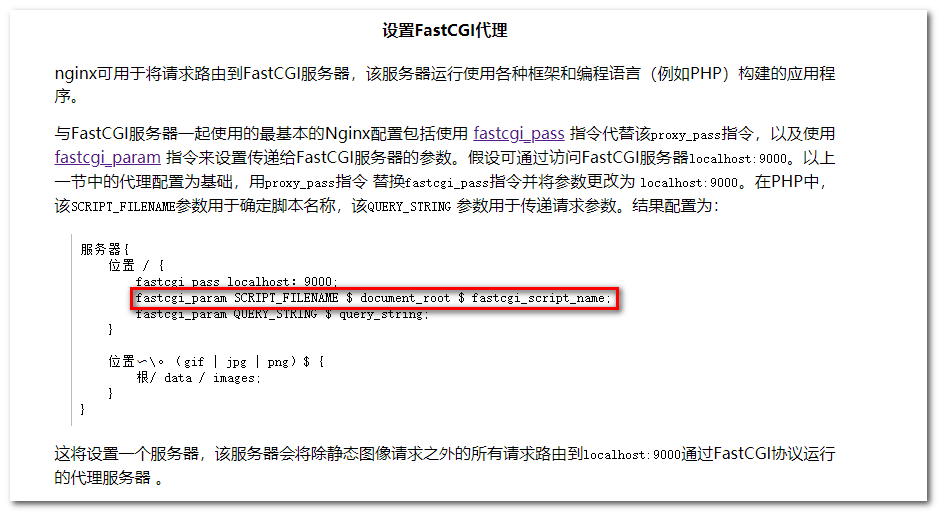
修改/nginx/conf.d/default.conf加入配置,为如下
location ~ \.php$ {
	    #代码目录
	    root           /code;
	    #修改为phpfpm容器
	    fastcgi_pass   php-fpm:9000;
	    fastcgi_index  index.php;
	    #在浏览器中访问的.php文件,实际读取的是 $document_root(网站root根目录)下的.php文件
	    fastcgi_param  SCRIPT_FILENAME  $document_root$fastcgi_script_name;
	    include        fastcgi_params;
	}
重启访问
配置默认加载index.php
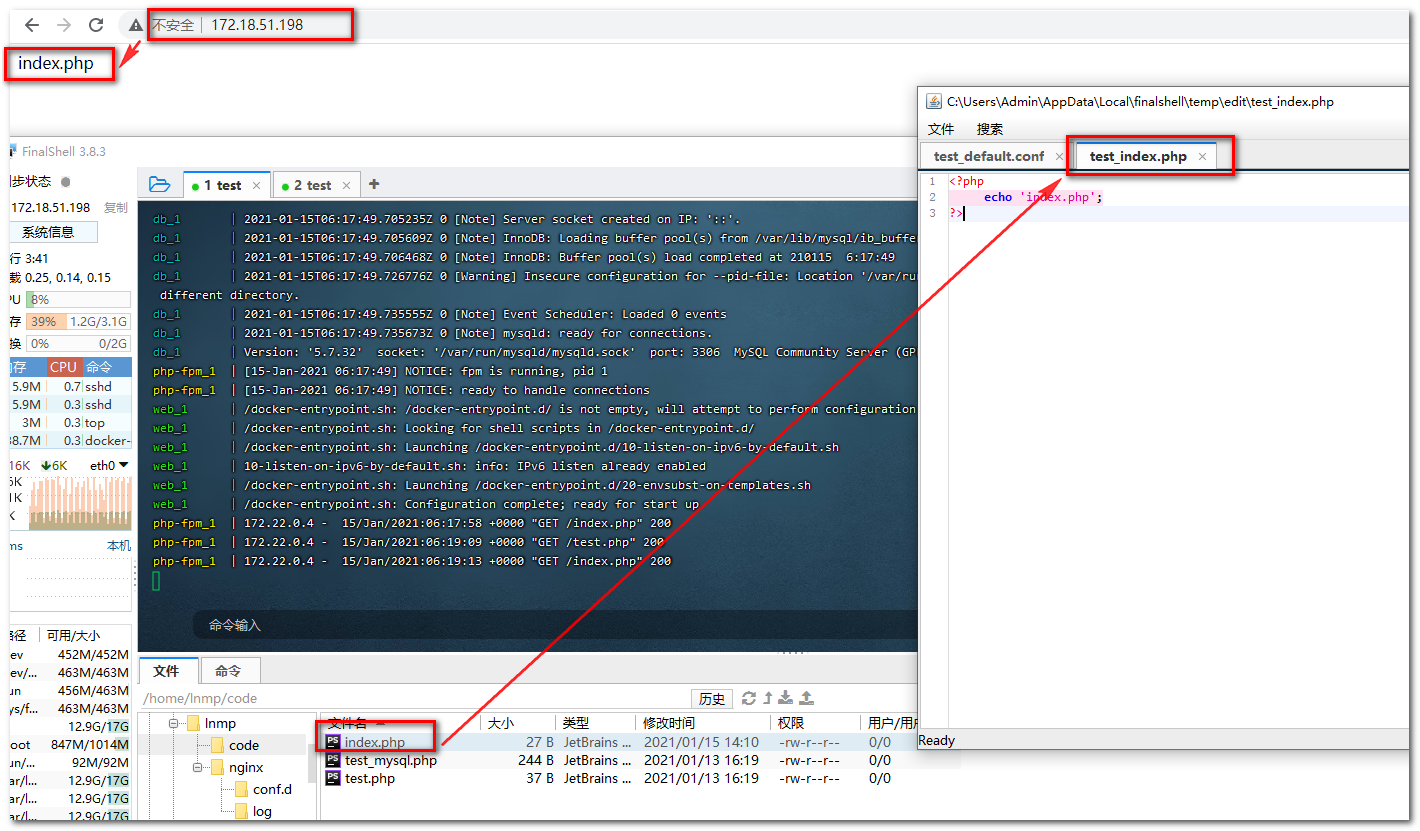
没有配置之前不会自动加载index.php
参考这个配置
server {
    listen       80;
    listen  [::]:80;
    server_name  localhost;

    #charset koi8-r;
    #access_log  /var/log/nginx/host.access.log  main;

    #配置代码根目录
    root           /code;
    location / {
    	#注释默认配置
        #root   /usr/share/nginx/html;
        #index  index.html index.htm;

	    #加入index.php
        index  index.html index.htm index.php;
    }

    #error_page  404              /404.html;

    # redirect server error pages to the static page /50x.html
    #
    error_page   500 502 503 504  /50x.html;
    location = /50x.html {
        root   /usr/share/nginx/html;
    }

    # proxy the PHP scripts to Apache listening on 127.0.0.1:80
    #
    #location ~ \.php$ {
    #    proxy_pass   http://127.0.0.1;
    #}

    # pass the PHP scripts to FastCGI server listening on 127.0.0.1:9000
    #
    #location ~ \.php$ {
    #    root           html;
    #    fastcgi_pass   127.0.0.1:9000;
    #    fastcgi_index  index.php;
    #    fastcgi_param  SCRIPT_FILENAME  /scripts$fastcgi_script_name;
    #    include        fastcgi_params;
    #}

    location ~ \.php$ {
	    #修改为phpfpm容器
	    fastcgi_pass   php-fpm:9000;
	    fastcgi_index  index.php;
	    #在浏览器中访问的.php文件,实际读取的是 $document_root(网站root根目录)下的.php文件
	    fastcgi_param  SCRIPT_FILENAME  $document_root$fastcgi_script_name;
	    include        fastcgi_params;
	}

    # deny access to .htaccess files, if Apache's document root
    # concurs with nginx's one
    #
    #location ~ /\.ht {
    #    deny  all;
    #}
}
重启,访问测试
配置支持PATH_INFO
PS:Nginx(PHP/fastcgi)的PATHINFO配置
PATHINFO是一个CGI 1.1的标准,经常用来做为传参载体,在Apache中, 当不加配置的时候, 对于PHP脚本, AcceptPathInfo是默认接受的,而对于Nginx下, 是不支持PATHINFO 的, 也就是需要设置才能使用PATHINFO模式.
我们可以使用PATH_INFO来代替Rewrite来实现伪静态页面, 很多PHP框架也使用PATHINFO模式来作为路由载体
在location ~ \.php$ 的配置项中加入
参考:
http://nginx.org/en/docs/http/ngx_http_fastcgi_module.html#fastcgi_split_path_info
fastcgi_split_path_info所在的行,正则表达式具有两个捕获: 第一个捕获成为fastcgi_script_name变量的值,第二个捕获成为变量fastcgi_path_info的值。
例如/show.php/article/0001请求:
SCRIPT_FILENAME 参数将等于"/show.php"
PATH_INFO 参数将等于"/article/0001".
 fastcgi_split_path_info  ^((?U).+\.php)(/?.+)$;
 fastcgi_param  PATH_INFO  $fastcgi_path_info;
 fastcgi_param  PATH_TRANSLATED  $document_root$fastcgi_path_info;
配置伪静态
伪静态是为了去掉index.php这个
在 location /中加入配置
if (!-e $request_filename){
    rewrite ^/(.*)$ /index.php/$1 last;
}
参考代理配置
/nginx/conf.d/default.conf文件
server {
    listen       80;
    listen  [::]:80;
    server_name  localhost;

    #charset koi8-r;
    #access_log  /var/log/nginx/host.access.log  main;

    #配置代码根目录
    root           /code;
    location / {
    	#注释默认配置
        #root   /usr/share/nginx/html;
        #index  index.html index.htm;

	    #加入index.php
        index  index.html index.htm index.php;

        #伪静态配置
        if (!-e $request_filename){
            rewrite ^/(.*)$ /index.php/$1 last;
        }
    }

    #error_page  404              /404.html;

    # redirect server error pages to the static page /50x.html
    #
    error_page   500 502 503 504  /50x.html;
    location = /50x.html {
        root   /usr/share/nginx/html;
    }

    # proxy the PHP scripts to Apache listening on 127.0.0.1:80
    #
    #location ~ \.php$ {
    #    proxy_pass   http://127.0.0.1;
    #}

    # pass the PHP scripts to FastCGI server listening on 127.0.0.1:9000
    #
    #location ~ \.php$ {
    #    root           html;
    #    fastcgi_pass   127.0.0.1:9000;
    #    fastcgi_index  index.php;
    #    fastcgi_param  SCRIPT_FILENAME  /scripts$fastcgi_script_name;
    #    include        fastcgi_params;
    #}

    location ~ \.php$ {
	    #修改为phpfpm容器
	    fastcgi_pass   php-fpm:9000;
	    fastcgi_index  index.php;
	    #path_info 支持配置
	    fastcgi_split_path_info  ^((?U).+\.php)(/?.+)$;
        fastcgi_param  PATH_INFO  $fastcgi_path_info;
        fastcgi_param  PATH_TRANSLATED  $document_root$fastcgi_path_info;
	    #在浏览器中访问的.php文件,实际读取的是 $document_root(网站root根目录)下的.php文件
	    fastcgi_param  SCRIPT_FILENAME  $document_root$fastcgi_script_name;
	    include        fastcgi_params;
	}

    # deny access to .htaccess files, if Apache's document root
    # concurs with nginx's one
    #
    #location ~ /\.ht {
    #    deny  all;
    #}
}
lnmp配置总结
经过上面的一系列配置,现在已经符合我们的基本需求
现在我们总结一下,各个配置文件
目录结构
根目录lnmp
├── code #代码目录,下面都是简单的测试代码
│   ├── index.php
│   ├── test_mysql.php
│   └── test.php
├── docker-compose.yml  #docker-compose yaml配置文件
├── nginx  #nginx挂载配置目录
│   ├── conf.d  #nginx 其他配置目录
│   │   └── default.conf
│   ├── log #nginx log目录
│   │   ├── access.log
│   │   └── error.log
│   └── nginx.conf #nginx 主配置文件
├── nginx.conf #参考的备份
└── php7.3_fpm_dockerfile  #php7.3_fpm 构建自定义镜像的dockerfile
优化点
关于docker-compose.yml文件配置可以优化的点
- php-fpm的挂载可以注释了,中间已经测试完毕了
- nginx挂载的目录宿主机地址可以改为相对地址,更方便
- 配置文件,代码目录等挂载改成只读防止容器内改变内容
docker-compose 挂载参考
https://www.cnblogs.com/makalochen/p/14266075.html#volumes
原本我想的是php-fpm挂载可以取消,经过测试发现,不能取消,原因是nginx实际做的是转发,转发给php容器执行所以php容器还是需要挂载代码目录并且目录要一致
下面为优化后的yaml
version: '3.1'

services:
  db:
    image: mysql:5.7
    #表示支持外部访问
    command: --default-authentication-plugin=mysql_native_password
    restart: always
    volumes:
        - db_data:/var/lib/mysql
    #映射到宿主机的端口,测试使用,测试完毕,请注释
    #ports:
    #    - 3306:3306

    networks:
        - lnmp
    environment:
        MYSQL_ROOT_PASSWORD: root
  php-fpm:
    #使用php 7.3-fpm镜像构建
    #改用dockerfile安装扩展
    #image: php:7.3-fpm

    #dockerfile方式配置
    build:
        #上下文环境,从哪里开始构建
        context: .
        #yaml同级目录下的php7.3_fpm_dockerfile文件
        dockerfile: php7.3_fpm_dockerfile

    #设置依赖
    depends_on:
        - db
    restart: always
    #挂载卷
    volumes:
        #设置代码目录
        - ./code:/code:ro
    #配置网络
    networks:
        - lnmp

  #ngnix配置
  web:
    #使用1.19.6镜像
    image: nginx:1.19.6
    #映射端口
    ports:
        - 80:80
    depends_on:
        - php-fpm
    restart: always
    #设置网络
    networks:
        - lnmp

    #设置挂载
    volumes:
        #主配置文件挂载
        - ./nginx/nginx.conf:/etc/nginx/nginx.conf:ro
        #其他配置目录挂载
        - ./nginx/conf.d:/etc/nginx/conf.d:ro
        #日志目录挂载
        - ./nginx/log:/var/log/nginx
        #代码目录挂载
        - ./code:/code:ro
volumes:
    db_data: {}
networks:
    lnmp:
所有的配置文件
php-fpm镜像构建dockerfile
php7.3_fpm_dockerfile
FROM php:7.3-fpm
RUN docker-php-ext-install pdo pdo_mysql
nginx
主配置文件
./nginx/nginx.conf
user  nginx;
worker_processes  1;

error_log  /var/log/nginx/error.log warn;
pid        /var/run/nginx.pid;


events {
    worker_connections  1024;
}


http {
    include       /etc/nginx/mime.types;
    default_type  application/octet-stream;

    log_format  main  '$remote_addr - $remote_user [$time_local] "$request" '
                      '$status $body_bytes_sent "$http_referer" '
                      '"$http_user_agent" "$http_x_forwarded_for"';

    access_log  /var/log/nginx/access.log  main;

    sendfile        on;
    #tcp_nopush     on;

    keepalive_timeout  65;

    #gzip  on;

    include /etc/nginx/conf.d/*.conf;
}
代理配置文件配置
./nginx/conf.d/default.conf
server {
    listen       80;
    listen  [::]:80;
    server_name  localhost;

    #charset koi8-r;
    #access_log  /var/log/nginx/host.access.log  main;

    #配置代码根目录
    root           /code;
    location / {
        #注释默认配置
        #root   /usr/share/nginx/html;
        #index  index.html index.htm;

        #加入index.php
        index  index.html index.htm index.php;

        #伪静态配置
        if (!-e $request_filename){
            rewrite ^/(.*)$ /index.php/$1 last;
        }
    }

    #error_page  404              /404.html;

    # redirect server error pages to the static page /50x.html
    #
    error_page   500 502 503 504  /50x.html;
    location = /50x.html {
        root   /usr/share/nginx/html;
    }

    # proxy the PHP scripts to Apache listening on 127.0.0.1:80
    #
    #location ~ \.php$ {
    #    proxy_pass   http://127.0.0.1;
    #}

    # pass the PHP scripts to FastCGI server listening on 127.0.0.1:9000
    #
    #location ~ \.php$ {
    #    root           html;
    #    fastcgi_pass   127.0.0.1:9000;
    #    fastcgi_index  index.php;
    #    fastcgi_param  SCRIPT_FILENAME  /scripts$fastcgi_script_name;
    #    include        fastcgi_params;
    #}

    location ~ \.php$ {
            #修改为phpfpm容器
            fastcgi_pass   php-fpm:9000;
            fastcgi_index  index.php;
            #path_info 支持配置
            fastcgi_split_path_info  ^((?U).+\.php)(/?.+)$;
            fastcgi_param  PATH_INFO  $fastcgi_path_info;
            fastcgi_param  PATH_TRANSLATED  $document_root$fastcgi_path_info;
            #在浏览器中访问的.php文件,实际读取的是 $document_root(网站root根目录)下的.php文件
            fastcgi_param  SCRIPT_FILENAME  $document_root$fastcgi_script_name;
            include        fastcgi_params;
        }

    # deny access to .htaccess files, if Apache's document root
    # concurs with nginx's one
    #
    #location ~ /\.ht {
    #    deny  all;
    #}
}
docker-compose 核心yaml
version: '3.1'

services:
  db:
    image: mysql:5.7
    #表示支持外部访问
    command: --default-authentication-plugin=mysql_native_password
    restart: always
    volumes:
        - db_data:/var/lib/mysql
    #映射到宿主机的端口,测试使用,测试完毕,请注释
    #ports:
    #    - 3306:3306

    networks:
        - lnmp
    environment:
        MYSQL_ROOT_PASSWORD: root
  php-fpm:
    #使用php 7.3-fpm镜像构建
    #改用dockerfile安装扩展
    #image: php:7.3-fpm

    #dockerfile方式配置
    build:
        #上下文环境,从哪里开始构建
        context: .
        #yaml同级目录下的php7.3_fpm_dockerfile文件
        dockerfile: php7.3_fpm_dockerfile

    #设置依赖
    depends_on:
        - db
    restart: always
    #挂载卷
    volumes:
        #设置代码目录
        - ./code:/code:ro
    #配置网络
    networks:
        - lnmp

  #ngnix配置
  web:
    #使用1.19.6镜像
    image: nginx:1.19.6
    #映射端口
    ports:
        - 80:80
    depends_on:
        - php-fpm
    restart: always
    #设置网络
    networks:
        - lnmp

    #设置挂载
    volumes:
        #主配置文件挂载
        - ./nginx/nginx.conf:/etc/nginx/nginx.conf:ro
        #其他配置目录挂载
        - ./nginx/conf.d:/etc/nginx/conf.d:ro
        #日志目录挂载
        - ./nginx/log:/var/log/nginx
        #代码目录挂载
        - ./code:/code:ro
volumes:
    db_data: {}
networks:
    lnmp:
项目部署
这里用我写的一个小项目
项目地址:
https://gitee.com/makalochen/think-php5.1_vue2.x_-base-admin
构建自定义php-fpm容器镜像加入phpcomposer[选看]
注意:一般来说不会在dockefile 中composer,代码提交后就包含扩展库,如果实在要安装可以参考
但是在这个项目中用到了composer和数据迁移,也就是说要:
- 安装composer
- 配置镜像源
- 安装扩展
- 执行数据迁移
安装composer
https://pkg.phpcomposer.com/#how-to-install-composer
https://docs.phpcomposer.com/00-intro.html
php -r "copy('https://install.phpcomposer.com/installer', 'composer-setup.php');"
php composer-setup.php
php -r "unlink('composer-setup.php');"
配置镜像源
https://pkg.phpcomposer.com/#how-to-use-packagist-mirror
https://www.cnblogs.com/makalochen/p/12924054.html#切换composer镜像为国内镜像
composer config -g repo.packagist composer https://mirrors.aliyun.com/composer/
安装扩展
composer install
执行数据迁移
php think migrate:run
我们将上面的php7.3_fpm_dockerfile修改下,按照上面的步骤执行
注意:很大可能失败,因为网络的原因
先将之前的镜像删除
docker rmi -f $(docker images -qa)
构建镜像
docker build -f php7.3_fpm_dockerfile -t test .
复制项目代码到挂载目录,并配置好数据库连接
例:
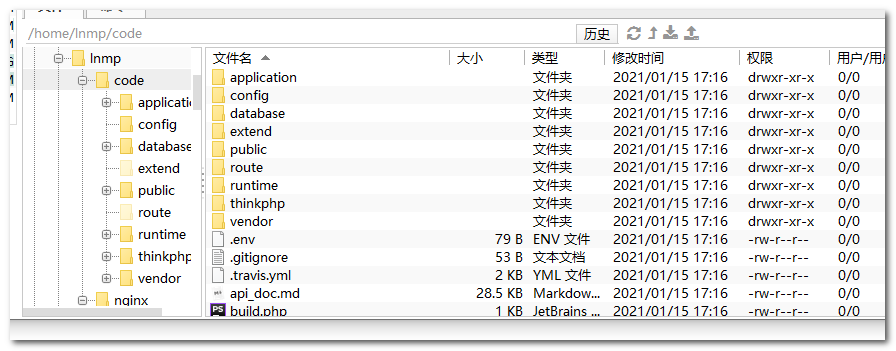
配置数据库连接,你就需要创建个数据库,这里可以使用
mysql环境变量
MYSQL_DATABASE此变量是可选的,允许您指定在映像启动时要创建的数据库的名称。如果提供了用户名/密码(请参阅下文),则将授予该用户对该数据库的超级用户访问权限(对应于
GRANT ALL)。
例:
#初始化数据库
MYSQL_DATABASE: makalo
此时的yaml
version: '3.1'

services:
  db:
    image: mysql:5.7
    #表示支持外部访问
    command: --default-authentication-plugin=mysql_native_password
    restart: always
    volumes:
        - db_data:/var/lib/mysql
    #映射到宿主机的端口,测试使用,测试完毕,请注释
    #ports:
    #    - 3306:3306

    networks:
        - lnmp
    environment:
        MYSQL_ROOT_PASSWORD: root
        #初始化数据库
        MYSQL_DATABASE: makalo
  php-fpm:
    #使用php 7.3-fpm镜像构建
    #改用dockerfile安装扩展
    #image: php:7.3-fpm

    #dockerfile方式配置
    build:
        #上下文环境,从哪里开始构建
        context: .
        #yaml同级目录下的php7.3_fpm_dockerfile文件
        dockerfile: php7.3_fpm_dockerfile

    #设置依赖
    depends_on:
        - db
    restart: always
    #挂载卷
    volumes:
        #设置代码目录
        - ./code:/code:ro
    #配置网络
    networks:
        - lnmp

  #ngnix配置
  web:
    #使用1.19.6镜像
    image: nginx:1.19.6
    #映射端口
    ports:
        - 80:80
    depends_on:
        - php-fpm
    restart: always
    #设置网络
    networks:
        - lnmp

    #设置挂载
    volumes:
        #主配置文件挂载
        - ./nginx/nginx.conf:/etc/nginx/nginx.conf:ro
        #其他配置目录挂载
        - ./nginx/conf.d:/etc/nginx/conf.d:ro
        #日志目录挂载
        - ./nginx/log:/var/log/nginx
        #代码目录挂载
        - ./code:/code:ro
volumes:
    db_data: {}
networks:
    lnmp:
配置数据库连接
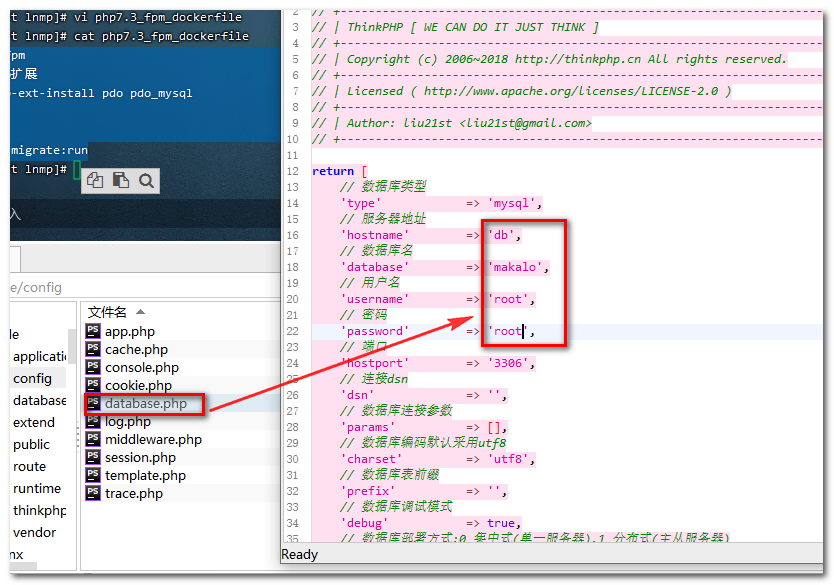
修改根目录到public
修改./nginx/conf.d/default.conf文件为如下内容
server {
    listen       80;
    listen  [::]:80;
    server_name  localhost;

    #charset koi8-r;
    #access_log  /var/log/nginx/host.access.log  main;

    #配置代码根目录
    root           /code/public;
    location / {
    	#注释默认配置
        #root   /usr/share/nginx/html;
        #index  index.html index.htm;

	#加入index.php
        index  index.html index.htm index.php;

        #伪静态配置
        if (!-e $request_filename){
            rewrite ^/(.*)$ /index.php/$1 last;
        }
    }

    #error_page  404              /404.html;

    # redirect server error pages to the static page /50x.html
    #
    error_page   500 502 503 504  /50x.html;
    location = /50x.html {
        root   /usr/share/nginx/html;
    }

    # proxy the PHP scripts to Apache listening on 127.0.0.1:80
    #
    #location ~ \.php$ {
    #    proxy_pass   http://127.0.0.1;
    #}

    # pass the PHP scripts to FastCGI server listening on 127.0.0.1:9000
    #
    #location ~ \.php$ {
    #    root           html;
    #    fastcgi_pass   127.0.0.1:9000;
    #    fastcgi_index  index.php;
    #    fastcgi_param  SCRIPT_FILENAME  /scripts$fastcgi_script_name;
    #    include        fastcgi_params;
    #}

    location ~ \.php$ {
	    #修改为phpfpm容器
	    fastcgi_pass   php-fpm:9000;
	    fastcgi_index  index.php;
	    #path_info 支持配置
	    fastcgi_split_path_info  ^((?U).+\.php)(/?.+)$;
	    fastcgi_param  PATH_INFO  $fastcgi_path_info;
            fastcgi_param  PATH_TRANSLATED  $document_root$fastcgi_path_info;
            #在浏览器中访问的.php文件,实际读取的是 $document_root(网站root根目录)下的.php文件
	    fastcgi_param  SCRIPT_FILENAME  $document_root$fastcgi_script_name;
	    include        fastcgi_params;
	}

    # deny access to .htaccess files, if Apache's document root
    # concurs with nginx's one
    #
    #location ~ /\.ht {
    #    deny  all;
    #}
}
进入容器执行数据迁移
启动
docker-compose up
进入容器
docker exec -it 909b86117c59 /bin/bash
进入目录
cd /code
执行迁移
注意:代码目录需要可读写并且配置好数据库参数
php think migrate:run
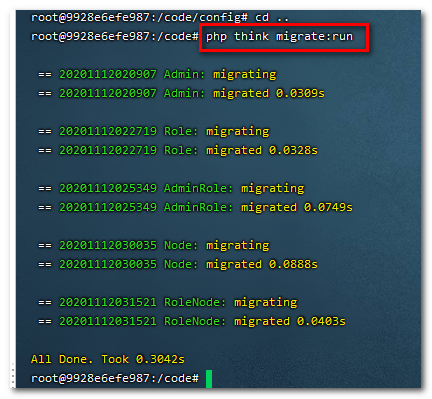
此时的表

启动测试
启动之前先将之前的镜像和容器全部删掉
docker rm -f $(docker ps -qa)
docker rmi -f $(docker images -qa)
启动测试
docker-compose up
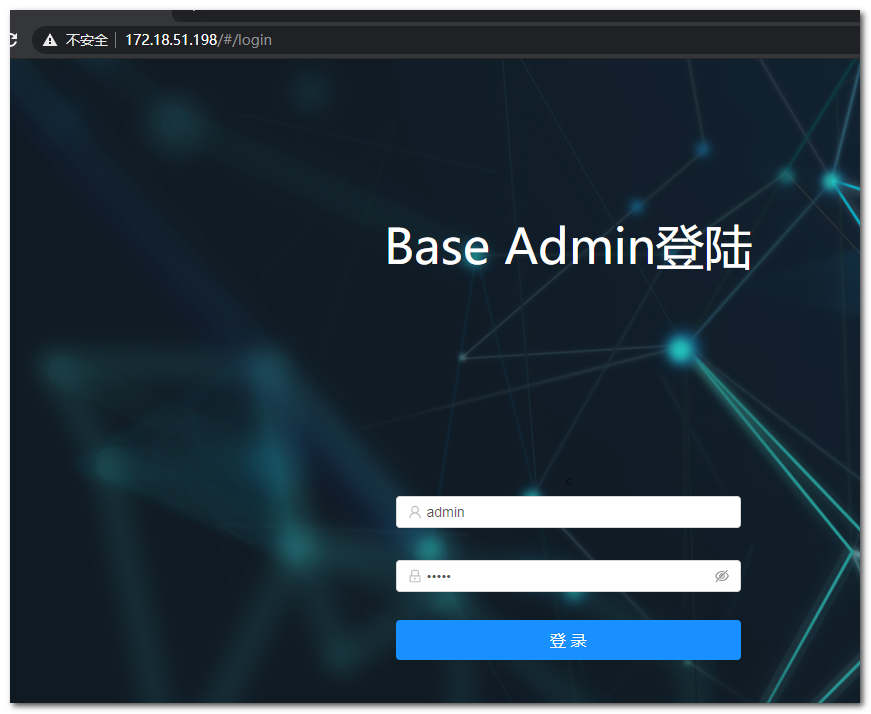
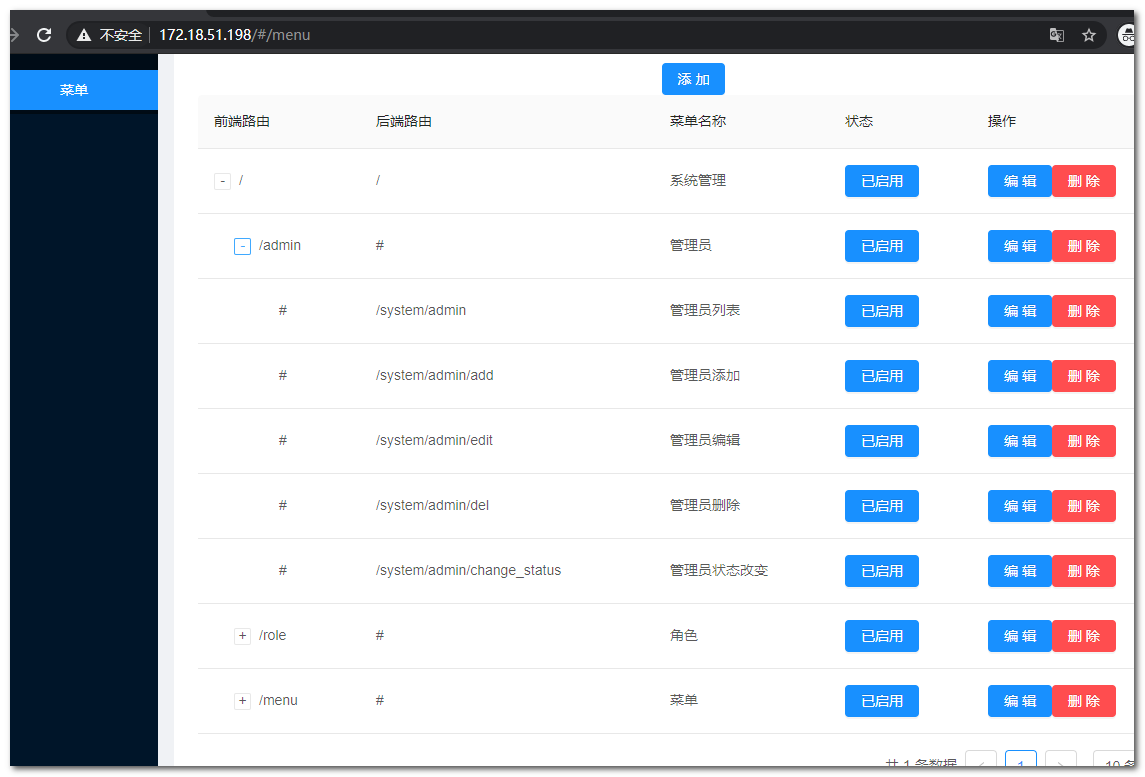
正常
此时的yaml
version: '3.1'

services:
  db:
    image: mysql:5.7
    #表示支持外部访问
    command: --default-authentication-plugin=mysql_native_password
    restart: always
    volumes:
        - db_data:/var/lib/mysql
    #映射到宿主机的端口,测试使用,测试完毕,请注释
    ports:
        - 3306:3306

    networks:
        - lnmp
    environment:
        MYSQL_ROOT_PASSWORD: root
        #初始化数据库
        MYSQL_DATABASE: makalo
  php-fpm:
    #使用php 7.3-fpm镜像构建
    #改用dockerfile安装扩展
    #image: php:7.3-fpm

    #dockerfile方式配置
    build:
        #上下文环境,从哪里开始构建
        context: .
        #yaml同级目录下的php7.3_fpm_dockerfile文件
        dockerfile: php7.3_fpm_dockerfile

    #设置依赖
    depends_on:
        - db
    restart: always
    #挂载卷
    volumes:
        #设置代码目录
        - ./code:/code
    #配置网络
    networks:
        - lnmp

  #ngnix配置
  web:
    #使用1.19.6镜像
    image: nginx:1.19.6
    #映射端口
    ports:
        - 80:80
    depends_on:
        - php-fpm
    restart: always
    #设置网络
    networks:
        - lnmp

    #设置挂载
    volumes:
        #主配置文件挂载
        - ./nginx/nginx.conf:/etc/nginx/nginx.conf:ro
        #其他配置目录挂载
        - ./nginx/conf.d:/etc/nginx/conf.d:ro
        #日志目录挂载
        - ./nginx/log:/var/log/nginx
        #代码目录挂载
        - ./code:/code
volumes:
    db_data: {}
networks:
    lnmp:
总结
在上面lnmp环境要做如下修改
- 代码复制到挂载目录需要修改数据库配置文件
- 需修改nginx的代理配置文件的
root参数到 项目的pubilc目录 - 如果有数据迁移需手动进入php-fpm容器执行迁移,不推荐自动


