

uniapp H5 打包并部署到 nginx
个人也是了百度了挺久的了,花费的时间( 俩个半小时 )
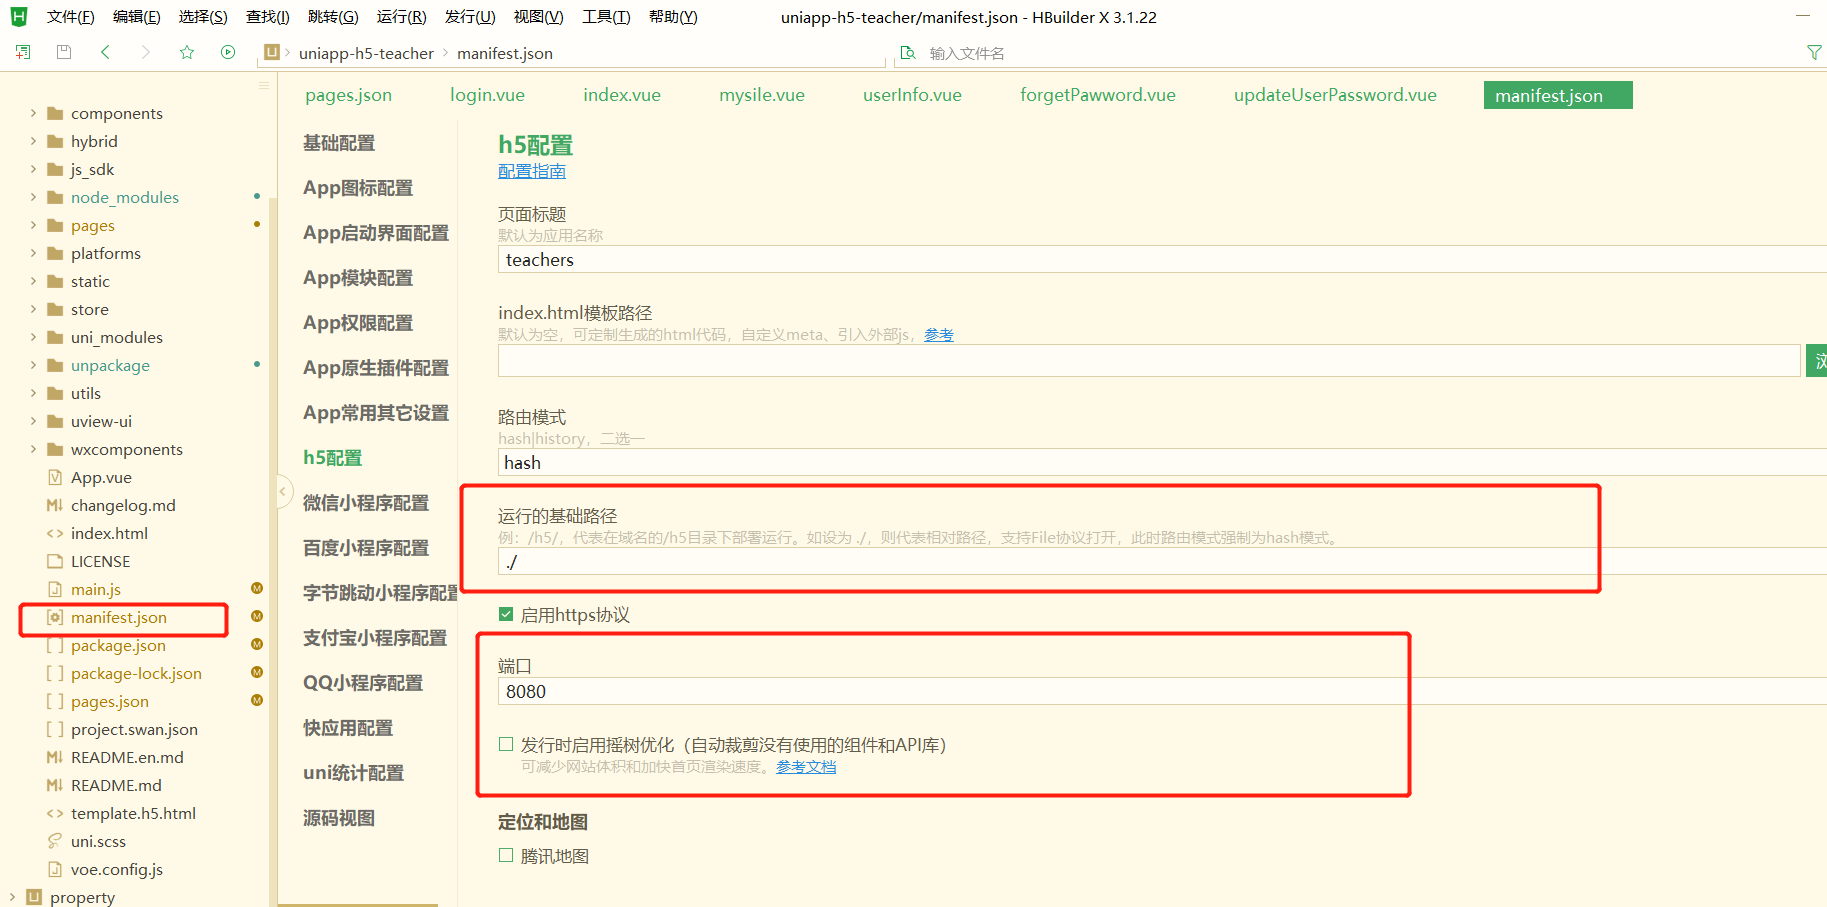
uniapp 的打包首先要先配置,配置好了才能去进行打包,如图所示。 这只是第一步。
注意:
1.运行基础路径最好用 ./ ,如果配置了其他请自行添加路径。
2.由于uniapp 的特性,所以导致了不支持 history 模式,只能支持 hash 模式( 路径会带 # )
3.千万千万不能勾选摇树优化( 如果项目引用了其他组件,则会报错 node模块找不到组件,实际上是由于摇树优化,裁剪了一部分没有使用的组件,导致 node模块的缺失 )
上面只是第一步,第二步的配置来了。
1. pubilcPath 的路径要和上图的运行基础路径一致,这是第一点。
2.disableHostCheck 要设置为true( 禁止访问本地host文件 )
3.router 的base,最好设置为 ./ ( 一致化,本人没有试过使用加了其他的会不会产生什么变化 )
4. domain 是服务器的地址,记得改为自己的本地地址或者是服务器的地址
5.看了下面的图之后会附上代码,可以复制粘贴。
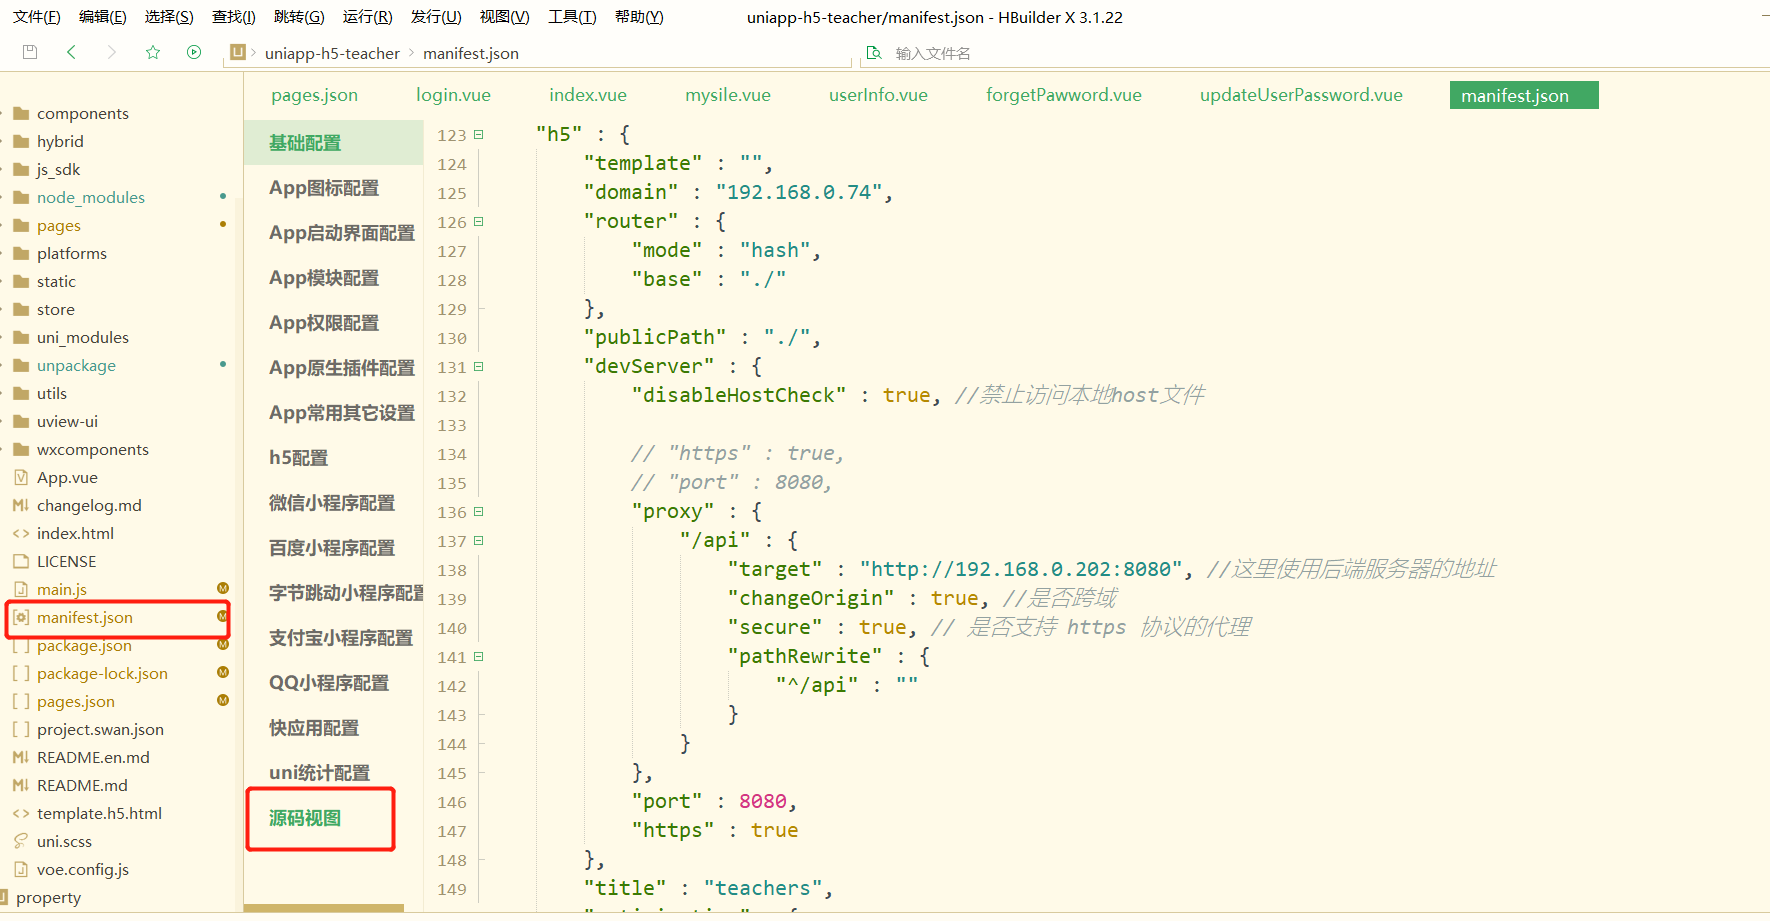

"template" : "",
        "domain" : "192.168.0.74",
        "router" : {
            "mode" : "hash",
            "base" : "./"
        },
        "publicPath" : "./",
        "devServer" : {
            "disableHostCheck" : true, //禁止访问本地host文件

            // "https" : true,
            // "port" : 8080,
            "proxy" : {
                "/api" : {
                    "target" : "http://192.168.0.202:8080", //这里使用后端服务器的地址
                    "changeOrigin" : true, //是否跨域
                    "secure" : true, // 是否支持 https 协议的代理
                    "pathRewrite" : {
                        "^/api" : ""
                    }
                }
            },
            "port" : 8080,
            "https" : true
        },
以上配置完成之后,就能进行打包了。
按图索骥即可完成
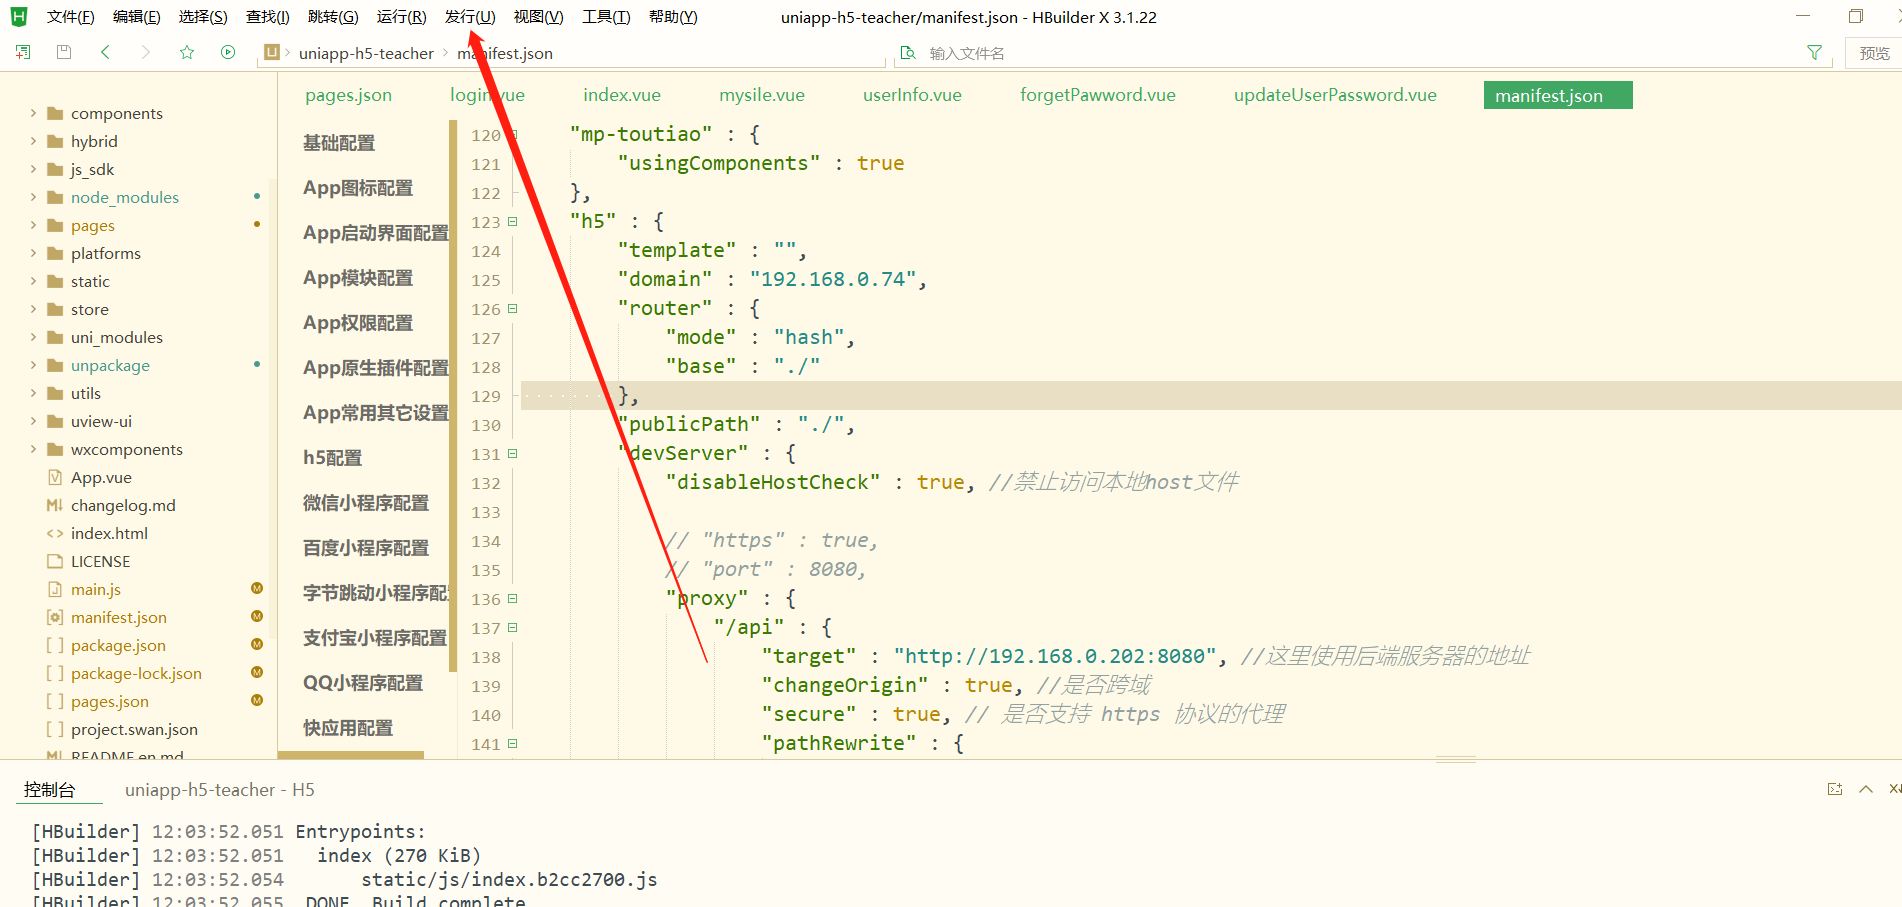
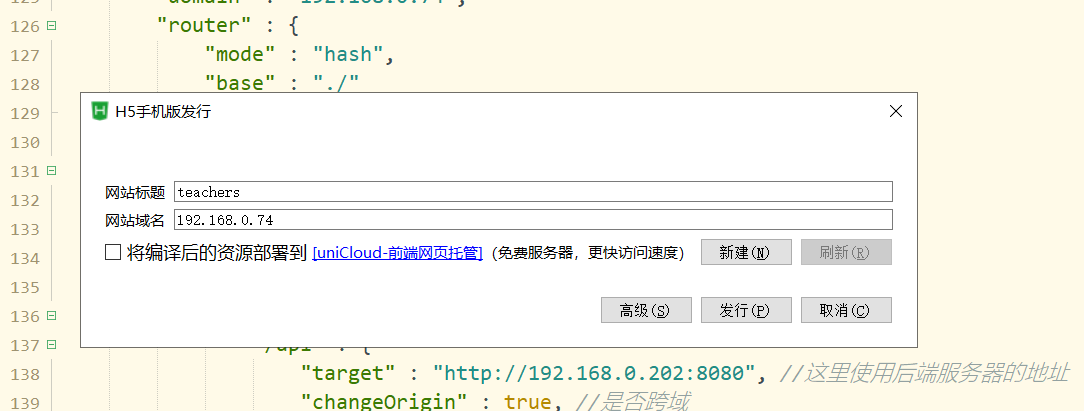
找到 H5的打包
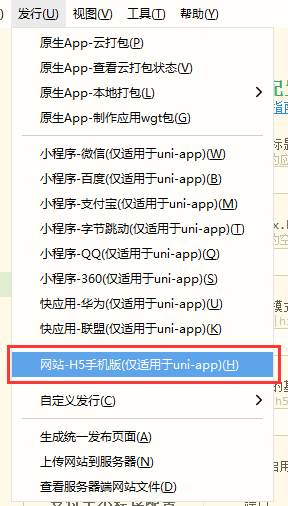
输入网址标题以及服务器名字( 本地 nginx 则用本地地址 ),然后选择 发行就会进行打包
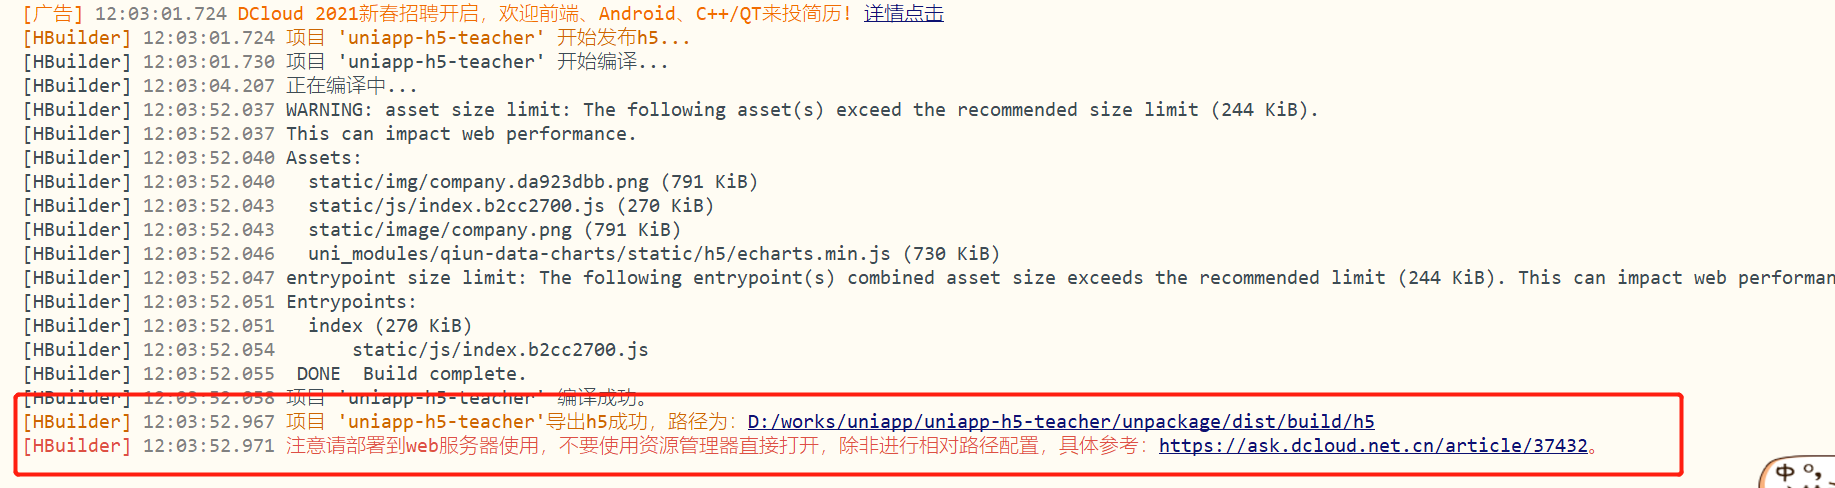
打完之后会出现这张图,出现选中部分就是打包成功,可以进行部署。
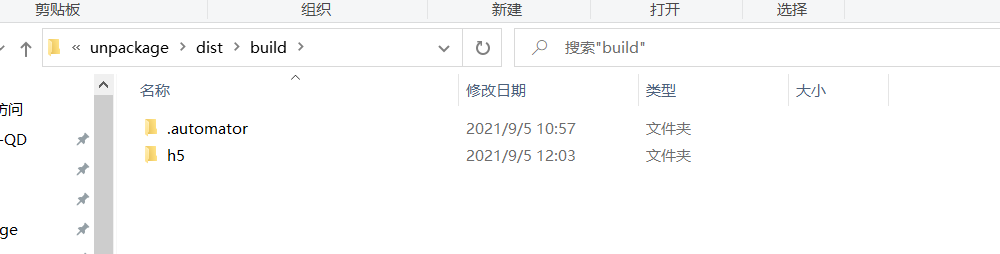
找到你的项目路径,找到这个打包之后的文件夹。例下图( 这个H5就是你要用的东西,整个文件里的内容都是。 )
本地nginx的部署:
1.找到你的 nginx (个人版本:1.18.0 )
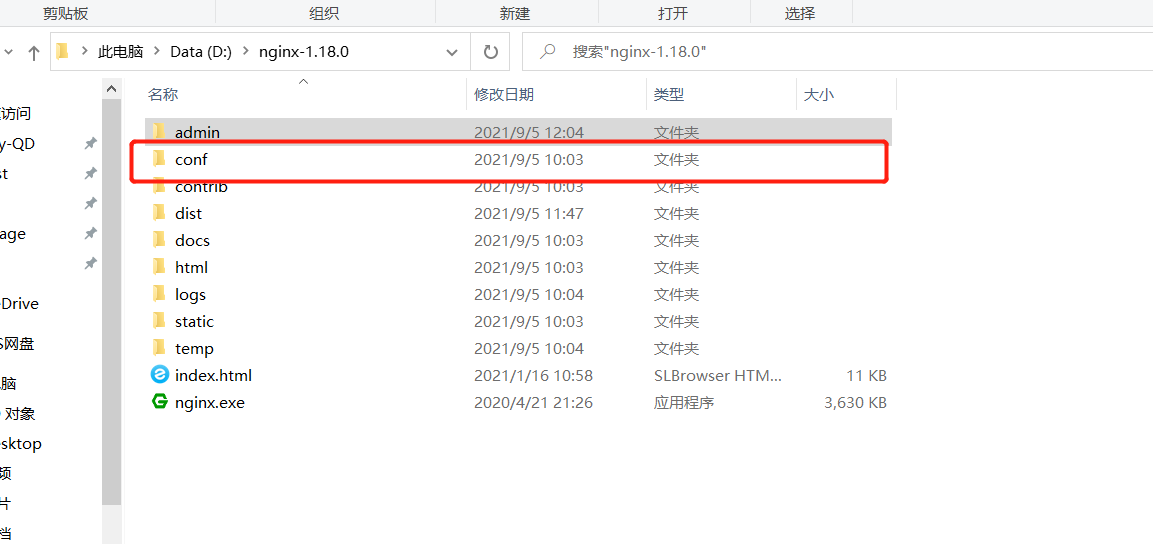
2.在你的 nginx 根目录下创建一个文件夹,例如下图。
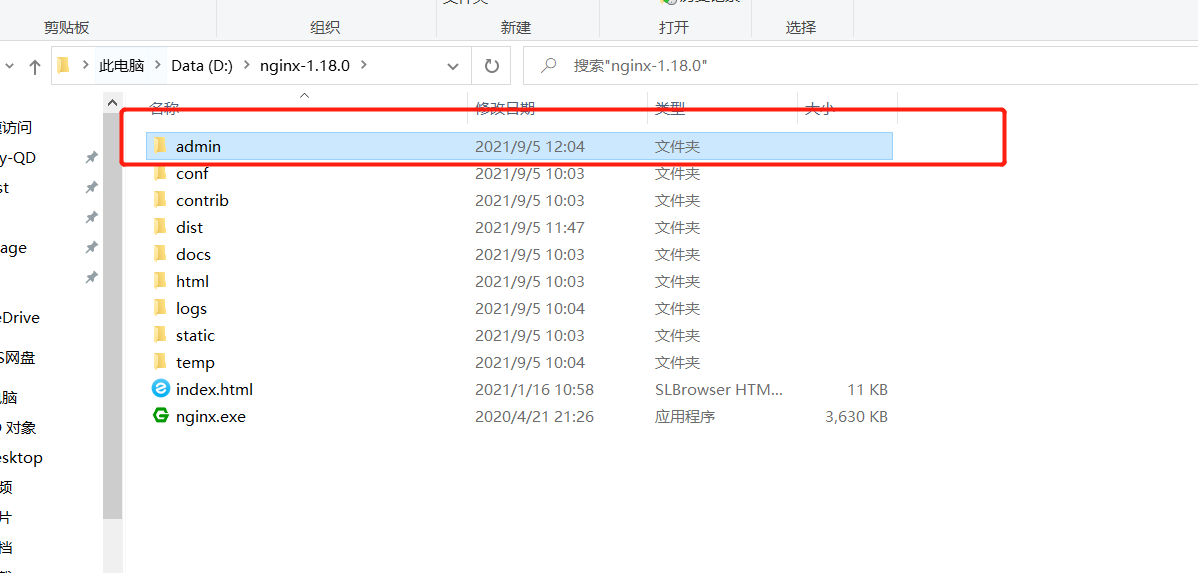
3.可以把名字( admin )换成你想要的任何一个名字,然后打开它。把刚刚打包完的H5文件夹,丢进来。

接下来开始配置 nginx 的路径了。
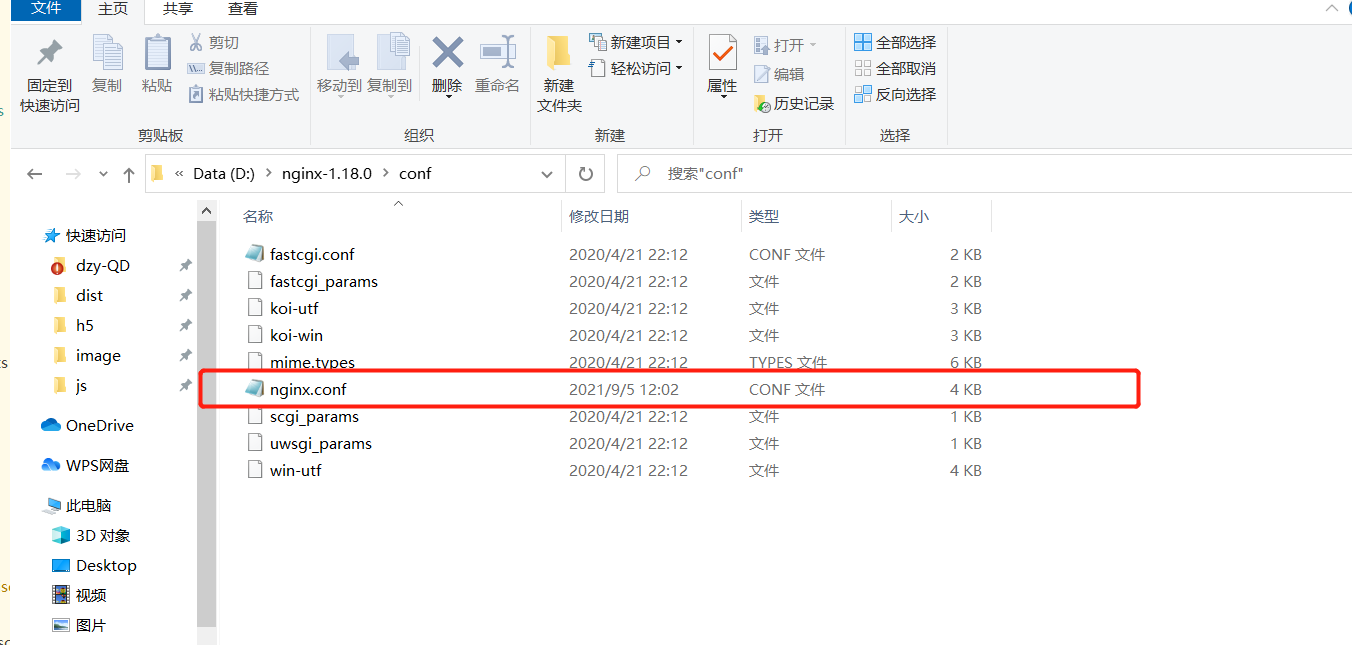
1.首先找到conf文件夹
2.其次点击进去,找到nginx.conf 文件,打开它
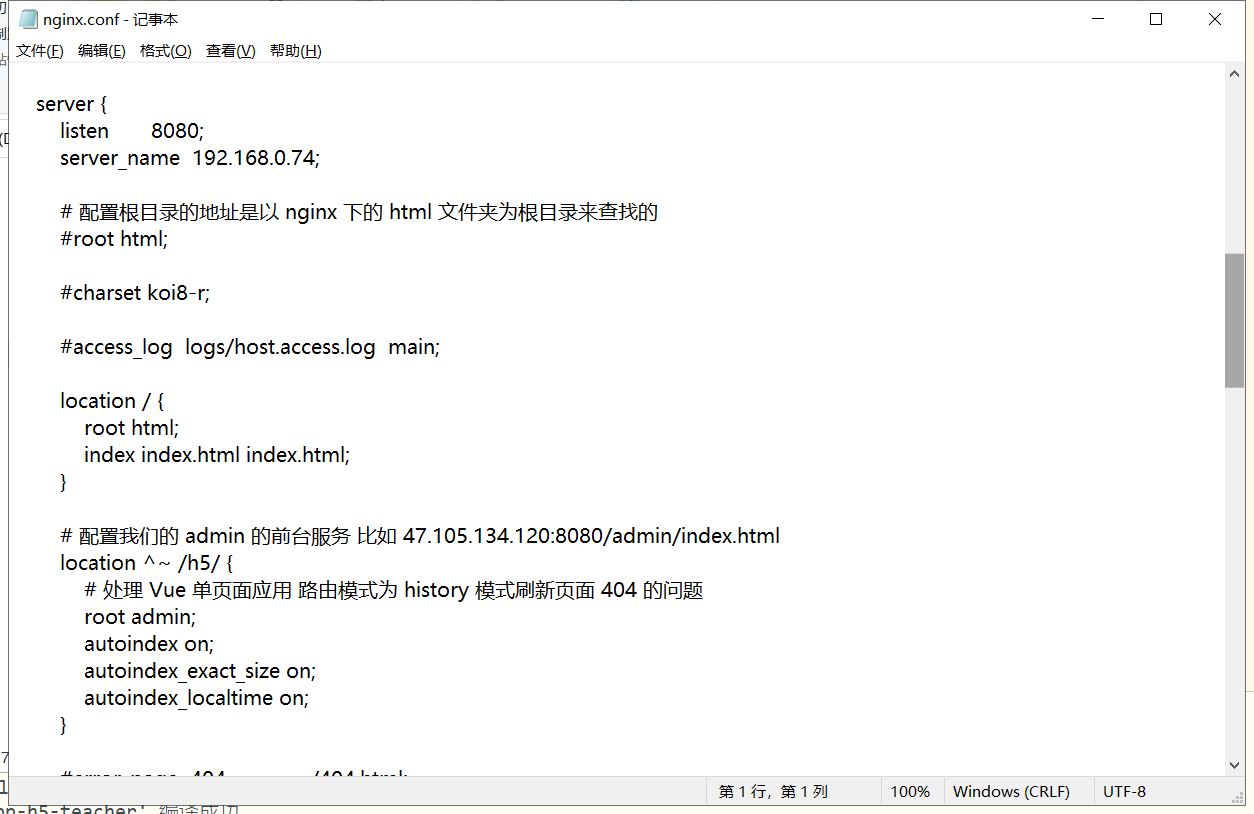
找到 server 这一个对象
注意: 这里的端口必须和前面打包之前设置的端口一样,不然会找不到。
location 对象里的 root ,就是连接你刚刚在服务器底下创建的文件夹名字, 连接上 /h5/ 则是为了和其他路径区分开来
#user  nobody;
worker_processes 1;
#error_log  logs/error.log;
#error_log  logs/error.log  notice;
#error_log  logs/error.log  info;
#pid        logs/nginx.pid;
events {
  worker_connections 1024;
}
http {
  include mime.types;
  default_type application/octet-stream;
  #log_format  main  '$remote_addr - $remote_user [$time_local] "$request" '
  #                  '$status $body_bytes_sent "$http_referer" '
  #                  '"$http_user_agent" "$http_x_forwarded_for"';
  #access_log  logs/access.log  main;
  sendfile on;
  #tcp_nopush     on;
  #keepalive_timeout  0;
  keepalive_timeout 65;
  #gzip  on;
  server {
    listen 8888;
    server_name localhost;
    root html;
    #charset koi8-r;
    #access_log  logs/host.access.log  main;
    location / {
      root  dist;
      try_files $uri $uri/ /index.html;
    }
    location /prod-api {
        proxy_pass http://192.168.0.202:8080; #后端服务器
      rewrite /prod-api/(.*) /$1 break;
        client_max_body_size    1000m;
    }
    location ^~ /admin {
      try_files $uri $uri/ /admin/index.html;
    }
    #error_page  404              /404.html;
    # redirect server error pages to the static page /50x.html
    #
    error_page 500 502 503 504 /50x.html;
    location = /50x.html {
      root html;
    }
    # proxy the PHP scripts to Apache listening on 127.0.0.1:80
    #
    #location ~ \.php$ {
    #    proxy_pass   http://127.0.0.1;
    #}
    # pass the PHP scripts to FastCGI server listening on 127.0.0.1:9000
    #
    #location ~ \.php$ {
    #    root           html;
    #    fastcgi_pass   127.0.0.1:9000;
    #    fastcgi_index  index.php;
    #    fastcgi_param  SCRIPT_FILENAME  /scripts$fastcgi_script_name;
    #    include        fastcgi_params;
    #}
    # deny access to .htaccess files, if Apache's document root
    # concurs with nginx's one
    #
    #location ~ /\.ht {
    #    deny  all;
    #}
  }
  # another virtual host using mix of IP-, name-, and port-based configuration
  #
  #server {
  #    listen       8000;
  #    listen       somename:8080;
  #    server_name  somename  alias  another.alias;
  #    location / {
  #        root   html;
  #        index  index.html index.htm;
  #    }
  #}
  # HTTPS server
  #
  #server {
  #    listen       443 ssl;
  #    server_name  localhost;
  #    ssl_certificate      cert.pem;
  #    ssl_certificate_key  cert.key;
  #    ssl_session_cache    shared:SSL:1m;
  #    ssl_session_timeout  5m;
  #    ssl_ciphers  HIGH:!aNULL:!MD5;
  #    ssl_prefer_server_ciphers  on;
  #    location / {
  #        root   html;
  #        index  index.html index.htm;
  #    }
  #}
}
选择性复制粘贴即可,内容解释的很清楚了。
最后,我们来学几条命令,用于启动 nginx
1. start nginx ( 首次启动的命令 )
2.nginx -s reload ( 更新配置之后启动的命令 )
3.nginx -s stop( 停止nginx,关闭server 的命令 )
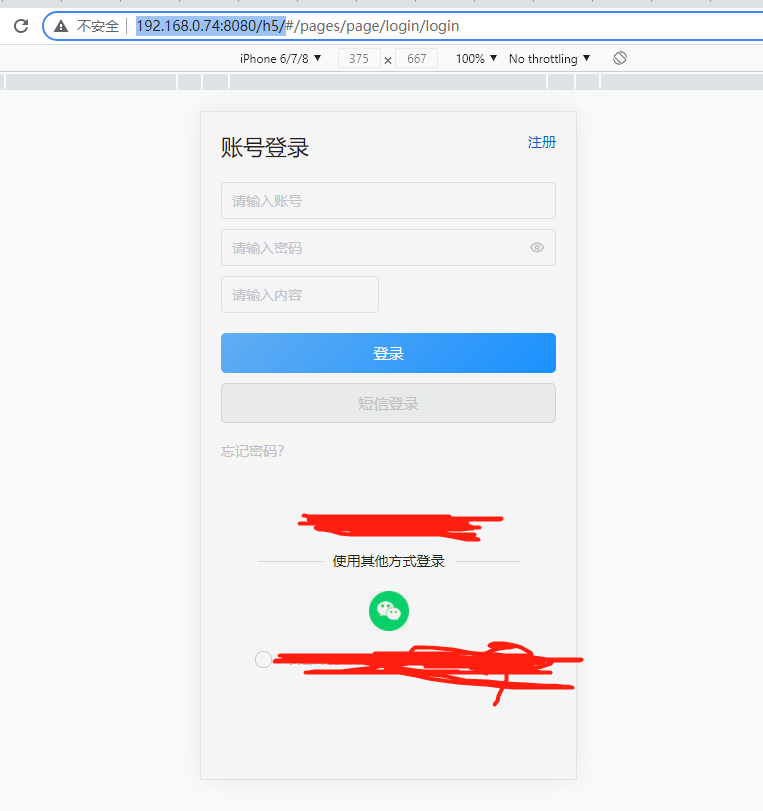
最后就可以直接打开访问了。( nginx 配置的 location 后面连接的 /h5/ 就是连接在这里的,如果不连接上去,会报错404 )
如果连接上去了还报错,检查路径是否写错。 如果按照我的图和我的代码来的话,是可以直达的哦亲。
例如:http://192.168.0.74:8080/h5/ ( 这样会跳转到你代码设置的默认首页 ),如图所示:
最后,附上一位可爱的小姐姐写的原创博客,她的内容给了我蛮大的帮助。
所以我也写了一遍,内容比较详细,按图索骥即可。
在此 @祈澈菇凉 ,希望可以多多指教。
https://wangxiaoting.blog.csdn.net/article/details/107176967?utm_medium=distribute.pc_relevant.none-task-blog-2%7Edefault%7ECTRLIST%7Edefault-1.control&depth_1-utm_source=distribute.pc_relevant.none-task-blog-2%7Edefault%7ECTRLIST%7Edefault-1.control


【推荐】国内首个AI IDE,深度理解中文开发场景,立即下载体验Trae
【推荐】编程新体验,更懂你的AI,立即体验豆包MarsCode编程助手
【推荐】抖音旗下AI助手豆包,你的智能百科全书,全免费不限次数
【推荐】轻量又高性能的 SSH 工具 IShell:AI 加持,快人一步
· 基于Microsoft.Extensions.AI核心库实现RAG应用
· Linux系列:如何用heaptrack跟踪.NET程序的非托管内存泄露
· 开发者必知的日志记录最佳实践
· SQL Server 2025 AI相关能力初探
· Linux系列:如何用 C#调用 C方法造成内存泄露
· 无需6万激活码!GitHub神秘组织3小时极速复刻Manus,手把手教你使用OpenManus搭建本
· Manus爆火,是硬核还是营销?
· 终于写完轮子一部分:tcp代理 了,记录一下
· 别再用vector<bool>了!Google高级工程师:这可能是STL最大的设计失误
· 单元测试从入门到精通