
Docker 制作定制asp.netcore 的容器
上文Windows docker k8s asp.net core 的k8swebap镜像只是一个asp.net core程序,在实际生产中我们希望容器中还有一些其他程序,比如ssh 和telegraf。
利用Dockerfile文件
只是网上比较推荐的一种方式,Dockerfile包含创建镜像所需要的全部指令,基于在Dockerfile中的指令,我们可以使用Docker build命令来创建镜像,通过减少镜像和容器的创建过程来简化部署。这里我们以 asp.net core 添加ssh服务为例:
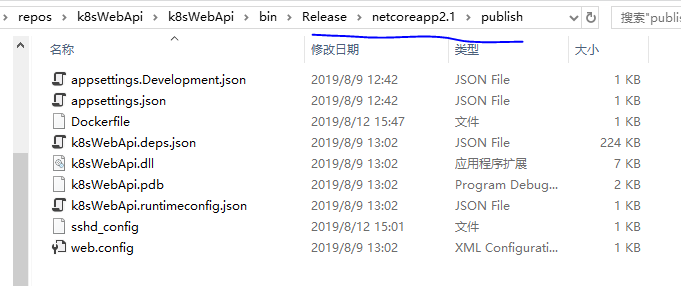
1.编译并发布项目(这里用发布后的文件):
![]()
2.首先创建一个sshd_config 文件如下:

Port 22
#AddressFamily any
#ListenAddress 0.0.0.0
#ListenAddress ::

#HostKey /etc/ssh/ssh_host_rsa_key
#HostKey /etc/ssh/ssh_host_ecdsa_key
#HostKey /etc/ssh/ssh_host_ed25519_key

# Ciphers and keying
#RekeyLimit default none

# Logging
#SyslogFacility AUTH
#LogLevel INFO

# Authentication:

#LoginGraceTime 2m
PermitRootLogin yes
#StrictModes yes
#MaxAuthTries 6
#MaxSessions 10

#PubkeyAuthentication yes

# Expect .ssh/authorized_keys2 to be disregarded by default in future.
#AuthorizedKeysFile    .ssh/authorized_keys .ssh/authorized_keys2

#AuthorizedPrincipalsFile none

#AuthorizedKeysCommand none
#AuthorizedKeysCommandUser nobody

# For this to work you will also need host keys in /etc/ssh/ssh_known_hosts
#HostbasedAuthentication no
# Change to yes if you don't trust ~/.ssh/known_hosts for
# HostbasedAuthentication
#IgnoreUserKnownHosts no
# Don't read the user's ~/.rhosts and ~/.shosts files
#IgnoreRhosts yes

# To disable tunneled clear text passwords, change to no here!
#PasswordAuthentication yes
#PermitEmptyPasswords no

# Change to yes to enable challenge-response passwords (beware issues with
# some PAM modules and threads)
ChallengeResponseAuthentication no

# Kerberos options
#KerberosAuthentication no
#KerberosOrLocalPasswd yes
#KerberosTicketCleanup yes
#KerberosGetAFSToken no

# GSSAPI options
#GSSAPIAuthentication no
#GSSAPICleanupCredentials yes
#GSSAPIStrictAcceptorCheck yes
#GSSAPIKeyExchange no

UsePAM yes

#AllowAgentForwarding yes
#AllowTcpForwarding yes
#GatewayPorts no
X11Forwarding yes
#X11DisplayOffset 10
#X11UseLocalhost yes
#PermitTTY yes
PrintMotd no
#PrintLastLog yes
#TCPKeepAlive yes
#UseLogin no
#PermitUserEnvironment no
#Compression delayed
#ClientAliveInterval 0
#ClientAliveCountMax 3
#UseDNS no
#PidFile /var/run/sshd.pid
#MaxStartups 10:30:100
#PermitTunnel no
#ChrootDirectory none
#VersionAddendum none

# no default banner path
#Banner none

# Allow client to pass locale environment variables
AcceptEnv LANG LC_*

# override default of no subsystems
Subsystem    sftp    /usr/lib/openssh/sftp-server

# Example of overriding settings on a per-user basis
#Match User anoncvs
#    X11Forwarding no
#    AllowTcpForwarding no
#    PermitTTY no
#    ForceCommand cvs server
3.创建Dockerfile文件如下:
FROM microsoft/dotnet:2.1-aspnetcore-runtime
WORKDIR /app
COPY . .
EXPOSE 22 80

RUN apt-get update -y && apt-get upgrade -y && apt-get install -y \
  openssh-server \
  && rm -rf /var/lib/apt/lists/*

RUN echo 'root:Harbor12345' | chpasswd
RUN mkdir /var/run/sshd

COPY sshd_config /etc/ssh/sshd_config

ENTRYPOINT ["/bin/bash", "-c", "/usr/sbin/sshd && dotnet k8sWebApi.dll"]
4.制作镜像biang验证
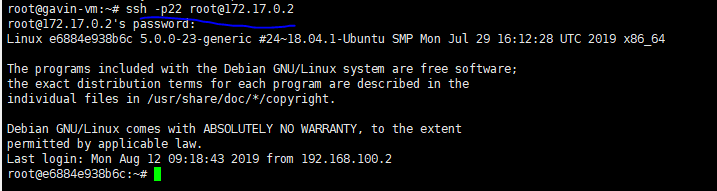
docker build -t k8swebapi . #自作镜像
docker  run  --rm -p8081:80 -p2222:22 k8swebapi  #启动docker 实例
docker exec 649c hostname -I  #查看容器ip
ssh root@172.17.0.2 #在宿主计算机上进入容器
在宿主进入容器如下:
![]()
在普通的计算机上进入容器如:
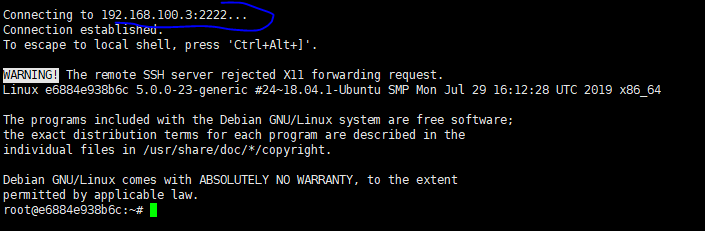
![]()
手动修改容器镜像
这里 我们以asp.net core 添加 telegraf 为例。首先我们需要一个含有asp.net core的容器。这里我们修改 上面的Dockerfile文件 如下:
FROM microsoft/dotnet:2.1-aspnetcore-runtime
WORKDIR /app
EXPOSE 22

RUN apt-get update -y && apt-get upgrade -y && apt-get install -y \
  openssh-server \
  && rm -rf /var/lib/apt/lists/*

RUN echo 'root:Harbor12345' | chpasswd
RUN mkdir /var/run/sshd

COPY sshd_config /etc/ssh/sshd_config

CMD ["/usr/sbin/sshd", "-D"]
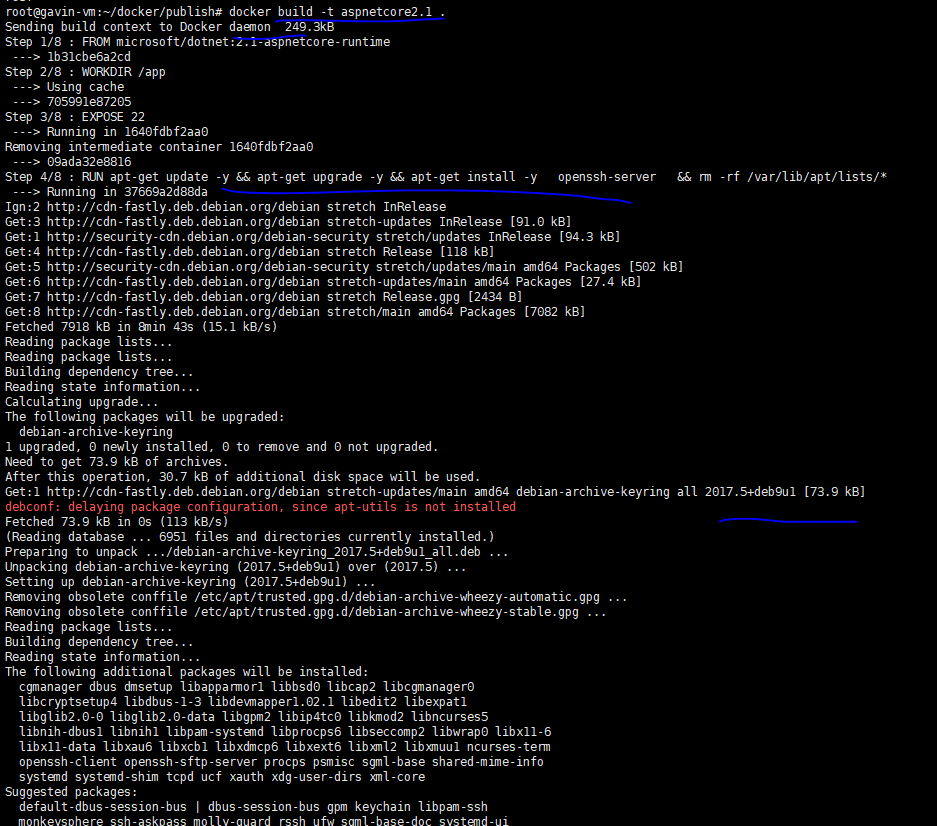
然后制作镜像 并启动实例
docker build -t aspnetcore2.1 .  #制作镜像
docker run -d -p2222:22 --name aspcor2.1  aspnetcore2.1 #启动容器
进入容器后安装telagraf
apt-get update
apt-get install apt-transport-https
apt-get install curl
apt-get install sudo
apt-get install gnupg2 &&  apt-get install gnupg1
cat <<EOF | sudo tee /etc/apt/sources.list.d/influxdata.list
deb https://repos.influxdata.com/ubuntu bionic stable
EOF
sudo curl -sL https://repos.influxdata.com/influxdb.key | sudo apt-key add -
sudo apt-get update
sudo apt-get -y install telegraf
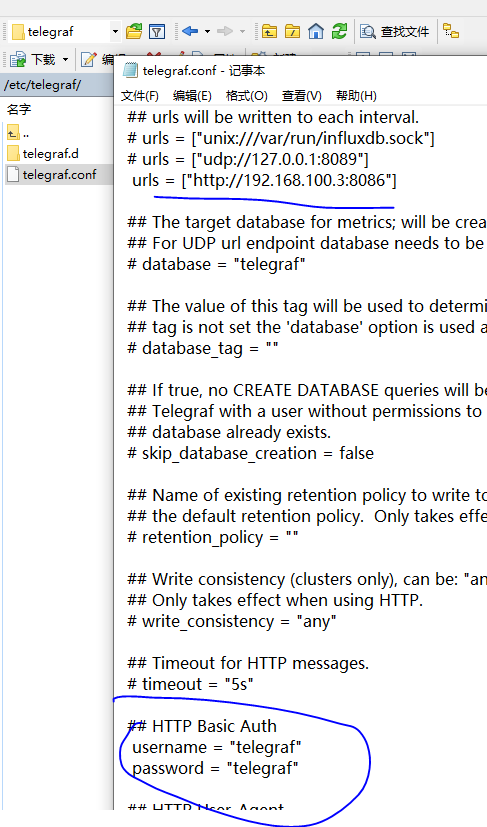
修改配置如图:
![]()
然后启动服务 制作新的镜像
sudo service telegraf start
sudo systemctl enable --now telegraf
docker commit aspcor2.1 192.168.100.3:80/repo-test/aspcore2.1

![]()
这里我们可以在influxdb里面验证telegraf的数据, 然后关闭relegraf 服务 ,安装service和lsof

![]()
再次 提交镜像 docker commit aspcor2.1 192.168.100.3:80/repo-test/aspcore2.1 (实际先前那一次不需要提交)
最后修改程序的Dockerfile如下:(备注一下 ,如果写成 ENTRYPOINT ["/bin/bash", "-c", "/usr/sbin/sshd && /usr/bin/telegraf && dotnet k8sWebApi.dll"] 或有问题的)
简单总结一下, 其实网上大家肌肤都推荐用Dockerfile来制作镜像,但是我个人比较推荐手动自作镜像,先看2个图吧
Dockerfile制作镜像(比较耗时,需要联网下载相关的软件,并且要求相对较高,验证的方式只能启动容器来验证):
手动安装(在引入docker开发,我相信一定会有私有仓库,所以这里的镜像制作非常快,只需要从本地下载镜像就可以,不需要下载其他软件,制作初始镜像比较麻烦, 但是相对简单, 验证也很方便):

参考
ubuntu docker inflxudb(安装 使用 备份 还原 以及python编码) telegraf Grafana


【推荐】国内首个AI IDE,深度理解中文开发场景,立即下载体验Trae
【推荐】编程新体验,更懂你的AI,立即体验豆包MarsCode编程助手
【推荐】抖音旗下AI助手豆包,你的智能百科全书,全免费不限次数
【推荐】轻量又高性能的 SSH 工具 IShell:AI 加持,快人一步
· .NET Core 中如何实现缓存的预热?
· 从 HTTP 原因短语缺失研究 HTTP/2 和 HTTP/3 的设计差异
· AI与.NET技术实操系列:向量存储与相似性搜索在 .NET 中的实现
· 基于Microsoft.Extensions.AI核心库实现RAG应用
· Linux系列:如何用heaptrack跟踪.NET程序的非托管内存泄露
· TypeScript + Deepseek 打造卜卦网站:技术与玄学的结合
· 阿里巴巴 QwQ-32B真的超越了 DeepSeek R-1吗?
· 【译】Visual Studio 中新的强大生产力特性
· 10年+ .NET Coder 心语 ── 封装的思维:从隐藏、稳定开始理解其本质意义
· 【设计模式】告别冗长if-else语句:使用策略模式优化代码结构
2013-08-12 win8 中如何删除 共享文件夹 用户名和密码