SpringBoot 整合 Mybatis
1、整合说明
Spring Boot默认没有对mybatis支持,而是Mybatis对springboot进行了支持。所以Spring Boot整合Mybatis的整合包要去Mybatis的的官方寻找。
官方路径:https://github.com/mybatis/spring-boot-starter
Maven 路径:http://www.mybatis.org/spring-boot-starter/mybatis-spring-boot-autoconfigure/
2、配置流程
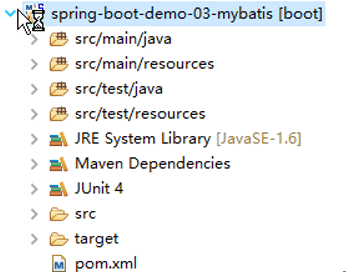
① 创建一个 Maven 项目
② 在 pom.xml 导入需要的依赖包
 1 <project xmlns="http://maven.apache.org/POM/4.0.0" xmlns:xsi="http://www.w3.org/2001/XMLSchema-instance"
 2     xsi:schemaLocation="http://maven.apache.org/POM/4.0.0 http://maven.apache.org/xsd/maven-4.0.0.xsd">
 3     <modelVersion>4.0.0</modelVersion>
 4     <groupId>cn.mgy</groupId>
 5     <artifactId>spring-boot-demo-01</artifactId>
 6     <version>1.0</version>
 7     <parent>
 8         <groupId>org.springframework.boot</groupId>
 9         <artifactId>spring-boot-starter-parent</artifactId>
10         <version>1.5.4.RELEASE</version>
11     </parent>
12     <dependencies>
13         <!-- freemarker支持包 -->
14         <dependency>
15             <groupId>org.springframework.boot</groupId>
16             <artifactId>spring-boot-starter-freemarker</artifactId>
17         </dependency>
18         <!--mybatis支持包 -->
19         <dependency>
20             <groupId>org.mybatis.spring.boot</groupId>
21             <artifactId>mybatis-spring-boot-starter</artifactId>
22             <version>1.3.0</version>
23         </dependency>
24         <!-- 数据库驱动 -->
25         <dependency>
26             <groupId>mysql</groupId>
27             <artifactId>mysql-connector-java</artifactId>
28         </dependency>
29         <!-- dbcp2连接池 -->
30         <dependency>
31             <groupId>org.apache.commons</groupId>
32             <artifactId>commons-dbcp2</artifactId>
33         </dependency>
34         <!-- Springboot测试包 -->
35         <dependency>
36             <groupId>org.springframework.boot</groupId>
37             <artifactId>spring-boot-starter-test</artifactId>
38         </dependency>
39     </dependencies>
40 </project>
③ 创建包,并且创建三个类

④ 编写一个 Application.java 类
 1 package cn.mgy;
 2
 3 import org.springframework.boot.SpringApplication;
 4 import org.springframework.boot.autoconfigure.SpringBootApplication;
 5
 6 @SpringBootApplication(scanBasePackages="cn.mgy")
 7 public class Application {
 8
 9     public static void main(String[] args) {
10         SpringApplication.run(Application.class, args);
11     }
12
13 }
⑤ 编写配置文件 application.properties
1 spring.datasource.url=jdbc:mysql://localhost:3306/school
2 spring.datasource.driverClassName=com.mysql.jdbc.Driver
3 spring.datasource.username=root
4 spring.datasource.password=root
5 #dbcp2 datasource
6 spring.datasource.type=org.apache.commons.dbcp2.BasicDataSource
⑥ 测试数据源
 1 package cn.mgy.test;
 2
 3 import java.sql.SQLException;
 4
 5 import javax.sql.DataSource;
 6
 7 import org.junit.Test;
 8 import org.junit.runner.RunWith;
 9 import org.springframework.beans.factory.annotation.Autowired;
10 import org.springframework.boot.test.context.SpringBootTest;
11 import org.springframework.test.context.junit4.SpringJUnit4ClassRunner;
12
13 @RunWith(SpringJUnit4ClassRunner.class)
14 @SpringBootTest
15 public class DataSourceTest {
16
17     @Autowired
18     private DataSource dataSource;
19
20     @Test
21     public void dataSource() {
22         try {
23             System.out.println(dataSource.getConnection());
24         } catch (SQLException e) {
25             // TODO Auto-generated catch block
26             e.printStackTrace();
27         }
28     }
29
30 }
⑦ 测试数据源正确后,编写 StudentMapper.java 接口
 1 package cn.mgy.mapper;
 2 import java.util.Map;
 3 import org.apache.ibatis.annotations.Insert;
 4 import org.apache.ibatis.annotations.Mapper;
 5
 6 //注意,使用的Mapper而不是@Repository
 7 @Mapper
 8 public interface StudentMapper {
 9
10     @Insert(value="INSERT INTO student    (SNAME, SEX, BIRTHDAY, AGE)    VALUES (#{sname}, #{sex},#{birthday}, #{age})")
11     public int insert(Map<String,Object> entity);
12
13 }
⑧ 编写一个 Service 类
 1 package cn.mgy.service;
 2 import java.util.Map;
 3 import org.springframework.beans.factory.annotation.Autowired;
 4 import org.springframework.stereotype.Service;
 5 import cn.gzsxt.mapper.StudentMapper;
 6
 7 @Service
 8 public class StudentService {
 9
10     @Autowired
11     private StudentMapper studentMapper;
12     public int insert(Map<String,Object> entity){
13         return studentMapper.insert(entity);
14     }
15 }
⑨ 编写一个 Controller 类
 1 package cn.mgy.controller;
 2
 3 import java.util.HashMap;
 4 import java.util.Map;
 5 import javax.servlet.http.HttpSession;
 6 import org.springframework.beans.factory.annotation.Autowired;
 7 import org.springframework.stereotype.Controller;
 8 import org.springframework.ui.Model;
 9 import org.springframework.web.bind.annotation.RequestMapping;
10 import cn.mgy.service.StudentService;
11
12 @Controller
13 public class StudentController {
14     @Autowired
15     private StudentService studentService;
16     @RequestMapping(value="/index")
17     public String index(Model model,HttpSession session){
18         System.out.println("-测试插入数据-");
19         Map<String, Object> entity=new HashMap<String, Object>();
20         //插入数据
21         entity.put("sname", "test3");
22         studentService.insert(entity);
23         return "index";
24     }
25 }
⑩ 启动程序测试
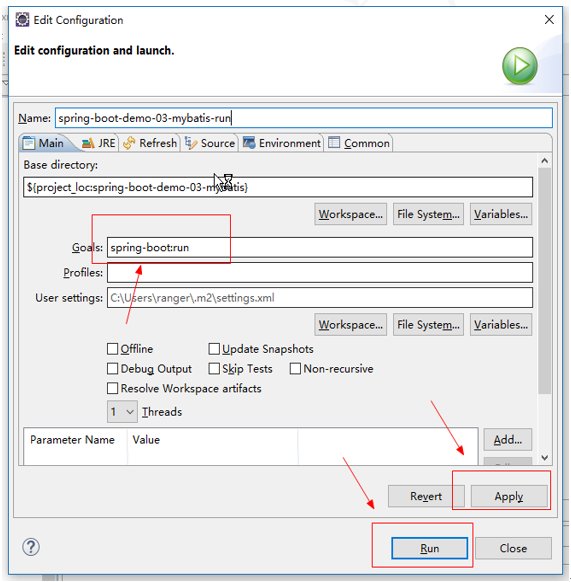
启动成功:提示使用 8080 端口访问

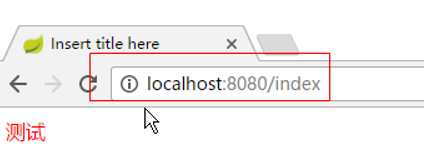
在浏览器执行访问
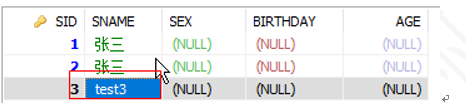
查看数据库结果,成功

 浙公网安备 33010602011771号