Spring Cloud Config 分布式配置
Spring Cloud Config 分布式配置
Dalston.RELEASE
Spring Cloud Config为分布式系统中的外部配置提供服务器和客户端支持。使用Config Server,您可以在所有环境中管理应用程序的外部属性。客户端和服务器上的概念映射与Spring Environment和PropertySource抽象相同,因此它们与Spring应用程序非常契合,但可以与任何以任何语言运行的应用程序一起使用。随着应用程序通过从开发人员到测试和生产的部署流程,您可以管理这些环境之间的配置,并确定应用程序具有迁移时需要运行的一切。服务器存储后端的默认实现使用git,因此它轻松支持标签版本的配置环境,以及可以访问用于管理内容的各种工具。很容易添加替代实现,并使用Spring配置将其插入。
概述
分布式系统面临的–配置文件问题
微服务意味着要将单体应用中的业务拆分成一个个子服务,每个服务的粒度相对较小,因此系统中会出现大量的服务,由于每个服务都需要必要的配置信息才能运行,所以一套集中式的,动态的配置管理设施是必不可少的。spring cloud提供了configServer来解决这个问题,我们每一个微服务自己带着一个application.yml,那上百个的配置文件修改起来,令人头疼!
什么是SpringCloud config分布式配置中心?
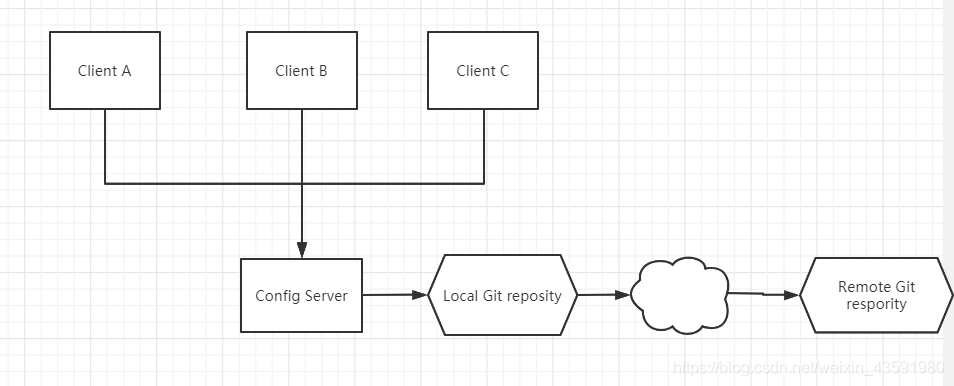
spring cloud config 为微服务架构中的微服务提供集中化的外部支持,配置服务器为各个不同微服务应用的所有环节提供了一个中心化的外部配置。
spring cloud config 分为服务端和客户端两部分。
服务端也称为 分布式配置中心,它是一个独立的微服务应用,用来连接配置服务器并为客户端提供获取配置信息,加密,解密信息等访问接口。
客户端则是通过指定的配置中心来管理应用资源,以及与业务相关的配置内容,并在启动的时候从配置中心获取和加载配置信息。配置服务器默认采用git来存储配置信息,这样就有助于对环境配置进行版本管理。并且可用通过git客户端工具来方便的管理和访问配置内容。
spring cloud config 分布式配置中心能干嘛?
- 集中式管理配置文件
- 不同环境,不同配置,动态化的配置更新,分环境部署,比如 /dev /test /prod /beta /release
- 运行期间动态调整配置,不再需要在每个服务部署的机器上编写配置文件,服务会向配置中心统一拉取配置自己的信息
- 当配置发生变动时,服务不需要重启,即可感知到配置的变化,并应用新的配置
- 将配置信息以REST接口的形式暴露
spring cloud config 分布式配置中心与GitHub整合
由于spring cloud config 默认使用git来存储配置文件 (也有其他方式,比如自持SVN 和本地文件),但是最推荐的还是git ,而且使用的是 http / https 访问的形式。
入门案例
服务端
新建springcloud-config-server-3344模块导入pom.xml依赖
<dependencies>
    <!--web-->
    <dependency>
        <groupId>org.springframework.boot</groupId>
        <artifactId>spring-boot-starter-web</artifactId>
    </dependency>
    <!--config-->
    <dependency>
        <groupId>org.springframework.cloud</groupId>
        <artifactId>spring-cloud-config-server</artifactId>
        <version>2.1.1.RELEASE</version>
    </dependency>

</dependencies>
resource下创建application.yml配置文件,Spring Cloud Config服务器从git存储库(必须提供)为远程客户端提供配置:
server:
  port: 3344
spring:
  application:
    name: springcloud-config-server
  # 连接码云远程仓库
  cloud:
    config:
      server:
        git:
          # 注意是https的而不是ssh
          uri: https://github.com/kase-ding/springcloud-config.git
            # 通过 config-server可以连接到git,访问其中的资源以及配置~
# 不加这个配置会报Cannot execute request on any known server 这个错:连接Eureka服务端地址不对
# 或者直接注释掉eureka依赖 这里暂时用不到eureka
eureka:
  client:
    register-with-eureka: false
    fetch-registry: false
主启动类
@EnableConfigServer // 开启spring cloud config server服务
@SpringBootApplication
public class Config_server_3344 {
    public static void main(String[] args) {
        SpringApplication.run(Config_server_3344.class,args);
    }
}
将本地git仓库springcloud-config文件夹下新建的application.yml提交到码云仓库:

定位资源的默认策略是克隆一个git仓库(在spring.cloud.config.server.git.uri),并使用它来初始化一个迷你SpringApplication。小应用程序的Environment用于枚举属性源并通过JSON端点发布。
HTTP服务具有以下格式的资源:
/{
    application}/{
    profile}[/{
    label}]
/{
    application}-{
    profile}.yml
/{
    label}/{
    application}-{
    profile}.yml
/{
    application}-{
    profile}.properties
/{
    label}/{
    application}-{
    profile}.properties
其中“应用程序”作为SpringApplication中的spring.config.name注入(即常规的Spring Boot应用程序中通常是“应用程序”),“配置文件”是活动配置文件(或逗号分隔列表的属性),“label”是可选的git标签(默认为“master”)。
测试访问http://localhost:3344/application-dev.yml
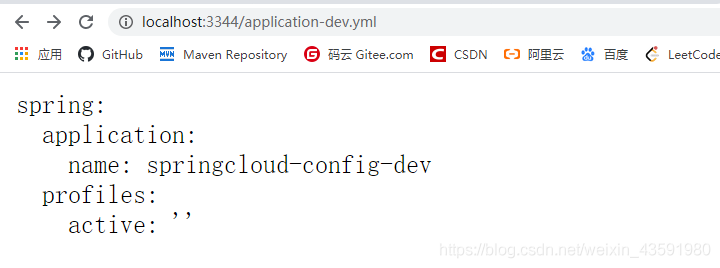
测试访问 http://localhost:3344/application/test/master

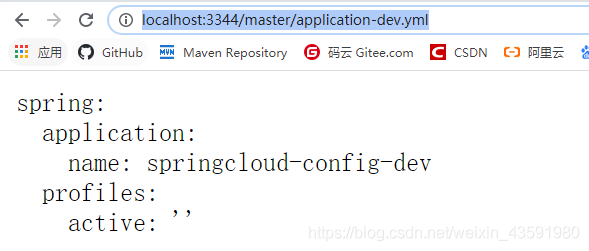
测试访问 http://localhost:3344/master/application-dev.yml
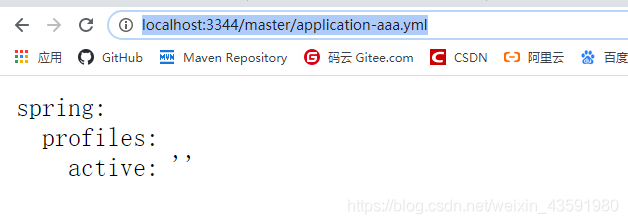
如果测试访问不存在的配置则不显示 如:http://localhost:3344/master/application-aaa.yml
客户端
将本地git仓库springcloud-config文件夹下新建的config-client.yml提交到码云仓库:

新建一个springcloud-config-client-3355模块,并导入依赖
<!--config-->
<!-- https://mvnrepository.com/artifact/org.springframework.cloud/spring-cloud-start -->
<dependencies>
    <dependency>
        <groupId>org.springframework.cloud</groupId>
        <artifactId>spring-cloud-starter-config</artifactId>
        <version>2.1.1.RELEASE</version>
    </dependency>
    <dependency>
        <groupId>org.springframework.boot</groupId>
        <artifactId>spring-boot-starter-actuator</artifactId>
    </dependency>
    <dependency>
        <groupId>org.springframework.boot</groupId>
        <artifactId>spring-boot-starter-web</artifactId>
    </dependency>
</dependencies>
resources下创建application.yml和bootstrap.yml配置文件
bootstrap.yml 是系统级别的配置
# 系统级别的配置
spring:
  cloud:
    config:
      name: config-client # 需要从git上读取的资源名称,不要后缀
      profile: dev
      label: master
      uri: http://localhost:3344
application.yml 是用户级别的配置
spring:
  application:
    name: springcloud-config-client-3355
创建controller包下的ConfigClientController.java 用于测试
@RestController
public class ConfigClientController {
    @Value("${spring.application.name}")//获取微服务名称
    private String applicationName;
    @Value("${eureka.client.service-url.defaultZone}")
    private String eurekaServer; //获取Eureka服务
    @Value("${server.port}")
    private String port; //获取服务端的端口号
    @RequestMapping("/config")
    public String getConfig(){
        return "applicationName:"+applicationName +
         "eurekaServer:"+eurekaServer +
         "port:"+port;
    }
}
主启动类
@SpringBootApplication
public class ConfigClient {
    public static void main(String[] args) {
        SpringApplication.run(ConfigClient.class,args);
    }
}
测试:
启动服务端Config_server_3344,再启动客户端ConfigClient-3355
访问:http://localhost:8201/config/

本地新建config-dept.yml和config-eureka.yml并提交到码云仓库
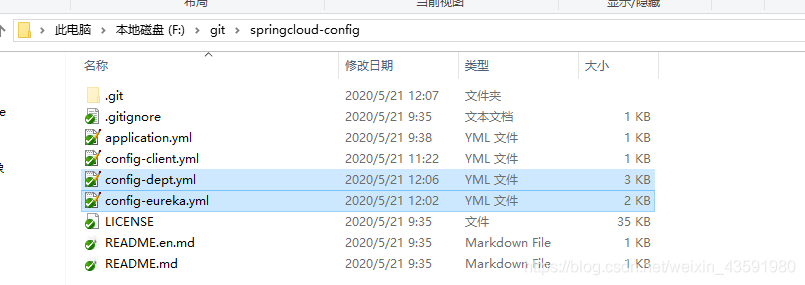
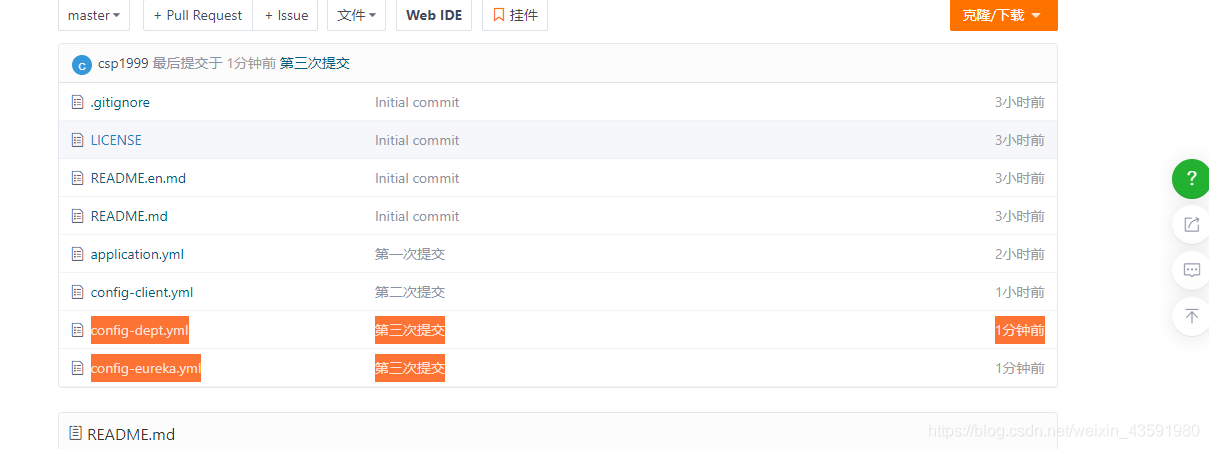
这里配置文件内容不再列举直接到代码中看把。
新建springcloud-config-eureka-7001模块,并将原来的springcloud-eureka-7001模块下的内容拷贝的该模块。
1.清空该模块的application.yml配置,并新建bootstrap.yml连接远程配置
spring:
  cloud:
    config:
      name: config-eureka # 仓库中的配置文件名称
      label: master
      profile: dev
      uri: http://localhost:3344
2.在pom.xml中添加spring cloud config依赖
<!--config-->
<!-- https://mvnrepository.com/artifact/org.springframework.cloud/spring-cloud-starter-config -->
<dependency>
    <groupId>org.springframework.cloud</groupId>
    <artifactId>spring-cloud-starter-config</artifactId>
    <version>2.1.1.RELEASE</version>
</dependency>
3.主启动类
@SpringBootApplication
@EnableEurekaServer //EnableEurekaServer 服务端的启动类,可以接受别人注册进来~
public class ConfigEurekaServer_7001 {
    public static void main(String[] args) {
        SpringApplication.run(ConfigEurekaServer_7001.class,args);
    }
}
4.测试
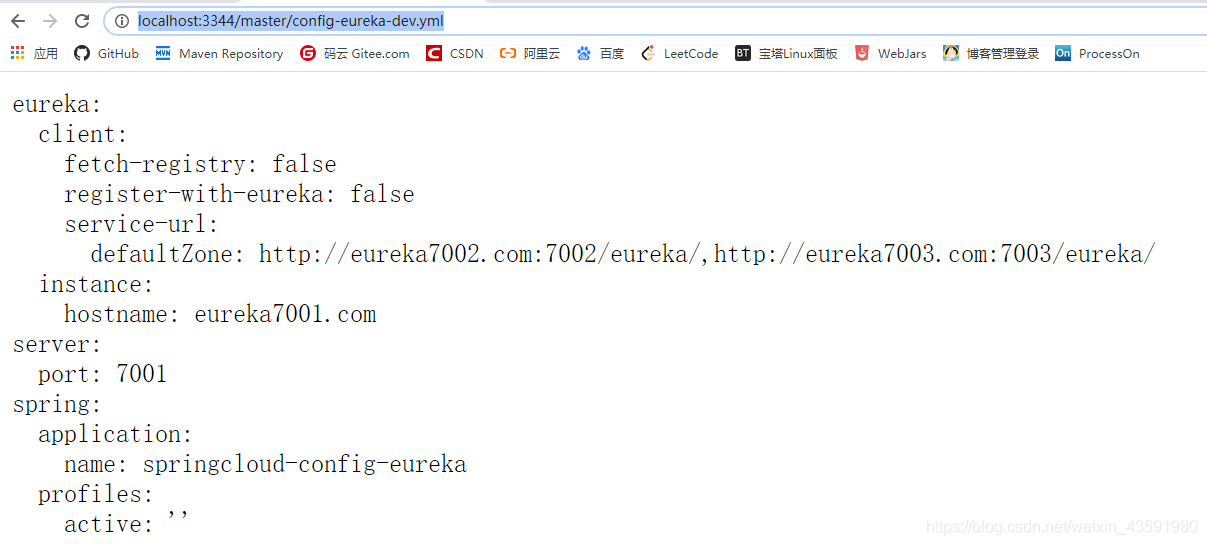
第一步:启动 Config_Server_3344,并访问 http://localhost:3344/master/config-eureka-dev.yml 测试
第二部:启动ConfigEurekaServer_7001,访问 http://localhost:7001/ 测试

显示上图则成功
新建springcloud-config-dept-8001模块并拷贝springcloud-provider-dept-8001的内容
同理导入spring cloud config依赖、清空application.yml 、新建bootstrap.yml配置文件并配置
spring:
  cloud:
    config:
      name: config-dept
      label: master
      profile: dev
      uri: http://localhost:3344
主启动类
@SpringBootApplication
@EnableEurekaClient //在服务启动后自动注册到Eureka中!
@EnableDiscoveryClient //服务发现~
@EnableCircuitBreaker //
public class ConfigDeptProvider_8001 {
    public static void main(String[] args) {
        SpringApplication.run(ConfigDeptProvider_8001.class,args);
    }
    //增加一个 Servlet
    @Bean
    public ServletRegistrationBean hystrixMetricsStreamServlet(){
        ServletRegistrationBean registrationBean = new ServletRegistrationBean(new HystrixMetricsStreamServlet());
        registrationBean.addUrlMappings("/actuator/hystrix.stream");
        return registrationBean;
    }
}
测试 (略)
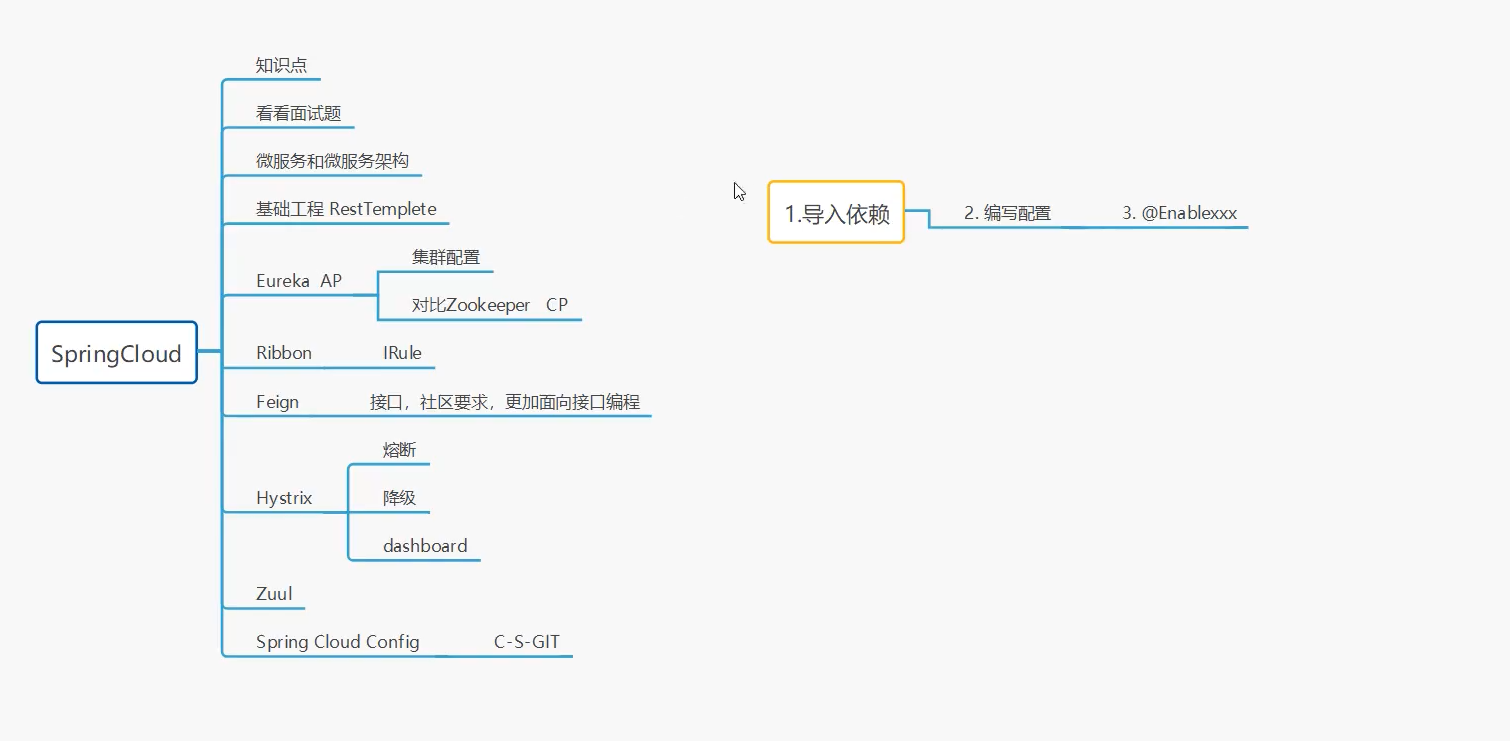
来源:(https://blog.csdn.net/weixin_43591980/article/details/106255122#t1)


【推荐】国内首个AI IDE,深度理解中文开发场景,立即下载体验Trae
【推荐】编程新体验,更懂你的AI,立即体验豆包MarsCode编程助手
【推荐】抖音旗下AI助手豆包,你的智能百科全书,全免费不限次数
【推荐】轻量又高性能的 SSH 工具 IShell:AI 加持,快人一步
· AI与.NET技术实操系列:基于图像分类模型对图像进行分类
· go语言实现终端里的倒计时
· 如何编写易于单元测试的代码
· 10年+ .NET Coder 心语,封装的思维:从隐藏、稳定开始理解其本质意义
· .NET Core 中如何实现缓存的预热?
· 25岁的心里话
· 闲置电脑爆改个人服务器(超详细) #公网映射 #Vmware虚拟网络编辑器
· 基于 Docker 搭建 FRP 内网穿透开源项目(很简单哒)
· 零经验选手,Compose 一天开发一款小游戏!
· 一起来玩mcp_server_sqlite,让AI帮你做增删改查!!