syzkaller 使用记录
-
下载
go 环境
wget https://dl.google.com/go/go1.17.6.linux-amd64.tar.gz
tar -xf go1.17.6.linux-amd64.tar.gz
# 后面这两条命令建议设置到~/.bashrc文件中置
export GOROOT=`pwd`/goroot
export PATH=$GOROOT/bin:$PATH
syzkaller 下载
git clone https://github.com/google/syzkaller cd syzkaller make (内存开大点) -
配置 kernel
拉一个 kernel 的源码
git clone --branch v5.11 git://git.kernel.org/pub/scm/linux/kernel/git/torvalds/linux.git生成配置文件
cd linux
make defconfig
make kvm_guest.config
修改 .config 文件(打开一些必要的配置)
# Coverage collection.
CONFIG_KCOV=y         # must

# Debug info for symbolization.
CONFIG_DEBUG_INFO=y

# Memory bug detector
CONFIG_KASAN=y
CONFIG_KASAN_INLINE=y

# Code coverage works better when KASLR Is disabled
# CONFIG_RANDOMIZE_BASE is not set

# 可选
CONFIG_KCOV_INSTRUMENT_ALL=y
CONFIG_KCOV_ENABLE_COMPARISONS=y
CONFIG_DEBUG_FS=y

CONFIG_DEBUG_KMEMLEAK=y

# 后面 fuzz 启动的时候出现了文件系统的挂载错误,所以加上这个
CONFIG_CONFIGFS_FS=y
CONFIG_SECURITYFS=y
重新生成配置并编译
make oldfconfig
make -j4
用debootstrap 构建 linux 镜像
sudo apt-get install debootstrap
cd image
wget https://raw.githubusercontent.com/google/syzkaller/master/tools/create-image.sh -O create-image.sh
chmod +x create-image.sh
./create-image.sh
启动 qemu
sudo qemu-system-x86_64 -m 2G -smp 2 -kernel /home/abc/kernel/linux-5.11/arch/x86/boot/bzImage -append "console=ttyS0 root=/dev/sda earlyprintk=serial net.ifnames=0" -drive file=/home/abc/kernel/image/stretch.img,format=raw -net user,hostfwd=tcp:127.0.0.1:10021-:22 -net nic,model=e1000 -enable-kvm -nographic -pidfile vm.pid 2>&1 | tee vm.log宿主机链接 ssh
ssh -i /home/abc/kernel/image/stretch.id_rsa -p 10021 -o "StrictHostKeyChecking no" root@localhost连不上的话需要在 /etc/hosts.allow中 加上一句
sshd: ALL关闭虚拟机
kill $(cat vm.pid) -
启动 syzkaller
新建 cfg 文件
{
        "target": "linux/amd64",
        "http": "127.0.0.1:56741",
        "workdir": "/home/abc/fuzz/syzkaller/workdir",
        "kernel_obj": "/home/abc/kernel/linux-5.11",
        "image": "/home/abc/kernel/image/stretch.img",
        "sshkey": "/home/abc/kernel/image/stretch.id_rsa",
        "syzkaller": "/home/abc/fuzz/syzkaller",
        "procs": 8,
        "type": "qemu",
        "vm": {
                "count": 4,
                "kernel": "/home/abc/kernel/linux-5.11/arch/x86/boot/bzImage",
                "cpu": 2,
                "mem": 2048,
		"qemu_args":"-enable-kvm"
        }
}
启动 fuzz
sudo ./bin/syz-manager -config=fuzz.cfg但这种方法寄掉了,所以只能先启动 qemu,再用 isolated 模式连过去
{
	"target": "linux/amd64",
	"http": "127.0.0.1:56741",
	"rpc": "127.0.0.1:0",
	"sshkey" : "/home/abc/kernel/image/stretch.id_rsa",
	"workdir": "/home/abc/fuzz/syzkaller/workdir",
	"kernel_obj": "/home/abc/kernel/linux-5.11",
	"syzkaller": "/home/abc/fuzz/syzkaller",
	"sandbox": "setuid",
	"type": "isolated",
	"vm": {
		"targets" : [ "127.0.0.1:10021" ],
		"pstore": false,
		"target_dir" : "/home/fuzzdir",
    		"target_reboot" : false
	}
}
其中各字段的含义:
target指定待测试设备的操作系统内核及cpu架构
vm.targets指定待fuzz设备的ip地址及ssh端口(默认是22)
enbale_syscalls:测试特定的几个系统调用
disable_syscalls:不调用某几个系统调用
-
提高 fuzz 效率
通过定制 syscall description 文件(syzkaller 自定义的语法),实现对部分驱动的针对性 fuzz。
直接编译进内核
1.在 kernel_src/drivers/char 下新建 test.c
#include <linux/init.h>
#include <linux/module.h>
#include <linux/proc_fs.h>
#include <linux/uaccess.h>
#include <linux/slab.h>

static int proc_open (struct inode *proc_inode, struct file *proc_file)
{
    printk(":into open!\n");
    return 0;
}

static ssize_t proc_read (struct file *proc_file, char __user *proc_user, size_t n, loff_t *loff)
{
    printk(":into read");
    return 0;
}

static ssize_t proc_write (struct file *proc_file, const char __user *proc_user, size_t n, loff_t *loff)
{
    char *c = kmalloc(512, GFP_KERNEL);
    copy_from_user(c, proc_user, 4096);
    printk(":into write!\n");
    return 0;
}

static struct proc_ops test_op = {
    .proc_open = proc_open,
    .proc_read = proc_read,
    .proc_write = proc_write,
};

static int __init mod_init(void)
{
    proc_create("test1", S_IRUGO|S_IWUGO, NULL, &test_op);
    printk(":proc init over!\n");
    return 0;
}

module_init(mod_init);
2.在 char/ 下的 Kconfig 文件中添加:
config TEST_MODULE
        tristate "heap overflow test"
        default y
        help
          This file is to test a buffer overflow
3.在 char/ 目录下的 Makefile 文件中添加:
obj-$(CONFIG_TEST_MODULE) += test.o4.重新编译内核
make clean
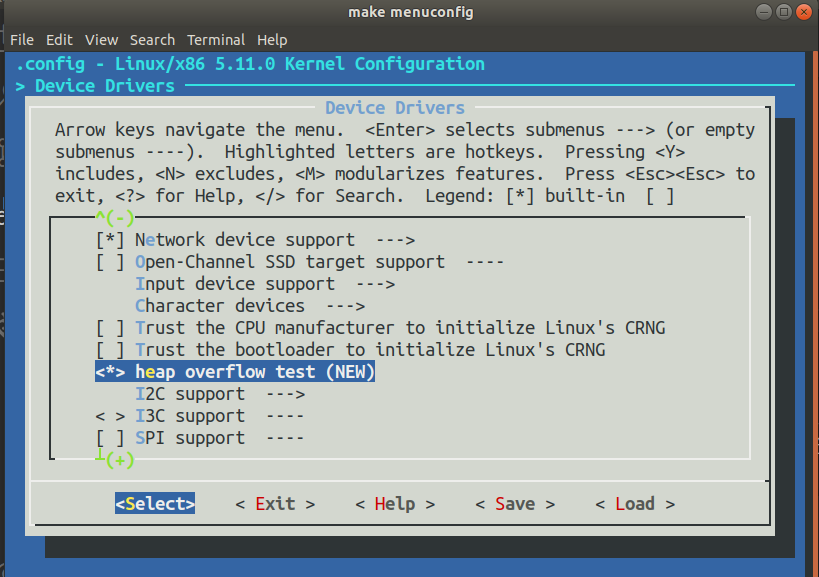
make menuconfig
make -j8
这时已经能看到加载的模块了

验证是否成功:
ls /proc/test15.定制 txt 系统调用描述文件
在 syzkaller 中的 sys/linux/ 下新建 proc_test.txt
include <linux/fs.h>

open$proc(file ptr[in, string["/proc/test1"]], flags flags[proc_open_flags], mode flags[proc_open_mode]) fd
read$proc(fd fd, buf buffer[out], count len[buf])
write$proc(fd fd, buf buffer[in], count len[buf])
close$proc(fd fd)

proc_open_flags = O_RDONLY, O_WRONLY, O_RDWR, O_APPEND, FASYNC, O_CLOEXEC, O_CREAT, O_DIRECT, O_DIRECTORY, O_EXCL, O_LARGEFILE, O_NOATIME, O_NOCTTY, O_NOFOLLOW, O_NONBLOCK, O_PATH, O_SYNC, O_TRUNC, __O_TMPFILE
proc_open_mode = S_IRUSR, S_IWUSR, S_IXUSR, S_IRGRP, S_IWGRP, S_IXGRP, S_IROTH, S_IWOTH, S_IXOTH
6.用 syz-extract 生成 const 文件
用之前需要先编译:
make bin/syz-extractbin/syz-extract -os linux -arch amd64 -sourcedir "/home/abc/kernel/linux-5.11" proc_test.txt然后用 syzgen 生成 const 文件
bin/syz-sysgen7.重新编译 syzkaller
make clean
make all
8.创建新的 cfg 文件
{
	"target": "linux/amd64",
	"http": "127.0.0.1:56741",
	"rpc": "127.0.0.1:0",
	"sshkey" : "/home/abc/kernel/image/stretch.id_rsa",
	"workdir": "/home/abc/fuzz/syzkaller/workdir",
	"kernel_obj": "/home/abc/kernel/linux-5.11",
	"syzkaller": "/home/abc/fuzz/syzkaller",
	"sandbox": "setuid",
	"type": "isolated",
	"enable_syscalls":[
 				"open$proc",
                "read$proc",
                "write$proc",
                "close$proc"
     ],
	"vm": {
		"targets" : [ "127.0.0.1:10021" ],
		"pstore": false,
		"target_dir" : "/home/fuzzdir",
    	"target_reboot" : false
	}
}
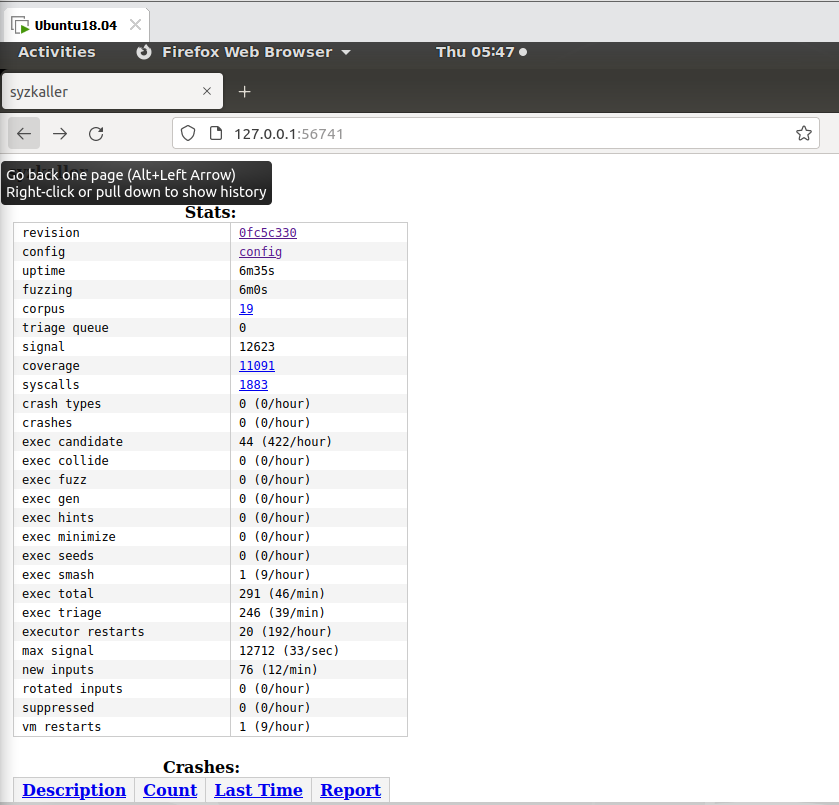
跑起来,过一会就有结果了
sudo ./bin/syz-manager -config=./cfg/fuzz-test.cfg -
参考文献

