

libtorch模型预测环境配置说明
1、cuda环境
(1)更新nvidia显卡驱动
首先在NVIDIA官网下载与电脑显卡类型一致的显卡驱动,我的显卡是quadro P2000,下载对应的显卡驱动程序安装。
474.82-quadro-rtx-desktop-notebook-win10-win11-64bit-international-whql.exe
(2)cuda的安装
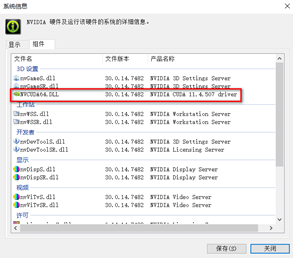
显卡驱动安装完成后,NVIDIA的控制面板上查看支持的cuda版本,可以看到cuda版本为11.4,这里所示的cuda版本指的是最高支持版本,具体下载哪一个版本需要根据libtorch的支持版本均衡,libtorch里面没有11.4版本的cuda,因此我选择使用11.3的cuda版本。

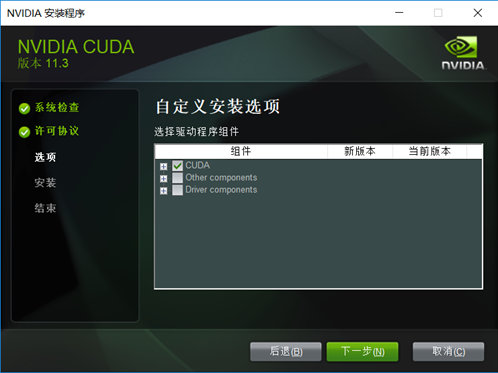
在官网下载11.3的cuda进行安装cuda_11.3.0_465.89_win10.exe,可以选择自定义安装取消下面两项的安装。
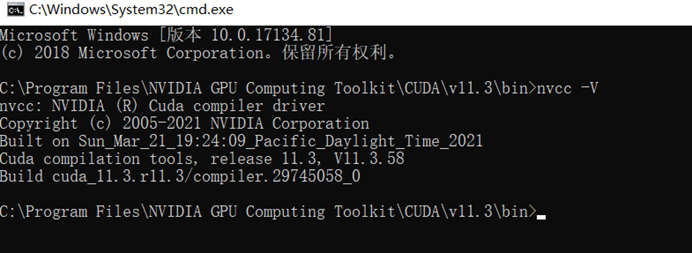
安装完成后在如下路径,执行nvcc –V 命令,,显示如下表示安装成功。
(3)cudnn的安装
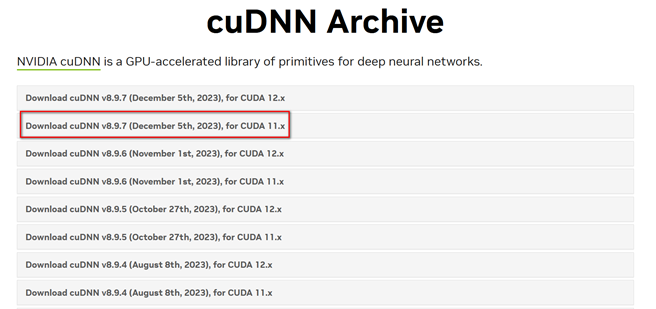
在cudnn的版本中,选择支持该cuda版本的即可,我使用8.9.7forCUDA11.x,这里.x表示11的所有版本都可以。
将下载完成的include、lib和bin目录拷贝到cuda的安装目录下,我的目录是C:\Program Files\NVIDIA GPU Computing Toolkit\CUDA\v11.3\bin。
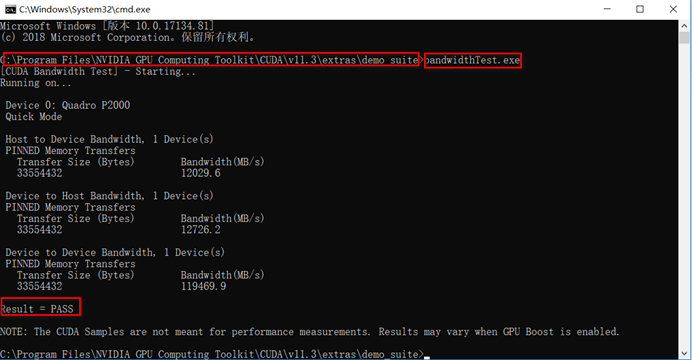
安装完成后,验证是否安装成功,在如下目录输入bandwidthTest.exe,结果显示pass
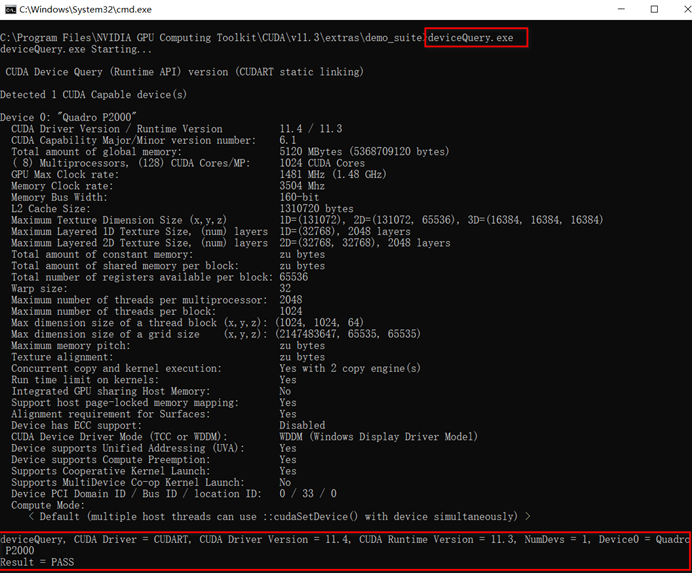
输入deviceQuery.exe命令,显示GPU型号等信息,表示安装成功。
2、libtorch安装
(1)版本选择与下载
这里选择了libtorch1.12.0版本进行安装,根据博文(https://blog.csdn.net/qq_35275007/article/details/116592120)提供的信息,下载了libtorch1.12.0-cu113的torch版本,这里只下载了cuda的debug和release版本,cuda版本也可以只运行cpu。
1 2 3 4 5 6 7 | libtorch 1.12.0cpu-release:https://download.pytorch.org/libtorch/cpu/libtorch-win-shared-with-deps-1.12.0%2Bcpu.zipcpu-debug:https://download.pytorch.org/libtorch/cpu/libtorch-win-shared-with-deps-debug-1.12.0%2Bcpu.zipcu113-debug: https://download.pytorch.org/libtorch/cu113/libtorch-win-shared-with-deps-debug-1.12.0%2Bcu113.zipcu113-release: https://download.pytorch.org/libtorch/cu113/libtorch-win-shared-with-deps-1.12.0%2Bcu113.zipcu116-debug: https://download.pytorch.org/libtorch/cu116/libtorch-win-shared-with-deps-debug-1.12.0%2Bcu116.zipcu116-release: https://download.pytorch.org/libtorch/cu116/libtorch-win-shared-with-deps-1.12.0%2Bcu116.zip |
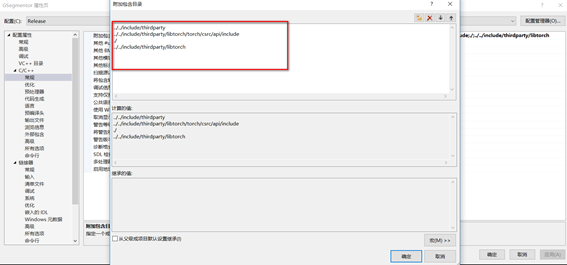
(2)VS2019属性配置
我这里根据项目配置要求调整了libtorch的文件位置,需要在工程配置讲头文件目录和lib文件目录包含进来。
(3)测试配置结果
新建工程,输入一下代码,测试配置的环境是否正常,结果,显示cuda不可用,并且tensor张量创建处崩溃。
1 2 3 4 5 6 7 8 9 10 11 12 13 14 15 | #include <iostream>#include "torch/torch.h"#include "torch/script.h"int main(){ std::cout << "cuda:is_avilable():" << torch::cuda::is_available() << std::endl; std::cout << "cuda:cudnn_is_available()" << torch::cuda::cudnn_is_available() << std::endl; std::cout << "cuda::device_count()" << torch::cuda::device_count() << std::endl; torch::Device device(torch::kCUDA); torch::Tensor tensor1 = torch::eye(3); torch::Tensor tensor2 = torch::eye(3, device); std::cout << tensor1 << std::endl; std::cout << tensor2 << std::endl;} |
根据网上提示在链接器里面增加命令,
/INCLUDE:?warp_size@cuda@at@@YAHXZ
/INCLUDE:?_torch_cuda_cu_linker_symbol_op_cuda@native@at@@YA?AVTensor@2@AEBV32@@Z
再次运行测试代码,测试通过,后在正式代码中测试,同时在cpu和gpu两种环境下都可以运行,至此libtorch环境基本配置完成。


【推荐】国内首个AI IDE,深度理解中文开发场景,立即下载体验Trae
【推荐】编程新体验,更懂你的AI,立即体验豆包MarsCode编程助手
【推荐】抖音旗下AI助手豆包,你的智能百科全书,全免费不限次数
【推荐】轻量又高性能的 SSH 工具 IShell:AI 加持,快人一步
· 被坑几百块钱后,我竟然真的恢复了删除的微信聊天记录!
· 没有Manus邀请码?试试免邀请码的MGX或者开源的OpenManus吧
· 【自荐】一款简洁、开源的在线白板工具 Drawnix
· 园子的第一款AI主题卫衣上架——"HELLO! HOW CAN I ASSIST YOU TODAY
· Docker 太简单,K8s 太复杂?w7panel 让容器管理更轻松!
2019-04-17 关于linux下编译的几点知识