

1、实验环境:源主机ip:192.168.1.62 目标主机ip:192.168.1.63
将192.168.1.62 /var/www/html 目录同步到 192.168.1.63 /web-back
目标主机上确保开放873端口
firewall-cmd --add-port=8080/tcp --permanent
firewall-cmd --reload
2、两台主机都安装xinetd rsync
yum -y install xinetd rsync
3、在目标主机192.168.1.63上面编辑rsyncd.conf
vim /etc/rsyncd.conf
uid = root #运行用户
gid = root #运行组
address =192.168.1.63 #监听ip
port =873 #监听端口
hosts allow =192.168.1.0/24 #允许同步的源ip
use chroot = yes
max connections =100
pid file =/var/run/rsyncd.pid
lock file =/var/run/rsync.lock
log file =/var/log/rsyncd.log
motd file =/etc/rsyncd.motd #客户端登录时候的提示信息
[wwwroot] #共享模块名
path =/web-back/ #路径
comment = use for web-data root
read only = no
list = yes
auth users = rsyncuser #备份用户,和系统用户无关
secrets file =/etc/rsync.passwd #用户密码
4.编辑欢迎信息 vim /etc/rsyncd.motd
welcome to rsync server
编辑密码文件 vim /etc/rsync.passwd
rsyncuser:password123 #注意格式 用户名:密码
并且修改/etc/rsync.passwd权限为600
chmod 600 /etc/rsync.passwd
5.启动服务
systemctl start xinetd
rsync --daemon --config=/etc/rsyncd.conf
6.在源主机192.168.1.62上测试
vim /etc/rsync.passwd
password123 #只需要密码,密码需要和目标服务器一致
rsync -avz /var/www/html rsyncuser@192.168.1.63::wwwroot --password-file=/etc/rsync.passwd
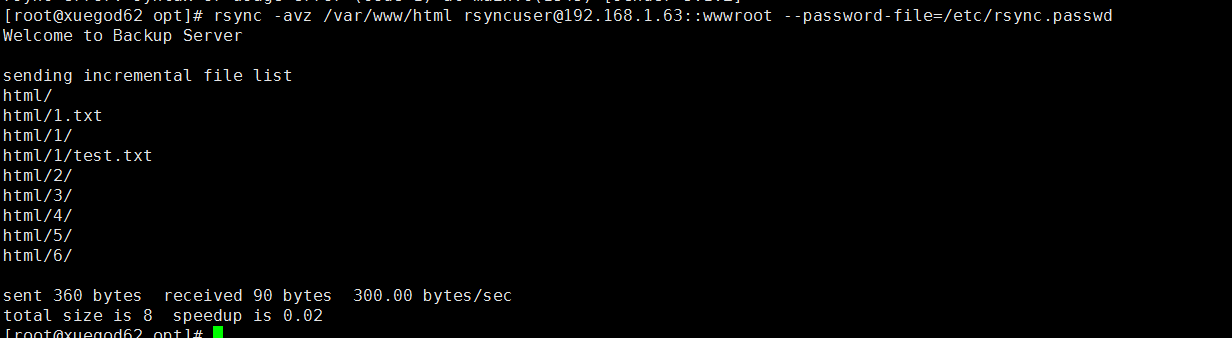
以上步骤说明rsync服务没问题
源主机192.168.1.62安装sersync
wget https://storage.googleapis.com/google-code-archive-downloads/v2/code.google.com/sersync/sersync2.5.4_64bit_binary_stable_final.tar.gz
解压
tar -xvf sersync2.5.4_64bit_binary_stable_final.tar.gz
重命名
mv GNU-Linux-x86 sersync
里面有2个文件 confxml.xml sersync2

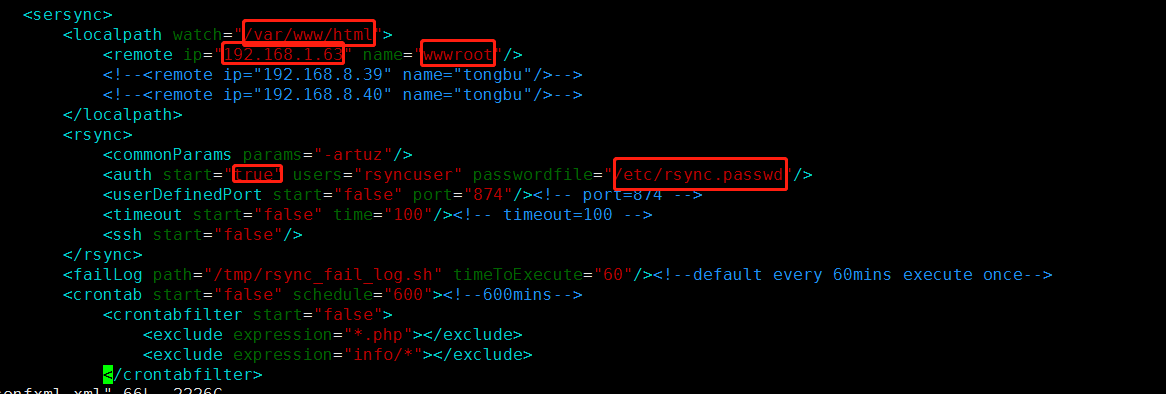
vim confxml.xml
以下几个地方需要修改
localpath watch="/var/www/html" #需要同步的目录
remote ip="192.168.1.63" name="wwwroot" #目标主机ip和共享模块名
<auth start="true" users="rsyncuser" passwordfile="/etc/rsync.passwd"/> #rsync设置的用户名和密码
启动服务
/opt/sersync/sersync2 -d -r -o /opt/sersync/confxml.xml
