PVE导入监控界面 grafana
PVE整合grafana
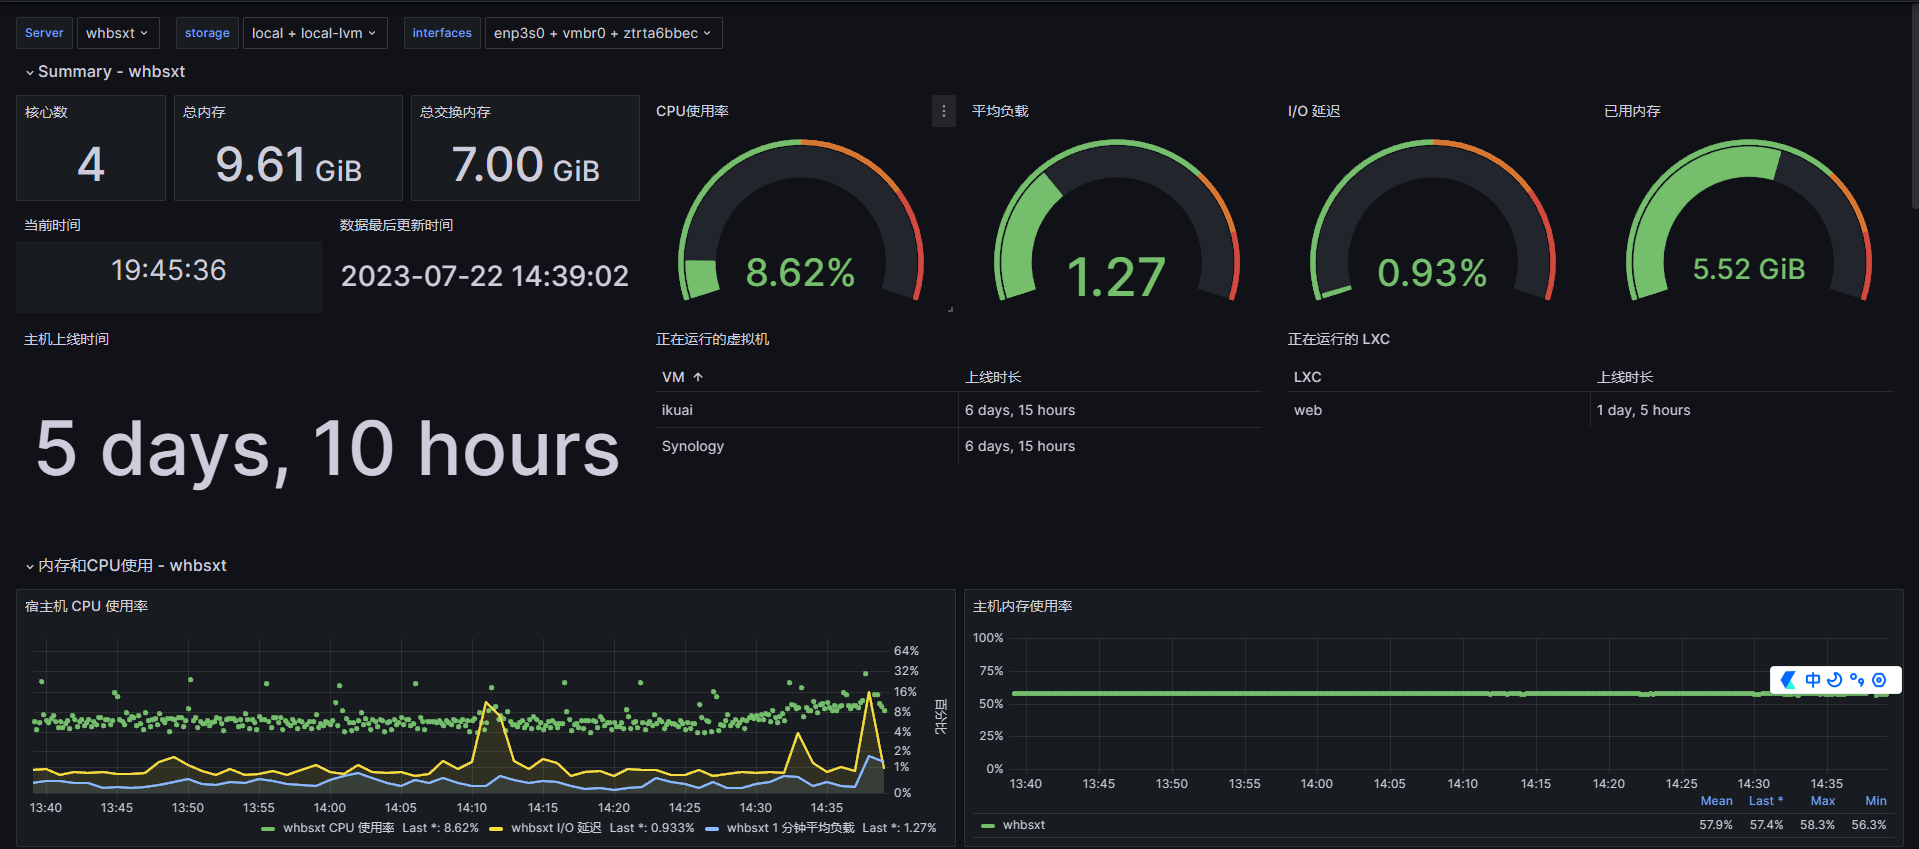
23.cnblogs.com/blog/3144497/202307/3144497-20230723203307208-1072816345.png)
本教程已测试支持 PVE 6.x-8.x
安装步骤
1.安装 influxdb
新建一个虚拟机
wget https://dl.influxdata.com/influxdb/releases/influxdb_1.8.10_amd64.deb
sudo dpkg -i influxdb_1.8.10_amd64.deb
systemctl start influxdb
systemctl enable influxdb
安装1.81版本influxdb ,apt库默认是1.6的
2.配置 influxdb
修改conf文件
vi /etc/influxdb/influxdb.conf
在530行附近找到udp 修改为以下
重点为这几句
enabled = true #开启udp
bind-address = "0.0.0.0:8089" #监听端口,此处为UDP端口,不要和下面HTTP端口混淆
database = "proxmox"
batch-size = 1000
batch-timeout = "1s"
示例:
[[udp]]
enabled = true
bind-address = "0.0.0.0:8089"
database = "proxmox"
  # retention-policy = ""

  # InfluxDB precision for timestamps on received points ("" or "n", "u", "ms", "s", "m", "h")
  # precision = ""

  # These next lines control how batching works. You should have this enabled
  # otherwise you could get dropped metrics or poor performance. Batching
  # will buffer points in memory if you have many coming in.

  # Flush if this many points get buffered
batch-size = 1000

  # Number of batches that may be pending in memory
  # batch-pending = 10

  # Will flush at least this often even if we haven't hit buffer limit
batch-timeout = "1s"

  # UDP Read buffer size, 0 means OS default. UDP listener will fail if set above OS max.
  # read-buffer = 0
应用配置
输入systemctl restart influxdb 重启服务以应用配置
输入systemctl status influxdb 查看运行状态

创建用户和数据库
命令行输入 influx 登陆
CREATE USER "admin" WITH PASSWORD '123456' WITH ALL PRIVILEGES 创建管理员用户
create database proxmox 创建名为 proxmox 的数据库
show users 查看管理员是否创建成功

show databases 查看数据库是否创建成功

quit 退出登陆
以上为influxdb安装完成
3.安装 grafana
sudo apt-get install -y adduser libfontconfig1
wget https://dl.grafana.com/oss/release/grafana_10.0.2_amd64.deb
sudo dpkg -i grafana_10.0.2_amd64.deb
sudo /bin/systemctl enable grafana-server
sudo /bin/systemctl start grafana-server
在pve内添加influxdb
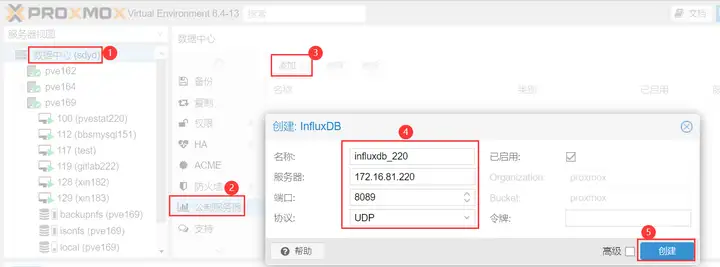
服务器填写虚拟机获取到的 ip
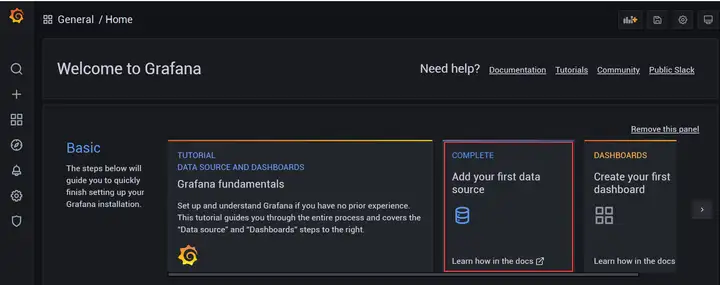
grafana内添加influxdb数据库
进入grafana网页 ip:3000
账号密码默认admin
点击 添加数据源
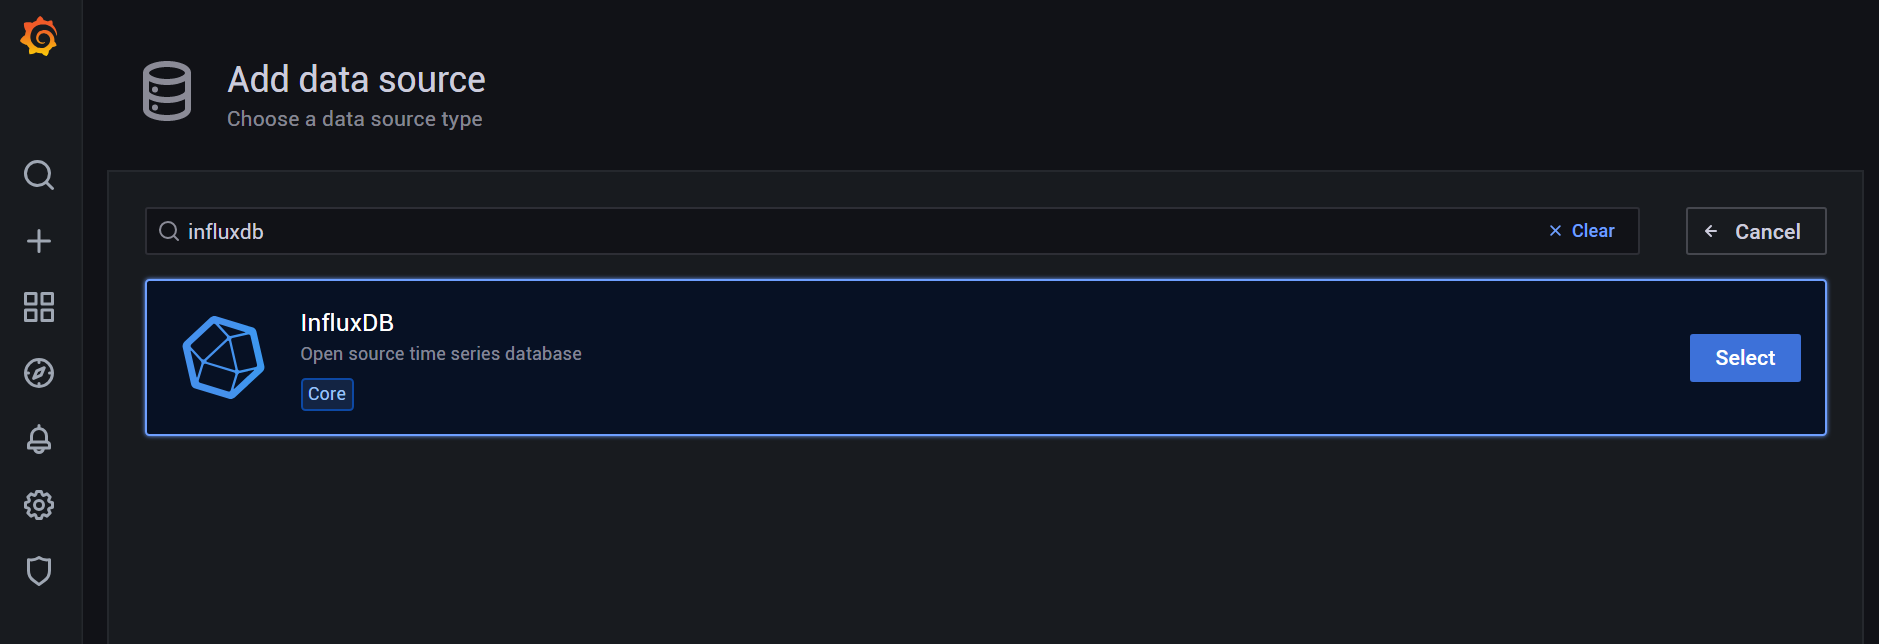
选择Influxdb
23.cnblogs.com/blog/3144497/202307/3144497-20230723203344149-1613653324.png)
这里需要解释下,http URL 需要填写的端口不是前面的8089,而是influxdb默认的8086
由于我们 grafana 和 influxdb 安装在一个虚拟机中,此处使用localhost
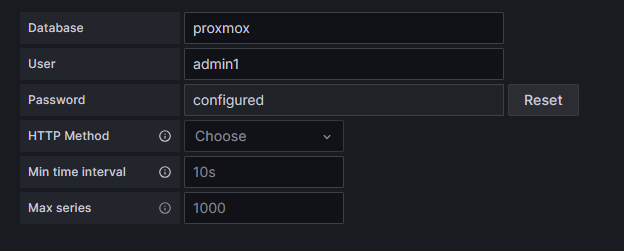
此处 database user password 填写在第二步里面创建的数据库名称和管理员账号密码
保存即可
添加仪表盘
访问官网 选择一个自己喜欢的仪表盘,注意必须是支持 influxdb 1.x 的仪表盘,记录右下角的ID
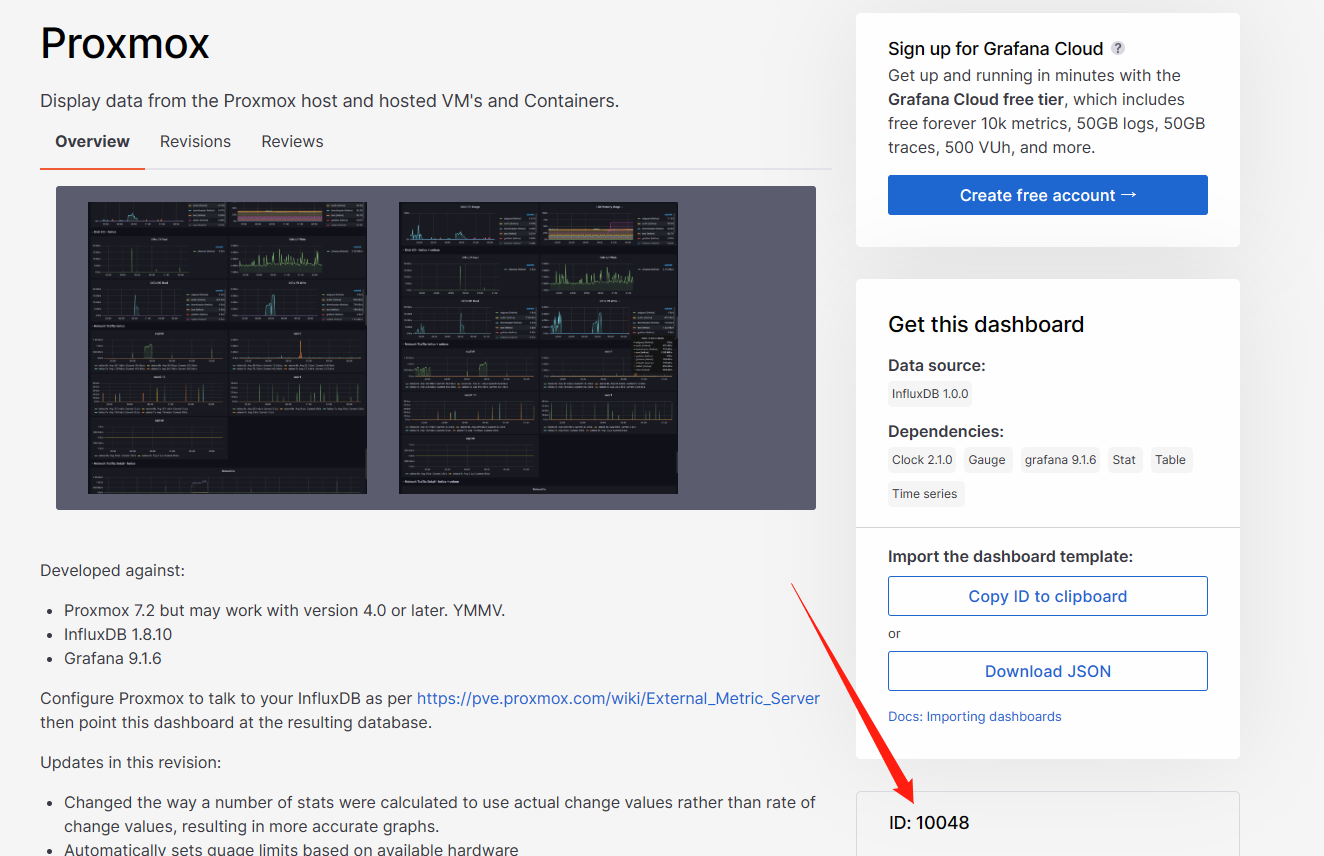
回到 grafana
点击导入仪表盘

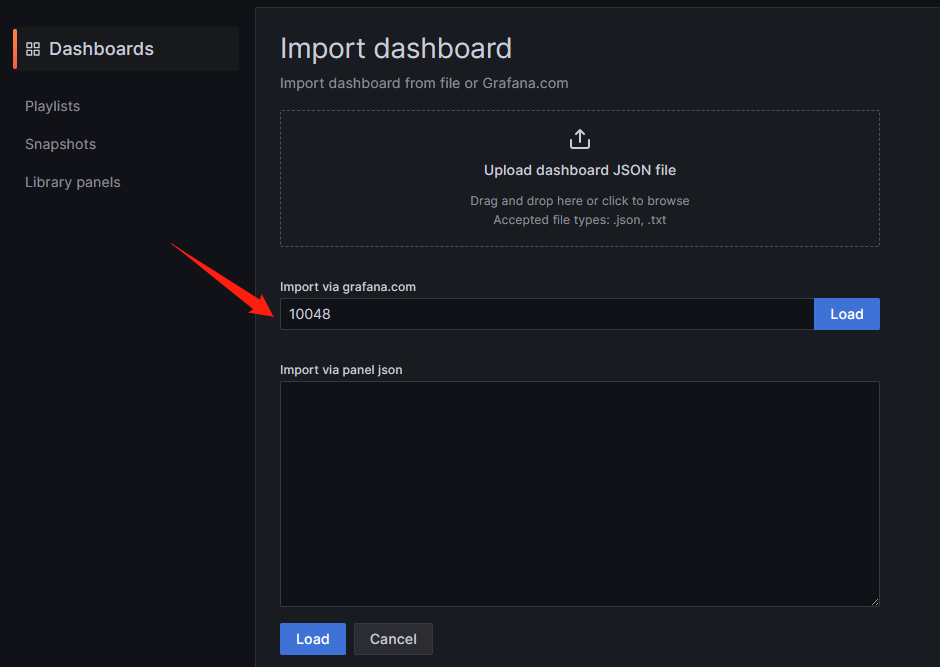
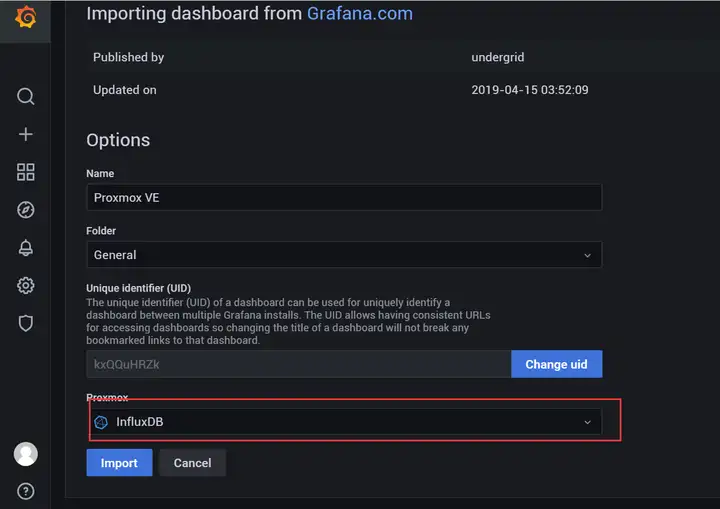
选择 刚创建的influxDB
大功告成
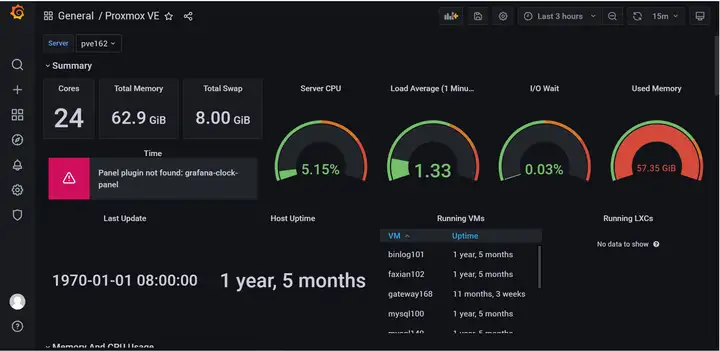
4.修复报错
首次导入仪表盘会出现 Panel plugin not found: grafana-clock-panel
命令行 状态输入以下命令
grafana-cli plugins install grafana-clock-panel

systemctl restart grafana-server
F5刷新一下就好了


 浙公网安备 33010602011771号