

2、zookeeper注册中心环境搭建
首先声明我这里是在windows中安装的zookeeper,在linux中安装的步骤一样以及需要修改的地方随机应变就行
首先进入官网http://dubbo.apache.org/zh-cn/blog/download.html下载好zookeeper的安装压缩包
或者用我所用的版本https://pan.baidu.com/s/1AGvd174cWA44iuYOgHCnrQ 提取码czcs
我把安装包放到了D盘的dubboTestEnvironment目录中,等下解压安装也是在这个目录中


解压到当前文件夹中

进入解压后的目录中再进入bin目录有专门在windows中使用zkCli.cmd(客户端)和zkServer.cmd(服务端)

我们先在该目录下打开cmd,然后运行zkServer.cmd
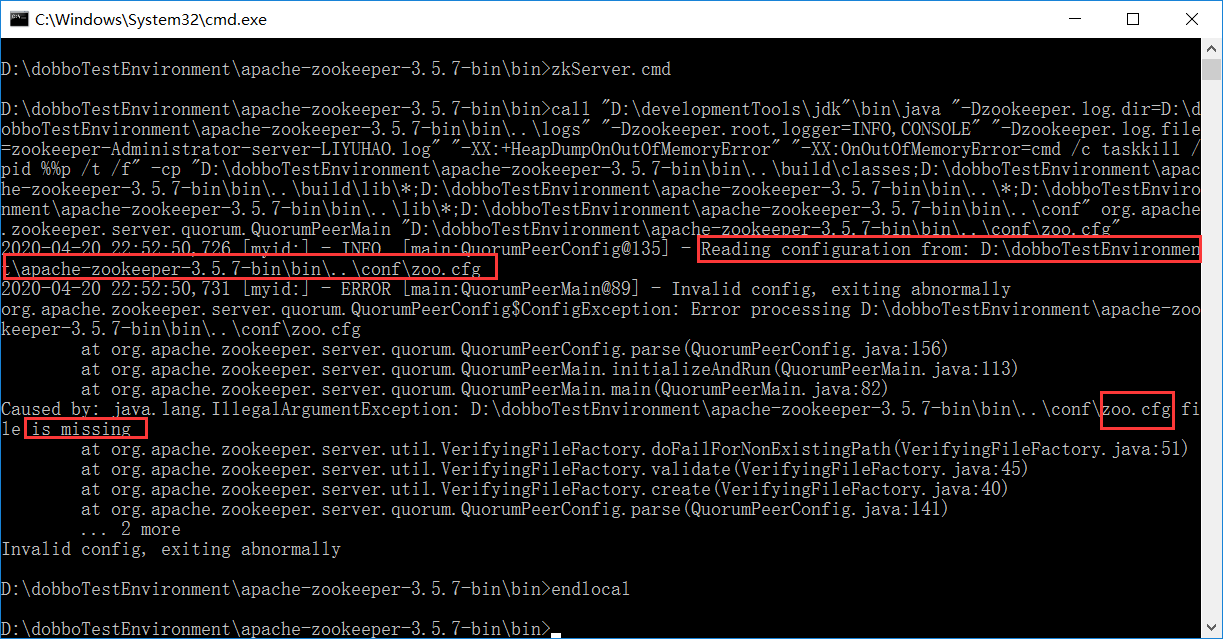
会发现运行的时候会出现错误,说在cof\目录下找不到zoo.cfg文件
原因确实是在cof目录下没有zoo.cfg这个文件,但是有一个zoo_sample.cfg文件
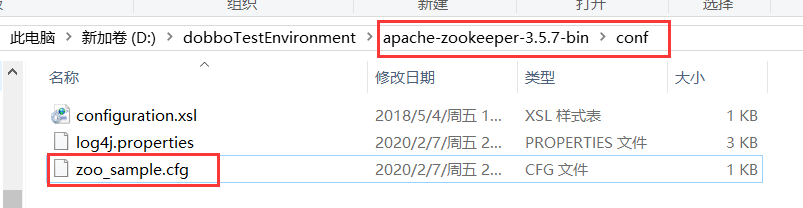
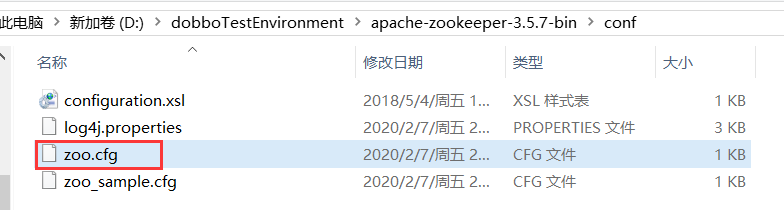
这就是一个示例文件,我们把它复制一份并改名为zoo.cfg
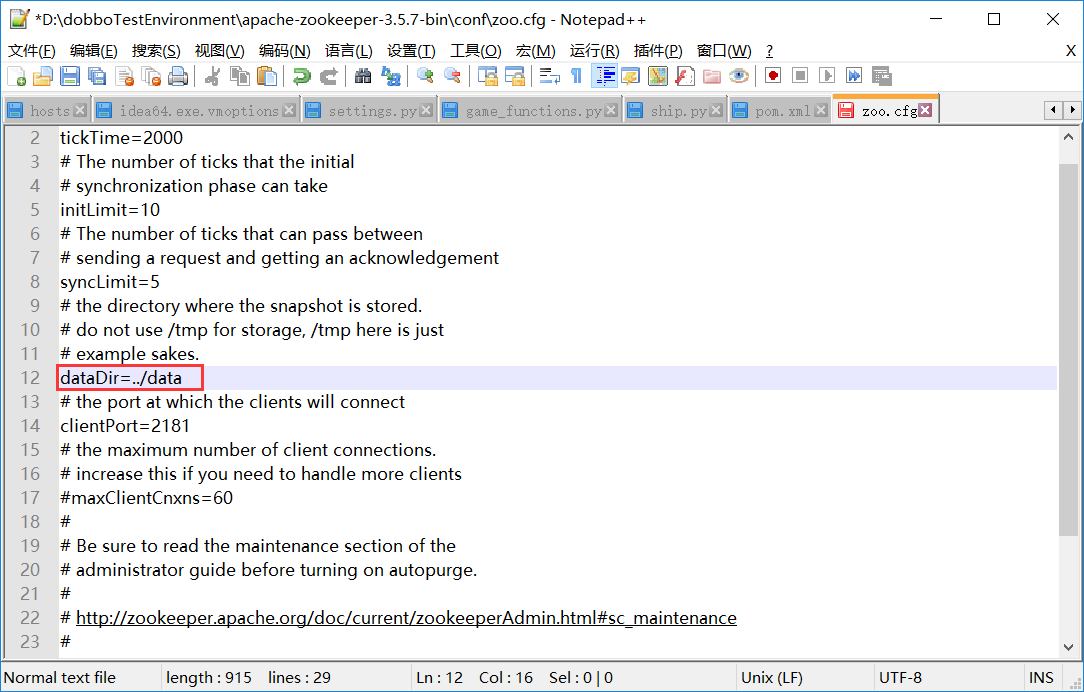
这是zoo.cfg里的原始内容

# The number of milliseconds of each tick
tickTime=2000
# The number of ticks that the initial
# synchronization phase can take
initLimit=10
# The number of ticks that can pass between
# sending a request and getting an acknowledgement
syncLimit=5
# the directory where the snapshot is stored.
# do not use /tmp for storage, /tmp here is just
# example sakes.
dataDir=/tmp/zookeeper
# the port at which the clients will connect
clientPort=2181
# the maximum number of client connections.
# increase this if you need to handle more clients
#maxClientCnxns=60
#
# Be sure to read the maintenance section of the
# administrator guide before turning on autopurge.
#
# http://zookeeper.apache.org/doc/current/zookeeperAdmin.html#sc_maintenance
#
# The number of snapshots to retain in dataDir
#autopurge.snapRetainCount=3
# Purge task interval in hours
# Set to "0" to disable auto purge feature
#autopurge.purgeInterval=1
dataDir为zookeeper数据的存储目录,因为原始路径是linux下的路径,但我这是安装在windows中,所以需要修改一下
首先在zookeeper的安装目录下建一个data目录
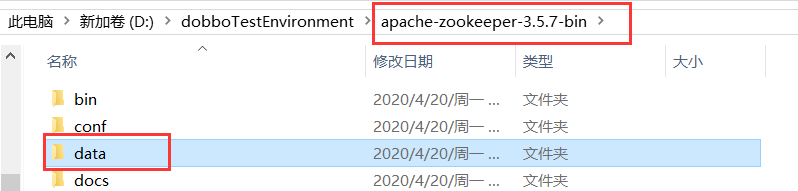
然后修改zoo.cfg文件中dataDir的值为../data(用的相对路径)
2、clientPort=2181 2181为zookeeper的默认端口
修改完成之后再在cmd中运行一下zkServer.cmd就能启动成功了

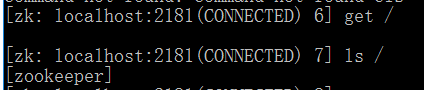
不要关闭运行着zookeeper服务端的这个cmd窗口,我们再在该目录下重新开启一个cmd窗口运行zkCli.cmd(客户端)进行连接 zookeeper服务器

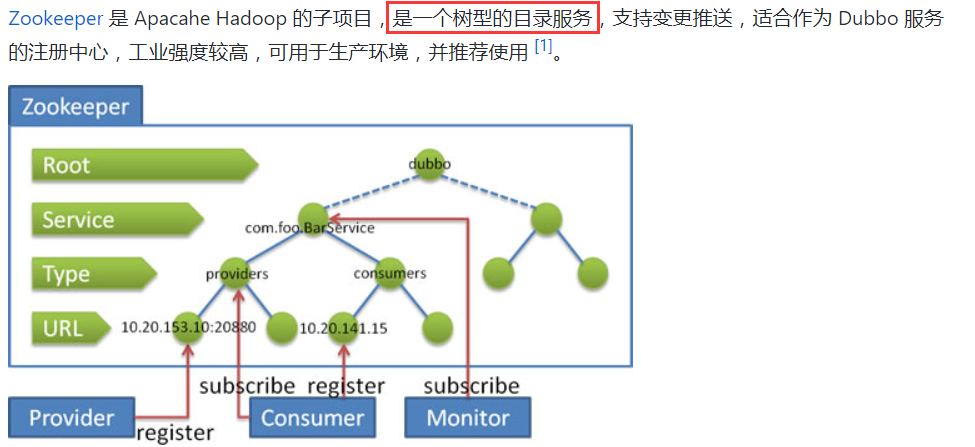
因为zookeeper是一个树型的目录服务,所以我们可以(在客户端的cmd窗口中)进行创建节点和查看节点
以上操作都没问题的话zookeeper的环境搭建相当于没问题了
zookeeper其它功能在这就不再多说明,可自行去学习zookeeper的使用,我这就是为了学习dubbo纯属把zookeeper作为注册中心


【推荐】国内首个AI IDE,深度理解中文开发场景,立即下载体验Trae
【推荐】编程新体验,更懂你的AI,立即体验豆包MarsCode编程助手
【推荐】抖音旗下AI助手豆包,你的智能百科全书,全免费不限次数
【推荐】轻量又高性能的 SSH 工具 IShell:AI 加持,快人一步
· AI与.NET技术实操系列:向量存储与相似性搜索在 .NET 中的实现
· 基于Microsoft.Extensions.AI核心库实现RAG应用
· Linux系列:如何用heaptrack跟踪.NET程序的非托管内存泄露
· 开发者必知的日志记录最佳实践
· SQL Server 2025 AI相关能力初探
· winform 绘制太阳,地球,月球 运作规律
· AI与.NET技术实操系列(五):向量存储与相似性搜索在 .NET 中的实现
· 超详细:普通电脑也行Windows部署deepseek R1训练数据并当服务器共享给他人
· 【硬核科普】Trae如何「偷看」你的代码?零基础破解AI编程运行原理
· 上周热点回顾(3.3-3.9)