Notion-douban:搭建自己的阅读清单
前言
交完论文盲审稿,终于从接近一年的实习、秋招和论文的忙碌中闲下来。
在复盘秋招的时候发现自己虽然看过不少书,但缺少整理和思考,所以想趁这个机会梳理一下自己的阅读习惯,希望以后再读新的东西可以更系统高效。但是手动输入图书信息实在太慢了。经过一番调研,我发现有插件Notion Plus可以导出豆瓣图书列表,但似乎缺少维护(我没试),以及我自己想体验一下Notion API,就动了写一个小程序的念头。在这里把搭建过程分享给大家,全当抛砖引玉。
使用场景 : 将单本图书信息从豆瓣导入到Notion database
预览: 读书清单
创建Notion机器人
想要利用Notion提供的API对自己WorkSpace中的block进行操作的话,首先需要创建机器人(integration),并为机器人授予所需要操作的block操作权限。在 我的机器人 页面可以快速创建机器人。
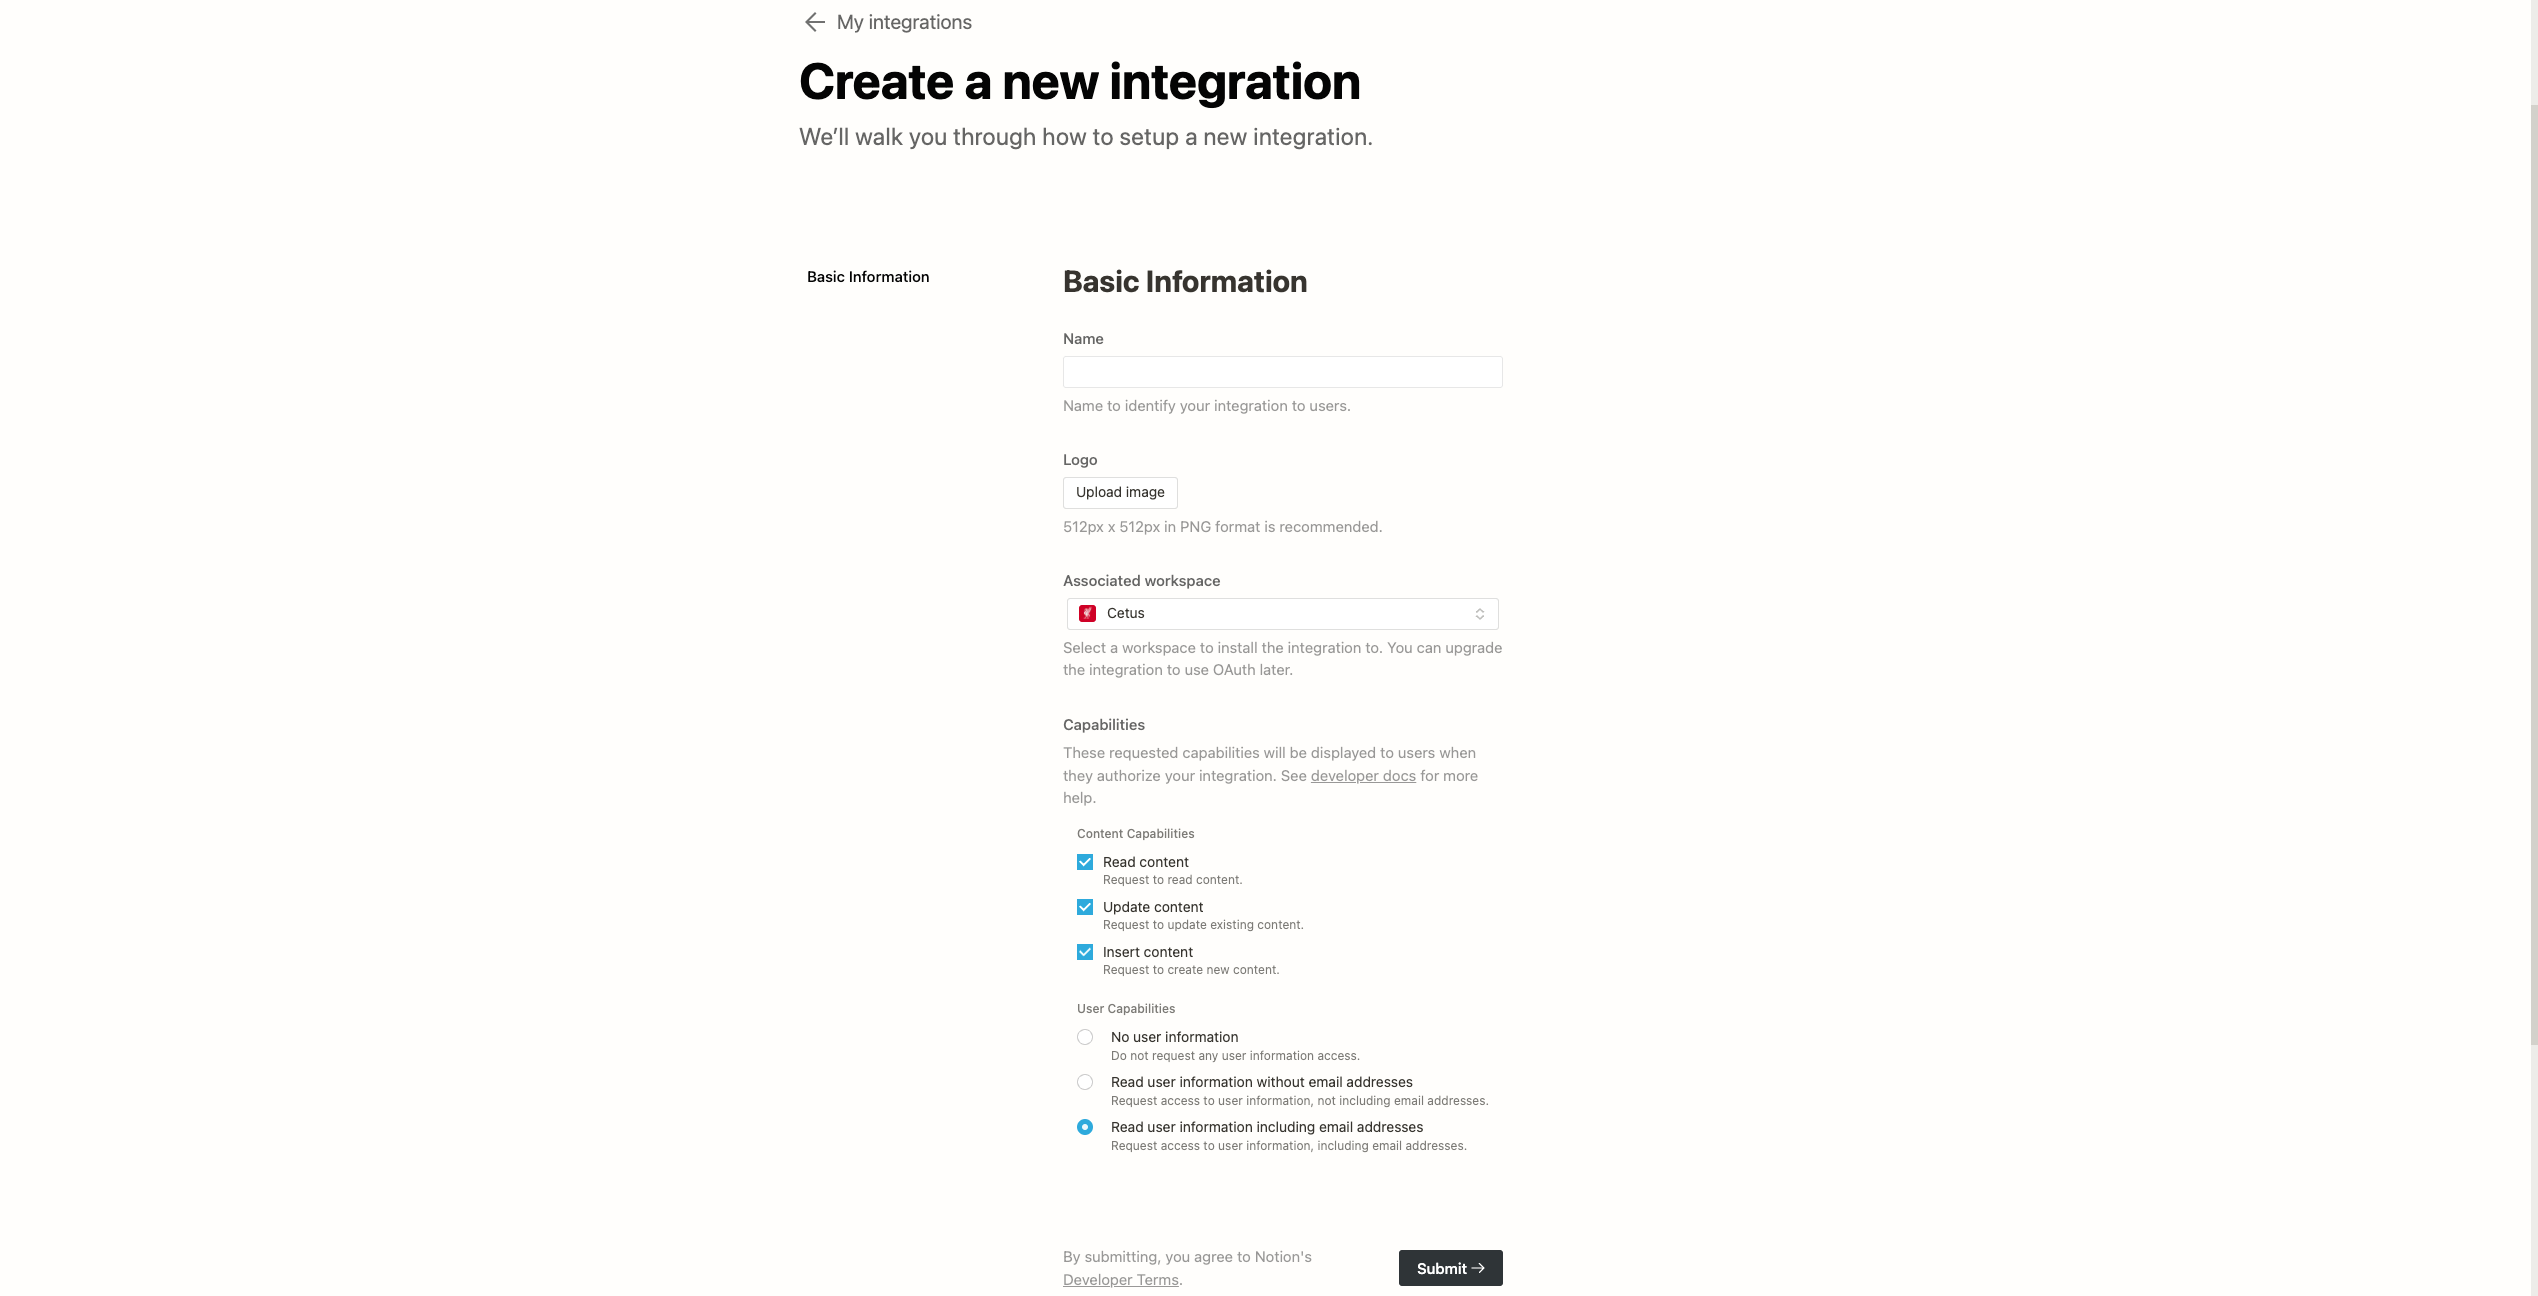
创建新的机器人
填完信息点击创建之后,系统跳转到新的页面。页面最上方给出了这个机器人的Secrets ( 就是 Bearer token),点击Show可以查看和复制。这个token会一直在这个页面,所以不用担心忘记。
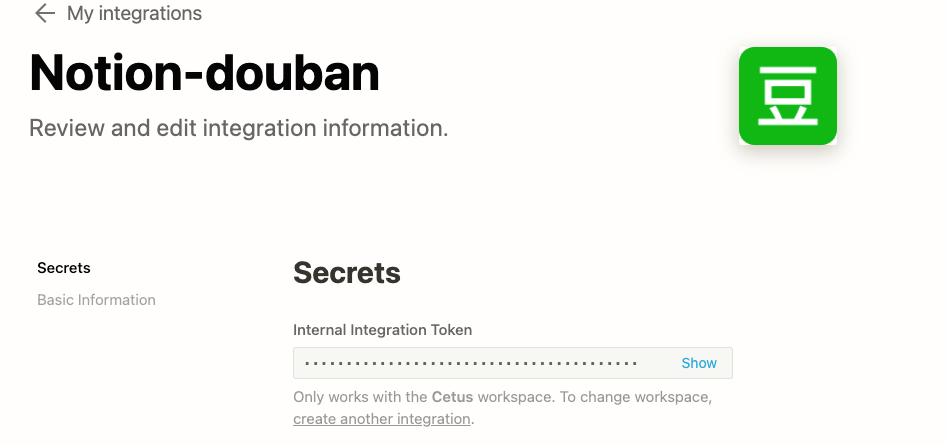
创建数据表并邀请机器人
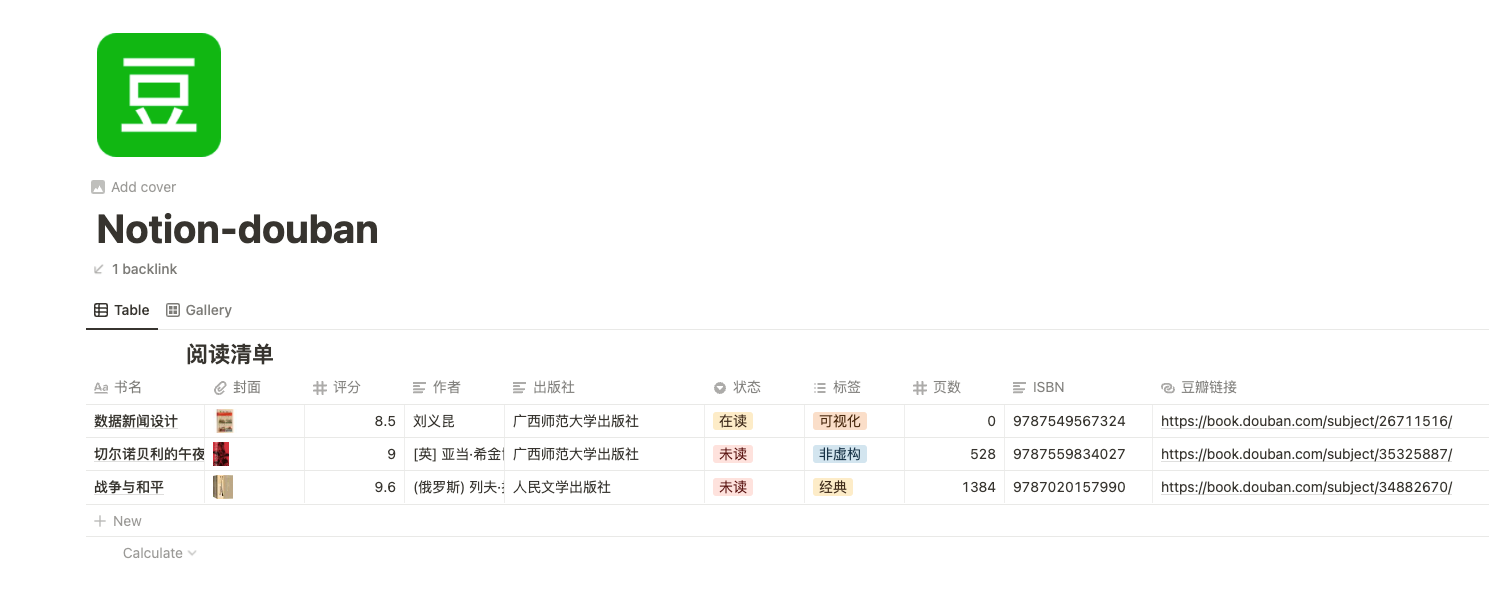
Notion 其实是提供了创建Database的API的,但我之前其实已经手动创建过了,所以这里就偷懒没写代码。我的数据表长这个样子:
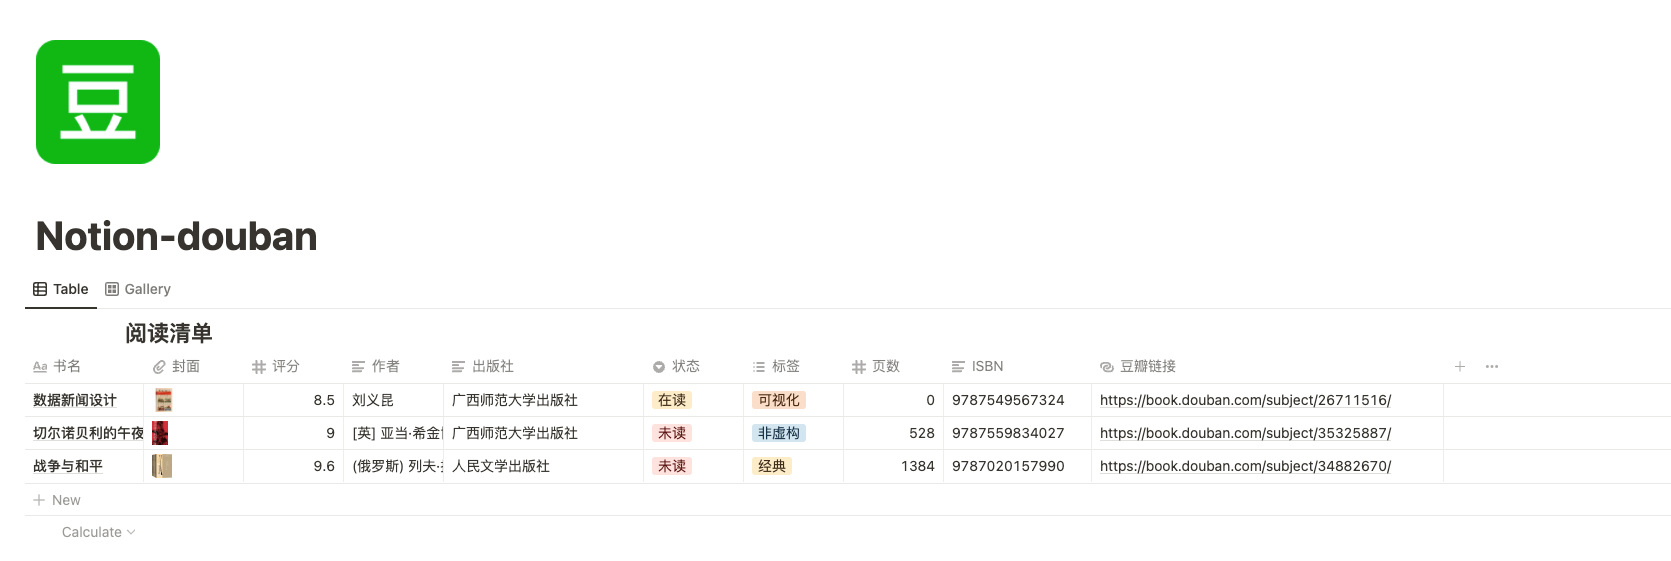
设计数据表
想偷懒的同学可以直接用我的模板:阅读清单
做好数据表之后需要邀请机器人,并授权:
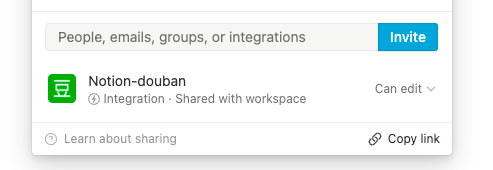
获取豆瓣读书数据
Notion API提供的是基于RESTful架构的接口,虽然官方文档提供的是JavaScript样例,但我自己写Python比较多,所以还是用Python进行开发,还有一个原因就是Python爬取豆瓣数据会更加容易。
def getInfo(url):
    header={
            'Accept': 'text/html,application/xhtml+xml,application/xml;q=0.9,image/webp,*/*;q=0.8',
            'Accept-Encoding': 'gzip, deflate, sdch',
            'Accept-Language': 'zh-CN,zh;q=0.8',
            'Connection': 'keep-alive',
            'User-Agent': 'Mozilla/5.0 (Windows NT 6.3; WOW64) AppleWebKit/537.36 (KHTML, like Gecko) Chrome/43.0.235'
        }

    r = requests.get(url=url, headers=header)
    soup = BeautifulSoup(r.text, 'lxml')
    # get info
    info = {}
    info['title'] = soup.h1.span.text
    infos = soup.find(id='info').find_all('span',attrs={'class':'pl'})

    for i in infos:
        if i.text.strip() == '作者':
            info['作者'] = i.next_sibling.next_sibling.text
        elif i.text == '出版社:':
            info['出版社'] = i.next_sibling.next_sibling.text
        else:
            info[i.text.strip().strip(':')] = i.next_sibling.text.strip()

    info['score'] = soup.find(class_='rating_num').text.strip()
    info['cover'] = soup.find(class_='nbg')['href'].strip()

    return info
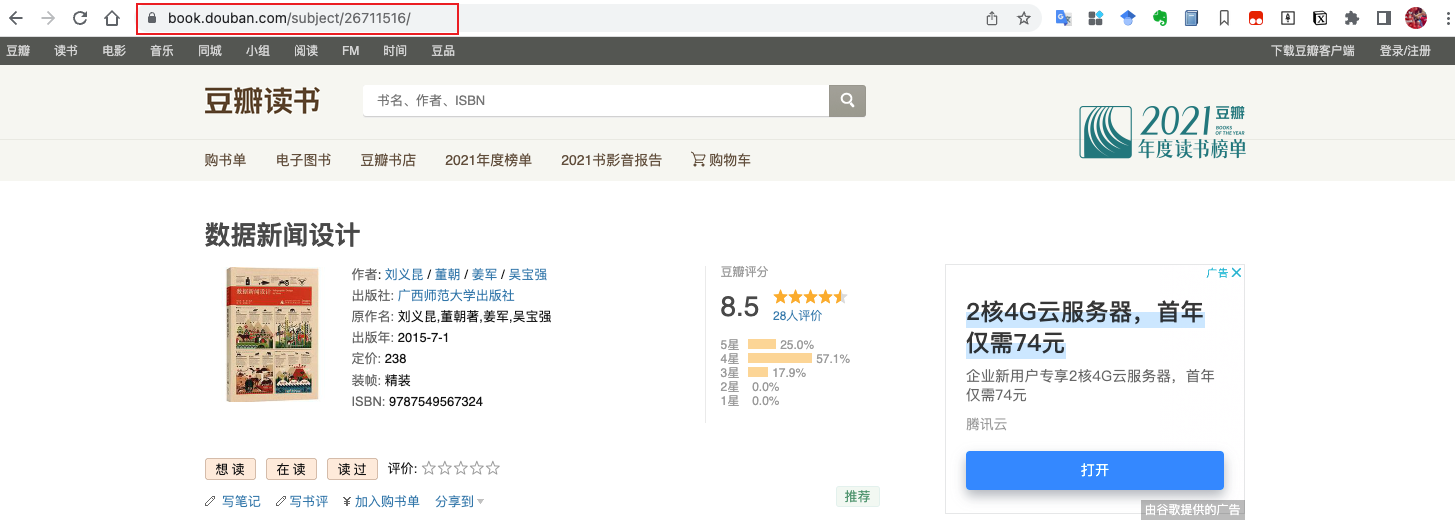
获取数据的程序非常简单,requests发送请求,BeautifulSoup解析html。这个函数需要的参数url就是豆瓣读书某本书详情页面的链接,如:
数据写入Notion
到这一步其实才开始用Notion API,简单来说就是构造请求,POST到指定的API就可以新建一条记录了。其中,构造请求的关键在于构造各字段(Property)。Notion中各类Property的values可以从property-value-object 中找到详细信息。比如Database的Name字段属于Title property,构造方式如下:
{
  "Name": {
    "title": [
      {
        "type": "text",
        "text": {
          "content": "The title"
        }
      }
    ]
  }
}
这里有一个小技巧,就是可以先通过程序查询指定页面中各字段的值来获取页面结构,然后直接修改相应的值就可以了。查询指定页面的字段结构,可以构造如下请求:
import requests
token = '***'
database_id = '***'
r = requests.request(
    "POST",
    "https://api.notion.com/v1/databases/" + database_id + "/query",
    headers={"Authorization": "Bearer " + token, "Notion-Version": "2022-02-22"},
)
print(r.text)
其中,token 就是上文创建机器人时Notion自动分配的Secrets ,database_id 就是需要查询的页面的id,页面的id可以直接从链接中找到,下如红框中的一串(从 / 到 ?中间 )就是id。

我截取了查询请求返回值的几个Property:
"页数": {
    "id": "U_TO",
    "type": "number",
    "number": 528
},
"书名": {
    "id": "title",
    "type": "title",
    "title": [
        {
            "type": "text",
            "text": {
                "content": "切尔诺贝利的午夜",
                "link": null
            },
            "annotations": {
                "bold": false,
                "italic": false,
                "strikethrough": false,
                "underline": false,
                "code": false,
                "color": "default"
            },
            "plain_text": "切尔诺贝利的午夜",
            "href": null
        }
    ]
},
"封面": {
    "id": "jZol",
    "type": "files",
    "files": [
        {
            "name": "https://img1.doubanio.com/view/subject/l/public/s33836089.jpg",
            "type": "external",
            "external": {
                "url": "https://img1.doubanio.com/view/subject/l/public/s33836089.jpg"
            }
        }
    ]
},
我们可以直接将对应的值替换成我们之前获取到的信息。这里面有很多字段是我们不需要的,比如“id”,或者"annotations" 。Notion会帮我们自动补全。
我构建的完整的Property如下:
body = {
      "parent": { "type": "database_id", "database_id":  database_id},
      "properties": {
          "书名": {
              "type": "title",
              "title": [{"type": "text", "text": {"content": info.get("title",' ')}}]
          },
          "豆瓣链接": {
              "url": url
          },
          "ISBN": {
              "type": "rich_text",
              "rich_text": [{"type": "text", "text": {"content": info.get("ISBN",'')}}]
          },
          "页数": {
              "number": int(info.get("页数",0))
          },
          "出版社": {
              "type": "rich_text",
              "rich_text": [{"type": "text", "text": {"content": info.get("出版社",' ')}}]
          },
          "评分": {
              "number": float(info["score"])
          },
          "作者": {
              "type": "rich_text",
              "rich_text": [{"type": "text", "text": {"content": info.get('作者','')}}]
          },
          "标签": {
              "type": "multi_select",
              "multi_select": [{"name": info.get('tag')}]
          },
          "封面": {
              "files": [
                  {
                      "type": "external",
                      "name": info['cover'],
                      "external": {"url": info['cover']}
                  }
              ]
          },
          "状态": {
              "type": "select",
              "select": {
                  "name": info.get('status'),
              }
          },
      },
  }
之后将这个Body作为请求的主体发送到相应的Notion API就可以在我们的数据表中添加一条新的记录啦。
re = requests.request(
        "POST",
        "https://api.notion.com/v1/pages",
        json= body,
        headers={"Authorization": "Bearer " + token, "Notion-Version": "2022-02-22"},

    )
完整代码可以从我的Github获得:Notion_douban
效果
最终的效果如下:
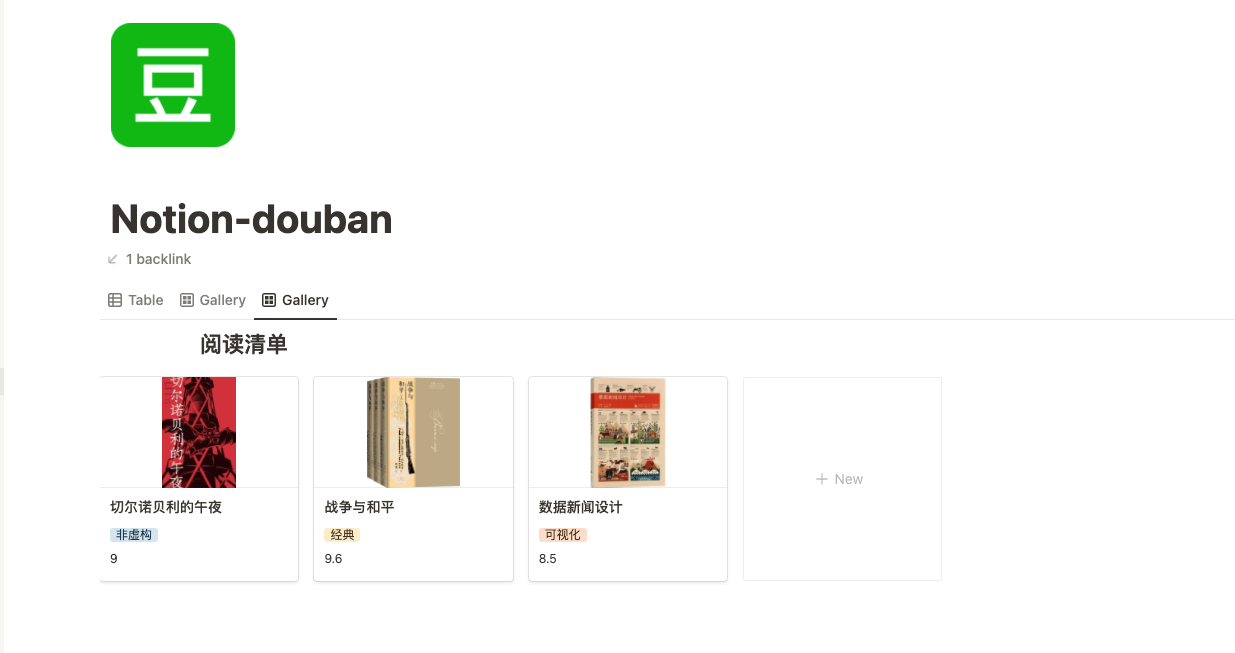
还可以添加一个Gallery View:


 浙公网安备 33010602011771号