
iOS多线程编程之创建线程
一、创建和启动线程简单说明
一个NSThread对象就代表一条线程
(1)创建、启动线程
1 2 | NSThread *thread = [[NSThread alloc] initWithTarget:self selector:@selector(run) object:nil];[thread start]; |
// 线程一启动,就会在线程thread中执行self的run方法
主线程相关用法
1 2 3 | + (NSThread *)mainThread; // 获得主线程- (BOOL)isMainThread; // 是否为主线程+ (BOOL)isMainThread; // 是否为主线程 |
其他用法
获得当前线程
1 | NSThread *current = [NSThread currentThread]; |
线程的调度优先级:调度优先级的取值范围是0.0 ~ 1.0,默认0.5,值越大,优先级越高
1 2 | + (double)threadPriority;+ (BOOL)setThreadPriority:(double)p; |
设置线程的名字
1 2 | - (void)setName:(NSString *)n;- (NSString *)name; |
其他创建线程的方式
(2)创建线程后自动启动线程
1 | [NSThread detachNewThreadSelector:@selector(run) toTarget:self withObject:nil]; |
(3)隐式创建并启动线程
1 | [self performSelectorInBackground:@selector(run) withObject:nil]; |
上述2种创建线程方式的优缺点
优点:简单快捷
缺点:无法对线程进行更详细的设置
二、代码示例
1.使用古老的方式创建

   YYViewController.m
10 #import "YYViewController.h"
11 #import <pthread.h>
14 @interface YYViewController ()
15 - (IBAction)btnClick;
16 @end
19 @implementation YYViewController
22 - (void)viewDidLoad
23 {
24     [super viewDidLoad];
25 }
28 //按钮的点击事件
29 - (IBAction)btnClick {
30     //1.获取当前线程
31     NSThread *current=[NSThread currentThread];
32     //主线程
33     NSLog(@"btnClick----%@",current);
34
35     //2.使用for循环执行一些耗时操作
36    pthread_t thread;
37     pthread_create(&thread, NULL, run, NULL);
38 }
41 //c语言函数
42 void *run(void *data)
43 {
44     //获取当前线程,是新创建出来的线程
45     NSThread *current=[NSThread currentThread];
48     for (int i=0; i<10000; i++) {
49         NSLog(@"btnClick---%d---%@",i,current);
50     }
51     return NULL;
52 }
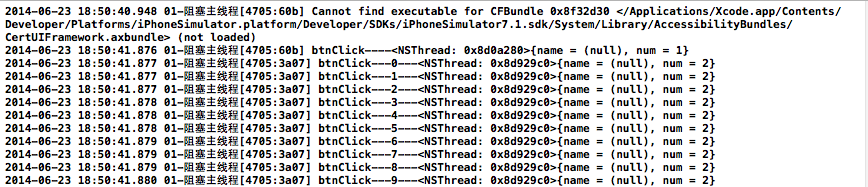
54 //多个线程,点击按钮执行按钮调用方法的时候,主线程没有被阻塞
56 @end
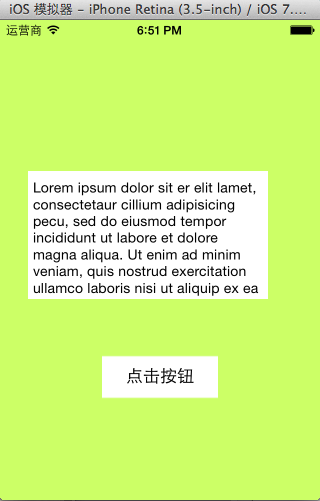
实现效果:
打印结果:
2.使用NSThread创建线程
  1 //
  2 //  YYViewController.m
  5 //  Created by apple on 14-6-23.
  6 //  Copyright (c) 2014年 itcase. All rights reserved.
  7 //
  8
  9 #import "YYViewController.h"
 10 #import <pthread.h>
 13 @interface YYViewController ()
 14 - (IBAction)btnClick;
 15 @end
 18 @implementation YYViewController
 20 - (void)viewDidLoad
 21 {
 22     [super viewDidLoad];
 23 }
 26 //按钮的点击事件
 27 - (IBAction)btnClick {
 28     //1.获取当前线程
 29     NSThread *current=[NSThread currentThread];
 30     //主线程
 31     NSLog(@"btnClick----%@",current);
 32
 33     //获取主线程的另外一种方式
 34    NSThread *main=[NSThread mainThread];
 35     NSLog(@"主线程-------%@",main);
 36
 37     //2.执行一些耗时操作
 38     [self creatNSThread];
 39 //    [self creatNSThread2];
 40 //    [self creatNSThread3];
 41 }
 44 /**
 45  * NSThread创建线程方式1
 46  * 1> 先创建初始化线程
 47  * 2> start开启线程
 48  */
 49 -(void)creatNSThread
 50 {
 51     NSThread  *thread=[[NSThread alloc]initWithTarget:self selector:@selector(run:) object:@"线程A"];
 52     //为线程设置一个名称
 53     thread.name=@"线程A";
 54      //开启线程
 55     [thread start];

 58     NSThread  *thread2=[[NSThread alloc]initWithTarget:self selector:@selector(run:) object:@"线程B"];
 59     //为线程设置一个名称
 60     thread2.name=@"线程B";
 61    //开启线程
 62     [thread2 start];
 63 }

 66 /**
 67  * NSThread创建线程方式2
 68 *创建完线程直接(自动)启动
 69  */
 70
 71 -(void)creatNSThread2
 72 {
 73 //    NSThread *thread=[NSThread detachNewThreadSelector:@selector(run:) toTarget:self withObject:@"创建完线程直接(自动)启动"];
 74
 75     [NSThread detachNewThreadSelector:@selector(run:) toTarget:self withObject:@"创建完线程直接(自动)启动"];
 76 }

 79 /**
 80  * NSThread创建线程方式3
 81  * 隐式创建线程, 并且直接(自动)启动
 82  */
 83
 84 -(void)creatNSThread3
 85 {
 86     //在后台线程中执行===在子线程中执行
 87     [self performSelectorInBackground:@selector(run:) withObject:@"隐式创建"];
 88 }

 92 -(void)run:(NSString *)str
 93 {
 94    //获取当前线程
 95     NSThread *current=[NSThread currentThread];
 96     //打印输出
 97     for (int i=0; i<10; i++) {
 98        NSLog(@"run---%@---%@",current,str);
 99     }
100 }
101 @end
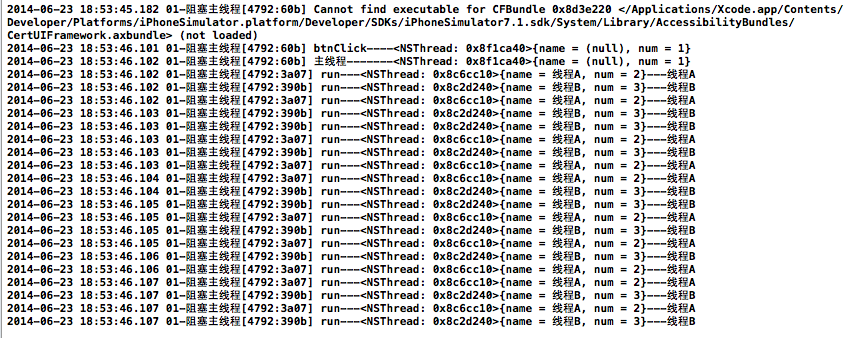
调用线程1,打印结果为:
调用线程2

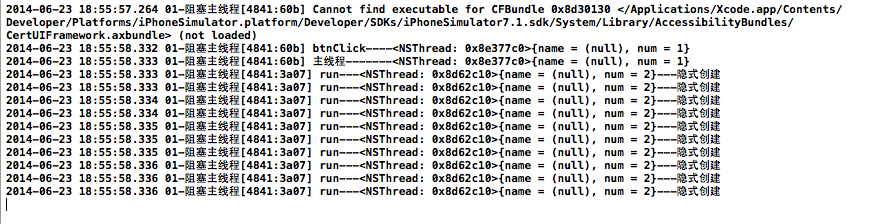
调用线程3


【推荐】国内首个AI IDE,深度理解中文开发场景,立即下载体验Trae
【推荐】编程新体验,更懂你的AI,立即体验豆包MarsCode编程助手
【推荐】抖音旗下AI助手豆包,你的智能百科全书,全免费不限次数
【推荐】轻量又高性能的 SSH 工具 IShell:AI 加持,快人一步
· AI与.NET技术实操系列:向量存储与相似性搜索在 .NET 中的实现
· 基于Microsoft.Extensions.AI核心库实现RAG应用
· Linux系列:如何用heaptrack跟踪.NET程序的非托管内存泄露
· 开发者必知的日志记录最佳实践
· SQL Server 2025 AI相关能力初探
· winform 绘制太阳,地球,月球 运作规律
· AI与.NET技术实操系列(五):向量存储与相似性搜索在 .NET 中的实现
· 超详细:普通电脑也行Windows部署deepseek R1训练数据并当服务器共享给他人
· 【硬核科普】Trae如何「偷看」你的代码?零基础破解AI编程运行原理
· 上周热点回顾(3.3-3.9)