


准备工作
1. 关于自定义
官方文档:https://docs.djangoproject.com/zh-hans/3.2/howto/custom-template-tags/
2. 路径配置
公用
1. 创建一个新的app,然后将自定义的模板标签和过滤器的python文件放置在新的app下;
2. app注册
某个app特有
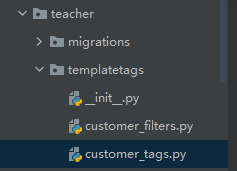
1. app目录下创建一个名为templatetags的文件夹(文件夹与包的差异在于文件夹内是否有__init__.py文件,若有则是包,无则为文件夹),所有templatetags文件夹中需要添加__init__.py文件,将其变成一个包。
2. 并在templatetage包中建立自定义过滤器customter_filters.py文件和自定义标签customter_tags.py文件
自定义模板过滤器
1. 定义
1. {{ 模板变量|过滤器[:字符串] }}
2. 过滤器是一个python函数,它有一个或者两个参数
3. 第一个参数 是传进来的模板变量
4. 第二个参数 可有可能没有 指向字符串参数
5. 自定义
customter_filter.py自定义过滤器

from django import template

register = template.Library()   # 变量名必须叫register

@register.filter('to_male') #--1
#@register.filter() #--2
def to_sex(value, arg='zh'):  #默认中文,在调用是可用不用提供
    change = {
        'zh': ('女', '男'),
        'en': ('Female', 'male')
    }
    return change[arg][int(value)]

# register.filter('to_male', to_sex) #--1    # 自定义过滤器注册
# register.filter(to_sex) #--2   #函数名和过滤器名相同时,可不同提供过滤器名
2. 注册
from django import template

register = template.Library()   # 变量名必须叫register

register.filter('to_male', to_sex)    # 自定义过滤器注册
a. 可按以上三步进行自定义过滤器注册
b. 在函数名与过滤器名不一致时,可采用#--1模式注册,需要提供过滤器名称,@采用的是装饰器模式直接注册
c. 在函数名与过滤器名一致时,可采用#--2模式注册,不用提供过滤器名称,直接采用函数名为过滤器名,同样可以直接采用装饰器进行注册。
3. 使用
首先需要导入自定义过滤器文件 {% load customer_filters %}
其次就是过滤器调用 <td>{{ student.sex|to_male:'zh' }}</td>
{% extends 'teacher/base.html' %}  <!--当前模板继承父模板base.html-->
{% load static %}  <!--#此处导入static后,将不再调用setting文件中的STATIC_URL = '/static/',直接调用STATICFILES_DIRS = [os.path.join(BASE_DIR, 'static')] -->
{% load customer_filters %}    #调用前需要导入自定义过滤器文件
{% block title %}
    <title>首页面</title>
{% endblock %}
{% block link %}
    <link rel="stylesheet" href="{% static 'teacher/index.css' %}">
{% endblock %}
{% block content %}
    <table>
        <tr>
            <th>序号</th>
            <th>姓名</th>
            <th>年龄</th>
            <th>性别</th>
        </tr>
        {% for student in students %}
        <tr {% if student.sex == '0' %}style="color:red;"{% endif %}>
            <td><a href="{% url 'teacher:detail' student.name %}">{{ forloop.counter }}</a></td>  <!-- forloop.counter0从0开始计数,没有0则从1开始计数-->
            <td>{{ student.name }}</td>
            <td>{{ student.age }}</td>
            <td>{{ student.sex|to_male:'zh' }}</td>   #调用方式,再默认'zh'时,可不用输入“:'zh'”
        </tr>
        {% endfor %}
    </table>
    模板过滤器:{{ lt.0|add:5 }}
{% endblock %}
自定义模板标签
模板标签可以做任何事
{% %}
1. 简单标签 django.template.Library.simple_tag()
1. 定义
from datetime import datetime
from django import template

register = template.Library()

#方式1:
#@register.simple_tag(name='current')
#def current_time():
#    return datetime.now().strftime('%Y年%m月%d日 %H:%M:%S')

#方式2:
#@register.simple_tag(name='current')
#def current_time(format_str):
#    return datetime.now().strftime(format_str)

#方式3:
@register.simple_tag(name='current', takes_context=True)
def current_time(context):
    format_str = context['format_str']
    return datetime.now().strftime(format_str)
2.注册
from django import template

register = template.Library()

@register.simple_tag(name='current')
上述三行代码表示标签的注册(方法同过滤器注册方式)
3.使用
{% extends 'teacher/base.html' %}  <!--当前模板继承父模板base.html-->
{% load static %}  <!--#此处导入static后,将不再调用setting文件中的STATIC_URL = '/static/',直接调用STATICFILES_DIRS = [os.path.join(BASE_DIR, 'static')] -->
{% load customer_filters %}
{% load customer_tags %}     #同样的,调用前需要导入自定义customer_tage文件
{% block title %}
    <title>首页面</title>
{% endblock %}
{% block link %}
    <link rel="stylesheet" href="{% static 'teacher/index.css' %}">
{% endblock %}
{% block content %}
    <table>
        <tr>
            <th>序号</th>
            <th>姓名</th>
            <th>年龄</th>
            <th>性别</th>
        </tr>
        {% for student in students %}
        <tr {% if student.sex == '0' %}style="color:red;"{% endif %}>
            <td><a href="{% url 'teacher:detail' student.name %}">{{ forloop.counter }}</a></td>  <!-- forloop.counter0从0开始计数,没有0则从1开始计数-->
            <td>{{ student.name }}</td>
            <td>{{ student.age }}</td>
            <td>{{ student.sex|to_male:'zh' }}</td>
        </tr>
        {% endfor %}
    </table>
    模板过滤器:{{ lt.0|add:5 }}
    模板过滤器:{{ lt|first }}
    <h3>当前时间:{{ now }}</h3>
    <h3>当前时间+过滤器:{{ now|date:'Y年m月d日 H:i:s' }}</h3>
    {# #方式1:<h3>当前时间+自定义模板标签:{% current '%Y年%m月%d日 %H:%M:%S' %}</h3> #}
    {# #方式2:<h3>当前时间+自定义模板标签:{% current format_str %}</h3> #}
    {# #方式3: #}
    <h3>当前时间+自定义模板标签:{% current %}</h3>      #方式1/2/3对应三种标签注册方法
    <h3>{{ format_str }}</h3>
{% endblock %}
方式3需要在views.py文件中对context输出项目进行定义
from django.shortcuts import render, redirect, reverse
from django.http import HttpResponse
from datetime import datetime

def index(request):
    now = datetime.now()
    #now = now.strftime('%Y年%m月%d日 %H:%M:%S')  #对时间呈现方式进行格式化
    format_str = '%Y年%m月%d日 %H:%M:%S'
    lt = [1, 2, 3]
    dt = {'name': 'tiger', 'age': 18}
    js = '<script>alert("1")</script>'
    html = '<h1>我是安全的</h1>'
    students =[
        {'name':'tager', 'age':18, 'sex':'1', 'course':['python', 'music', 'java', '前端']},
        {'name': 'liuda', 'age': 19, 'sex': '0', 'course':['python', 'music', 'java', '前端']},
        {'name': 'lier', 'age': 20, 'sex': '1', 'course':['python', 'music', 'java', '前端']},
        {'name': 'zhangsan', 'age': 18, 'sex': '0', 'course':['python', 'music', 'java', '前端']},
        {'name': 'wangwu', 'age': 21, 'sex': '1', 'course':['python', 'music', 'java', '前端']},
    ]
    for i in students:
        value = i['course']
    def func():
        return '函数'

    return render(request, 'teacher/index.html', context={
        'now': now,
        'lt': lt,
        'dt': dt,
        'func': func,
        'js': js,
        'html': html,
        'students': students,
        'format_str': format_str,
        'value': value
    })
4. 引用上下文变量
a. format_str:在views.py定义---->通过context传递到模板文件---->通过自定义模板标签传递到自定义模板标签函数
b. takes_context=True 实现从views.py中context中获取需要的变量,第一个参数必须是context,且takes_context必须为True
#方式3:
@register.simple_tag(name='current', takes_context=True)
def current_time(context):
    format_str = context['format_str']
    return datetime.now().strftime(format_str)
2. 包含标签 django.template.Library.inclusion_tag()
1. 定义
from datetime import datetime
from django import template

register = template.Library()

#方式1:
#@register.inclusion_tag('teacher/show_list.html')
#def show_list(value):   #定义一个函数,接收模板变量
#    return {'ls': value}

#方式2:
@register.inclusion_tag('teacher/show_list.html')
def show_list(value, style='link'):   #定义一个函数,接收模板变量,style默认link,html文件调用时,若为link,可不同提供
    return {'ls': value, 'style': style}

#方式3:
#@register.inclusion_tag('teacher/show_list.html', takes_context=True)
#def show_list(context, style='link'):   #定义一个函数,接收模板变量,style默认link,html文件调用时,若为link,可不同提供
#    value = context['value']
#    return {'ls': value, 'style': style}
2.注册
from django import template

register = template.Library()

@register.inclusion_tag('teacher/show_list.html')
上述三行代码表示标签的注册(方法同过滤器注册方式)
3.使用
show_list.html代码
{% if style == 'button' %}
<div>
    {% for l in ls %}
    <button>{{ l }}</button>
    {% endfor %}
</div>

{% elif style == 'link' %}
<div>
    {% for l in ls %}
    <a>{{ l }}</a>
    {% endfor %}
</div>

{% else %}
<!--方式1:-->
<ul>
    {% for l in ls %}
    <li>{{ l }}</li>
    {% endfor %}
</ul>

{% endif %}
index.html代码
tends 'teacher/base.html' %}  <!--当前模板继承父模板base.html-->
{% load static %}  <!--#此处导入static后,将不再调用setting文件中的STATIC_URL = '/static/',直接调用STATICFILES_DIRS = [os.path.join(BASE_DIR, 'static')] -->
{% load customer_filters %}
{% load customer_tags %}    #同样需要导入自定义标签customer_tages文件
{% block title %}
    <title>首页面</title>
{% endblock %}
{% block link %}
    <link rel="stylesheet" href="{% static 'teacher/index.css' %}">
{% endblock %}
{% block content %}
    <table>
        <tr>
            <th>序号</th>
            <th>姓名</th>
            <th>年龄</th>
            <th>性别</th>
            <th>选课</th>
        </tr>
        {% for student in students %}
        <tr {% if student.sex == '0' %}style="color:red;"{% endif %}>
            <td><a href="{% url 'teacher:detail' student.name %}">{{ forloop.counter }}</a></td>  <!-- forloop.counter0从0开始计数,没有0则从1开始计数-->
            <td>{{ student.name }}</td>
            <td>{{ student.age }}</td>
            <td>{{ student.sex|to_male:'zh' }}</td>
            {# <td>{{ student.course }}</td> #}
            <td>
            {# 方式1:{% show_list student.course %} #}
            {# 方式2: #}
            {% show_list student.course style='button' %}   #同样的三种方式调用
            {# 方式3:{% show_list style='button' %} #}
        #第三种方式未演示,参考简单标签模式编写,代码错误无法正常显示,在views.py文件添加context对应项目输出后OK
            </td>
        </tr>
        {% endfor %}
    </table>
    模板过滤器:{{ lt.0|add:5 }}
    模板过滤器:{{ lt|first }}
    <h3>当前时间:{{ now }}</h3>
    <h3>当前时间+过滤器:{{ now|date:'Y年m月d日 H:i:s' }}</h3>
    {# #方式1:<h3>当前时间+自定义模板标签:{% current '%Y年%m月%d日 %H:%M:%S' %}</h3> #}
    {# #方式2:<h3>当前时间+自定义模板标签:{% current format_str %}</h3> #}
    {# #方式3: #}
    <h3>当前时间+自定义模板标签:{% current %}</h3>
    <h3>{{ format_str }}</h3>
{% endblock %}
同简单标签一样,views.py文件中需要对context输出项目进行定义
from django.shortcuts import render, redirect, reverse
from django.http import HttpResponse
from datetime import datetime

def index(request):
    now = datetime.now()
    #now = now.strftime('%Y年%m月%d日 %H:%M:%S')  #对时间呈现方式进行格式化
    format_str = '%Y年%m月%d日 %H:%M:%S'
    lt = [1, 2, 3]
    dt = {'name': 'tiger', 'age': 18}
    js = '<script>alert("1")</script>'
    html = '<h1>我是安全的</h1>'
    students =[
        {'name':'tager', 'age':18, 'sex':'1', 'course':['python', 'music', 'java', '前端']},
        {'name': 'liuda', 'age': 19, 'sex': '0', 'course':['python', 'music', 'java', '前端']},
        {'name': 'lier', 'age': 20, 'sex': '1', 'course':['python', 'music', 'java', '前端']},
        {'name': 'zhangsan', 'age': 18, 'sex': '0', 'course':['python', 'music', 'java', '前端']},
        {'name': 'wangwu', 'age': 21, 'sex': '1', 'course':['python', 'music', 'java', '前端']},
    ]
    for i in students:
        value = i['course']
    def func():
        return '函数'

    return render(request, 'teacher/index.html', context={
        'now': now,
        'lt': lt,
        'dt': dt,
        'func': func,
        'js': js,
        'html': html,
        'students': students,
        'format_str': format_str,
        'value': value
    })
4. 引用上下文变量
a. format_str:在views.py定义---->通过context传递到模板文件---->通过自定义模板标签传递到自定义模板标签函数
b. takes_context=True 实现从views.py中context中获取需要的变量,第一个参数必须是context,且takes_context必须为True
总结:
1. 可以接受任意位置、关键字参数
2. 通过空格分离
3. 简单标签:return什么页面直接展示什么
4. 包含标签:接受数据,把数据通过另一个模板进行渲染后再返回回来,哪里调用,哪里显示。


【推荐】国内首个AI IDE,深度理解中文开发场景,立即下载体验Trae
【推荐】编程新体验,更懂你的AI,立即体验豆包MarsCode编程助手
【推荐】抖音旗下AI助手豆包,你的智能百科全书,全免费不限次数
【推荐】轻量又高性能的 SSH 工具 IShell:AI 加持,快人一步
· winform 绘制太阳,地球,月球 运作规律
· 震惊!C++程序真的从main开始吗?99%的程序员都答错了
· AI与.NET技术实操系列(五):向量存储与相似性搜索在 .NET 中的实现
· 超详细:普通电脑也行Windows部署deepseek R1训练数据并当服务器共享给他人
· 【硬核科普】Trae如何「偷看」你的代码?零基础破解AI编程运行原理