


centos7 环境安装elasticsearch
1、elasticserach官网下载对应的tar.gz 压缩包
https://www.elastic.co/cn/downloads/elasticsearch

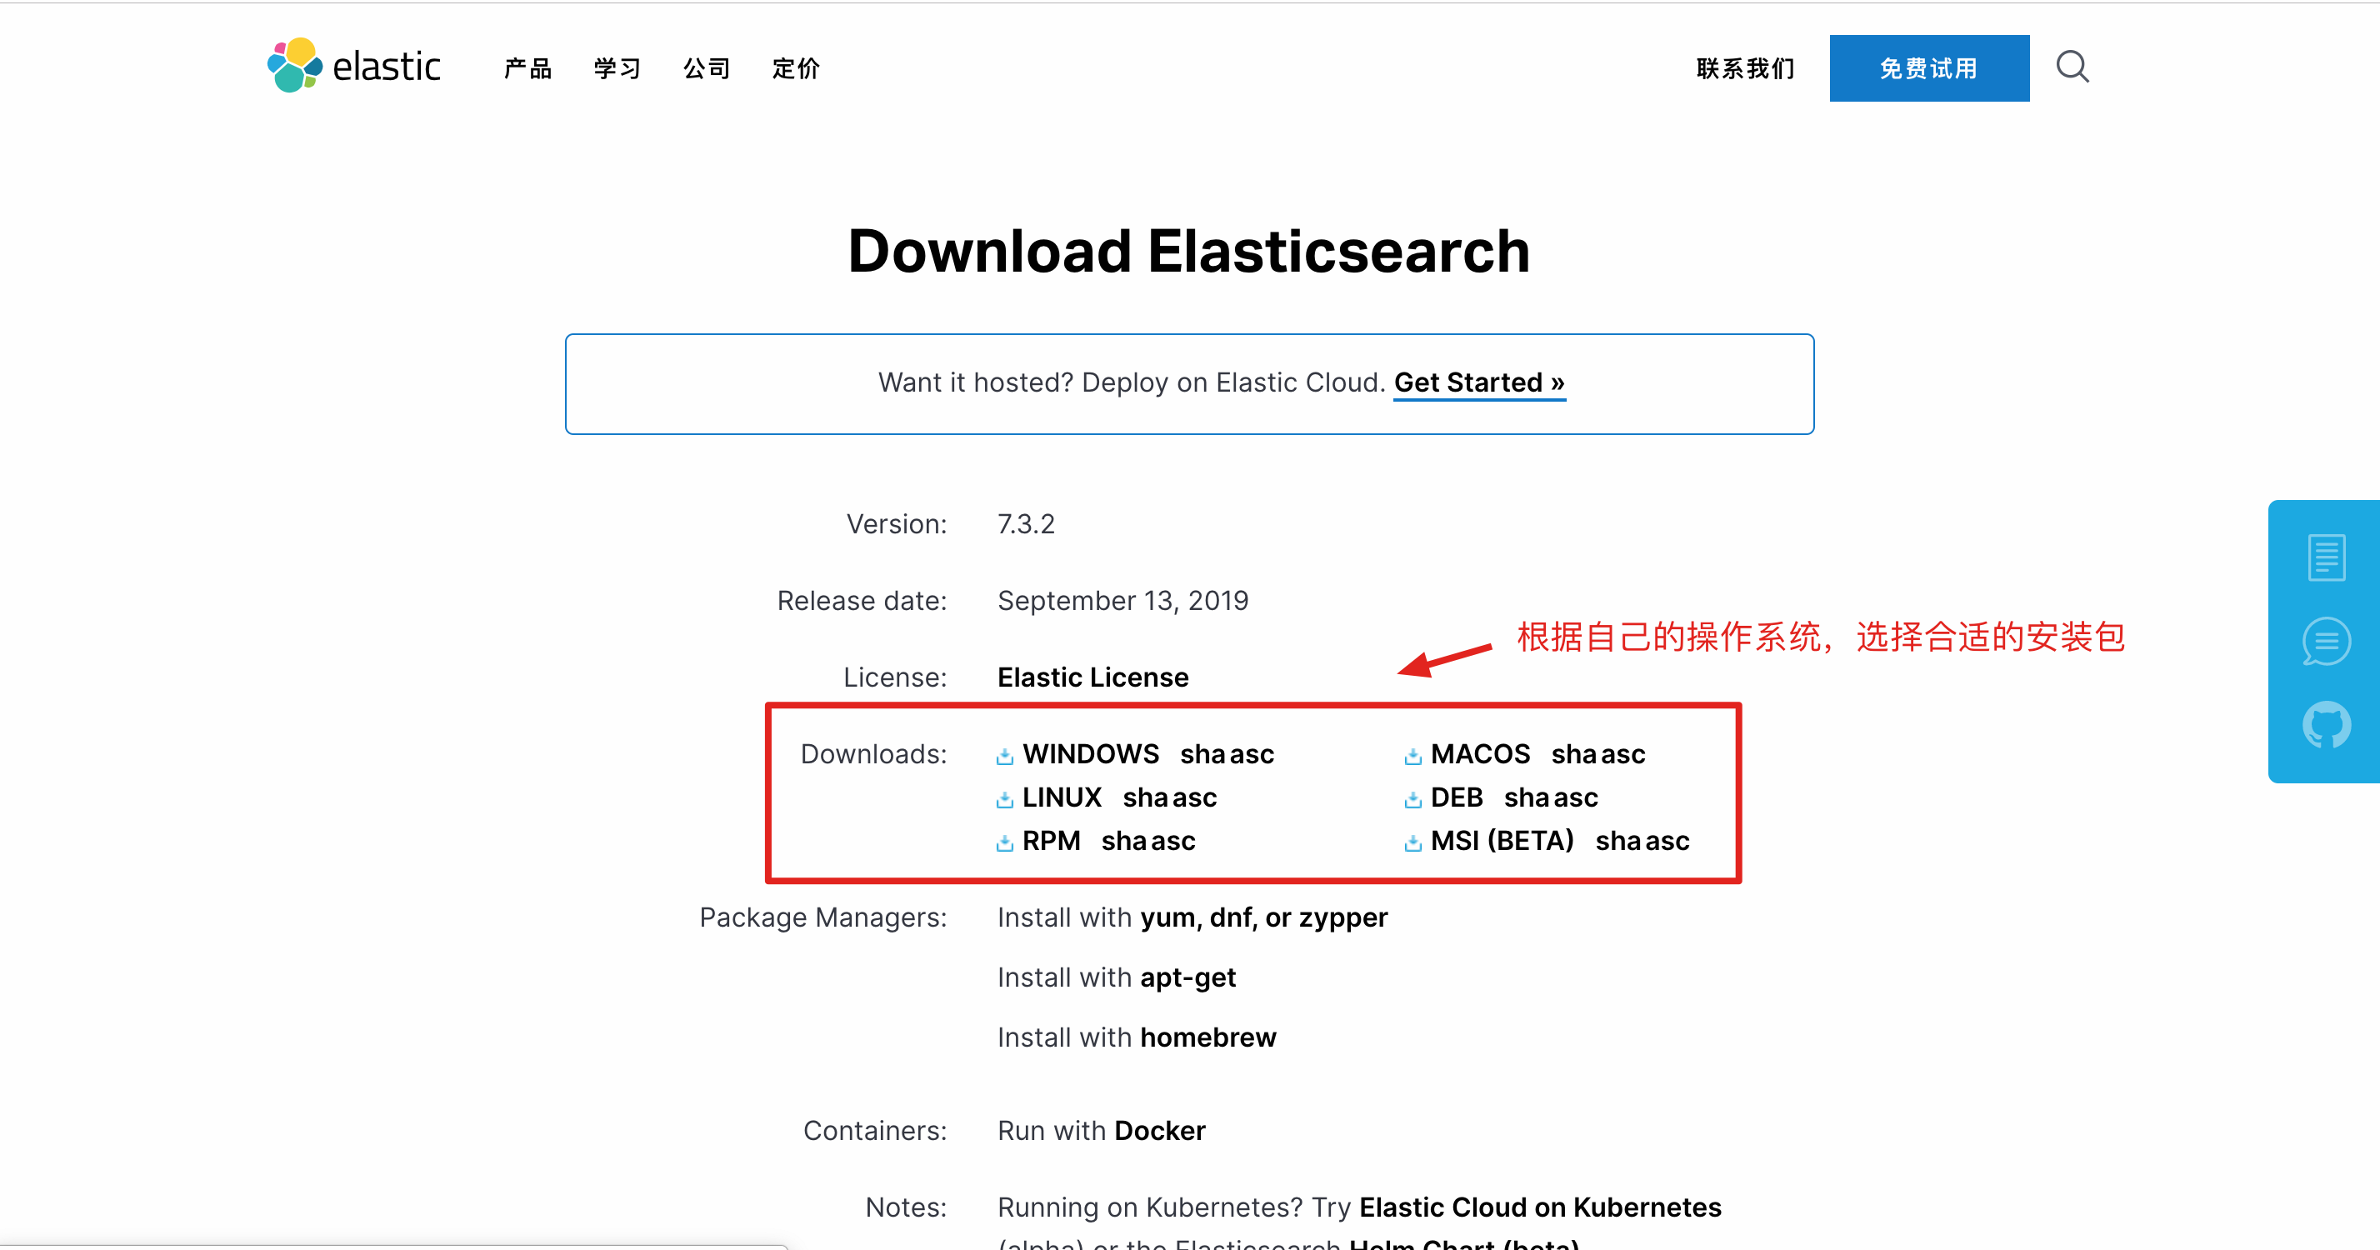
2、下载成功后,解压到指定目录
tar -zxvf elasticsearch-7.9.1-linux-x86_64.tar.gz
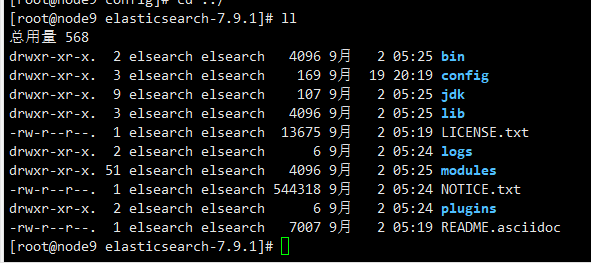
3、进入解压后目录,解压后目录结构如下:
4、添加用户组和用户
elastic 无法直接从root用户直接启动,所以先添加用户
groupadd elsearch
useradd elsearch -g elsearch -p es123456
5、查看新创建的用户、组cat /etc/passwd

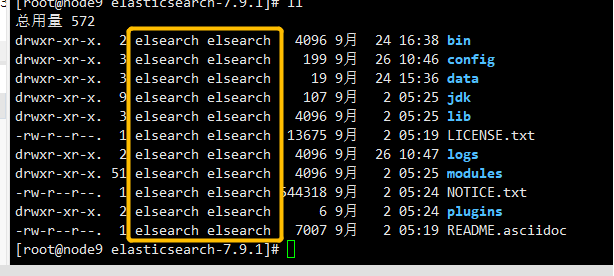
6、#chown 用户名 目录名|文件名
chown -R elsearch:elsearch elasticsearch-7.9.1
Elasticsearch 目录、配置文件说明、注意点
7、这里大概解答下各个目录、配置文件的作用:
| 目录 | 配置文件 | 描述 |
| bin | 放置脚本文件,如启动脚本elasticsearch,插件安装脚本等。 | |
| config | elasticsearch.yml | elasticsearch配置文件,如集群配置、jvm配置等。 |
| jdk | Java运行环境 | |
| data | path.data | 数据持久化文件 |
| lib | 依赖相关类库 | |
| logs | path.log | 日志文件 |
| modules | 包含的所有ES模块 | |
| plugins | 包含的所有已安装 |
注意点:
• 有些童鞋的机器内存可能不够,就需要修改 JVM 参数,配置文件路径为 config/jvm.options,ES V7.1 版本默认为 1g, 老版本为2g, 你可以自行修改。
• Xmx 和Xms 数值请设置相同;
• Xmx 不要超过机器内存的 50%;
内存总量不要超过 30GB, 参见官方文档 https://www.elastic.co/cn/blog/a-heap-of-trouble;
8、-- 创建目录
mkdir -p ./bigdata/es_work_space/elasticsearch-7.9.1/data
9、#同时修改数据目录权限
chown -R elsearch:elsearch bigdata
cd config
10、进入config目录、修改elasticsearch.yml配置文件
vim elasticsearch.yml
elasticsearch配置
1、配置网络访问地址
2、配置集群单节点模式
cluster.name: 集群名称,具有相同集群名称的节点可以组成一个集群
node.name : 节点名称
node.master : 当前节点是否设置为主节点(候选节点)
node.data : 当前节点是否为数据节点
node.ingest : 当前节点是否为预处理任务节点
node.ml : 当前节点是否为机器学习节点
cluster.name: node-1 #集群名称(部署集群时,此名称在所有节点中要相同)
node.name: node9 #节点名称(在集群中节点此名称在所有节点中要唯一)
path.data: /xxxx/xxxx #数据存放路径
path.log: /xxxx/xxxx #日志存放路径
network.host: 0.0.0.0 #本机IP地址(设置可以访问的ip地址)
network.publish_host: xx.xx.xx.xx #本机IP地址(设置节点访问的ip地址)
http.port: 9200 #es暴露对外的端口
discovery.seed_hosts: [xx.xx.xx.xx] #设置本机IP地址
cluster.initial_master_nodes: ["node-1"] #本机的节点


注意:如果是集群"node-1" 必须唯一、找到 默认是有注释的,把注释去掉 后保存 ,
如果节点不是master节点,也不是data节点,也不是ingest节点,也不是ml节点,那么它只能是协调节点(coordinating node),只用于转发请求,不处理实际数据
path.data : 数据文件存储路径
path.logs : 日志文件存储路径
bootstrap.memory_lock : 启动时是否锁定内存
network.host : 绑定的主机名或地址(如设置为服务器的内网地址,可供网络访问,如果设置为127.0.0.1那只能本地访问)
http.port : 对外提供的http访问端口(默认为9200)
transport.port: 用于集群中与其他节点通信的端口(默认为9300)
discovery.seed_hosts : 集群的节点地址列表(以7.2有以下的低版本为discovery.zen.ping.unicast.hosts)
cluster.initial_master_nodes : 集群初始化时主节点的侯选节点列表(即可参与主节点选举的节点列表)
11、切换用户、es只允许使用普通用户启动
su elsearch
./elasticsearch -d
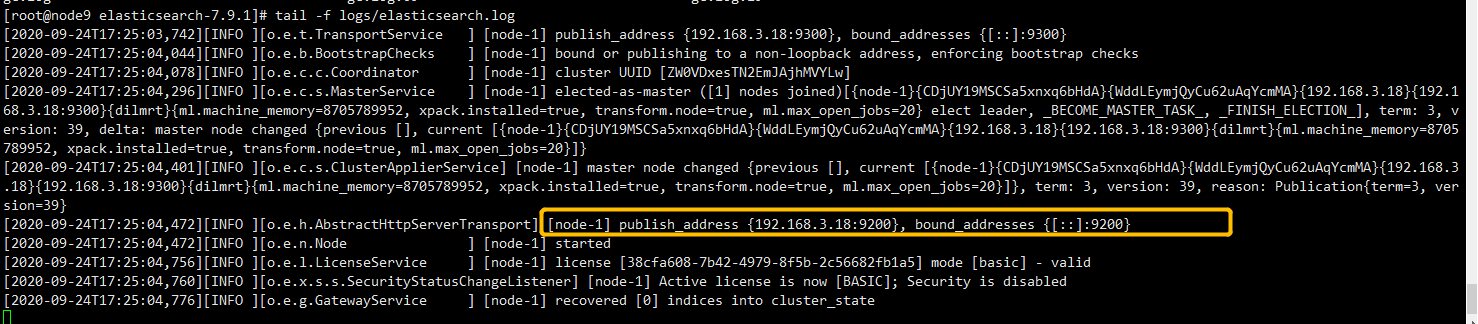
查看后台运行日志
tail -f logs/elasticsearch.log
以下是常见错误的解决
Elasticse报错-org.elasticsearch.bootstrap.BootstrapException: java.nio.file.AccessDeniedException

 1     Exception in thread "main" org.elasticsearch.bootstrap.BootstrapException: java.nio.file.AccessDeniedException: /usr/local/elasticsearch/elasticsearch-7.1.0/config/elasticsearch.keystore
 2
 3     Likely root cause: java.nio.file.AccessDeniedException: /usr/local/elasticsearch/elasticsearch-7.1.0/config/elasticsearch.keystore
 4
 5             at sun.nio.fs.UnixException.translateToIOException(UnixException.java:84)
 6
 7             at sun.nio.fs.UnixException.rethrowAsIOException(UnixException.java:102)
 8
 9             at sun.nio.fs.UnixException.rethrowAsIOException(UnixException.java:107)
10
11             at sun.nio.fs.UnixFileSystemProvider.newByteChannel(UnixFileSystemProvider.java:214)
12
13             at java.nio.file.Files.newByteChannel(Files.java:361)
14
15             at java.nio.file.Files.newByteChannel(Files.java:407)
16
17             at org.apache.lucene.store.SimpleFSDirectory.openInput(SimpleFSDirectory.java:77)
18
19             at org.elasticsearch.common.settings.KeyStoreWrapper.load(KeyStoreWrapper.java:206)
20
21             at org.elasticsearch.bootstrap.Bootstrap.loadSecureSettings(Bootstrap.java:224)
22
23             at org.elasticsearch.bootstrap.Bootstrap.init(Bootstrap.java:289)
24
25             at org.elasticsearch.bootstrap.Elasticsearch.init(Elasticsearch.java:159)
26
27             at org.elasticsearch.bootstrap.Elasticsearch.execute(Elasticsearch.java:150)
28
29             at org.elasticsearch.cli.EnvironmentAwareCommand.execute(EnvironmentAwareCommand.java:86)
30
31             at org.elasticsearch.cli.Command.mainWithoutErrorHandling(Command.java:124)
32
33             at org.elasticsearch.cli.Command.main(Command.java:90)
34
35             at org.elasticsearch.bootstrap.Elasticsearch.main(Elasticsearch.java:115)
36
37             at org.elasticsearch.bootstrap.Elasticsearch.main(Elasticsearch.java:92)
38
39     Refer to the log for complete error details.
解决办法:切换到root用户修改文件elasticsearch.keystore权限
执行如下命令:
chown -R elsearch:elsearch elasticsearch.keystore
问题描述:
启动Elasticsearch 时报错如下:
1     [3] bootstrap checks failed
2
3     [1]: max file descriptors [4096] for elasticsearch process is too low, increase to at least [65535]
4
5     [2]: max virtual memory areas vm.max_map_count [65530] is too low, increase to at least [262144]
6
7     [3]: the default discovery settings are unsuitable for production use; at least one of [discovery.seed_hosts, discovery.seed_providers, cluster.initial_master_nodes] must be configured

Elasticsearch 服务需要大量的虚拟内存支撑,系统默认的最大虚拟内存是 65530, 而 ES 至少需要 262144.
解决办法:
设置虚拟内存大小,此设置需要重启系统
运行elasticsearch需要vm.max_map_count至少需要262144内存
切换到root用户修改配置sysctl.conf
vi /etc/sysctl.conf
在尾行添加以下内容
vm.max_map_count=262144
并执行命令
sysctl -p
12、Elasticsearch 报错如下:
1 max file descriptors [4096] for elasticsearch process is too low, increase to at least [65535]

解决办法:
13、编辑 /etc/security/limits.conf,追加以下内容
// 文件句柄数
* soft nofile 65536
* hard nofile 65536
elsearch soft memlock unlimited
elsearch hard memlock unlimited
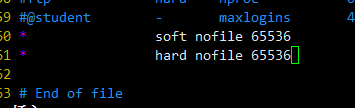

此文件修改后需要退出用户,重新登录才会生效。
14、登录后使用 ulimit -Hn 查看
ulimit -Hn

15、验证ES服务是否可用
通过 jps 命令查看当前系统中运行的所有java 进程

16、查看日志若出现如下信息则说明启动成功

17、开放指定端口
1 2 3 4 5 6 7 8 9 10 11 12 13 | firewall-cmd --add-port=9200/tcp --permanent重载入添加的端口firewall-cmd --reload查看指定端口是否已经开放firewall-cmd --query-port=9200/tcp移除指定端口firewall-cmd --permanent --remove-port=9200/tcp |
18、查询开放的端口列表
1 2 3 4 5 6 7 8 9 | firewall-cmd --zone=public --list-ports查看防火墙状态 systemctl status firewalld开启防火墙 systemctl start firewalld关闭防火墙 systemctl stop firewalld重启防火墙 service firewalld start |
19、在浏览器中访问

 1 {
 2     "name": "node-1",
 3     "cluster_name": "elasticsearch",                # 当前集群的名称, 同一集群中要保证一致
 4     "cluster_uuid": "ZW0VDxesTN2EmJAjhMVYLw",
 5     "version": {
 6     "number": "7.9.1",                                # 当前运行的ES的版本号
 7     "build_flavor": "default",
 8     "build_type": "tar",
 9     "build_hash": "083627f112ba94dffc1232e8b42b73492789ef91",
10     "build_date": "2020-09-01T21:22:21.964974Z",
11     "build_snapshot": false,                        # 当前运行的版本是不是从源代码构建而来
12     "lucene_version": "8.6.2",                        # 当前ES底层的Lucene的版本号
13     "minimum_wire_compatibility_version": "6.8.0",
14     "minimum_index_compatibility_version": "6.0.0-beta1"
15     },
16     "tagline": "You Know, for Search"
17 }
或者在命令窗口执行如下命令:
curl -X GET http://ip:9200/

健康状态检测
http://ip:9200/_cat/health
c
20、关闭与重启服务
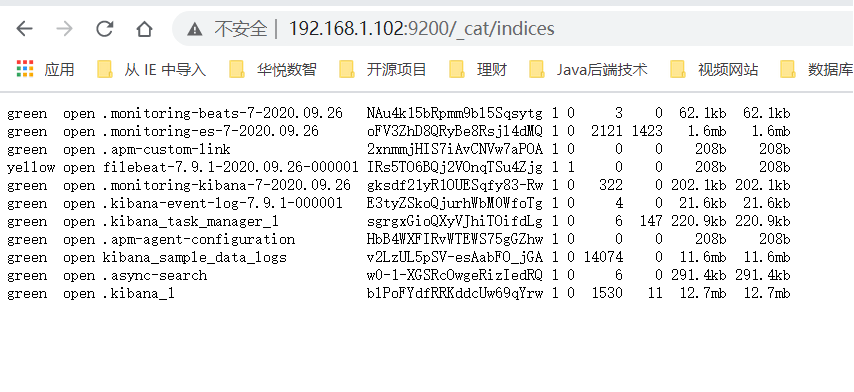
21、查看索引
http://ip:9200/_cat


【推荐】国内首个AI IDE,深度理解中文开发场景,立即下载体验Trae
【推荐】编程新体验,更懂你的AI,立即体验豆包MarsCode编程助手
【推荐】抖音旗下AI助手豆包,你的智能百科全书,全免费不限次数
【推荐】轻量又高性能的 SSH 工具 IShell:AI 加持,快人一步
· AI与.NET技术实操系列:基于图像分类模型对图像进行分类
· go语言实现终端里的倒计时
· 如何编写易于单元测试的代码
· 10年+ .NET Coder 心语,封装的思维:从隐藏、稳定开始理解其本质意义
· .NET Core 中如何实现缓存的预热?
· 25岁的心里话
· 闲置电脑爆改个人服务器(超详细) #公网映射 #Vmware虚拟网络编辑器
· 零经验选手,Compose 一天开发一款小游戏!
· 通过 API 将Deepseek响应流式内容输出到前端
· AI Agent开发,如何调用三方的API Function,是通过提示词来发起调用的吗