OPENCV入门学习(二)--------OPENCV入门实用函数介绍
OPENCV入门学习(二)--------OPENCV基本函数介绍
1、bitwise()
import cv2 as cv
import numpy as np

blank = np.zeros((400,400), dtype='uint8')
#先创建一个长方形和圆形
rectangle = cv.rectangle(blank.copy(), (30,30), (370,370), 255, -1)
circle = cv.circle(blank.copy(), (200,200), 200, 255, -1)

cv.imshow('Rectangle', rectangle)
cv.imshow('Circle', circle)
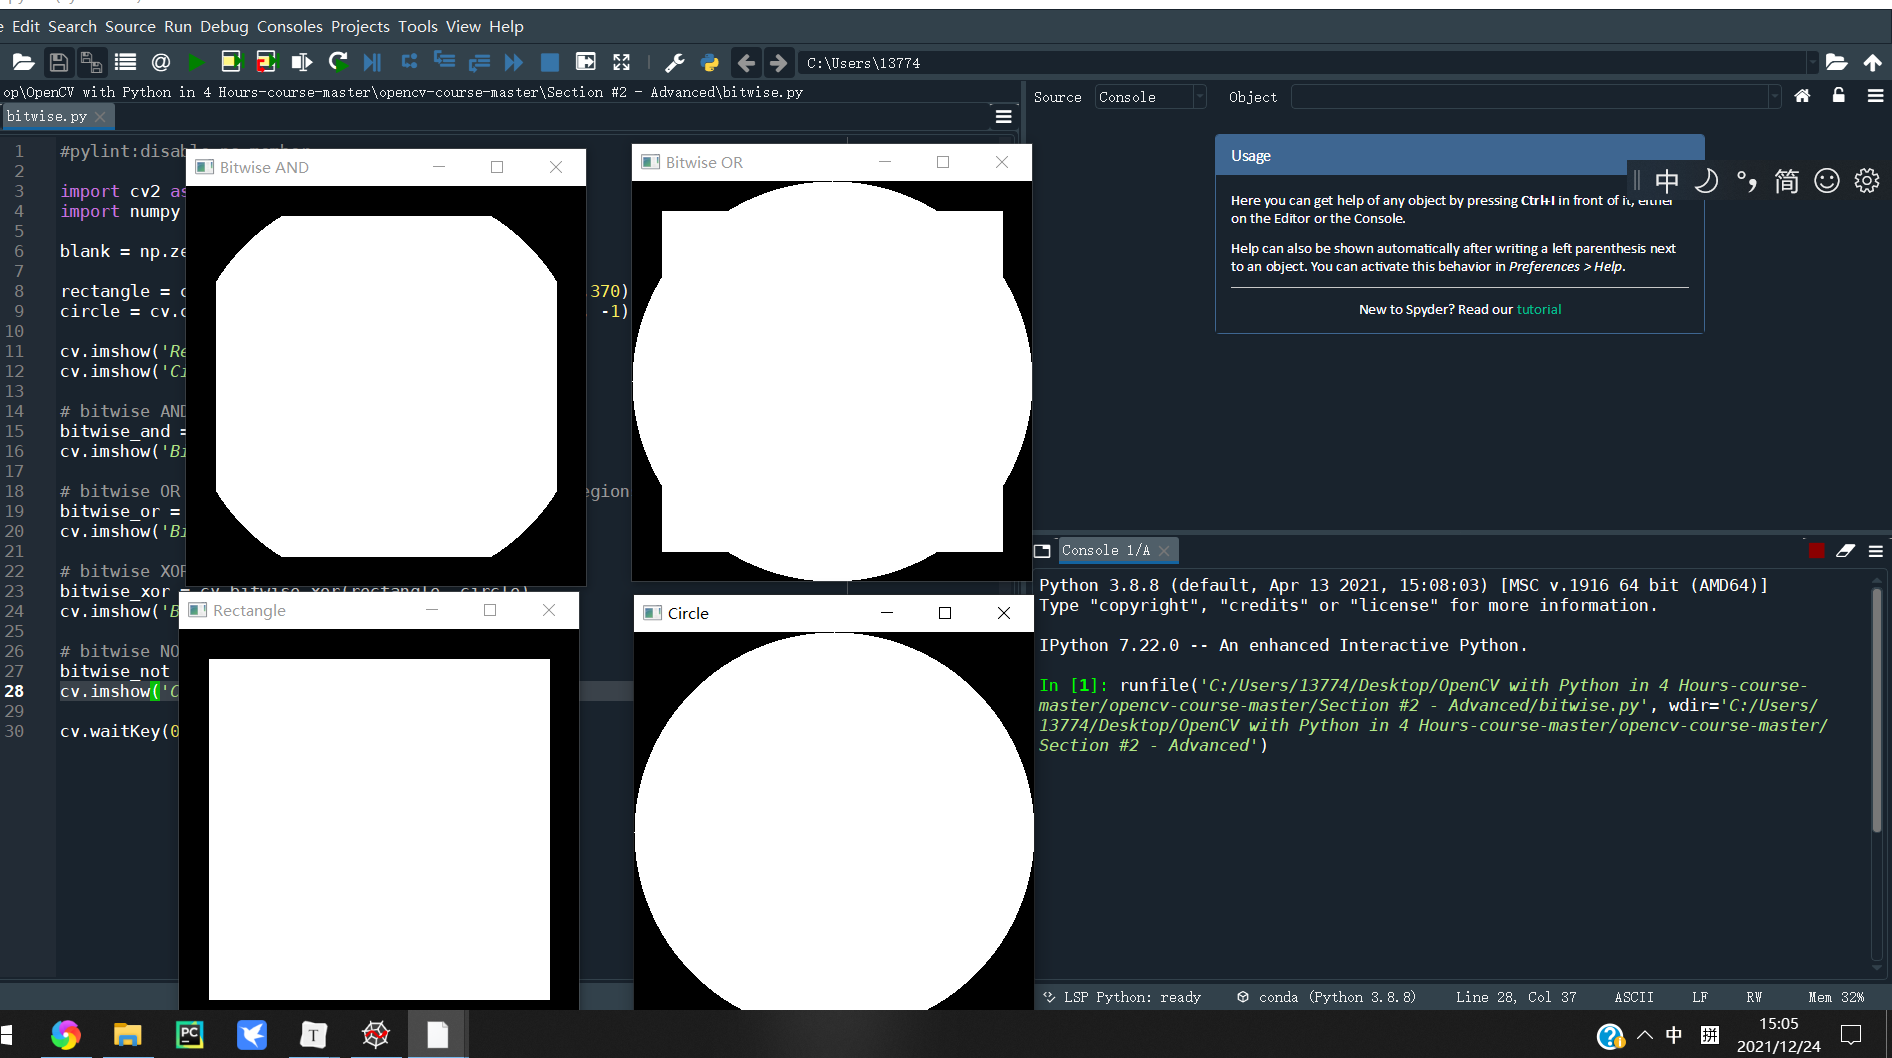
在对两张图片进行OR 和AND 运算,顾名思义,结果如下图,一目了然
bitwise_and = cv.bitwise_and(rectangle, circle)
cv.imshow('Bitwise AND', bitwise_and)

# bitwise OR --> non-intersecting and intersecting regions
bitwise_or = cv.bitwise_or(rectangle, circle)
cv.imshow('Bitwise OR', bitwise_or)
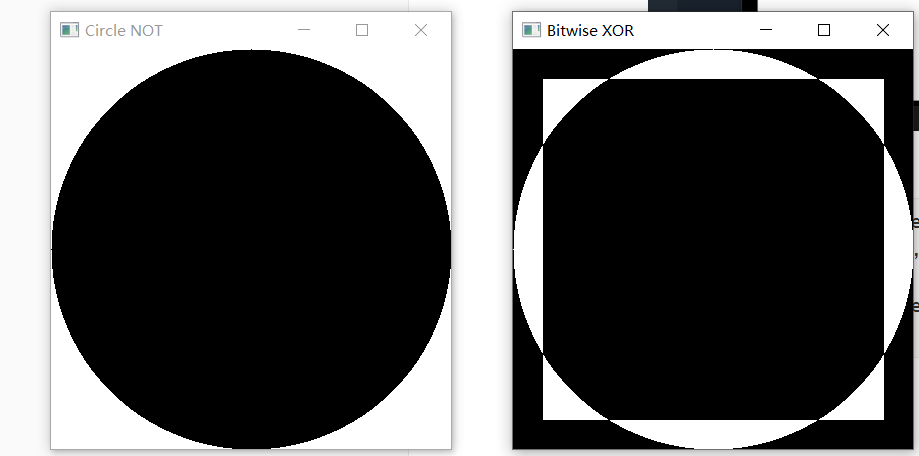
再就是异或运算和非运算
bitwise_xor = cv.bitwise_xor(rectangle, circle)
cv.imshow('Bitwise XOR', bitwise_xor)

bitwise_not = cv.bitwise_not(circle)
cv.imshow('Circle NOT', bitwise_not)
2、降噪滤波方式
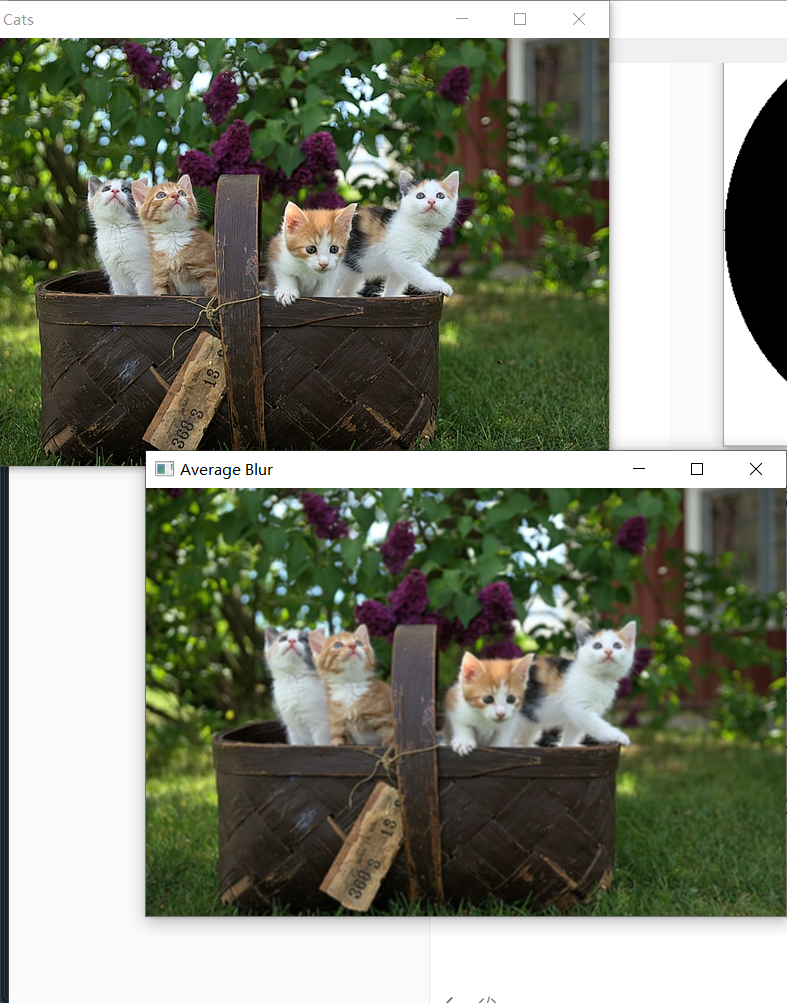
首先打开一张图片,采取平均滤波的方式,结果如下图
import cv2 as cv

img = cv.imread('../Resources/Photos/cats.jpg')
cv.imshow('Cats', img)

# Averaging
average = cv.blur(img, (3,3))
cv.imshow('Average Blur', average)
高斯滤波
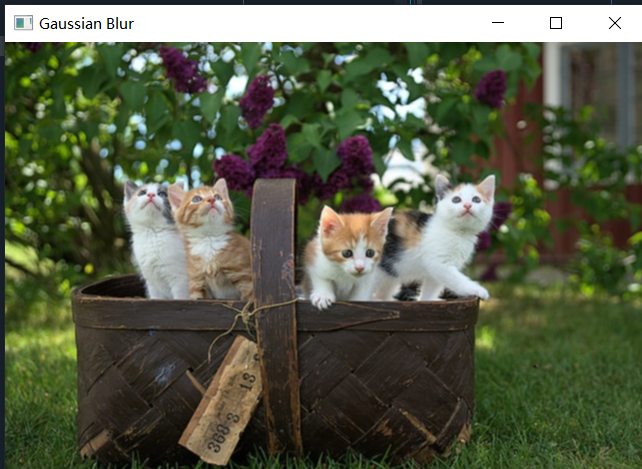
通俗的讲,高斯滤波就是对整幅图像进行加权平均的过程,每一个像素点的值,都由其本身和邻域内的其他像素值经过加权平均后得到。高斯滤波的具体操作是:用一个模板(或称卷积、掩模)扫描图像中的每一个像素,用模板确定的邻域内像素的加权平均灰度值去替代模板中心像素点的值。
gauss = cv.GaussianBlur(img, (3,3), 0)
cv.imshow('Gaussian Blur', gauss)
中值滤波
中值滤波是基于排序统计理论的一种能有效抑制噪声的非线性信号处理技术,中值滤波的基本原理是把数字图像或数字序列中一点的值用该点的一个邻域中各点值的中值代替,让周围的像素值接近真实值,从而消除孤立的噪声点。
median = cv.medianBlur(img, 3)
cv.imshow('Median Blur', median)

双边滤波 (Bilateral Filter)
目前我们了解的滤波器都是为了 平滑 图像, 问题是有些时候这些滤波器不仅仅削弱了噪声, 连带着把边缘也给磨掉了。 为避免这样的情形 (至少在一定程度上 ), 我们可以使用双边滤波。
类似于高斯滤波器,双边滤波器也给每一个邻域像素分配一个加权系数。 这些加权系数包含两个部分, 第一部分加权方式与高斯滤波一样,第二部分的权重则取决于该邻域像素与当前像素的灰度差值。
bilateral = cv.bilateralFilter(img, 10, 35, 25)
cv.imshow('Bilateral', bilateral)

3、将图片转换为其他颜色方式
#pylint:disable=no-member

import cv2 as cv
import matplotlib.pyplot as plt

img = cv.imread('../Resources/Photos/park.jpg')
cv.imshow('Park', img)

# plt.imshow(img)
# plt.show()

# BGR to Grayscale
gray = cv.cvtColor(img, cv.COLOR_BGR2GRAY)
cv.imshow('Gray', gray)

# BGR to HSV
hsv = cv.cvtColor(img, cv.COLOR_BGR2HSV)
cv.imshow('HSV', hsv)

# BGR to L*a*b
lab = cv.cvtColor(img, cv.COLOR_BGR2LAB)
cv.imshow('LAB', lab)

# BGR to RGB
rgb = cv.cvtColor(img, cv.COLOR_BGR2RGB)
cv.imshow('RGB', rgb)

# HSV to BGR
lab_bgr = cv.cvtColor(lab, cv.COLOR_LAB2BGR)
cv.imshow('LAB --> BGR', lab_bgr)

cv.waitKey(0)

4、几种检测边缘的方式
import cv2 as cv
import numpy as np

img = cv.imread('../Resources/Photos/park.jpg')
cv.imshow('Park', img)

gray = cv.cvtColor(img, cv.COLOR_BGR2GRAY)
cv.imshow('Gray', gray)

# Laplacian
lap = cv.Laplacian(gray, cv.CV_64F)
lap = np.uint8(np.absolute(lap))
cv.imshow('Laplacian', lap)

# Sobel
sobelx = cv.Sobel(gray, cv.CV_64F, 1, 0)
sobely = cv.Sobel(gray, cv.CV_64F, 0, 1)
combined_sobel = cv.bitwise_or(sobelx, sobely)

cv.imshow('Sobel X', sobelx)
cv.imshow('Sobel Y', sobely)
cv.imshow('Combined Sobel', combined_sobel)

canny = cv.Canny(gray, 150, 175)
cv.imshow('Canny', canny)
cv.waitKey(0)

5、图片颜色分布图
#pylint:disable=no-member

import cv2 as cv
import matplotlib.pyplot as plt
import numpy as np

img = cv.imread('../Resources/Photos/cats.jpg')
cv.imshow('Cats', img)

blank = np.zeros(img.shape[:2], dtype='uint8')

# gray = cv.cvtColor(img, cv.COLOR_BGR2GRAY)
# cv.imshow('Gray', gray)

mask = cv.circle(blank, (img.shape[1]//2,img.shape[0]//2), 100, 255, -1)

masked = cv.bitwise_and(img,img,mask=mask)
cv.imshow('Mask', masked)

# GRayscale histogram
# gray_hist = cv.calcHist([gray], [0], mask, [256], [0,256] )

# plt.figure()
# plt.title('Grayscale Histogram')
# plt.xlabel('Bins')
# plt.ylabel('# of pixels')
# plt.plot(gray_hist)
# plt.xlim([0,256])
# plt.show()

# Colour Histogram

plt.figure()
plt.title('Colour Histogram')
plt.xlabel('Bins')
plt.ylabel('# of pixels')
colors = ('b', 'g', 'r')
for i,col in enumerate(colors):
    hist = cv.calcHist([img], [i], mask, [256], [0,256])
    plt.plot(hist, color=col)
    plt.xlim([0,256])

plt.show()

cv.waitKey(0)

6、通过bitwise方法截取部分图片
#pylint:disable=no-member

import cv2 as cv
import numpy as np

img = cv.imread('../Resources/Photos/cats 2.jpg')
cv.imshow('Cats', img)

blank = np.zeros(img.shape[:2], dtype='uint8')
cv.imshow('Blank Image', blank)

circle = cv.circle(blank.copy(), (img.shape[1]//2 + 45,img.shape[0]//2), 100, 255, -1)

rectangle = cv.rectangle(blank.copy(), (30,30), (370,370), 255, -1)

weird_shape = cv.bitwise_and(circle,rectangle)
cv.imshow('Weird Shape', weird_shape)

masked = cv.bitwise_and(img,img,mask=weird_shape)
cv.imshow('Weird Shaped Masked Image', masked)

cv.waitKey(0)

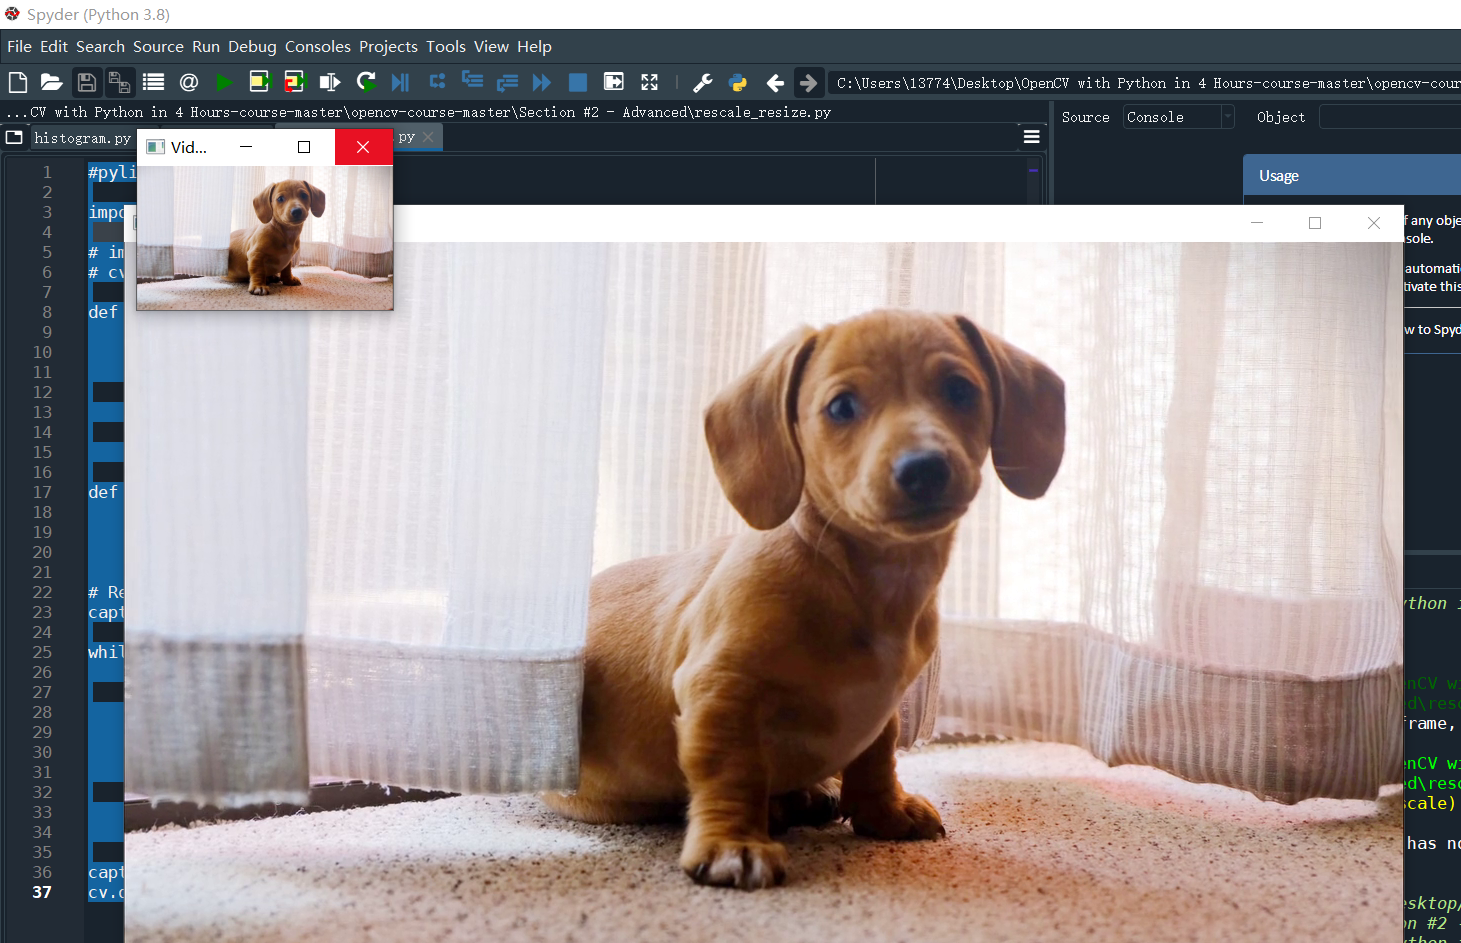
7、按比例缩放图片或视频
#pylint:disable=no-member

import cv2 as cv

# img = cv.imread('../Resources/Photos/cat.jpg')
# cv.imshow('Cat', img)

def rescaleFrame(frame, scale=0.75):
    # Images, Videos and Live Video
    width = int(frame.shape[1] * scale)
    height = int(frame.shape[0] * scale)

    dimensions = (width,height)

    return cv.resize(frame, dimensions, interpolation=cv.INTER_AREA)

def changeRes(width,height):
    # Live video
    capture.set(3,width)
    capture.set(4,height)

# Reading Videos
capture = cv.VideoCapture('../Resources/Videos/dog.mp4')

while True:
    isTrue, frame = capture.read()

    frame_resized = rescaleFrame(frame, scale=.2)

    cv.imshow('Video', frame)
    cv.imshow('Video Resized', frame_resized)

    if cv.waitKey(20) & 0xFF==ord('d'):
        break

capture.release()
cv.destroyAllWindows()
8、通过操作数组将图片不同色相显示
#pylint:disable=no-member

import cv2 as cv
import numpy as np

img = cv.imread('../Resources/Photos/park.jpg')
cv.imshow('Park', img)

blank = np.zeros(img.shape[:2], dtype='uint8')

b,g,r = cv.split(img)

blue = cv.merge([b,blank,blank])
green = cv.merge([blank,g,blank])
red = cv.merge([blank,blank,r])


cv.imshow('Blue', blue)
cv.imshow('Green', green)
cv.imshow('Red', red)

print(img.shape)
print(b.shape)
print(g.shape)
print(r.shape)

merged = cv.merge([b,g,r])
cv.imshow('Merged Image', merged)

cv.waitKey(0)

