基于dlib以及opencv的人脸识别入门学习
基于dlib以及opencv的人脸识别入门学习
1.下载安装dlib库
dlib库是一个机器学习的开源库,包含了机器学习的很多算法,使用起来很方便,直接包含头文件即可,并且不依赖于其他库(自带图像编解码库源码)。Dlib可以帮助您创建很多复杂的机器学习方面的软件来帮助解决实际问题。目前Dlib已经被广泛的用在行业和学术领域,包括机器人,嵌入式设备,移动电话和大型高性能计算环境。
(ps:建议使用虚拟环境进行试验)
1.如果没有的话首先需要安装cmake
pip install cmake
2.再进行安装dlib一样使用pip安装
pip install dlib
3.如果不行的话可以直接下载dlib-19.19.0-cp38-cp38-win_amd64.whl文件进行安装
链接如下,python3.8的dlib库
https://pan.baidu.com/s/1RcJao1YMuLItlhrHxJZy2A,提取码1111
4.记得将文件路径加入到环境变量之中
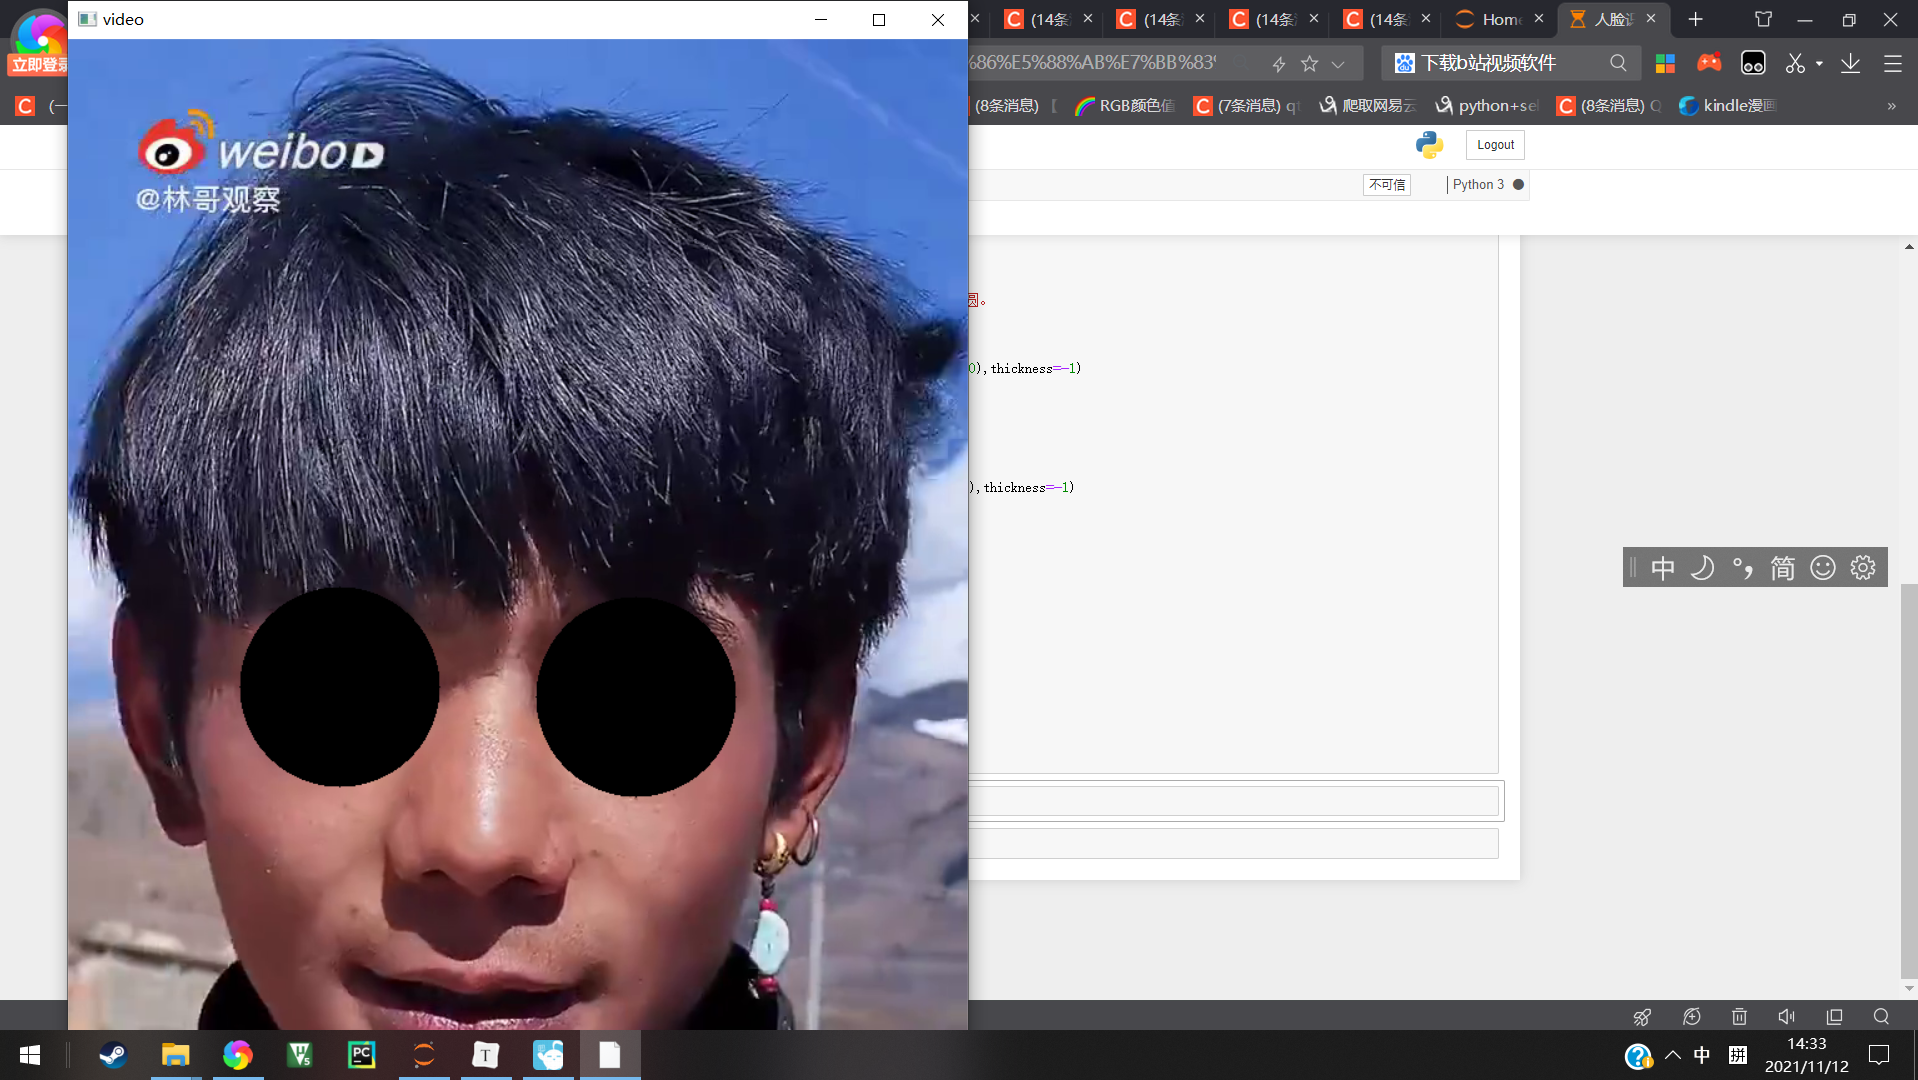
2.利用dlib库在眼睛处绘制黑色的实心圆
(ps:训练好的特征分类数据在这里可以下载:
https://pan.baidu.com/s/1IuXX9IfTcesaYruoILWq3Q
提取码:1111)
代码如下,很简陋的一个小项目。
# 导入包
import numpy as np
import cv2
import dlib
import os
import sys
import random
def get_detector_and_predicyor():
    #使用dlib自带的frontal_face_detector作为我们的特征提取器
    detector = dlib.get_frontal_face_detector()
    #返回训练好的人脸68特征点检测器
    predictor = dlib.shape_predictor('shape_predictor_68_face_landmarks.dat')
    return detector,predictor
#获取检测器
detector,predictor=get_detector_and_predicyor()
def painting_sunglasses(img,detector,predictor):
    #给人脸带上墨镜
    rects = detector(img_gray, 0)
    for i in range(len(rects)):
        landmarks = np.matrix([[p.x, p.y] for p in predictor(img,rects[i]).parts()])
        right_eye_x=0
        right_eye_y=0
        left_eye_x=0
        left_eye_y=0
        for i in range(36,42):#右眼范围
            #将坐标相加
            right_eye_x+=landmarks[i][0,0]
            right_eye_y+=landmarks[i][0,1]
        #取眼睛的中点坐标
        pos_right=(int(right_eye_x/6),int(right_eye_y/6))
        """
        利用circle函数画圆
        函数原型
        cv2.circle(img, center, radius, color[, thickness[, lineType[, shift]]])
        img:输入的图片data
        center:圆心位置
        radius:圆的半径
        color:圆的颜色
        thickness:圆形轮廓的粗细(如果为正)。负厚度表示要绘制实心圆。
        lineType: 圆边界的类型。
        shift:中心坐标和半径值中的小数位数。
        """
        cv2.circle(img=img, center=pos_right, radius=80,color=(0,0,0),thickness=-1)
        for i in range(42,48):#左眼范围
           #将坐标相加
            left_eye_x+=landmarks[i][0,0]
            left_eye_y+=landmarks[i][0,1]
        #取眼睛的中点坐标
        pos_left=(int(left_eye_x/6),int(left_eye_y/6))
        cv2.circle(img=img, center=pos_left, radius=80,color=(0,0,0),thickness=-1)
# 打开摄像头 参数为输入流,可以为摄像头或视频文件
camera = cv2.VideoCapture("123.mp4")
ok=True
while ok:
    ok,img = camera.read()
     # 转换成灰度图像
    img_gray = cv2.cvtColor(img,cv2.COLOR_BGR2GRAY)
    #display_feature_point(img,detector,predictor)
    painting_sunglasses(img,detector,predictor)#调用画墨镜函数
    cv2.imshow('video', img)
    k = cv2.waitKey(1)
    if k == 27:    # press 'ESC' to quit
        break
camera.release()
cv2.destroyAllWindows()

实验要求效果完成
学习参考:
https://blog.csdn.net/junseven164/article/details/121054134?spm=1001.2014.3001.5501
