
源码包安装
源码包安装
目录
源码包的优缺点:
优点
- 可以自行修改代码供我们使用。二次开发
- 可以定制需要的相关功能
- 新版本优先更新源码
- 自动化规范,可以自定义安装路径
缺点
- 相对于yum安装,过程复杂繁琐
- 耗时较长
获取方式:
安装什么服务,就去什么服务的官方网站,下载源码包
例如: mysql nginx apache...
源码包安装步骤:
- 解压tar
- 生成/.configure cmake
- 编译make
- 安装make install
安装实例:nginx
1.上nginx官网,下载源码包:http://nginx.org
2.下载解压包
wget http://nginx.org/download/nginx-1.20.2.tar.gz
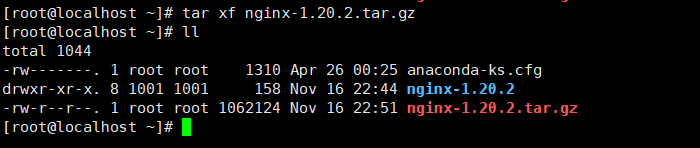
3.解压源码包,并进入相应目录
[root@localhost ~]# tar xf nginx-1.20.2.tar.gz
[root@node1localhost ~]# cd nginx-1.12.2
4.生成
./configure(定制组件)

1.指定安装路径,例如 --prefix=/opt/nginx-1.12
2.启用或禁用某项功能, 例如 --enable-ssl
3.和其它软件关联,例如--with-pcre
4.检查安装环境,例如是否有编译器 gcc,是否满足软件的依赖需求
5.检测通过后生成Makefile文件

[root@localhost nginx-1.20.2]# ./configure --prefix=/opt/nginx-1.12.2 --user=nginx --group=nginx --with-http_ssl_module --with-http_stub_status_module
5.根据报错提示安装依赖包和基础环境
[root@localhost nginx-1.20.2]# yum install -y pcre-devel openssl-devel gcc gcc-c++ glibczlib-devel

# 报错一./configure: error: C compiler cc is not found
报错原因:缺少C语言环境
解决方法:yum install -ygcc gcc-c++ glibc

# 报错二 ./configure: error: the HTTP rewrite module requires the PCRE library.You can either disable the module by using --without-http_rewrite_moduleoption, or install the PCRE library into the system, or build the PCRE librarystatically from the source with nginx by using --with-pcre=<path> option.
报错原因:缺少pcre库文件
解决方法:yum install -y pcre-devel

# 报错三./configure: error: SSL modules require the OpenSSL library.You can either do not enable the modules, or install the OpenSSL libraryinto the system, or build the OpenSSL library statically from the sourcewith nginx by using --with-openssl=<path> option.
报错原因:缺少openssl库文件
解决方法:yum install -y openssl-deve
6.编译并安装
验证上一步命令是否成功, 非0d都不算成功
[root@node1 nginx-1.12.2]# echo $?
0

编译(让系统能识别你的代码,并且把刚才指定的功能和路径编译到源码中)
[root@localhost nginx-1.20.2]# make
[root@node1 nginx-1.12.2]# make install
7.做成软链接
[root@localhost nginx-1.20.2]# ln -s /opt/nginx-1.20.2/ /opt/nginx
8.编写环境变量
如果安装时不是使用的默认路径,则必须要修改PATH环境变量,以能够识别此程序的二进制文件路径

1.添加nginx的环境变量,让nginx程序可以直接运行
[root@localhost opt]# vim /etc/profile.d/nginx.sh   exportPATH="$PATH:/opt/nginx/sbin"

2.加载环境变量
[root@localhost opt]# source /etc/profile
9.启动nginx并检查nginx是否启动成功(端口)
启动nginx
[root@localhost ~]# nginx

检查nginx是否启动成功(端口)
[root@localhost ~]# netstat -lntup|grep nginx

检查nginx进程
[root@localhost ~]# ps -ef|grep nginx
10.关闭防火墙和selinux
关闭防火墙
[root@localhost ~]# systemctl stop firewalld

关闭selinux
[root@localhost ~]# setenforce
nginx网页
# 站点目录
[root@localhost html]# pwd
/opt/nginx/html
# 代码文件
[root@localhost html]# vim index.html

 浙公网安备 33010602011771号