C# Pdf添加文本水印(iTextSharp)
第一步通过Nuget添加iTextSharp引用
具体实现代码如下:
        /// <summary>
        /// 添加文本水印
        /// </summary>
        /// <param name="pdfPath">pdf文件</param>
        /// <param name="outPath">输出文件位置</param>
        /// <param name="addText">水印文字</param>
        public static void PdfAddWatermark(string pdfPath, string outPath, string addText)
        {
            //读取pdf
            iTextSharp.text.pdf.PdfReader reader = new iTextSharp.text.pdf.PdfReader(pdfPath);
            //创建新pdf
            System.IO.Stream outStream = new System.IO.FileStream(outPath, System.IO.FileMode.Create, System.IO.FileAccess.Write, System.IO.FileShare.None);
            iTextSharp.text.pdf.PdfStamper stamper = new iTextSharp.text.pdf.PdfStamper(reader, outStream); ;
            int pdfTotalPage = reader.NumberOfPages;//总页数
            //第一页pdf尺寸
            iTextSharp.text.Rectangle psize = reader.GetPageSize(1);
            float width = psize.Width;
            float height = psize.Height;

            iTextSharp.text.pdf.PdfContentByte content;
            //【C:\WINDOWS\Fonts】系统字体存放位置
            iTextSharp.text.pdf.BaseFont font = iTextSharp.text.pdf.BaseFont.CreateFont(@"C:\WINDOWS\Fonts\SIMFANG.TTF", iTextSharp.text.pdf.BaseFont.IDENTITY_H, iTextSharp.text.pdf.BaseFont.EMBEDDED);
            iTextSharp.text.pdf.PdfGState gs = new iTextSharp.text.pdf.PdfGState();
            for (int i = 1; i <= pdfTotalPage; i++)
            {
                //GetUnderContent内容下层
                //GetOverContent内容上层
                content = stamper.GetUnderContent(i);
                //透明度
                gs.FillOpacity = 0.3f;
                content.SetGState(gs);
                //content.SetGrayFill(0.3f);
                //开始写入文本
                content.BeginText();
                //设置颜色
                content.SetColorFill(iTextSharp.text.BaseColor.GRAY);
                //字体大小
                content.SetFontAndSize(font, 30);
                //设置文本矩阵
                content.SetTextMatrix(0, 0);
                //水印文本位置
                //中间
                content.ShowTextAligned(iTextSharp.text.Element.ALIGN_CENTER, addText, width / 2, height / 4, -45);
                content.ShowTextAligned(iTextSharp.text.Element.ALIGN_CENTER, addText, width / 2, height - 120, -45);
                content.ShowTextAligned(iTextSharp.text.Element.ALIGN_CENTER, addText, width / 2, height - 360, -45);
                //右侧
                content.ShowTextAligned(iTextSharp.text.Element.ALIGN_CENTER, addText, width - 100, height / 4, -45);
                content.ShowTextAligned(iTextSharp.text.Element.ALIGN_CENTER, addText, width - 100, height - 120, -45);
                content.ShowTextAligned(iTextSharp.text.Element.ALIGN_CENTER, addText, width - 100, height - 360, -45);
                //左侧
                content.ShowTextAligned(iTextSharp.text.Element.ALIGN_CENTER, addText, width - 500, height / 4, -45);
                content.ShowTextAligned(iTextSharp.text.Element.ALIGN_CENTER, addText, width - 500, height - 120, -45);
                content.ShowTextAligned(iTextSharp.text.Element.ALIGN_CENTER, addText, width - 500, height - 360, -45);
                content.EndText();
            }
            stamper.Close();
            reader.Close();
            System.Diagnostics.Process.Start(outPath);
        }
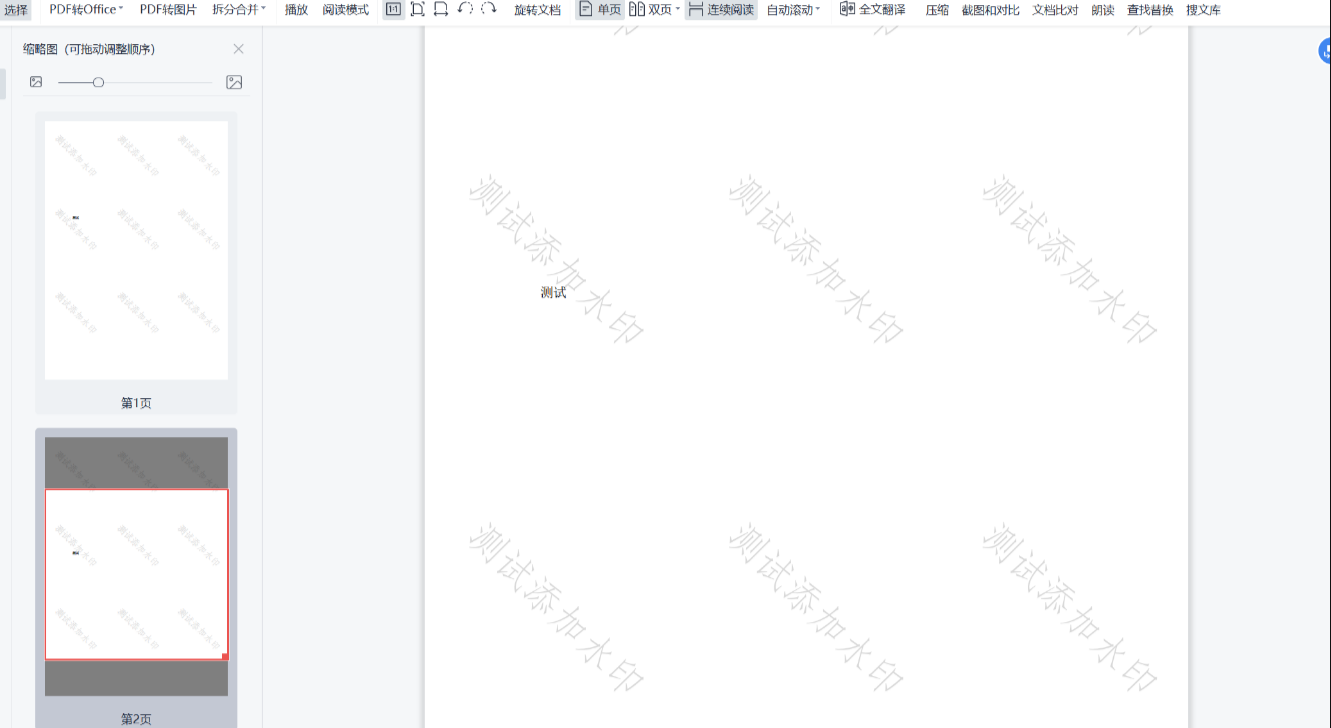
效果如下所示

本文来自博客园,作者:流纹,转载请注明原文链接:https://www.cnblogs.com/lwk9527/p/17374228.html


