tensorflow object api 定制自己的对象检测模块
1、需要准备的东西

分别解压

安装包编译环境
yum install autoconf
yum install automake
yum install libtool
yum install curl
yum install make
yum install g++
yum install unzip (g++没找到)
yum install gcc-c++ (用这个命令才能安装g++)
yum install zlib
yum install zlib-devel
yum install openssl-devel -y
yum install -y bzip2-devel
1、安装python3.6
解压Python-3.6.5
tar -zxvf Python-3.6.5.tgz
cd Python-3.6.5/
./configure --with-ssl
./configure --prefix=/usr/local/python3 (不用prefix) 用了tensorboard可能有问题
make
make install
ln -s /usr/local/python3/bin/python3 /usr/bin/python3
2.安装protobuf
首先,进入你所下载的protobuf安装包的目录下面,然后依次执行以下命令:
./autogen.sh
./configure
make
make check(这个地方会报错,忽略即可)
最后两个命令的执行时间可能略长,半个小时左右。
sudo make install
sudo ldconfig
测试安装:protoc --version
如果安装正确会输出版本号。
安装protobuf的python模块:
首先,进入protobuf安装包下的python文件目录下,执行以下命令:
python3 setup.py build
python3 setup.py test
python3 setup.py install(如果在这一步没有权限执行的话,就用sudo python setup.py install )
测试安装:
sudo python3 -c 'import google.protobuf;print google.protobuf.__version__'(这个地方有问题)
3.安装numpy tensorflow opencv等依赖包
pip install -i https://pypi.tuna.tsinghua.edu.cn/simple some-package (使用清华大学源)
pip install applicationName==version
pip3 install -i https://pypi.tuna.tsinghua.edu.cn/simple numpy
pip3 install -i https://pypi.tuna.tsinghua.edu.cn/simple opencv-python
pip3 install -i https://pypi.tuna.tsinghua.edu.cn/simple Cython
pip3 install -i https://pypi.tuna.tsinghua.edu.cn/simple Pillow
pip3 install -i https://pypi.tuna.tsinghua.edu.cn/simple lxml
pip3 install -i https://pypi.tuna.tsinghua.edu.cn/simple jupyter
pip3 install -i https://pypi.tuna.tsinghua.edu.cn/simple matplotlib
pip3 install -i https://pypi.tuna.tsinghua.edu.cn/simple pandas
pip3 install -i https://pypi.tuna.tsinghua.edu.cn/simple tensorflow-gpu==1.14.0
4、安装.COCO API installation
cd cocoapi/PythonAPI
make
cp -r pycocotools <path_to_tensorflow>/models/research/ <path_to_tensorflow> tensorflow地址
5.protobuf编译
进入tensorflow/models/research/目录下执行以下命令:
protoc object_detection/protos/*.proto --python_out=.
在<path_to_tensorflow>/models/research/目录下执行
export PYTHONPATH=$PYTHONPATH:`pwd`:`pwd`/slim
你也可以将上面的命令加入到~/.bashrc file.下
pip3损坏

6.测试安装:
python3 object_detection/builders/model_builder_test.py
7.通过图片测试SSD模型
将test_tensorflow_object_detech_api解压 (博客文件中有)
执行python3 test.py(test.py中图片路径和SSD模型位置需要修改为恰当位置)
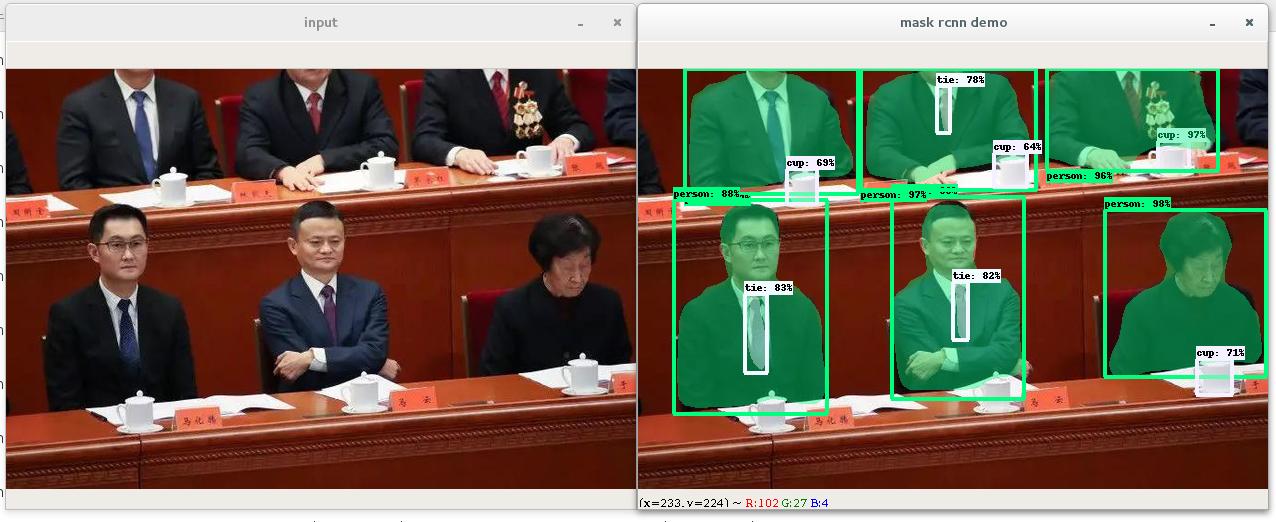
7.训练自己的模型
本案识别图片和视频中的马云,图片聪网络下载,可自行选择下载并使用。
2)标注物体
使用labelImg标注问题非常方便,下载地址 https://tzutalin.github.io/labelImg/
安装和使用可以参考这篇,这里不重复, https://cloud.tencent.com/developer/news/325876
打开labelImg,点击open dir选择train目录,如下图,
得到的训练集和测试集,分别在\models-master\research\object_detection\test_images文件夹下创建train和test文件夹,把对应的数据集拷贝进去。如下:

train和test目录中存放的是

修改上面标注格式xml文件修改成TensorFlow的格式 下载转化脚本, https://github.com/XiangGuo1992/Screen-Vehicle-Detection-using-Tensorflow-API
下载完解压包,进入目录
第一步,找到xml_to_csv.py 文件,修改dir和path为之前的train目录,如下,
os.chdir(‘/root/my_tensorflow_object_detech_api/models-master/research/object_detection/test_images/train/’)
path = ‘/root/my_tensorflow_object_detech_api/models-master/research/object_detection/test_images/train/’
xml_df.to_csv('mayun_train.csv', index=None) #修改最后生成的CSV文件名称
运行xml_to_csv.py(命令 python3 /root/my_tensorflow_object_detech_api/Screen-Vehicle-Detection-using-Tensorflow-API-master/xml_to_csv.py),对应的目录下生成 mayun_train.csv文件,如下


第二步 上一步生成的 mayun_train.csv和mayun_test.csv文件拷贝到models-master\research\object_detection\data文件夹下
将generate_tfrecord.py拷贝到models-master\research\object_detection\
cp ~/my_tensorflow_object_detech_api/Screen-Vehicle-Detection-using-Tensorflow-API-master/generate_tfrecord.py ./ (object_detection目录下)
修改generate_tfrecord.py中的 tensorflow_object_detech_api路径
#os.chdir('D:\\tensorflow-model\\models\\research\\object_detection\\')
os.chdir('/root/my_tensorflow_object_detech_api/models-master/research/object_detection/') (修改为合适路径)
修改标签对应的id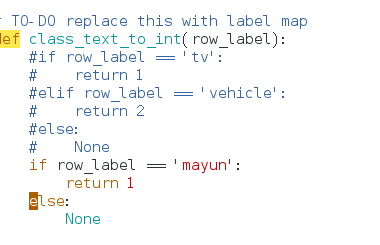
修改图片的路径为test_images/test和test_images/train

运行
python3 generate_tfrecord.py --csv_input=data/mayun_train.csv --output_path=data/mayun_train.record
python3 generate_tfrecord.py --csv_input=data/mayun_test.csv --output_path=data/mayun_test.record
生成tfrecofd文件
现在object_detechion/data/下的文件如下

第三步 在object_detection/data创建一个*.pbtxt文件,本案为例mayun.pbtxt,内容如下,类型和ID对应mayun_train.record中保持一致。
item {
id: 1
name: 'mayun'
}
在object_detection目录下执行
mkdir train
cp /root/my_tensorflow_object_detech_api/models-master/research/object_detection/samples/configs/ssd_mobilenet_v1_coco
编辑ssd_mobilenet_v1_coco
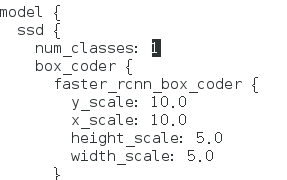
num_classes 修改为1
bratch_size修改为1
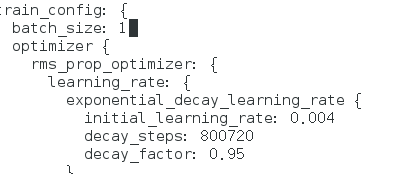
以下这两行注释掉

修改测试集和训练集的位置

.3 开始训练
在models-master\research\object_detection目录下运行
python3 object_detection/model_main.py
–pipeline_config_path=object_detection/training/ssd_mobilenet_v1_coco.config
–model_dir=object_detection/training
–num_train_steps=50000(这行我没用)
–num_eval_steps=2000 (这行我也没用)
–alsologtostderr
可以看到训练过程了:

python3 object_detection/model_main.py --pipeline_config_path=object_detection/train/ssd_mobilenet_v1_coco.config --model_dir=object_detection/training --alsologtostderr --num_train_steps=50000 –num_eval_steps=2000 --model_dir指定训练结果存储的位置
最后训练出来的文件放在了object_detection/training
打包模型(traing下没有model.ckpt-200000,没关系,还是这样写)
python3 object_detection/export_inference_graph.py --input_type image_tensor --pipeline_config_path object_detection/train/ssd_mobilenet_v1_coco.config --trained_checkpoint_prefix object_detection/training/model.ckpt-200000 --output_directory /root/myyun_detech_graph
将模型打包成zip
ssd_mayun_mobilenet_v1_coco_2018_01_28 是上一步的myyun_detech_graph 进行重命名得到的
tar -zcvf ssd_mayun_mobilenet_v1_coco_2018_01_28.tar.gz ssd_mayun_mobilenet_v1_coco_2018_01_28/*
GPU版本
cudnn下载地址
https://developer.nvidia.com/rdp/cudnn-archive#a-collapse742-10
cuda下载地址
https://developer.nvidia.com/cuda-toolkit-archive
cuda历史版本下载地址(https://developer.nvidia.com/cuda-toolkit-archive)(亲测可用)
英伟达驱动下载地址
https://us.download.nvidia.cn/XFree86/Linux-x86_64/440.59/NVIDIA-Linux-x86_64-440.59.run
https://www.nvidia.cn/Download/index.aspx?lang=cn

--> 正在处理依赖关系 ocl-icd,它被软件包 3:nvidia-driver-cuda-410.48-1.el7.x86_64 需要
--> 解决依赖关系完成
错误:软件包:3:nvidia-driver-cuda-410.48-1.el7.x86_64 (cuda-10-0-local-10.0.130-410.48)
需要:ocl-icd
错误:软件包:3:nvidia-driver-410.48-1.el7.x86_64 (cuda-10-0-local-10.0.130-410.48)
需要:libva-vdpau-driver(x86-64)
错误:软件包:3:nvidia-driver-cuda-410.48-1.el7.x86_64 (cuda-10-0-local-10.0.130-410.48)
需要:opencl-filesystem
您可以尝试添加 --skip-broken 选项来解决该问题
安装cuda时遇到以上问题 通过 yum install cuda --skip-broken 强行安装

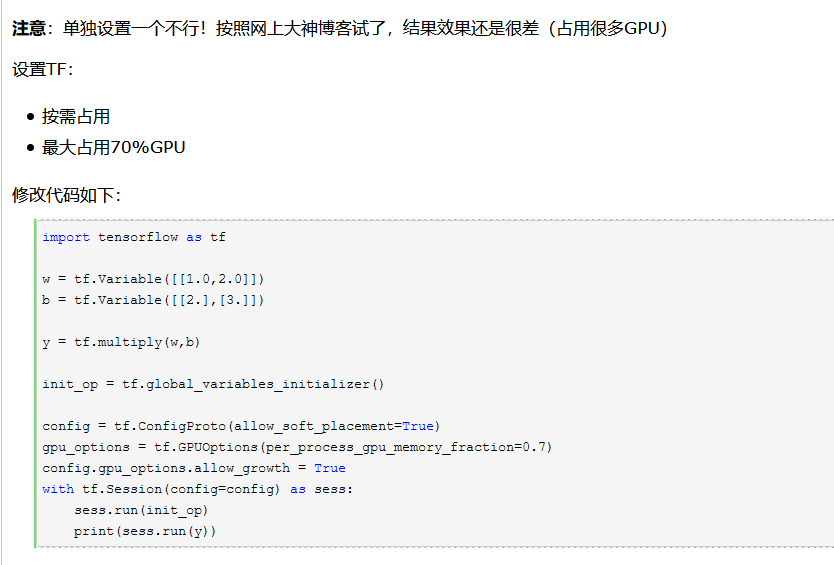
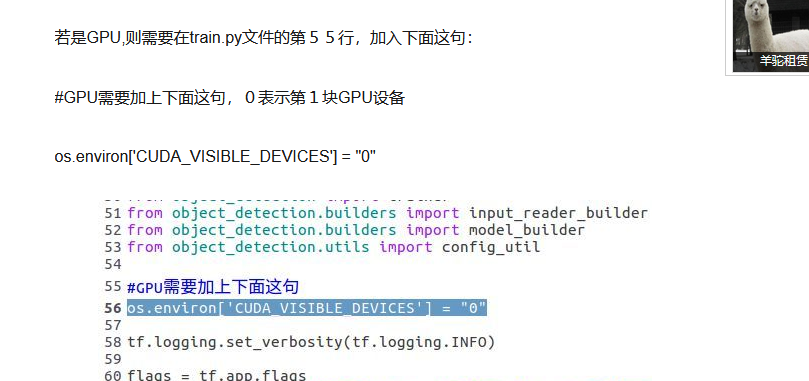
//将冻结的pb模型生成对应的pbtxt
tf_text_graph_ssd.py在opencv源码的/samples/dnn目录中
python3 tf_text_graph_ssd.py --input /root/ssd_mayun_mobilenet_v1_coco_2018_01_28/frozen_inference_graph.pb --config /root/my_tensorflow_object_detech_api/models-master/research/object_detection/train/ssd_mobilenet_v1_coco.config --output /root/lvyunxiangoutput/ssd-v1.pbtxt
tensorboard 的使用方法
tensorboard --logdir=trainning
最终调用参考另一篇随笔
这个命令可以用来评估生成的模型
python eval.py --logtostderr --pipeline_config_path=faster_rcnn_inception_v2_coco.config --checkpoint_dir=model_output --eval_dir=eval

