记得关闭防火墙或者开放端口
1.修改主 vim /etc/my.cnf文件
# For advice on how to change settings please see
# http://dev.mysql.com/doc/refman/5.7/en/server-configuration-defaults.html

[mysqld]
#
# Remove leading # and set to the amount of RAM for the most important data
# cache in MySQL. Start at 70% of total RAM for dedicated server, else 10%.
# innodb_buffer_pool_size = 128M
#
# Remove leading # to turn on a very important data integrity option: logging
# changes to the binary log between backups.
# log_bin
#
# Remove leading # to set options mainly useful for reporting servers.
# The server defaults are faster for transactions and fast SELECTs.
# Adjust sizes as needed, experiment to find the optimal values.
# join_buffer_size = 128M
# sort_buffer_size = 2M
# read_rnd_buffer_size = 2M
datadir=/var/lib/mysql
socket=/var/lib/mysql/mysql.sock

# Disabling symbolic-links is recommended to prevent assorted security risks
symbolic-links=0

log-error=/var/log/mysqld.log
pid-file=/var/run/mysqld/mysqld.pid

character_set_server=utf8
init_connect='SET NAMES utf8'

#主服务器唯一ID,跟数字大小没有关系,只是唯一
server-id=1
#启用二进制日志
log-bin=mysql-bin
## 设置不要复制的数据库(可设置多个)
binlog-ignore-db=mysql
binlog-ignore-db=information_schema
##设置需要复制的数据库
binlog-do-db=mydb
##设置logbin格式
binlog_format=STATEMENT
binlog日志三种格式:
1. STATEMENT   不能保证数据一致性 如insert into ...now();
2.ROW     把每条语句都写上,造成数据庞大。
3.MIXED   不能识别@@host name 语句
2.修改从 :
# For advice on how to change settings please see
# http://dev.mysql.com/doc/refman/5.7/en/server-configuration-defaults.html

[mysqld]
#
# Remove leading # and set to the amount of RAM for the most important data
# cache in MySQL. Start at 70% of total RAM for dedicated server, else 10%.
# innodb_buffer_pool_size = 128M
#
# Remove leading # to turn on a very important data integrity option: logging
# changes to the binary log between backups.
# log_bin
#
# Remove leading # to set options mainly useful for reporting servers.
# The server defaults are faster for transactions and fast SELECTs.
# Adjust sizes as needed, experiment to find the optimal values.
# join_buffer_size = 128M
# sort_buffer_size = 2M
# read_rnd_buffer_size = 2M
datadir=/var/lib/mysql
socket=/var/lib/mysql/mysql.sock

# Disabling symbolic-links is recommended to prevent assorted security risks
symbolic-links=0

log-error=/var/log/mysqld.log
pid-file=/var/run/mysqld/mysqld.pid

character_set_server=utf8
init_connect='SET NAMES utf8'
#主服务器唯一ID,跟数字大小没有关系,只是唯一
server-id=2
#启用中继日志
relay-log=mysql-relay
3. 主机、从机重启MySQL服务,主机从机都关闭防火墙,不关防火墙需开放端口,在主机上建立帐户并授权slave
#在主机MySQL里执行授权命令 %表示任意IP
进入主机MySQL客户端: mysql -uroot -p密码; 从机也是如此
GRANT REPLICATION SLAVE ON *.* TO 'lvym(可随意命名,但要与后面一致)'@'%' IDENTIFIED BY '密码';
#查询master的状态
show master status;

#记录下File和Position的值 #执行完此步骤后不要再操作主服务器MySQL,防止主服务器状态值变化
在从机上配置需要复制的主机:
CHANGE MASTER TO MASTER_HOST='主机IP',
MASTER_USER='lvym(授权用户)',
MASTER_PASSWORD='Lvym777@(密码)',
MASTER_LOG_FILE='mysql-bin.000001',MASTER_LOG_POS=154;
#启动从服务器复制功能:
start slave;
#查看从服务器状态:
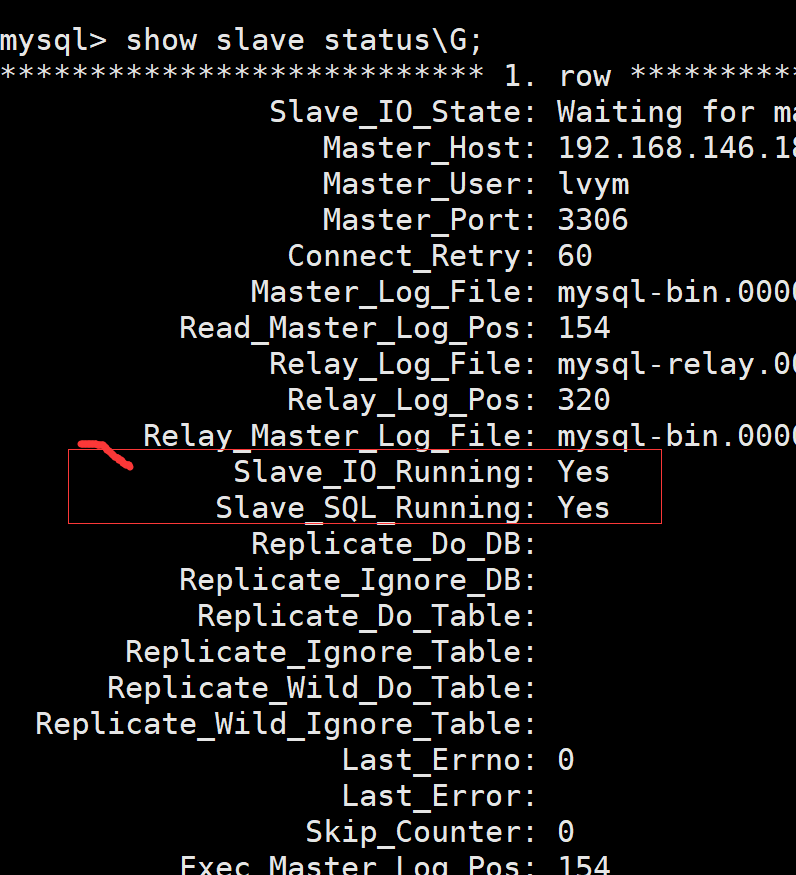
show slave status\G;

#上面两个参数都是Yes,则说明主从配置成功!#Slave_IO_Running: Yes #Slave_SQL_Running: Yes
如何重新配置主从:主机从机任意都可输入
stop slave;
reset master;
在主数据库写操作,从数据库会有,在从数据库写操作,主数据库不会有。
------------------------------------------------------Docker 搭建MySQL8一主多从------------------------------------------
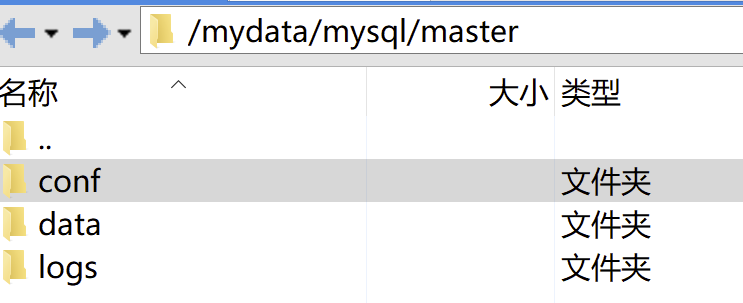
1.主机新建my.cnf文件用于挂载 必须

# For advice on how to change settings please see
# http://dev.mysql.com/doc/refman/5.7/en/server-configuration-defaults.html

[mysqld]
#
# Remove leading # and set to the amount of RAM for the most important data
# cache in MySQL. Start at 70% of total RAM for dedicated server, else 10%.
# innodb_buffer_pool_size = 128M
#
# Remove leading # to turn on a very important data integrity option: logging
# changes to the binary log between backups.
# log_bin
#
# Remove leading # to set options mainly useful for reporting servers.
# The server defaults are faster for transactions and fast SELECTs.
# Adjust sizes as needed, experiment to find the optimal values.
# join_buffer_size = 128M
# sort_buffer_size = 2M
# read_rnd_buffer_size = 2M
datadir=/var/lib/mysql
socket=/var/lib/mysql/mysql.sock

# Disabling symbolic-links is recommended to prevent assorted security risks
symbolic-links=0

log-error=/var/log/mysqld.log
pid-file=/var/run/mysqld/mysqld.pid
character_set_server=utf8

#主服务器唯一ID,跟数字大小没有关系,只是唯一
server-id=1
#启用二进制日志
log-bin=mysql-bin
## 设置不要复制的数据库(可设置多个)
binlog-ignore-db=mysql
binlog-ignore-db=information_schema
##设置需要复制的数据库
binlog-do-db=mydb
##设置logbin格式
binlog_format=STATEMENT
主机新建data,logs文件夹 用于挂载 可选

2.从机1新建my.cnf文件用于挂载 必须

......
#不可为主机
#主服务器唯一ID,跟数字大小没有关系,只是唯一
server-id=2
#启用中继日志
relay-log=mysql-relay
或
#可为主机
#主服务器唯一ID,跟数字大小没有关系,只是唯一
server-id=2
#启用二进制日志
log-bin=mysql-bin
## 设置不要复制的数据库(可设置多个)
binlog-ignore-db=mysql
 binlog-ignore-db=information_schema
##设置需要复制的数据库
binlog-do-db=mydb
##设置logbin格式   默认  show variables like '%binlog_format%';
binlog_format=STATEMENT
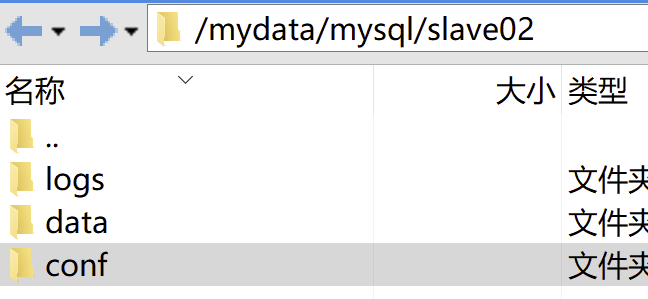
从机新建data,logs文件夹 用于挂载 可选

3.从机2新建my.cnf文件用于挂载 必须

......
......
#不可为主机
#主服务器唯一ID,跟数字大小没有关系,只是唯一
server-id=3
#启用中继日志
relay-log=mysql-relay
或
#可为主机
#主服务器唯一ID,跟数字大小没有关系,只是唯一
server-id=2
#启用二进制日志
log-bin=mysql-bin
## 设置不要复制的数据库(可设置多个)
binlog-ignore-db=mysql
 binlog-ignore-db=information_schema
##设置需要复制的数据库
binlog-do-db=mydb
##设置logbin格式
从机新建data,logs文件夹 用于挂载 可选

3.拉取并运行MySQL
主机
docker run -d -p 3306:3306  -v /mydata/mysql/master/conf:/etc/mysql/conf.d -v /mydata/mysql/master/logs:/logs -v /mydata/mysql/master/data:/var/lib/mysql -e MYSQL_ROOT_PASSWORD=123456  mysql
从机1
docker run -d -p 3307:3306  -v /mydata/mysql/slave/conf:/etc/mysql/conf.d -v /mydata/mysql/slave/logs:/logs -v /mydata/mysql/slave/data:/var/lib/mysql -e MYSQL_ROOT_PASSWORD=123456  mysql
从机2
docker run -d -p 3308:3306  -v /mydata/mysql/slave02/conf:/etc/mysql/conf.d -v /mydata/mysql/slave02/logs:/logs -v /mydata/mysql/slave02/data:/var/lib/mysql -e MYSQL_ROOT_PASSWORD=123456  mysql
4.进入MySQL容器,登录MySQL
主机操作
[root@lvym springboot]# docker ps
CONTAINER ID        IMAGE               COMMAND                  CREATED              STATUS              PORTS                               NAMES
7238de2486fa        mysql               "docker-entrypoint.s…"   About a minute ago   Up About a minute   0.0.0.0:3306->3306/tcp, 33060/tcp   angry_euler
进入容器
[root@lvym springboot]# docker exec -it 7238de2486fa bash
登录
root@7238de2486fa:/# mysql -uroot -p123456 或 mysql -uroot -p123456 -h 192.168.146.140 -P 3306
主机授权

CREATE USER 'slave'@'%' IDENTIFIED BY 'slave';
GRANT REPLICATION SLAVE ON *.* TO 'slave'@'%';
alter user 'slave'@'%' identified with mysql_native_password by 'slave';
flush privileges;

mysql> CREATE USER 'slave'@'%' IDENTIFIED BY 'slave';
Query OK, 0 rows affected (0.01 sec)

mysql> GRANT REPLICATION SLAVE ON *.* TO 'slave'@'%';
Query OK, 0 rows affected (0.00 sec)

mysql> alter user 'slave'@'%' identified with mysql_native_password by 'slave';
Query OK, 0 rows affected (0.01 sec)

mysql> flush privileges; 刷新权限
Query OK, 0 rows affected (0.01 sec)

mysql> SHOW MASTER STATUS;
+------------------+----------+--------------+--------------------------+-------------------+
| File             | Position | Binlog_Do_DB | Binlog_Ignore_DB         | Executed_Gtid_Set |
+------------------+----------+--------------+--------------------------+-------------------+
| mysql-bin.000003 |     1132 | mydb         | mysql,information_schema |                   |
+------------------+----------+--------------+--------------------------+-------------------+
1 row in set (0.01 sec)

从机1/2操作
root@lvym springboot]# docker ps
CONTAINER ID        IMAGE               COMMAND                  CREATED              STATUS              PORTS                               NAMES
c13eb9c67a43        mysql               "docker-entrypoint.s…"   18 minutes ago       Up 18 minutes       33060/tcp, 0.0.0.0:3307->3306/tcp   strange_tesla
进入容器
[root@lvym springboot]# docker exec -it c13eb9c67a43 bash
登录
root@c13eb9c67a43:/# mysql -uroot -p123456 或 mysql -uroot -p123456 -P 3307 -h 192.168.146.141
连接主机

CHANGE MASTER TO MASTER_HOST='192.168.146.140',
MASTER_USER='slave',
master_port=3306,
MASTER_PASSWORD='slave',
MASTER_LOG_FILE='mysql-bin.000003',
MASTER_LOG_POS=1132;

mysql> CHANGE MASTER TO MASTER_HOST='192.168.146.140',
    -> MASTER_USER='slave',
    -> master_port=3306,
    -> MASTER_PASSWORD='slave',
    -> MASTER_LOG_FILE='mysql-bin.000003',
    -> MASTER_LOG_POS=1132;
Query OK, 0 rows affected, 1 warning (0.01 sec)
mysql> start slave;
Query OK, 0 rows affected (0.01 sec)

mysql> show slave status\G;
*************************** 1. row ***************************
               Slave_IO_State: Waiting for master to send event
                  Master_Host: 192.168.146.140
                  Master_User: slave
                  Master_Port: 3306
                Connect_Retry: 60
              Master_Log_File: mysql-bin.000003
          Read_Master_Log_Pos: 1132
               Relay_Log_File: mysql-relay.000002
                Relay_Log_Pos: 324
        Relay_Master_Log_File: mysql-bin.000003
             Slave_IO_Running: Yes
            Slave_SQL_Running: Yes
              Replicate_Do_DB:
          Replicate_Ignore_DB:
           Replicate_Do_Table:
       Replicate_Ignore_Table:
      Replicate_Wild_Do_Table:
  Replicate_Wild_Ignore_Table:
                   Last_Errno: 0
                   Last_Error:
                 Skip_Counter: 0
          Exec_Master_Log_Pos: 1132
              Relay_Log_Space: 529
              Until_Condition: None
               Until_Log_File:
                Until_Log_Pos: 0
           Master_SSL_Allowed: No
           Master_SSL_CA_File:
           Master_SSL_CA_Path:
              Master_SSL_Cert:
            Master_SSL_Cipher:
               Master_SSL_Key:
        Seconds_Behind_Master: 0
Master_SSL_Verify_Server_Cert: No
                Last_IO_Errno: 0
                Last_IO_Error:
               Last_SQL_Errno: 0
               Last_SQL_Error:               下面也不要报错
  Replicate_Ignore_Server_Ids:
             Master_Server_Id: 1
                  Master_UUID: 6958c5fe-bab9-11ea-8bc7-0242ac110002
             Master_Info_File: mysql.slave_master_info
                    SQL_Delay: 0
          SQL_Remaining_Delay: NULL
      Slave_SQL_Running_State: Slave has read all relay log; waiting for more updates
           Master_Retry_Count: 86400
                  Master_Bind:
      Last_IO_Error_Timestamp:
     Last_SQL_Error_Timestamp:
               Master_SSL_Crl:
           Master_SSL_Crlpath:
           Retrieved_Gtid_Set:
            Executed_Gtid_Set:
                Auto_Position: 0
         Replicate_Rewrite_DB:
                 Channel_Name:
           Master_TLS_Version:
       Master_public_key_path:
        Get_master_public_key: 0
            Network_Namespace:
1 row in set (0.00 sec)
搭建完成

-------------------------------主机宕机手动重新配主机-------------------------------------
1.暂停所有操作,从库都输入:stop slave io_thread; 暂停从机IO线程,从机都输入:show slave status\G;查看状态,一般这些值谁大就选谁做新主机
mysql> stop slave io_thread;
Query OK, 0 rows affected, 1 warning (0.00 sec)
mysql> start slave;
Query OK, 0 rows affected (0.00 sec)


2.选好新主机
mysql> stop slave;reset slave all;
Query OK, 0 rows affected (0.01 sec)
Query OK, 0 rows affected (0.01 sec)
mysql> set global read_only=0; 查看是否只读:show global variables like "%read_only%"; 1=on 0=off
Query OK, 0 rows affected (0.01 sec)
mysql> reset master;
Query OK, 0 rows affected (0.01 sec)
创建用户授权
mysql> CREATE USER 'slave'@'%' IDENTIFIED BY 'slave';
Query OK, 0 rows affected (0.01 sec)
mysql> GRANT REPLICATION SLAVE ON *.* TO 'slave'@'%';
Query OK, 0 rows affected (0.00 sec)
mysql> alter user 'slave'@'%' identified with mysql_native_password by 'slave';
Query OK, 0 rows affected (0.01 sec)
mysql> flush privileges;
Query OK, 0 rows affected (0.00 sec)
mysql> show master status;
+------------------+----------+--------------+--------------------------+-------------------+
| File | Position | Binlog_Do_DB | Binlog_Ignore_DB | Executed_Gtid_Set |
+------------------+----------+--------------+--------------------------+-------------------+
| mysql-bin.000001 | 1142 | mydb | mysql,information_schema | |
+------------------+----------+--------------+--------------------------+-------------------+
1 row in set (0.00 sec)
3.从机
mysql> stop slave io_thread;
Query OK, 0 rows affected, 1 warning (0.00 sec)
mysql> stop slave;reset slave all;
Query OK, 0 rows affected, 1 warning (0.00 sec)
Query OK, 0 rows affected (0.01 sec)
mysql> CHANGE MASTER TO MASTER_HOST='192.168.146.140',
-> MASTER_USER='slave',
-> master_port=3307,
-> MASTER_PASSWORD='slave',
-> MASTER_LOG_FILE='mysql-bin.000001',
-> MASTER_LOG_POS=1142,
-> MASTER_CONNECT_RETRY=60;
Query OK, 0 rows affected, 2 warnings (0.02 sec)
mysql> start slave;
Query OK, 0 rows affected (0.01 sec)
mysql> show slave status\G;
*************************** 1. row ***************************
Slave_IO_State: Waiting for master to send event
Master_Host: 192.168.146.140
Master_User: slave
Master_Port: 3307
Connect_Retry: 60
Master_Log_File: mysql-bin.000001
Read_Master_Log_Pos: 1142
Relay_Log_File: d7060445ecd7-relay-bin.000002
Relay_Log_Pos: 324
Relay_Master_Log_File: mysql-bin.000001
Slave_IO_Running: Yes
Slave_SQL_Running: Yes
Replicate_Do_DB:
Replicate_Ignore_DB:
Replicate_Do_Table:
Replicate_Ignore_Table:
Replicate_Wild_Do_Table:
Replicate_Wild_Ignore_Table:
Last_Errno: 0
Last_Error:
Skip_Counter: 0
Exec_Master_Log_Pos: 1142
Relay_Log_Space: 540
Until_Condition: None
Until_Log_File:
Until_Log_Pos: 0
Master_SSL_Allowed: No
Master_SSL_CA_File:
Master_SSL_CA_Path:
Master_SSL_Cert:
Master_SSL_Cipher:
Master_SSL_Key:
Seconds_Behind_Master: 0
Master_SSL_Verify_Server_Cert: No
Last_IO_Errno: 0
Last_IO_Error:
Last_SQL_Errno: 0
Last_SQL_Error:
Replicate_Ignore_Server_Ids:
Master_Server_Id: 2
Master_UUID: 33be6562-bb37-11ea-8ed3-0242ac110003
Master_Info_File: mysql.slave_master_info
SQL_Delay: 0
SQL_Remaining_Delay: NULL
Slave_SQL_Running_State: Slave has read all relay log; waiting for more updates
Master_Retry_Count: 86400
Master_Bind:
Last_IO_Error_Timestamp:
Last_SQL_Error_Timestamp:
Master_SSL_Crl:
Master_SSL_Crlpath:
..............
从库切换主库成功
--------------报错----------------------------
Last_IO_Errno: 13114
Last_IO_Error: Got fatal error 1236 from master when reading data from binary log: 'Could not find first log file name in binary log index file'
Last_SQL_Errno: 0
1.进入主机---主库
mysql> flush logs;
Query OK, 0 rows affected (0.02 sec)
mysql> show master status\G;
*************************** 1. row ***************************
File: mysql-bin.000002
Position: 156
Binlog_Do_DB:
Binlog_Ignore_DB:
Executed_Gtid_Set:
1 row in set (0.00 sec)
2.进入从库
mysql> stop slave;
Query OK, 0 rows affected (0.00 sec)
mysql> change master to master_log_file='mysql-bin.000002',master_log_pos=156; 这里的file和pos都是主库master显示的
Query OK, 0 rows affected (0.01 sec)
mysql> start slave;
Query OK, 0 rows affected (0.00 sec)
mysql> show slave status\G;
*************************** 1. row ***************************
Slave_IO_State: Waiting for master to send event
Master_Host: 192.168.146.140
Master_User: slave
Master_Port: 3306
Connect_Retry: 60
Master_Log_File: mysql-bin.000003
Read_Master_Log_Pos: 1141
Relay_Log_File: d7060445ecd7-relay-bin.000001
Relay_Log_Pos: 324
Relay_Master_Log_File: mysql-bin.000002
Slave_IO_Running: Yes
Slave_SQL_Running: Yes
Replicate_Do_DB:
翻译 朗读 复制 正在查询,请稍候…… 重试 朗读 复制 复制 朗读 复制 via 谷歌翻译(国内) 译
翻译 朗读 复制 正在查询,请稍候…… 重试 朗读 复制 复制 朗读 复制 via 谷歌翻译(国内) 译


