springboot-swagger:介绍和集成
1 swagger介绍
1.1 前后端分离:
- 前端 -> 前端控制层、视图层
- 后端 -> 后端控制层、服务层、数据访问层
- 前后端通过API进行交互
- 前后端相对独立且松耦合
1.2 产生的问题
- 前后端集成,前端或者后端无法做到“及时协商,尽早解决”,最终导致问题集中爆发
1.3 解决思路
- 首先定义schema [ 计划的提纲 ],并实时跟踪最新的API,降低集成风险
1.4 使用swagger解决
- 号称世界上最流行的API框架
- Restful Api 文档在线自动生成器 => API 文档 与API 定义同步更新
- 直接运行,在线测试API
- 支持多种语言 (如:Java,PHP等)
- 官网:https://swagger.io/
2 springboot集成swagger
2.1 创建一个springboot项目
创建过程中引入web模块
2.2 导入依赖
pom.xml
<!--Springfox-swagger2-->
<dependency>
    <groupId>io.springfox</groupId>
    <artifactId>springfox-swagger2</artifactId>
    <version>3.0.0</version>
</dependency>
<!--swagger-springmvc-->
<dependency>
    <groupId>io.springfox</groupId>
    <artifactId>springfox-swagger-ui</artifactId>
    <version>3.0.0</version>
</dependency>
<!--启动器-->
<dependency>
    <groupId>io.springfox</groupId>
    <artifactId>springfox-boot-starter</artifactId>
    <version>3.0.0</version>
</dependency>
2.2 创建一个config包,并在该包下编写swagger的配置类
src/main/java/com/lv/config/SwaggerConfig.java
package com.lv.config;

import org.springframework.context.annotation.Configuration;
import springfox.documentation.swagger2.annotations.EnableSwagger2;

@Configuration
@EnableSwagger2 //开启Swagger2
public class SwaggerConfig {

}
2.3 在项目的主启动类上添加@EnableWebMvc注解
如果不进行这一步,项目启动时会报空指针异常
src/main/java/com/lv/SwaggerDemoApplication.java
package com.lv;

import org.springframework.boot.SpringApplication;
import org.springframework.boot.autoconfigure.SpringBootApplication;
import org.springframework.web.servlet.config.annotation.EnableWebMvc;

@SpringBootApplication
@EnableWebMvc
public class SwaggerDemoApplication {
    public static void main(String[] args) {
        SpringApplication.run(SwaggerDemoApplication.class, args);
    }
}
2.4 启动项目访问: http://localhost:8080/swagger-ui/index.html
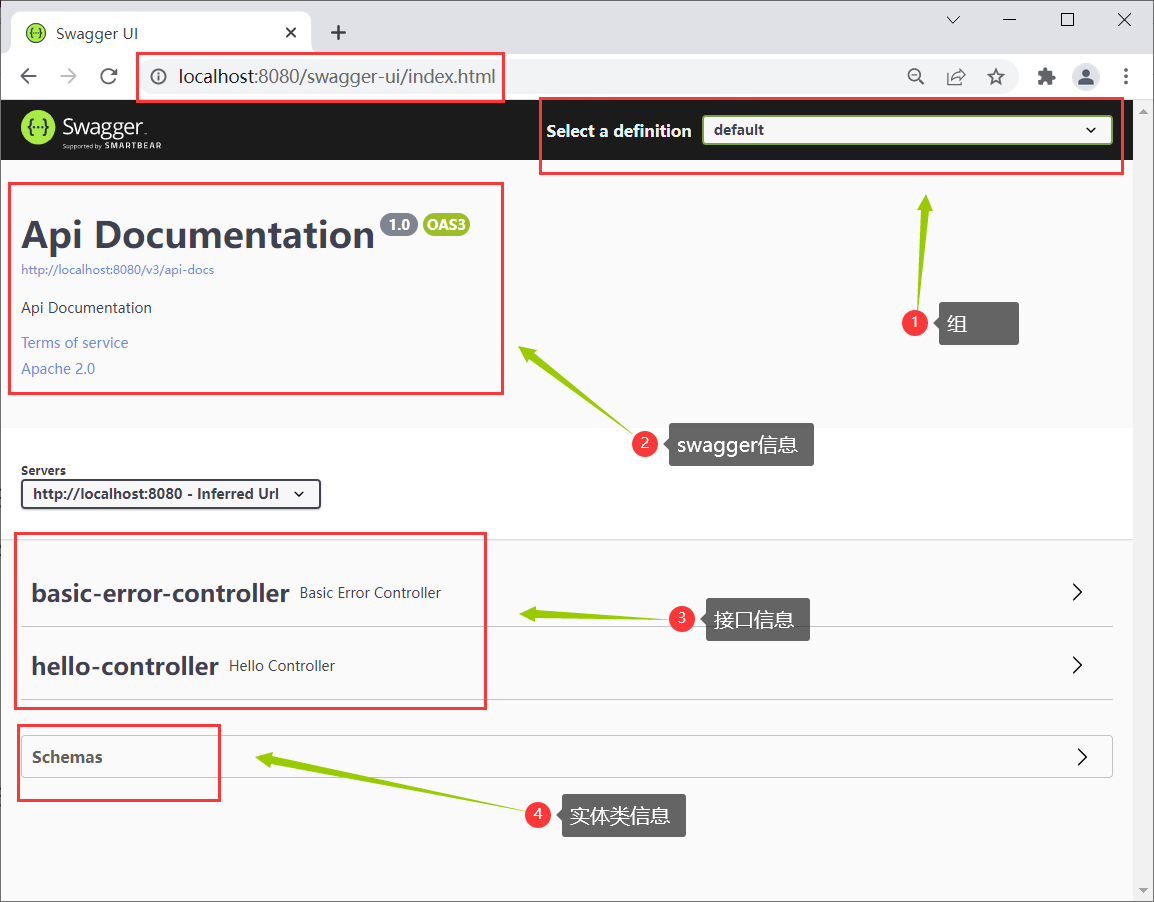
访问成功,说明springboot成功集成swagger

 浙公网安备 33010602011771号